If you’re a creative professional or hobbyist who loves working in Photoshop, you’ve probably wished for a quick way to access high-quality images without leaving your workspace. That’s where the Shutterstock Photoshop Plugin comes in! This handy tool seamlessly integrates Shutterstock’s vast library of millions of images, illustrations, and vectors directly into Photoshop. With just a few clicks, you can browse, preview, and license stunning visuals without ever opening a browser. It’s all about making your workflow smoother and more efficient, so you can focus on what you do best—creating amazing designs.
Requirements and Compatibility for the Plugin
Before you get started, it’s important to ensure your setup meets the requirements and compatibility criteria for the Shutterstock Photoshop Plugin. The plugin is designed to work with specific versions of Adobe Photoshop, so double-check that your software is up to date.
- Supported Photoshop Versions: Photoshop CC 2019 and later versions (including Creative Cloud updates)
- Operating System: Windows (Windows 10 or later) and macOS (Mojave or later)
- Internet Connection: A stable internet connection is essential for browsing and licensing images.
- Adobe Creative Cloud Desktop App: You’ll need to have the Adobe Creative Cloud desktop app installed and signed in with your Adobe ID. This is how the plugin is installed and managed.
To check your Photoshop version, go to Help > About Photoshop on Windows or Photoshop > About Photoshop on macOS. If you’re not running a compatible version, consider updating via the Adobe Creative Cloud app.
Additionally, ensure your subscription includes access to Shutterstock images. Some plans include access to the plugin, while others might require an additional purchase. Once all requirements are met, you’re ready to install and start enjoying the benefits of quick image access right within Photoshop!
Step-by-Step Instructions to Install the Shutterstock Photoshop Plugin
Getting the Shutterstock Photoshop plugin set up is pretty straightforward, and I’ll walk you through each step so you can start using it without a hitch. First things first, make sure you have a Shutterstock account and Photoshop installed on your computer. If you’re all set, let’s dive into the installation process!
Step 1: Download the Plugin
- Visit the official Shutterstock website or the Adobe Exchange marketplace.
- Search for the “Shutterstock Photoshop Plugin” in the search bar.
- Click on the plugin listing, then hit the Download or Add to Photoshop button. Depending on your setup, it might redirect you back to Adobe Exchange.
Step 2: Install the Plugin
- If you downloaded a file, locate it in your downloads folder.
- Run the installer file. On Windows, this will be an .exe file; on Mac, it might be a .dmg or .pkg file.
- Follow the on-screen prompts. Usually, it’s just clicking Next and accepting the terms.
- Make sure Photoshop is closed during installation. If it’s open, close it now, and then proceed.
Step 3: Verify the Installation
- Open Photoshop.
- Navigate to the Window menu, then select Extensions or Plugins. You should see “Shutterstock” listed there.
- If it’s not visible, go to Edit > Preferences > Plugins (on Windows) or Photoshop > Preferences > Plugins (on Mac), and ensure that plugin folders are enabled.
And that’s it! With these steps, you’ve successfully installed the Shutterstock Photoshop plugin. Now, let’s move on to how to access and activate it within Photoshop itself.
How to Access and Activate the Plugin in Photoshop
Once the plugin is installed, you’ll want to know how to find it and get it ready to use in your workflow. Here’s a simple guide to help you access the Shutterstock plugin directly from Photoshop and activate it for your projects.
Step 1: Open Photoshop and Locate the Plugin
- Launch Adobe Photoshop as you normally would.
- Go to the Window menu at the top of the interface.
- Hover over Extensions (or Plugins), and you should see Shutterstock listed among the options.
Step 2: Open the Shutterstock Panel
- Click on Shutterstock from the Extensions menu.
- A panel will appear, usually docked on the right side of your workspace. If it doesn’t show up, check if the panel is hidden or minimized.
- If you can’t find it, go to Window > Extensions > Shutterstock to bring it up.
Step 3: Sign In and Activate
- When you first open the Shutterstock plugin, it will prompt you to sign in. Use your Shutterstock account credentials.
- If you’re using a subscription or license, make sure it’s active. The plugin will verify your account status.
- Once signed in, you might need to authorize the plugin—just follow any on-screen instructions to complete activation.
Step 4: Start Browsing and Using Shutterstock Assets
- With the plugin activated, you can browse Shutterstock’s extensive library directly within Photoshop.
- Search for images, illustrations, or vectors, and easily download or license assets without leaving your workspace.
- Once you find an asset you like, you can insert it directly into your document, ready for editing.
That’s all there is to accessing and activating the Shutterstock plugin in Photoshop! It’s designed to be user-friendly so you can streamline your creative process without any fuss. Now, you’re all set to explore Shutterstock’s vast library right from your favorite editing software.
Using the Shutterstock Plugin to Find and Insert Images
If you’re familiar with Photoshop, you probably already know how powerful and versatile it is for editing and creating stunning visuals. But did you know that with the Shutterstock plugin, your workflow can become even smoother? The plugin makes it super easy to find, preview, and insert high-quality images directly into your project — all without leaving Photoshop. Let’s walk through how to do it:
Step 1: Opening the Shutterstock Plugin
- First, ensure that you have the plugin installed. You can find it in the Adobe Creative Cloud marketplace or through the Photoshop plugin panel.
- Once installed, open Photoshop and navigate to Window > Extensions > Shutterstock. The Shutterstock panel will pop up, ready for use.
Step 2: Signing In and Searching for Images
Click the Sign In button and log into your Shutterstock account. If you don’t have one, you can create an account right within the plugin. After signing in, you’ll see a search bar where you can type in keywords related to the images you’re looking for.
Step 3: Browsing and Previewing
- Type in your search terms—for example, “sunset,” “business meeting,” or “mountains.”
- The plugin will display a grid of images matching your keywords. You can scroll through and preview images directly within Photoshop.
- Hover over any thumbnail to see a larger preview and get a better look at the image details.
Step 4: Inserting Images into Your Project
- Once you find an image you like, simply click the Insert button.
- The image will automatically download and appear as a new layer in your Photoshop workspace. You can resize, move, or edit it just like any other layer.
- If you have a paid Shutterstock plan, the image will be inserted with full resolution. For free images or previews, you might need to purchase or license the image before using it in your final design.
Bonus Tip: The plugin also allows you to filter images by orientation, color, and even the type of image (photo, vector, or illustration). Use these filters to narrow down your search and find exactly what you need faster.
Tips for Searching and Selecting the Best Images
Finding the perfect image isn’t just about typing in keywords and clicking the first thing you see. It’s about being strategic and thoughtful to ensure your visuals truly enhance your project. Here are some tips to help you search smarter and select the best images:
1. Use Specific Keywords
Instead of broad terms like “flower,” try more descriptive phrases like “pink cherry blossom tree” or “close-up of sunflower.” The more specific your keywords, the more relevant your results will be.
2. Leverage Filters Effectively
- Orientation: Choose between landscape, portrait, or square to fit your layout.
- Color: Select colors that match your palette or mood.
- Image Type: Filter for photos, vectors, or illustrations depending on your needs.
- Licensing: Make sure to pick images that fit your licensing requirements.
3. Pay Attention to Image Composition and Quality
Look at the overall composition—does it have a clear focal point? Is the background cluttered or clean? Also, check the resolution; high-resolution images will look much better when printed or enlarged.
4. Consider the Context and Message
Choose images that align with your message or brand identity. For example, if you’re creating a professional presentation, opt for clean, polished photos. For a fun, casual blog, more playful or quirky images might work better.
5. Preview Before Downloading or Inserting
Always preview images in your workspace to see how they interact with your existing design elements. Sometimes, a photo looks perfect in thumbnail but doesn’t quite fit once placed in your layout.
6. Respect Licensing and Usage Rights
Remember, some images require proper licensing for commercial use. Always double-check the licensing details before finalizing your selections to avoid any legal issues.
Mastering these searching techniques will save you time and help you pick images that truly elevate your project. The Shutterstock plugin is a powerful tool, but combining it with strategic search habits makes the process even more effective. Happy designing!
Managing and Licensing Images Directly Through the Plugin
One of the coolest features of the Shutterstock Photoshop plugin is how seamlessly it lets you manage and license images right from within your editing workspace. No more juggling between different tabs or websites—everything you need is right at your fingertips. This makes your workflow smoother and saves you a ton of time.
When you find an image you love, you can easily preview it in full resolution before deciding to license or purchase. The plugin displays licensing options, so you can choose the right one based on your project needs. Whether it’s a standard license for personal projects or an extended license for commercial use, the plugin guides you through the process effortlessly.
Here’s how to do it step-by-step:
- Preview the image: Click on an image thumbnail to view a larger version within the plugin window. You can rotate, zoom, or see it in different lighting modes.
- Select licensing options: The plugin clearly displays licensing tiers. Choose the one that fits your project. You can see the price and details right there.
- License the image: Once you’re happy with your selection, click the “License & Download” button. The image will be licensed and downloaded directly into your Photoshop workspace.
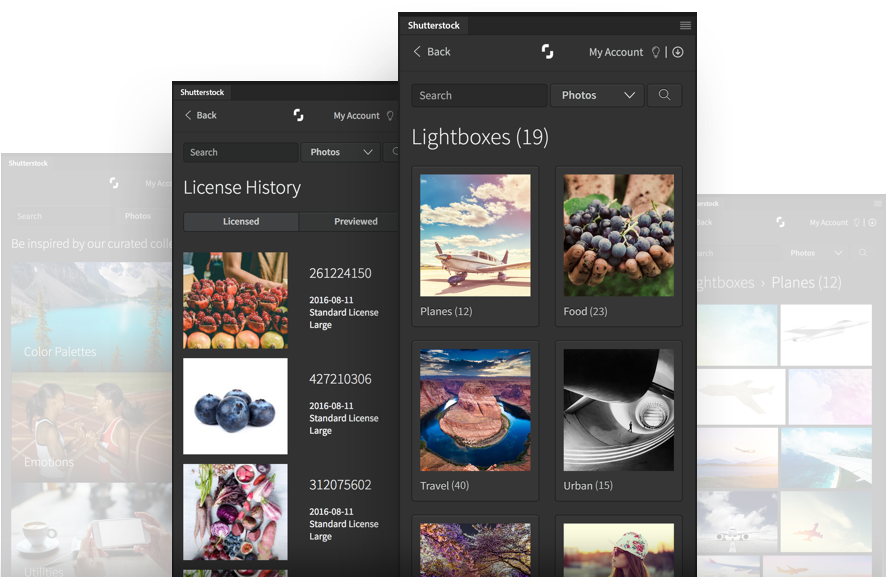
- Manage your licensed images: The plugin also keeps track of your licensed images. You can view your existing licenses, download additional copies, or remove licenses you no longer need, all within the plugin.
This integration not only simplifies licensing but also helps you stay organized. You can create collections or folders within the plugin, making it easier to find images for future projects. Plus, licensing is straightforward, so you’re always clear on what rights you have for each image.
Another handy feature is the ability to access your Shutterstock account directly through the plugin. This means you can review your purchase history, manage subscriptions, or update your billing info without ever leaving your Photoshop workspace. It’s all about making your creative process as smooth as possible.
Troubleshooting Common Issues with the Shutterstock Photoshop Plugin
Like any software tool, the Shutterstock Photoshop plugin can sometimes run into hiccups. Don’t worry—most issues are easy to resolve once you know what to look for. Here’s a quick guide to troubleshooting some of the most common problems:
1. Plugin Not Loading or Showing Errors
If the plugin isn’t appearing in Photoshop or keeps crashing:
- Ensure you have the latest version of both Photoshop and the plugin installed.
- Restart Photoshop and try opening the plugin again.
- Check your internet connection—since the plugin relies on online access, a weak connection can cause issues.
- If problems persist, try reinstalling the plugin or resetting your Photoshop preferences.
2. Images Not Downloading or Licensing Failing
If images won’t download or licensing doesn’t work:
- Verify your Shutterstock account login within the plugin—sometimes sessions expire.
- Make sure your subscription or license allows for the type of image you’re trying to license.
- Clear cache or temporary files in the plugin settings, then restart Photoshop.
- If you see error messages, note them down and check Shutterstock’s support page or contact their help desk.
3. Licensing or Downloading Images Takes Too Long
If downloads are slow or stalled:
- Check your internet speed—slow connections can delay downloads.
- Pause any other large downloads or streaming activities on your network.
- Close other programs that might be using bandwidth.
- Try restarting Photoshop and reattempting the download.
4. Compatibility Issues
Sometimes, the plugin might not work as expected with certain Photoshop versions:
- Ensure your Photoshop is updated to the latest version compatible with the plugin.
- Visit the Shutterstock plugin support page for compatibility charts.
- If compatibility issues persist, consider downgrading or updating Photoshop accordingly.
Remember, Shutterstock’s support team is always ready to help if you hit a roadblock. Providing screenshots of error messages and detailed descriptions of your issue can speed up the troubleshooting process. Overall, most problems are minor and can be quickly resolved, so don’t get discouraged. With a bit of patience, you’ll be back to creating in no time!
Conclusion and Additional Resources for Photoshop and Shutterstock Users
In summary, leveraging the Shutterstock Photoshop plugin can significantly streamline your creative workflow, allowing you to access a vast library of high-quality images directly within Photoshop. By integrating Shutterstock seamlessly into your editing environment, you save time and enhance your projects with professional visuals. Remember to explore the plugin’s features such as filtering images by orientation, category, and licensing options to find the perfect assets for your needs.
For further enhancement of your skills and knowledge, consider the following resources:
- Shutterstock Help Center: Comprehensive guides and FAQs on using the Shutterstock plugin and licensing images.
- Adobe Photoshop Tutorials: Official tutorials to improve your editing techniques and workflow efficiency.
- Creative Communities: Join forums like Adobe Community or Behance to share your work and gain inspiration.
| Resource Type | Link |
|---|---|
| Shutterstock Help Center | https://support.shutterstock.com |
| Adobe Photoshop Tutorials | https://helpx.adobe.com/photoshop/tutorials.html |
| Creative Communities | https://www.behance.net/ |
By utilizing these resources, Photoshop users can maximize the benefits of the Shutterstock plugin, stay updated with new features, and continually improve their design skills. Happy creating!