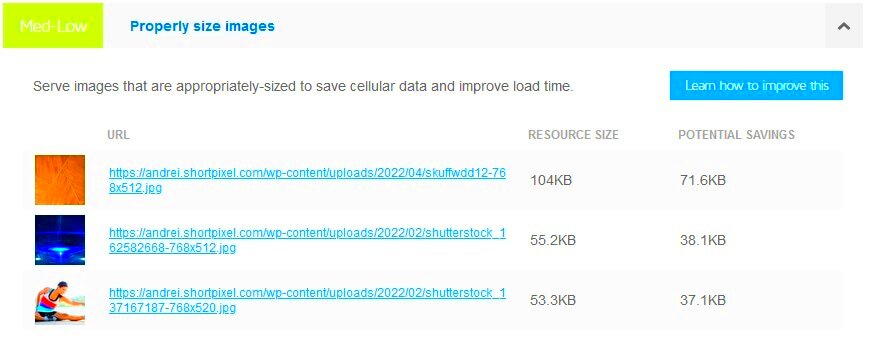
Welcome to the world of image optimization! If you’re running a WordPress site, you’ve probably noticed how crucial images are for engaging your audience. They can make your content pop, but if not optimized properly, they can slow down your website and hurt your SEO. Image optimization isn’t just about compressing files; it’s about serving images that are the right size for your audience. This means ensuring your images load quickly without sacrificing quality. In this section, we’ll explore the essentials of image optimization and why it should be a key part of your web strategy.
Understanding the Importance of Proper Image Sizing

When it comes to serving images on your WordPress site, size matters—quite literally! Using images that are too large can lead to slower page load times, which can frustrate visitors and hurt your search engine rankings. Here are some key points to consider about proper image sizing:
- Faster Load Times: Properly sized images load more quickly, enhancing user experience. Studies show that a one-second delay can reduce customer satisfaction by up to 16%!
- Better SEO: Search engines favor sites that load quickly. By optimizing your images, you’ll improve your chances of ranking higher on search engine results pages (SERPs).
- Reduced Bandwidth Usage: Smaller images mean less data that needs to be transferred, which is particularly important for users on mobile networks.
- Improved User Engagement: Faster sites keep users engaged longer. A seamless experience often leads to higher conversion rates.
But how do you achieve the perfect image size? Here’s a quick reference table to guide you:
| Image Type | Recommended Dimensions |
|---|---|
| Blog Post Featured Image | 1200 x 627 pixels |
| Thumbnail Image | 150 x 150 pixels |
| Gallery Images | 800 x 600 pixels |
By understanding the importance of proper image sizing, you not only improve performance but also create a better experience for your users. So, let’s dive into how to get these images optimized for your WordPress site!
Choosing the Right Image Format

When it comes to selecting images for your WordPress site, the format you choose can make a huge difference in both quality and performance. With multiple formats available, understanding the benefits and drawbacks of each can help you make informed decisions that improve your site’s load times and user experience.
Here’s a simple rundown of the most common image formats:
- JPEG: This format is perfect for photographic images. It uses lossy compression, which reduces file size significantly while maintaining reasonable quality. Just be careful not to over-compress, as doing so can lead to pixelation.
- PNG: Ideal for images requiring transparency, PNG files provide high quality with lossless compression. However, they tend to be larger in file size, which could impact your page speed if overused.
- GIF: While GIFs are great for simple animations, they support only 256 colors, making them less suitable for photographs. Use them sparingly to add elements of fun to your site.
- WebP: A newer format that offers excellent quality at reduced file sizes, WebP supports both lossy and lossless compression. Major browsers support it, making it a fantastic option if you want to optimize your site further.
Before uploading images, consider your audience and how they engage with your content. If it’s mainly high-quality visuals, JPEG may be the best bet. For designs needing transparency, opt for PNG. All in all, choosing the right format not only improves site performance but also enhances user experience.
How to Determine the Ideal Image Size for Your WordPress Site
Determining the ideal image size for your WordPress site is crucial for optimizing performance without sacrificing quality. A perfectly sized image ensures quicker loading times and a better user experience. So, how do you find that sweet spot?
First, consider where the image will be used. Different areas of your site may require different dimensions:
- Featured Images: Typically these should be around 1200 x 675 pixels.
- Blog Post Images: Depending on your layout, aim for 800 x 600 pixels or larger.
- Thumbnails: A standard size is about 150 x 150 pixels.
Next, think about the device your users are likely to access your site with. Mobile users will appreciate smaller, optimized images because they offer a smoother experience. Tools like Google’s PageSpeed Insights or GTmetrix can help you analyze your current image sizes and provide recommendations.
Lastly, always keep in mind the balance between quality and loading speed. Experiment with compression tools like TinyPNG or ImageOptim, which can significantly reduce file sizes without noticeably impacting quality. By following these guidelines, you’ll ensure your images look great and your site runs smoothly!
Using WordPress Built-in Tools for Image Management
When it comes to handling images in WordPress, you might be surprised at how many built-in tools are at your disposal. These tools are designed to help you manage your images efficiently. Here’s a breakdown of some key features that can help you optimize your images:
- Media Library: The Media Library in WordPress allows you to upload, edit, and manage all your images in one centralized location. It’s super user-friendly! You can drag and drop images, create folders, and even search for images by name or type.
- Image Editing Tools: WordPress offers built-in image editing tools that let you crop, rotate, and scale images without needing external software. Once your image is uploaded, just click on it in the Media Library and hit ‘Edit Image’. You’ll find options to resize or crop your image quickly.
- Alt Text and Captions: Adding alt text is crucial for accessibility and SEO. WordPress allows you to input alt text, title, caption, and description for each image you upload. This not only helps visually impaired users but also improves your image rankings on search engines.
- Image Size Options: When you upload an image, WordPress automatically creates several sizes of that image (thumbnail, medium, large). You can use these different sizes for various purposes, reducing loading times and ensuring better performance on your site.
So next time you’re adding an image, don’t forget about these handy tools! They’ll make your life easier and your website faster.
Implementing Responsive Images with srcset
In today’s mobile-first world, ensuring your images look great on any device is a top priority. This is where the srcset attribute comes into play. It helps you serve properly sized images based on the user’s screen size, enhancing performance without compromising quality. Here’s how it works:
The srcset attribute allows you to define multiple image sources for different display conditions. You can specify which image should be used depending on the screen’s pixel density or viewport width. Here’s a quick rundown:
| Device Type | Image Size | Recommended Resolution |
|---|---|---|
| Mobile Phone | 320px | Small |
| Tablet | 768px | Medium |
| Desktop | 1200px | Large |
To implement this in WordPress, you just need to ensure you’re using the right image dimensions in your theme or while uploading images. By doing this, you might see significant improvements in your site’s loading time and overall performance.
In summary, utilizing the srcset attribute is a simple yet effective way to make your images responsive. This method not only fine-tunes user experience across various devices but also contributes to the SEO success of your site!
7. Utilizing Image Optimization Plugins
When it comes to enhancing your WordPress site’s performance, utilizing image optimization plugins can be a game-changer. These plugins automate the process of compressing and resizing images, ensuring you don’t have to manually edit each photo before uploading. But why is this important? Well, large image files can significantly slow down your website, leading to a poor user experience and potentially lower search engine rankings.
There are several great image optimization plugins available for WordPress. Here’s a quick list of some top picks:
- Smush: Known for its user-friendly interface, Smush automatically optimizes images as you upload them and can even batch-process existing images.
- Imagify: This plugin offers a variety of compression levels, allowing you to choose the balance between quality and file size that works best for your site.
- ShortPixel: ShortPixel compresses images without losing quality and supports various formats, ensuring maximum versatility.
- WP Compress: Ideal for those who want instant optimization, WP Compress can optimize images in real-time and provides a CDN option as well.
Remember, finding the right plugin for your needs is crucial. Look for ease of use, compatibility with your theme and other plugins, and the features that align with your goals. Optimization should be hassle-free, so you can focus on creating content rather than worrying about how fast your site loads!
8. Best Practices for Image Uploading and Management
Managing your images effectively can make all the difference in your WordPress site’s loading times and overall performance. Here are some best practices to consider when uploading and managing images:
| Practice | Description |
|---|---|
| Use the Right File Format | Choose JPG for photos and PNG for graphics with fewer colors or transparency. This helps achieve the perfect balance between quality and size. |
| Resize Before Uploading | Instead of uploading high-resolution images, resize them to their display size. This avoids unnecessarily large files that can bog down your site. |
| Add Alt Text | Don’t forget to include descriptive alt text for accessibility and SEO benefits! It helps search engines understand your images. |
| Organize Your Media Library | Keep your media library neat and tidy by creating folders or using tags. This will save you time when searching for specific images later. |
By following these best practices, you’re not just making your images work with your website; you’re enhancing the overall functionality and user experience. Remember, every effort counts when it comes to optimizing your site!
9. Testing and Monitoring Image Performance
When it comes to managing images on your WordPress site, the work doesn’t stop after you’ve uploaded them. Testing and monitoring the performance of your images is crucial for ensuring that your site remains fast and user-friendly. After all, an image that looks great but takes forever to load can drive visitors away faster than you can say “404 error.”
There are several ways to track the performance of your images:
- Speed Testing Tools: Use tools like Google PageSpeed Insights, GTmetrix, or Pingdom. These platforms analyze your website’s loading time and provide insights on how your images are affecting performance.
- Image Formats: Pay attention to the image formats you are using. JPEGs are great for photographs, while PNGs are fantastic for graphics and images with transparency. WebP is an even better option, providing superior compression.
- File Sizes: Regularly check the file sizes of your images. Are they heavier than needed? This could be a huge drag on your site’s load time. Aim for a balance between quality and size.
- A/B Testing: If you’re unsure about which images work best, consider A/B testing. Try different image sizes and formats, and see which ones yield better loading times and user engagement.
- Monitoring Plugins: Consider using monitoring plugins like MonsterInsights or WP Performance Score Booster to keep track of your site’s performance metrics on an ongoing basis.
By actively testing and monitoring your image performance, you can proactively address any issues that arise, keeping your website speedy and user-friendly.
10. Conclusion: Enhancing Performance with Properly Sized Images
In today’s fast-paced digital world, the importance of properly sized images on your WordPress site cannot be overstated. Images are often the first thing visitors see, and if they take too long to load, you may lose potential customers and readers.
To sum it all up, here are some key takeaways to remember:
- Optimize Sizes: Make sure your images are not larger than necessary. Use image editing tools to resize them before uploading.
- Choose the Right Formats: Select the most suitable image formats for your needs. JPEG, PNG, and WebP each serve different purposes and have unique benefits.
- Utilize Compression: Always compress your images. It’s an easy way to reduce file size without sacrificing too much quality.
- Implement Lazy Loading: This clever technique allows images to load only when they enter the viewport, improving first paint times significantly.
- Monitor Regularly: Keep an eye on your site’s performance through testing and monitoring tools to ensure your images are not slowing you down.
By applying these strategies, you can significantly enhance your WordPress site’s performance and provide a smoother experience for your users. Remember, in the digital age, speed matters, and properly sized images are your new best friend in the quest for a faster, more efficient website.


