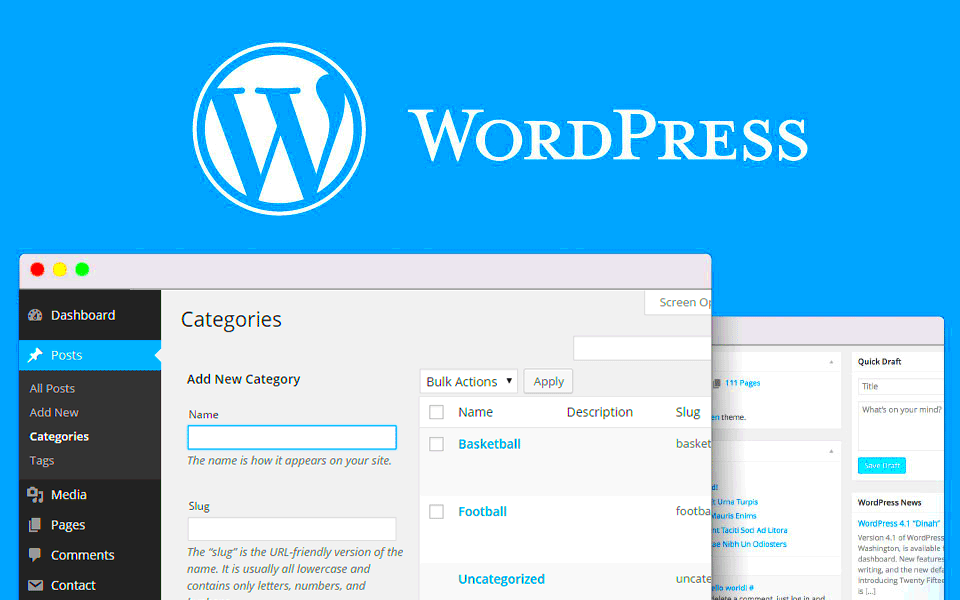
De-indexing tag pages in WordPress is a useful strategy for improving your website’s SEO performance. In WordPress, tag pages are automatically generated based on the tags you assign to your posts. While these pages help users navigate content, they can sometimes create SEO issues. If tag pages are not properly managed, they may be indexed by search engines, leading to duplicate content problems and lower rankings. In this post, we’ll walk you through why de-indexing tag pages is important and how to do it effectively.
Why Tag Pages Can Affect SEO

Tag pages in WordPress are often considered low-quality by search engines because they are automatically created based on tags you use in posts. These pages can lead to several SEO challenges:
- Duplicate Content: If you use similar tags across many posts, search engines may see the tag pages as duplicate content. This can negatively impact your SEO performance.
- Thin Content: Tag pages often feature very little content, just a list of posts. Search engines prefer pages with unique, valuable content, and thin tag pages don’t meet this criterion.
- Wasted Crawl Budget: Search engines have a limited amount of time (crawl budget) to explore your site. If they are crawling tag pages with little value, they may miss more important pages on your site.
For these reasons, many website owners choose to de-index tag pages to avoid these SEO issues and focus search engine resources on more valuable content.
Steps to De-Index Tag Pages in WordPress
De-indexing tag pages is a relatively simple process. There are multiple ways to do it, depending on your preferences and the tools you have available. Here are three common methods to help you de-index your tag pages:
1. Using the Noindex Meta Tag
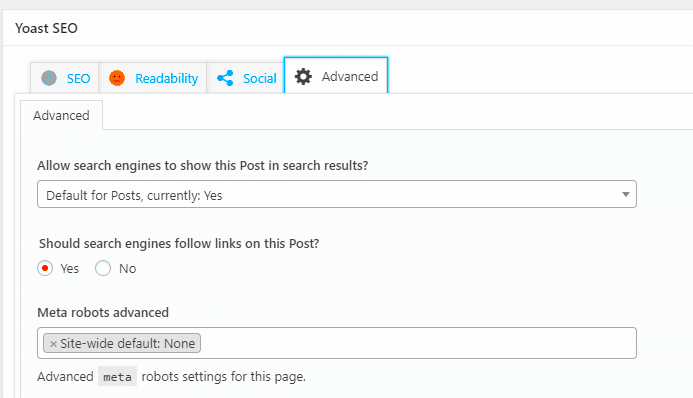
The most direct way to prevent search engines from indexing tag pages is by adding a “noindex” meta tag to the header of those pages. This tells search engines not to include them in search results. Here’s how to do it:
- Install an SEO plugin like Yoast SEO or All in One SEO.
- Navigate to the tag page settings and select the option to add a “noindex” directive.
- Save your changes, and your tag pages will no longer be indexed by search engines.
2. Blocking Tag Pages Using Robots.txt
You can also use the robots.txt file to block search engines from crawling tag pages. This method is simple and effective:
- Access your website’s robots.txt file (usually found in the root directory).
- Add the following line:
Disallow: /tag/ - Save the changes, and search engines will no longer crawl tag pages.
3. Using Plugins to De-Index Tag Pages
If you’re not comfortable editing code or want an easier solution, WordPress plugins can help you de-index tag pages automatically. Popular SEO plugins like Yoast SEO and RankMath allow you to manage indexing settings without needing to touch the code:
- Install and activate your chosen SEO plugin.
- Navigate to the SEO settings and find the section for Tags or Taxonomies.
- Select the option to noindex tag pages.
- Save the settings, and your tag pages will be de-indexed.
These plugins provide a user-friendly interface to manage your SEO settings, making it easy for you to focus on optimizing the more important pages of your site.
Using Noindex Meta Tag to De-Index Tag Pages
One of the most effective ways to stop search engines from indexing your tag pages is by using a “noindex” meta tag. This tag specifically tells search engines not to index the page in search results. The noindex tag is often the preferred method for those who want to keep their tag pages accessible to users but prevent them from affecting SEO. Let’s walk through how to do this:
Steps to Add the Noindex Meta Tag
Adding the noindex meta tag is straightforward, especially if you use an SEO plugin like Yoast SEO or RankMath. Here’s how to do it:
- Install and activate an SEO plugin (Yoast SEO, RankMath, etc.) on your WordPress site.
- Go to the SEO settings in your dashboard.
- Navigate to the “Taxonomies” or “Tags” section.
- Find the option for indexing tag pages and choose “Noindex” for tags.
- Save your changes, and the noindex tag will be added to your tag pages automatically.
With the noindex tag in place, search engines will no longer include your tag pages in their search index, reducing the risk of duplicate content and boosting your overall SEO health.
Blocking Tag Pages in Robots.txt
The robots.txt file is another useful tool for controlling which pages search engines can crawl. By blocking your tag pages in the robots.txt file, you can prevent search engines from even crawling them, ensuring that they don’t take up crawl budget or affect your SEO. This method is simple but effective for blocking access to specific pages across your site.
How to Block Tag Pages Using Robots.txt
Follow these steps to block tag pages using your robots.txt file:
- Access the robots.txt file, which is typically located in your site’s root directory.
- Add the following line to the file:
Disallow: /tag/ - This command tells search engines to avoid crawling any page under the “tag” directory.
- Save and upload the updated robots.txt file back to your website.
After updating the robots.txt file, search engines will be instructed not to crawl any tag pages, preventing them from showing up in search results. This is a simple yet powerful method to keep your site focused on higher-priority content.
How to Remove Tag Pages from Search Engines Using Plugins
If you prefer not to edit code or manually tweak your settings, using a plugin is a user-friendly solution to remove tag pages from search engines. Plugins like Yoast SEO, RankMath, and All in One SEO offer simple ways to control the indexing of tag pages without having to worry about technical details.
Steps to Remove Tag Pages Using a Plugin
Here’s how you can use popular plugins to remove tag pages from search engines:
- Install and activate a plugin like Yoast SEO or RankMath.
- Go to the plugin’s settings, usually found in the WordPress dashboard under SEO or RankMath.
- Look for a section on “Taxonomies” or “Tags” settings.
- Choose the option to noindex the tag pages.
- Save your settings, and the plugin will automatically add the necessary noindex tags to the tag pages.
Once configured, the plugin will handle the noindex tagging for you, keeping your tag pages out of search engine results while ensuring your site’s SEO remains optimized.
Plugins are perfect for users who want a hassle-free way to manage their site’s SEO without needing to dive into code or configuration files. Just install the plugin, tweak the settings, and you’re done!
Monitoring the Impact of De-Indexing Tag Pages on SEO
After you’ve de-indexed your tag pages, it’s essential to monitor the impact on your site’s SEO performance. While de-indexing can help eliminate duplicate content and improve crawl efficiency, it’s important to track the results to ensure that the changes are having the desired effect. Monitoring SEO metrics allows you to see if the changes are improving your rankings and user engagement or if further adjustments are needed.
Key Metrics to Track
Here are some key metrics you should monitor after de-indexing tag pages:
- Organic Traffic: Track your site’s organic traffic using tools like Google Analytics. Look for any changes in traffic to your important pages after de-indexing the tag pages.
- Index Coverage: Use Google Search Console to check the Index Coverage report. Ensure that your tag pages are no longer indexed and that other important pages are still being indexed correctly.
- Bounce Rate: A decrease in bounce rate can indicate that your content is now more focused and relevant to visitors, which is a positive sign after de-indexing unnecessary pages.
- Page Rankings: Check your keyword rankings to ensure that other high-priority pages are gaining visibility. This can help you confirm that search engines are crawling and indexing your valuable pages more efficiently.
By tracking these metrics, you can determine if de-indexing tag pages has improved your site’s SEO or if adjustments need to be made. Regular monitoring will help you maintain an optimal balance between user experience and search engine visibility.
FAQ
Q1: Can de-indexing tag pages hurt my SEO?
De-indexing tag pages typically helps improve your SEO by preventing duplicate content and focusing search engine crawl budget on more valuable pages. However, if you have important tag pages with unique content, consider adjusting your strategy rather than completely de-indexing them.
Q2: Will de-indexing tag pages remove them from my website?
No, de-indexing tag pages does not remove them from your website. It only stops search engines from including them in their search results. Your tag pages will still be accessible to visitors, but they won’t be indexed by search engines.
Q3: How long does it take for changes to reflect in search engines?
It can take anywhere from a few days to a few weeks for search engines to process changes and update their index. You can monitor the progress through Google Search Console to see when tag pages are no longer indexed.
Conclusion
De-indexing tag pages is an important step in improving your website’s SEO. By removing unnecessary pages from search engine indexes, you can reduce the risk of duplicate content, prevent wasted crawl budget, and focus search engines on your most important pages. Whether you choose to use a noindex meta tag, modify your robots.txt file, or use a plugin, the process is simple and effective.
After implementing these changes, be sure to monitor your site’s SEO performance to track improvements and make necessary adjustments. With proper management, de-indexing tag pages can help streamline your site’s SEO and drive better results in search engine rankings.


