Are you looking to expand your WordPress community by adding new members? Whether you’re managing a blog, an online store, or a membership site, it’s essential to know the basics of adding users. This not only enhances collaboration but also helps in managing permissions effectively. So, let’s dive into how you can seamlessly add new members to your WordPress site and create a vibrant community.
Understanding User Roles in WordPress

One of the first things you need to grasp when adding new members is the concept of user roles. WordPress is designed to manage various users and assign them different capabilities based on their roles. Let’s break it down:
| User Role | Description |
|---|---|
| Administrator | The highest level of access. They can manage settings, add plugins, and delete users. |
| Editor | A user who can publish and manage posts, including those of other users. |
| Author | Can publish and manage their own posts but not those of others. |
| Contributor | Can write and manage their own posts but cannot publish them. |
| Subscriber | Can manage their own profile and read content on the site. |
Selecting the right role is crucial as it dictates what each member can do on your site. For instance, if you want someone to only write content without publishing it, you’d assign them as a Contributor. On the other hand, if someone needs full access to all features, the Administrator role is your go-to option. Understanding these roles can help you maintain control and security within your WordPress site.
Methods for Adding New Members
Adding new members to your WordPress website is a crucial task, especially if you’re managing a community, a membership site, or a collaborative project. Fortunately, WordPress offers several straightforward methods to onboard new members. Let’s dive into the most common approaches:
- Manual User Addition: With this method, you directly add new members through the WordPress dashboard. It’s simple and effective for a smaller site with few members.
- Registration Forms: You can enable user registration on your site, allowing visitors to sign up. It’s a great option for larger communities and encourages user interaction!
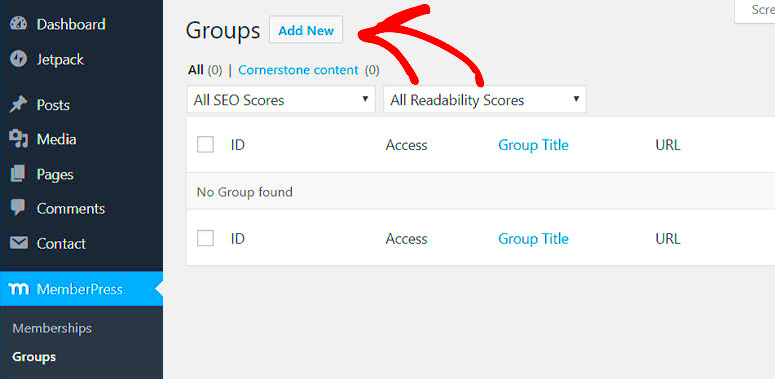
- Membership Plugins: Plugins like MemberPress, Restrict Content Pro, and WooCommerce Memberships take user management to the next level. They offer features like subscription levels, content restrictions, and more, making it easier to manage a membership site.
- Social Media Integration: Some plugins allow users to register using their social media accounts. This can streamline the sign-up process and increase the likelihood of user registration.
- Bulk User Import: If you have a long list of new members to add, consider using a bulk import plugin. This method saves you tons of time by allowing you to upload a CSV file containing all user details.
Each method has its advantages and can be tailored to fit your specific needs. Whether you’re running a personal blog or a full-fledged membership site, there’s an approach that will fit just right!
Using the WordPress Dashboard to Add Members
The WordPress dashboard is a powerful tool for managing your entire website, including adding new members. If you’re opting for the manual user addition method, here’s how you can do so seamlessly:
- Access the Dashboard: First, log in to your WordPress admin panel.
- Navigate to Users: On the left-hand menu, find the “Users” section. Click on it to see a submenu.
- Select “Add New”: In the Users submenu, click on “Add New.” This will take you to the user creation page.
- Fill in User Details: You’ll need to provide a few key details:
- Username: Choose a unique username for the member.
- Email: Enter the user’s valid email address.
- First Name & Last Name: Optional, but useful for personalizing your communication.
- Password: You can either create a password or let WordPress generate one. Make sure the password is strong!
- Role: Choose a suitable role for the member (Subscriber, Contributor, Author, Editor, or Administrator) based on the level of access you want to grant.
- Send Password: There is an option to send the login details to the user’s email. It’s a good practice to notify them of their new account.
- Add New User: Finally, click the “Add New User” button, and voila! Your new member is added!
Adding members through the dashboard is quick and straightforward, making it an excellent choice for site administrators. Just be sure to keep track of user roles and permissions for smooth community management!
Inviting Users via Email
One of the simplest and most effective ways to add new members to your WordPress website is by inviting them through email. This method not only allows you to reach out personally to potential members but also keeps the process organized and under your control. Here’s how you can do it:
- Prepare Your Invitation List: Start by gathering the email addresses of people you wish to invite. This could be friends, colleagues, or anyone who might be interested in your website’s content.
- Craft a Personal Message: Take a moment to write a message that welcomes them. Let them know why you think they’d enjoy being a part of your community. A personal touch goes a long way!
- Utilize a Mailing Plugin: Consider using a mailing plugin such as Mailchimp or MailPoet. These plugins can help you manage your email list and send invitations more efficiently.
- Send Out Invitations: Once your message is ready, hit send and wait for responses! It’s helpful to keep track of who you’ve invited and follow up, if necessary.
Remember, personalization is key! Make sure you address your recipients by name and tailor your message to reflect why they’d benefit from joining your website. You want to make them feel valued and excited about the prospect of joining your online community.
Installing Membership Plugins for Enhanced Functionality
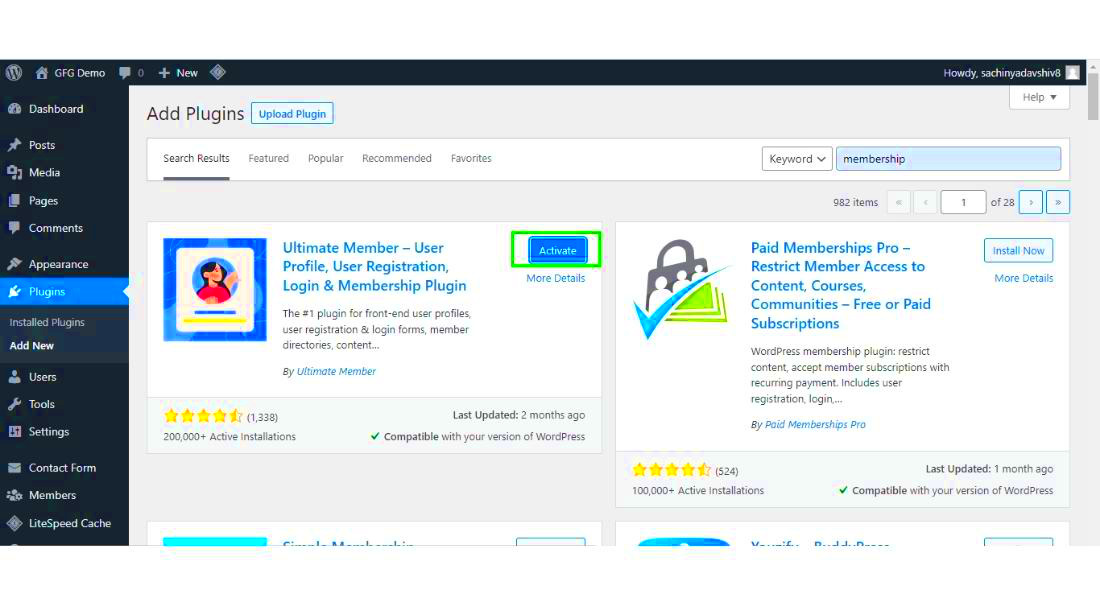
If you’re serious about building a membership site on WordPress, one of the best routes is to explore membership plugins. These powerful tools can significantly enhance your site’s capabilities, giving both you and your members a more enjoyable experience. Here’s how to get started:
- Choose the Right Plugin: There are many membership plugins available, each with its own features. Some popular options include:
- Install and Activate: After choosing a plugin, go to your WordPress dashboard, navigate to ‘Plugins’ > ‘Add New’, search for your selected plugin, then click ‘Install Now’ followed by ‘Activate.’
- Configure the Settings: Each plugin will have its own setup requirements. Take time to customize settings according to your site’s needs, such as member levels, payment options, and content access.
| Plugin Name | Key Features | Price |
|---|---|---|
| MemberPress | Content protection, member management, subscription management | $179/year |
| Restrict Content Pro | Member management, detailed reporting, discount codes | $99/year |
| Paid Memberships Pro | Multiple membership levels, recurring payments, content protection | Free with optional paid add-ons |
By installing a membership plugin, you not only streamline the process of managing members but also unlock various features that can engage your audience. You can easily control who sees what content, create exclusive member-only areas, and even set up subscription payments—all adding to a richer user experience!
7. Managing Member Accounts and Permissions
Managing member accounts and permissions in WordPress is crucial for ensuring that your site runs smoothly and securely. Once you’ve welcomed new members onto your site, the next step is to maintain control over who can access what. This not only protects your content but also helps create a better user experience.
To effectively manage member accounts, consider using built-in user roles provided by WordPress. These roles include:
- Administrator: Full control over the site, including adding and removing users.
- Editor: Can publish and manage posts, including those of other users.
- Author: Can write and manage their posts.
- Contributor: Can write posts but not publish them.
- Subscriber: Can manage their profile and view content.
Using these roles helps you customize the permissions based on what you want each member to be able to do. For instance, if you want to allow only certain users to edit or publish content, you can assign them the Editor or Author role while keeping less active members as Subscribers.
Additionally, various plugins can enhance your control over member accounts. Plugins like User Role Editor allow you to create custom roles and adjust capabilities easily. You can revoke or grant permissions based on specific needs, fostering a tailored experience for your community.
Keeping track of member accounts also involves regularly checking for inactive or spam accounts. This helps maintain the integrity of your website and ensures that your content reaches real, engaged users.
8. Customizing the Registration Process
Customizing the registration process on your WordPress site is an excellent way to create a seamless experience for new members. An effective registration system sets the tone for what users can expect during their interactions with your site. Instead of sticking with the standard fields, why not spice things up?
First, consider what information you actually need from new members. Besides standard fields like username and email address, you could add fields for:
- Profile Picture: Allow users to upload an avatar.
- Interests: Let users select their areas of interest to tailor content delivery.
- Website URL: Encourage networking among members.
Next, implementing plugins like WPForms or Ultimate Member can simplify the customization process. These tools offer drag-and-drop features that help you create custom registration forms without any coding knowledge. This means you can add or delete fields as you please, making your registration process as unique as your brand.
Also, don’t forget to add a touch of branding! Include your logo, customize button colors, and style your forms to match your website’s aesthetic. This helps create a cohesive user experience, encouraging new members to identify with your community.
Finally, testing your registration process is essential before going live. Enlist friends or colleagues to go through the registration flow and provide feedback. This allows you to troubleshoot any issues before welcoming your new members with open arms!
Conclusion and Best Practices
As you embark on the journey of adding new members to your WordPress website, understanding the various methods and best practices will help ensure a seamless experience for both you and your new users. Whether you’re operating a community forum, an online course provider, or a membership site, the right approach to adding members can vastly improve user engagement and retention.
Conclusion
Following the outlined steps and best practices can significantly enhance the member registration process on your WordPress site. By utilizing the right plugins and tools, you can not only simplify adding new members but also ensure their ongoing satisfaction with your platform.
Best Practices
- Use Reliable Plugins: Opt for well-reviewed and regularly updated plugins for managing memberships.
- Clear Registration Process: Ensure your registration forms are easy to understand and fill out, with clear error messages if fields are not completed correctly.
- Automate Email Confirmations: Set up automated emails to confirm registrations and provide necessary information, enhancing user experience.
- Monitor Members: Regularly review and manage member activity to foster community engagement and address issues swiftly.
- Offer Support: Provide clear channels for member support inquiries, building trust and loyalty within your community.
Checklist for Adding New Members
| Task | Status |
|---|---|
| Choose a membership plugin | ✔️ |
| Set up registration forms | ✔️ |
| Configure member roles | ✔️ |
| Test the registration process | ✔️ |
| Launch and promote | ✔️ |


