WordPress offers an intuitive and user-friendly platform for managing websites. One important feature of WordPress is the Admin Menu, which provides access to various settings, tools, and options within the dashboard. Sometimes, customizing this menu to suit your needs can improve the overall user experience. One such customization is adding a class to submenu items, which can help modify the appearance and functionality of the menu. In this post, we’ll explore why and how to add a class to submenu items in the
Understanding WordPress Admin Menu Structure
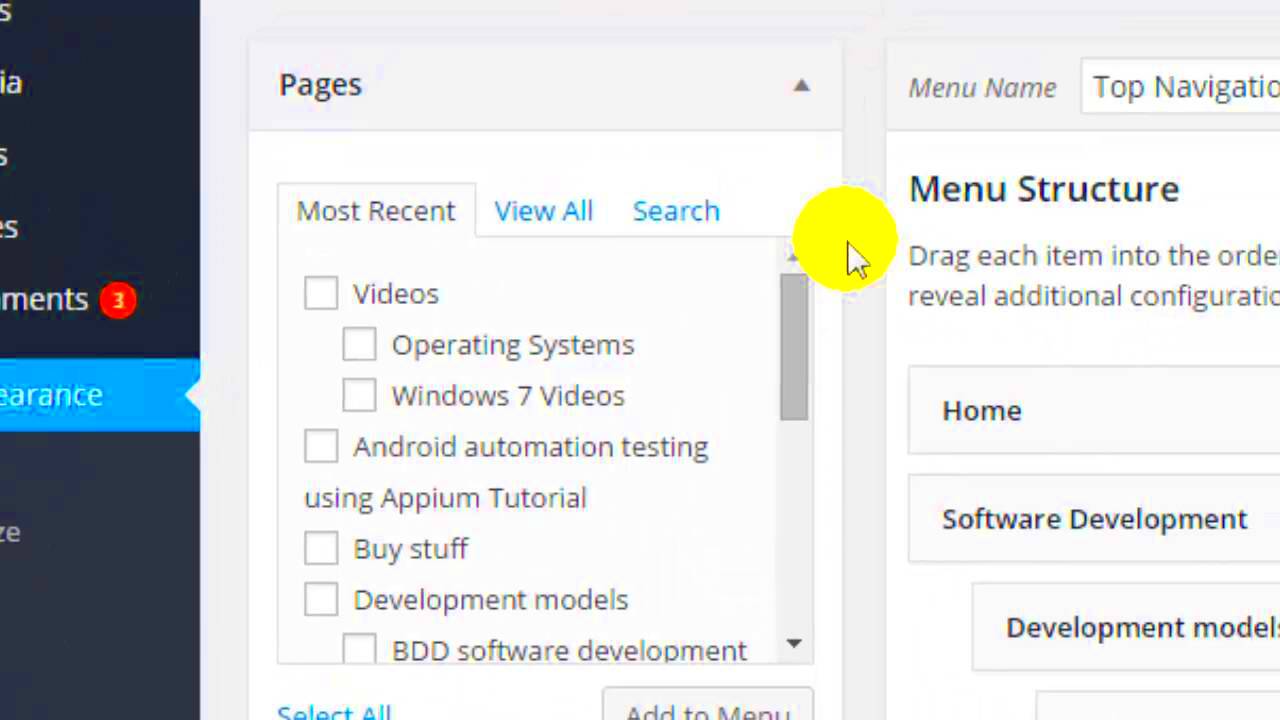
The WordPress Admin Menu is a vertical navigation panel located on the left side of the admin dashboard. It contains links to all the essential features of your WordPress website, such as posts, pages, media, plugins, and settings. This menu is divided into two primary sections: the main menu items and the submenu items. The main menu includes top-level categories, while the submenu consists of the options that appear when you hover over or click on a main menu item.
The structure is hierarchical, meaning that submenu items are nested under their respective parent menu items. For instance, the “Settings” menu includes several submenu items like “General,” “Writing,” and “Reading.” Understanding this structure is important for anyone looking to customize or add new functionality to the WordPress Admin Menu.
Key components of the Admin Menu include:
- Main Menu: Top-level navigation links.
- Submenu Items: Options that appear under main menu items.
- Custom Menu Items: Links added by plugins or custom code.
Why Adding a Class to Submenu Items is Important
Adding a class to submenu items in WordPress can have several benefits, especially if you’re looking to personalize the admin interface for users. Here’s why it can be important:
- Custom Styling: By adding a class, you can apply custom CSS to style submenu items differently. For example, you might want a submenu item to stand out with a different color or background, making it easier to navigate.
- Enhanced User Experience: Submenu items with distinct classes can improve navigation by making important items more visible or accessible. This is especially helpful for websites with many menu items.
- Improved Functionality: You can use the added class to trigger specific JavaScript actions. This could be for opening dropdowns, changing icons, or displaying tooltips, which enriches the admin interface.
- Better Organization: For developers managing multiple plugins or custom menu items, adding classes helps in organizing and grouping similar items under one theme or function.
By incorporating these classes, you gain more control over the look and feel of the WordPress Admin Menu, enhancing both its appearance and usability for users.
Step-by-Step Guide to Add a Class to Submenu Items
Adding a class to submenu items in WordPress is a straightforward process, especially if you’re comfortable working with some basic PHP and CSS. Here’s a simple step-by-step guide to help you add custom classes to submenu items:
- Access Your Theme’s Functions File: First, you’ll need to access your WordPress theme’s
functions.phpfile. You can do this by navigating to Appearance > Theme Editor and selecting thefunctions.phpfile from the right sidebar. - Add the PHP Code: To add a class, you need to hook into WordPress using a custom function. Insert the following PHP code into the
functions.phpfile:function add_custom_class_to_submenu($classes, $item, $args) { if($args->theme_location == 'primary') { // Add custom class to specific submenu item if ($item->title == 'Your Submenu Title') { $classes[] = 'your-custom-class'; } } return $classes; } add_filter('nav_menu_css_class', 'add_custom_class_to_submenu', 10, 3); - Save and Test: After adding the code, save the changes to your
functions.phpfile. Then, refresh your website to see the class applied to your submenu item. You can inspect the HTML to confirm that your class is added. - Apply Custom Styles: With the class added, you can now use custom CSS to style the submenu item. For example, to change the background color of the item, you could add the following CSS:
.your-custom-class {
    background-color: #ff6347;
}
That’s it! By following these steps, you’ve successfully added a custom class to submenu items in the WordPress Admin Menu, and now you can style or manipulate them as needed.
Customizing the Class for Specific Submenu Items
Once you’ve added a class to the submenu items, you might want to target specific items for customization. Here’s how you can do it:
- Target Submenu Items by Title: In the previous example, we targeted a submenu item based on its title. You can change the condition in the code to match other parameters like the item’s ID or URL. For instance:
if ($item->ID == 123) { $classes[] = 'special-item-class'; } - Apply Different Classes to Different Items: If you want to apply unique classes to several submenu items, simply use multiple
ifconditions. Here’s an example where two different submenu items get different classes:if ($item->title == 'Menu Item 1') { $classes[] = 'class-for-item-1'; } elseif ($item->title == 'Menu Item 2') { $classes[] = 'class-for-item-2'; } - Dynamic Class Assignment: You can also add classes dynamically based on the page or user role. For example, you can check the current page and assign classes based on the active state:
    if (is_page('about-us')) {
        $classes[] = 'about-page-class';
    }
This level of customization allows you to target specific submenu items and apply unique styles or behavior, making your admin menu more functional and visually appealing.
Using a Plugin to Add Classes to Submenu Items
If you’re not comfortable with coding, you can still add classes to submenu items using a plugin. There are several WordPress plugins designed to make this process easier. Here’s how you can do it using a plugin:
- Install a Custom Menu Plugin: One popular plugin is WP Custom Menu Class. To install it, go to Plugins > Add New, search for “WP Custom Menu Class,” and click Install Now. Once installed, activate the plugin.
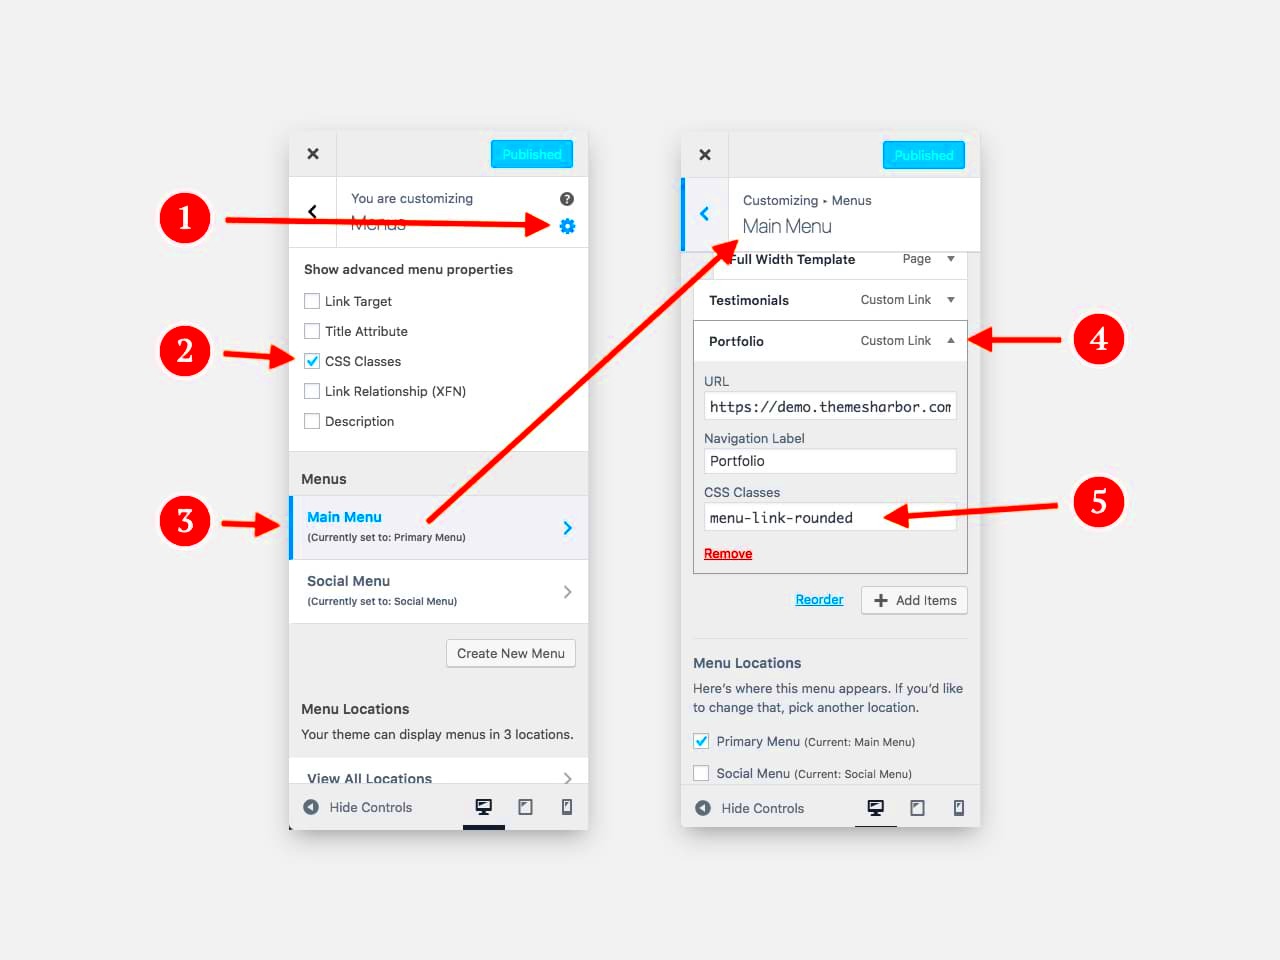
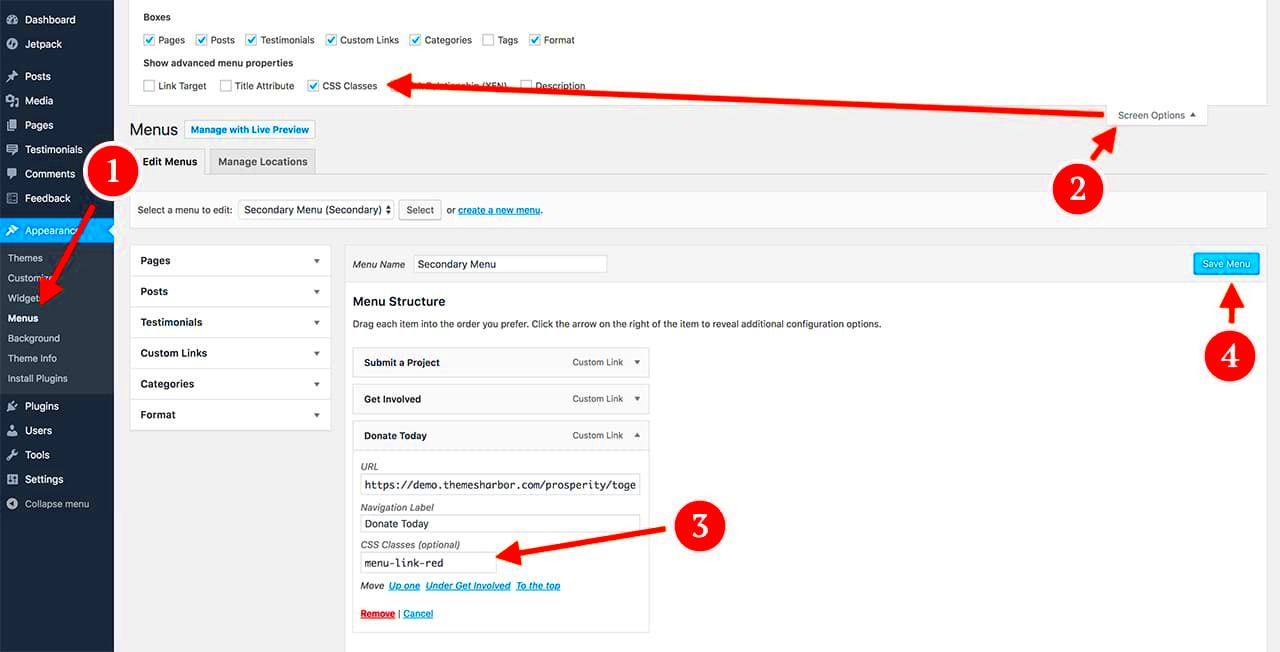
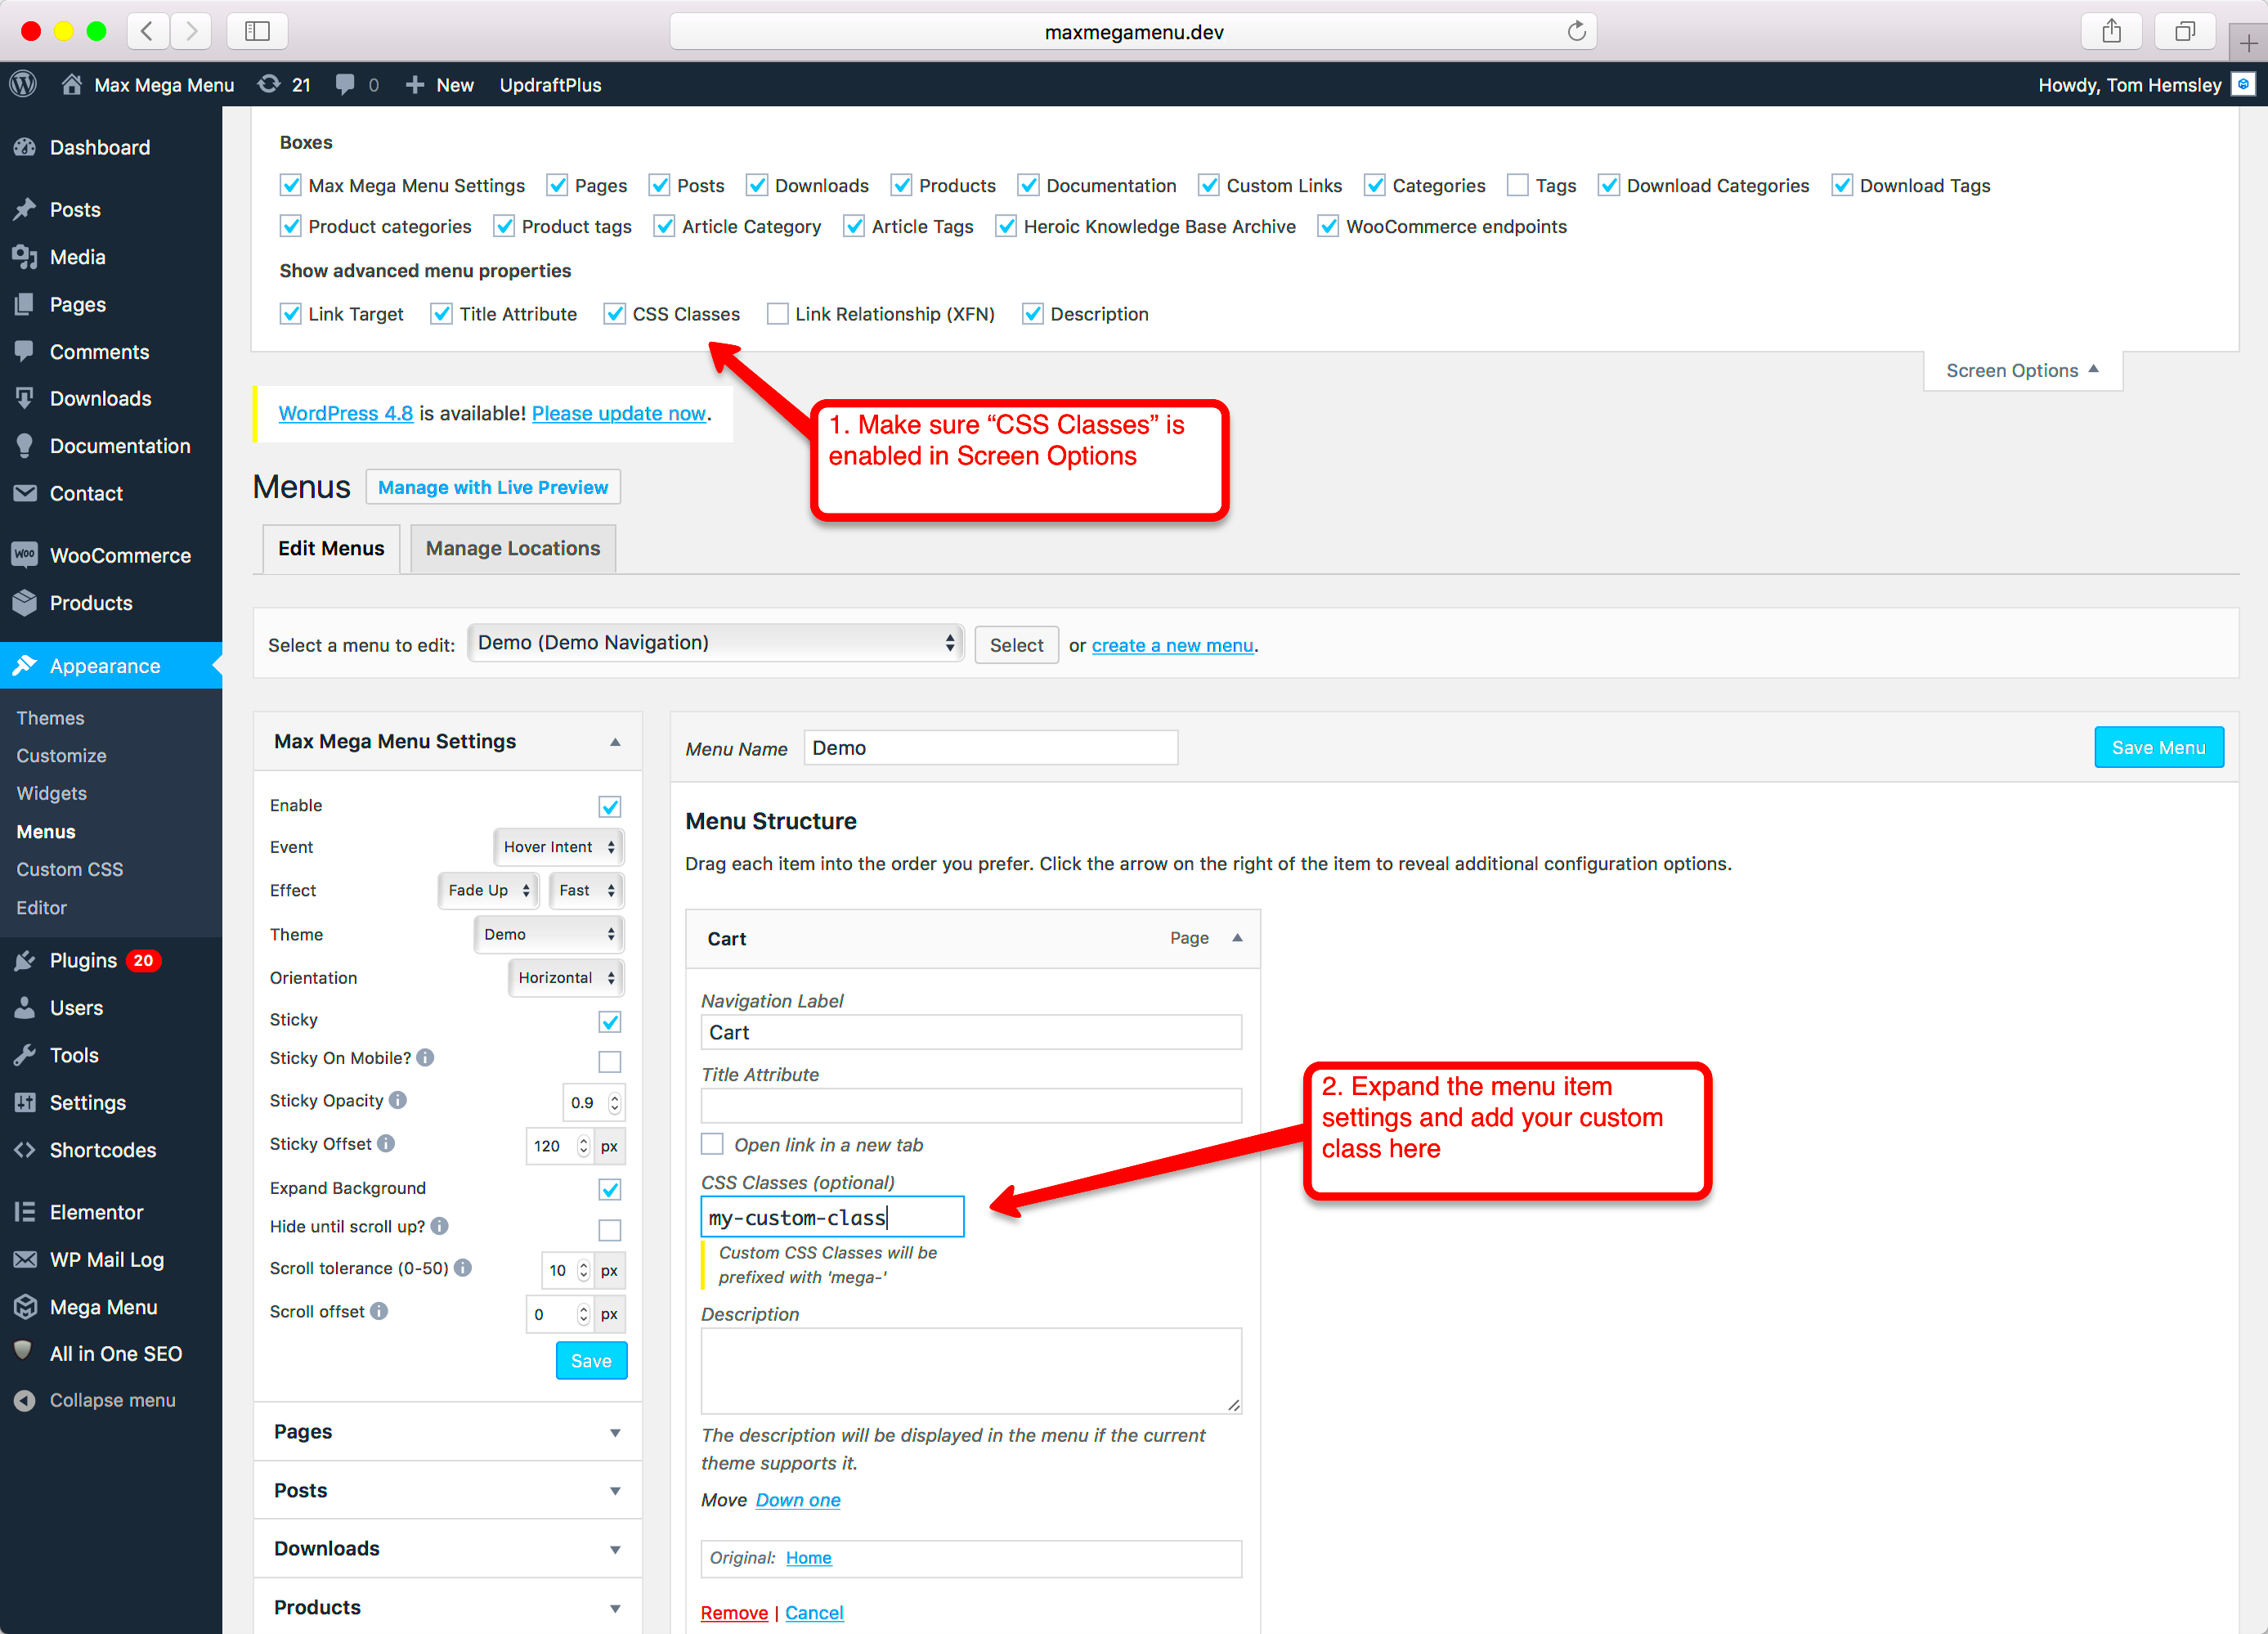
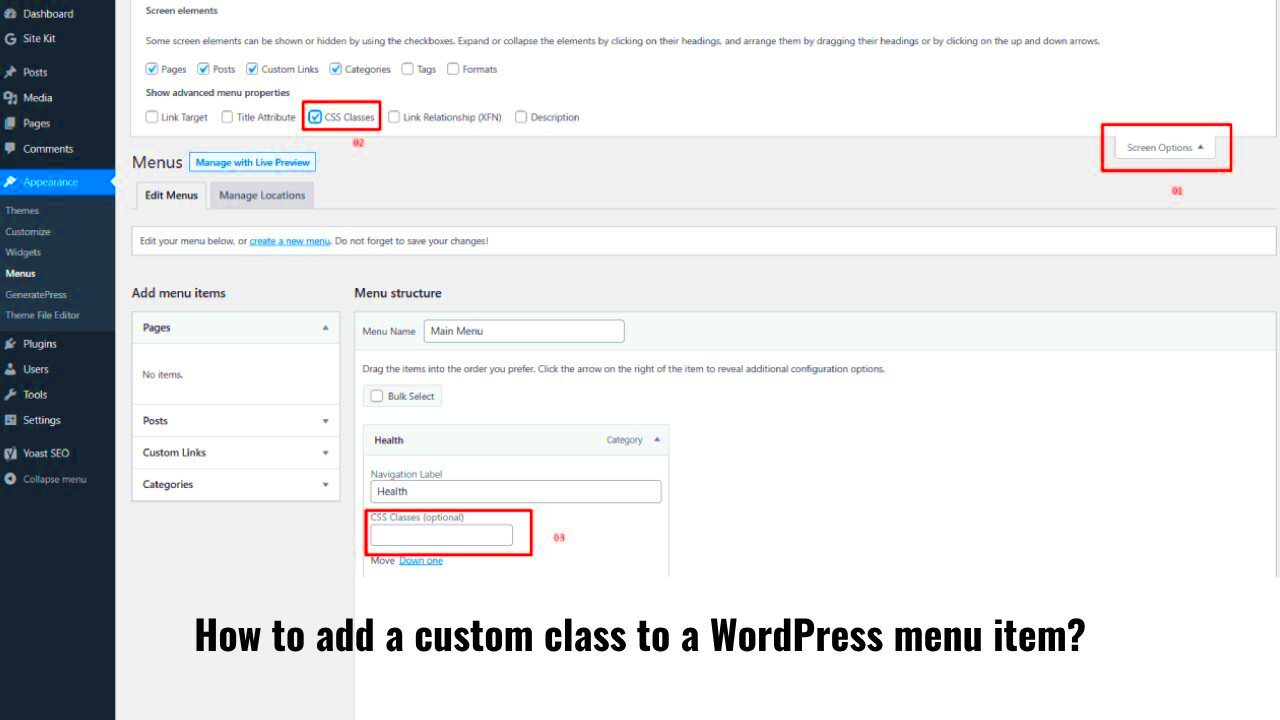
- Navigate to the Menu Settings: After activating the plugin, go to Appearance > Menus. You’ll see an option to add custom classes to menu items directly in the menu editor.
- Add Classes to Submenu Items: In the Menu Structure section, expand the submenu item you want to edit. There will be a field labeled “CSS Classes (optional).” Enter your desired class name here and save the menu.
- Apply Custom Styles: Now that you’ve added the class, you can style the submenu item using custom CSS. For example:
.your-class-name {
    color: #ffffff;
    background-color: #000000;
}
Using a plugin simplifies the process of adding classes, especially for beginners. It also eliminates the need for coding, while still offering the ability to customize your WordPress Admin Menu to suit your needs.
Common Issues When Adding a Class to Submenu Items
While adding a class to submenu items in WordPress is relatively simple, there are some common issues that users might encounter. These problems usually stem from either coding errors or compatibility issues with themes or plugins. Let’s go through a few common challenges and how to fix them:
- Class Not Showing: If the class you added doesn’t appear in the HTML output, it might be due to incorrect PHP code or where the code is placed. Make sure your custom code is added to the
functions.phpfile of the active theme and that you’re targeting the right menu location. Always clear your browser cache to see the changes. - CSS Not Applied: Sometimes, even though the class is added correctly, your custom CSS might not be applied. This could happen if there’s a conflict with existing styles. You can try using more specific selectors in your CSS or add the
!importantflag to force the styles to take priority, like so:.your-custom-class { background-color: #ff6347 !important; } - Plugin Conflicts: Plugins that modify the WordPress Admin Menu might conflict with your custom classes. Deactivating plugins one by one can help identify the conflicting plugin. If you find the culprit, check the plugin’s settings to see if it has an option to disable its effect on the menu.
- Menu Item Not Found: If you’re targeting a specific menu item and it’s not being found by your code, ensure that you are using the correct parameters. Double-check the title, ID, or URL you’re using to match the submenu item.
- JavaScript Interference: If your theme or plugins use JavaScript to manipulate the admin menu, your added classes might be overwritten. Test to see if JavaScript is causing the issue, and if so, ensure that your class is added after the script runs.
By identifying and troubleshooting these common issues, you can successfully add custom classes to your submenu items and enjoy a fully customized WordPress Admin Menu.
FAQ
Here are some frequently asked questions regarding adding classes to submenu items in WordPress:
- Q1: Do I need to know PHP to add a class to submenu items?
- Q2: Can I add a class to all submenu items at once?
A1: While knowledge of PHP is helpful for adding a class manually, you can also use a plugin to achieve the same result without any coding.
A2: Yes, you can add a class to all submenu items by targeting the entire menu or submenu using a more general CSS selector, such as:
ul.sub-menu li {
    background-color: #f0f0f0;
}
A3: No, adding a class will not affect the functionality of your WordPress site. It is purely for styling or JavaScript-based customization.
A4: You can target submenu items by their title, ID, or URL. Inspect the menu structure and use one of these parameters to identify the correct items in your code.
A5: Yes, you can add multiple classes to a submenu item. Simply separate them with spaces in the class attribute:
$classes[] = 'class-one class-two';
Conclusion
Adding a class to submenu items in WordPress is a powerful way to customize the appearance and functionality of your admin menu. Whether you’re a developer looking to tweak the interface or a beginner using a plugin for easy customization, this process can enhance both user experience and site management.
By following the step-by-step guide, customizing classes for specific items, and troubleshooting common issues, you’ll be able to give your WordPress Admin Menu the look and behavior you want. So, take your time experimenting with different styles and classes, and don’t hesitate to reach out for help if needed. With the right tools and knowledge, your WordPress admin can be as organized and visually appealing as the rest of your site.

