If you’re looking to create custom products and take your eCommerce game to the next level, you’ve probably heard of Printify and WooCommerce. But what exactly are they? Well, Printify is a print-on-demand service that allows you to create a wide variety of custom products, from apparel to home décor, without having to hold any inventory. On the other hand, WooCommerce is a powerful, open-source eCommerce plugin for WordPress that makes it easy to set up your online store. Together, these two tools can help you design, sell, and ship unique products seamlessly. Let’s dive deeper into how to activate Printify for WooCommerce!
Benefits of Using Printify with WooCommerce

So, why should you consider using Printify alongside WooCommerce for your custom products? There are several compelling reasons, and here’s a quick rundown:
- Seamless Integration: Printify effortlessly connects with your WooCommerce store, allowing you to sync products automatically and manage everything from one dashboard.
- Wide Product Range: With Printify, you can choose from hundreds of customizable products. Whether you want to sell T-shirts, mugs, phone cases, or even wall art, there’s something for everyone!
- No Inventory Hassles: Since Printify operates on a print-on-demand model, you don’t need to invest in inventory or worry about stock management. You only pay for products after they’re sold.
- Custom Branding: You can easily add your branding to your products and packaging, helping you to build a strong brand identity with minimal effort.
- Global Reach: Printify has print providers in multiple locations, allowing you to offer faster shipping options to customers from different parts of the world.
- Easy-to-Use Interface: The Printify platform is user-friendly, making it straightforward to design and manage your products, even if you’re not tech-savvy.
With all these benefits, integrating Printify with WooCommerce can transform your eCommerce venture into a successful and efficient business, giving you time to focus on what you love — creating and marketing your custom products!
Prerequisites for Integration
Before diving into the exciting world of customizing and selling products through Printify and WooCommerce, there are a few essential prerequisites you need to check off your list. Think of this as your checklist to ensure a smooth integration and a hassle-free experience.
- WooCommerce Installation: First and foremost, you need to have the WooCommerce plugin installed and activated on your WordPress website. If you haven’t installed it yet, don’t worry; it’s just a simple process!
- WordPress Account: Ensure you have a functioning WordPress account to host your eCommerce store. A stable hosting service is also recommended for better performance.
- Printify Account: Sign up for a Printify account if you haven’t already. It’s free and enables you to access various customizable products!
- Compatible Theme: While most themes are compatible, using a WooCommerce-optimized theme is the best way to ensure everything looks perfect. Availability of customizations may vary based on the theme you choose.
- Product Designs Ready: Have your custom designs ready. This could be graphics, logos, or other artwork you plan to print. Having these in a high-resolution format will yield the best results.
- Shipping & Tax Setup: Familiarize yourself with WooCommerce’s settings regarding shipping and taxes before starting. Knowing your strategy here can save you a lot of time later!
Once you have ticked off these prerequisites, you are ready to jump into the next stage of configuring your Printify with WooCommerce. The road ahead is exciting!
Step-by-Step Guide to Activate Printify on WooCommerce
Now that you’ve made sure you have everything in place, let’s get started on activating Printify on your WooCommerce store. Don’t worry; I’ll walk you through it step by step!
- Log into Your WordPress Dashboard: Start by logging into your WordPress website. You’ll find all the settings and options you need right here.
- Install the Printify Plugin: Navigate to Plugins in the left sidebar and click on Add New. In the search bar, type ‘Printify’ and choose the official Printify plugin. Click Install Now, and then activate it after installation.
- Connect Your Printify Account: After activation, you’ll see a Printify option. Click on it, and you’ll be prompted to log into your Printify account. Follow the instructions to connect your account seamlessly.
- Configure Your Settings: Once connected, go to the settings within Printify. Here, you can set up shipping options, your preferred print providers, and other essential configurations that suit your needs.
- Add Products: Now comes the fun part! You can start adding custom products. Use your ready designs to create unique items— from t-shirts to mugs—whatever fits your brand!
- Test Your Setup: Before going live, make sure you run a few tests. Check if the product pages are displaying correctly and whether the checkout process is smooth. This is crucial for a positive user experience!
- Launch Your Store: Once you’ve tested everything, you’re all set to launch! Promote your custom products through social media or your mailing list to attract customers. Happy selling!
And just like that, you’ve successfully integrated Printify with WooCommerce! Enjoy leveraging your creativity to offer unique products to your audience.
5. How to Set Up Custom Products in Printify
Setting up custom products in Printify is as easy as pie! Whether you’re looking to create unique apparel or personalized home décor, the platform offers an intuitive design process that will get your creative juices flowing.
Here’s how to do it step-by-step:
- Log into Your Printify Account: Start by accessing your Printify dashboard. If you don’t have an account yet, you’ll need to sign up—it’s free!
- Select a Product: Click on the “Catalog” tab to browse various product options. Printify offers everything from t-shirts and hoodies to mugs and phone cases. Pick a product that sparks your interest!
- Customize Your Product: After selecting a product, you’ll be led to the design interface. Here, you can upload your artwork, add text, and even adjust colors to make sure everything looks just right.
- Set Your Pricing: Once your design is finalized, you can set the retail price. Make sure to consider production costs and desired profit margin. It’s a balancing act—price it attractively while ensuring a good return!
- Save and Publish: Finally, save your product and publish it. You can list it on your WooCommerce store directly, or choose to do it later if you’re still finalizing your product line.
And just like that, you’ve created a custom product ready to be sold!
6. Syncing Your Products with WooCommerce
Now that you’ve created your custom products in Printify, let’s get them synced with your WooCommerce store. This bridge ensures that your products are accessible to your customers and ready for purchase. Let’s dive into the syncing process!
Follow these straightforward steps to sync your Printify products with WooCommerce:
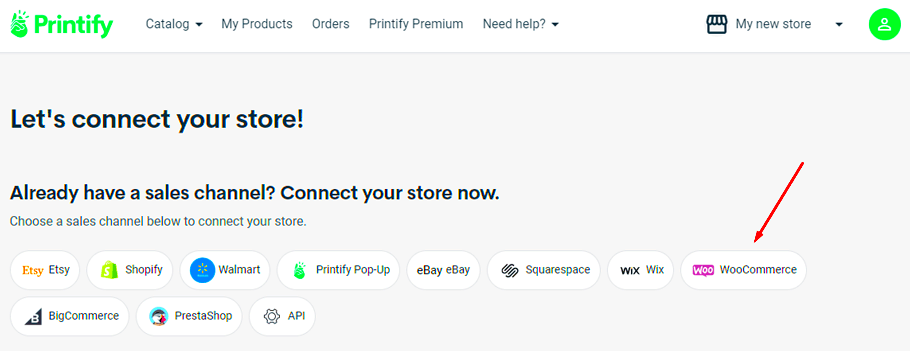
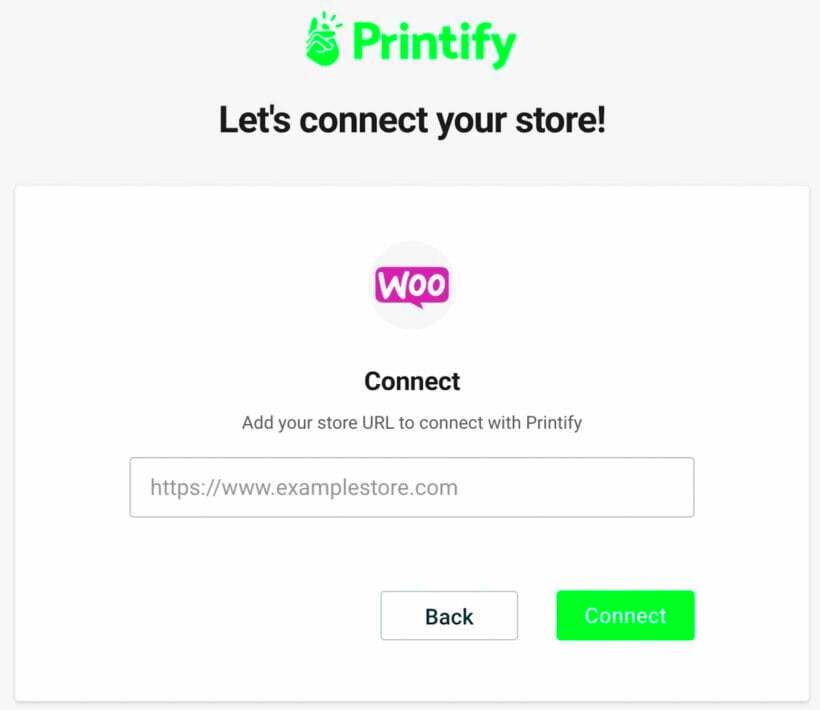
- Integrate Printify with WooCommerce: Navigate to the “My Stores” section in Printify. Click “Connect,” and select WooCommerce. Log in with your WooCommerce credentials to establish the connection.
- Choose Your Products: After integration, go back to your Printify dashboard and locate the products you’ve created. Select the ones you wish to sync, and you’ll see an option to publish them directly to WooCommerce.
- Adjust Product Details: Before finalizing, review the product details like descriptions, images, and pricing. You want everything to look perfect for your customers!
- Publish Your Products: Once you’re ready, hit the “Publish” button. Your products are now synced! They will appear in your WooCommerce store with a big “Buy Now!” button.
- Test the Sync: To ensure everything works smoothly, go to your WooCommerce store and see if your products are listed. Try adding an item to the cart to verify the process!
And voilà! Your custom products are now live on your WooCommerce store, ready to catch your customers’ eyes. Happy selling!
Managing Orders and Fulfillment
Once you’ve activated Printify for your WooCommerce store and set up your custom products, the next step is managing orders and fulfillment. This is an essential process that ensures your customers receive their products on time and in excellent condition. Let’s break it down step by step.
When a customer places an order for a product that you’ve created with Printify, the order details automatically sync with the Printify platform. Here’s how to manage this process:
- Order Notifications: Printify sends notifications for every new order. Ensure you have notifications enabled so you can keep track of incoming orders.
- Review and Confirm: Log into your Printify account to review the order specifics—check the product, quantity, and shipping details. Confirm that everything looks good.
- Fulfillment Process: Printify will handle the printing and shipping of the products. You’ll typically see status updates such as “In Production” or “Shipped.”
- Shipping Notifications: Once an order is shipped, Printify will provide tracking information. Make sure to send this information to your customer so they know when to expect their package.
- Customer Service: Be ready to address any questions your customers might have about their orders. Direct them to your store’s contact page or have a dedicated email for support.
Managing orders with Printify can be a seamless experience, especially if you stay organized and maintain clear communication with your customers. By automating most of the processes with Printify, you can focus on growing your business and enhancing customer satisfaction.
Troubleshooting Common Issues
Even with the best systems in place, sometimes things don’t go as planned. If you’re using Printify with WooCommerce, you might encounter a few common issues along the way. But don’t worry—most can be resolved easily!
| Issue | Possible Cause | Solution |
|---|---|---|
| Failed Order Sync | Connection Issues | Check your WooCommerce settings and ensure Printify API keys are correctly configured. |
| Incorrect Product Design | Design Misalignment | Go back to your Printify product editor and make sure your design is uploaded and correctly positioned. |
| Shipping Delays | Supplier Issues | Review your supplier’s status in Printify. Sometimes, certain products can have longer processing times. |
| No Tracking Info | Shipping Method | Ensure you selected a carrier that provides tracking. If not, contact Printify support for help. |
Whenever you hit a snag, the first step is to remain calm and identify the issue. Utilize Printify’s support resources, including their help center and customer support, to find solutions quickly. By addressing these common hiccups proactively, you can maintain a positive experience for both you and your customers.
Conclusion and Next Steps
In summary, activating Printify with your WooCommerce store opens up numerous possibilities for offering custom products. Following the outlined steps can simplify your journey into print on demand (POD). By effectively integrating Printify, you can enhance your product offerings and cater to a wide range of customer preferences.
Here are the next steps you should consider:
- Test Your Integration: Ensure that the Printify and WooCommerce integration is functioning as expected. Create a test product to verify that everything works smoothly.
- Explore Product Options: Familiarize yourself with the variety of products available on Printify. Choose items that resonate with your branding and target audience.
- Customize Your Products: Utilize Printify’s design tools to create unique designs that reflect your brand identity.
- Set Competitive Pricing: Consider your costs, competitor pricing, and profit margins when setting prices for your products.
- Promote Your Store: Use social media, email marketing, and other channels to showcase your custom products and drive traffic to your WooCommerce store.
As you take these next steps, remember to continuously monitor your store’s performance and gather feedback from your customers. This will help you refine your offerings and ensure ongoing success in the print-on-demand business.


