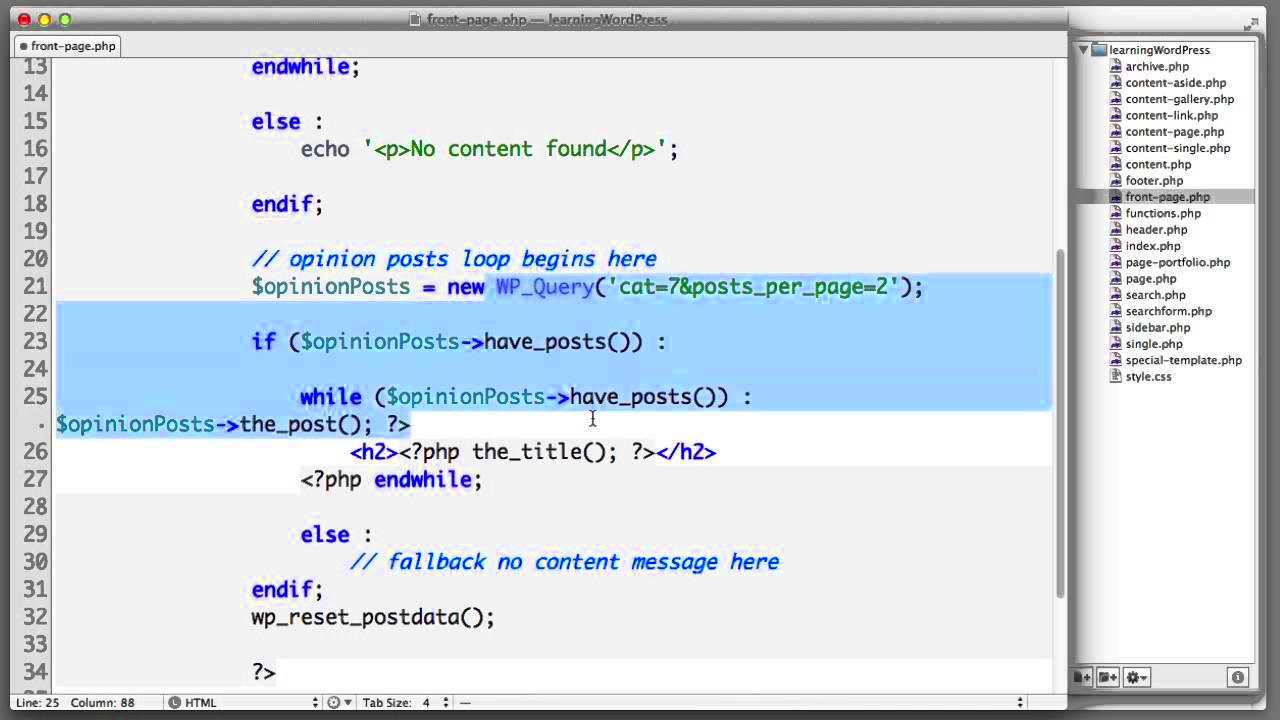
Welcome to the fascinating world of WordPress Query Loops! If you’re looking to customize how your content is displayed, you’re in the right place. In simple terms, a Query Loop is a powerful tool that lets you control what posts are shown on a page based on specific conditions. This comes in handy when you want to showcase recent articles, filter by category, or even highlight custom post types. With Query Loops, the possibilities are endless—let’s dive deeper into how they work!
Understanding Custom Fields in WordPress
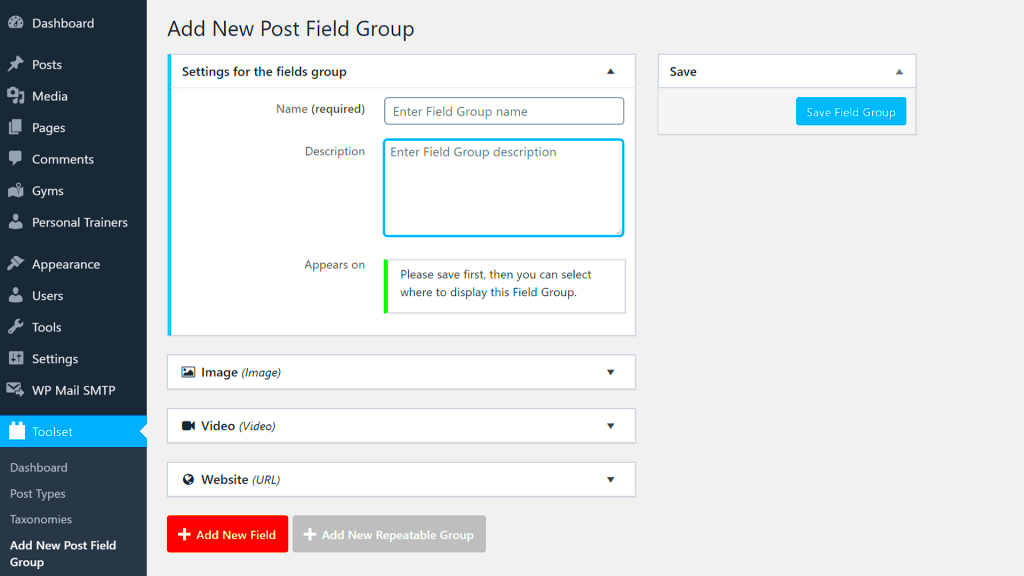
Custom fields play an essential role in enhancing your WordPress site’s functionality. In WordPress, custom fields allow users to add extra information or metadata to posts, pages, or custom post types. Think of them as personalized note cards tucked away within each piece of content.
Here’s what makes custom fields so valuable:
- Flexibility: They give you the freedom to add any kind of data you might need, from ratings and review scores to additional product details.
- Searchability: Well-defined custom fields can improve the searchability of your content, making it easier for readers to find what they’re looking for.
- Custom Display: With custom fields, you can customize how content is displayed on your website, enhancing user experience.
Now, let’s break down how this works:
| Field Name | Description |
|---|---|
| _custom_field_name | Your defined field name where you will store data. |
| Value | This is the actual content or data you want to store for that field. |
To sum it all up, custom fields are a gateway to making your content more insightful and tailored to your audience’s needs. So why wait? Let’s explore how we can integrate these with Query Loops for maximum impact!
Setting Up Your Development Environment
Before diving into the nitty-gritty of WordPress query loops and custom fields, it’s essential to establish a solid development environment. A well-configured workspace will allow you to experiment freely without fear of breaking your live site. Let’s break it down into manageable steps.
First things first, you’ll need a local server. This means installing software that emulates a web server on your computer. Here are a few popular options:
- XAMPP – A well-rounded package that includes PHP, MySQL, and Apache.
- MAMP – Especially handy for Mac users but also available for Windows.
- LocalWP – An intuitive tool designed specifically for WordPress development.
After setting up your local server, it’s time to install WordPress. Download it directly from the WordPress website and unzip the files into the root directory of your local server. With XAMPP, for example, that would be in htdocs.
Next, you need a database. Open your server’s control panel (like PHPMyAdmin for XAMPP) and create a new database. Remember the name, as you’ll need it during the WordPress installation process. Then, follow these steps:
- Navigate to your WordPress directory in your browser.
- Follow the on-screen instructions to set up your site, connecting it to the database you just created.
Lastly, always use debbuging tools like the Developer Console in your browser, which can help track down errors quickly. Once everything is set up, you’re ready to start experimenting with custom fields and WordPress query loops!
Creating a Custom Field in WordPress
Custom fields add a dynamic edge to your WordPress posts and pages, enabling you to store additional information beyond the standard options. This is especially handy for your query loops, as it allows you to retrieve and display personalized content. So, let’s roll up our sleeves and create a custom field!
First, you’ll want to ensure you have the right tools. If you haven’t already, install the Advanced Custom Fields (ACF) plugin—it’s user-friendly and makes the process so much smoother. Here’s how you can get started:
- Install ACF:
- Navigate to Plugins > Add New in your WordPress admin panel.
- Search for “Advanced Custom Fields”.
- Click “Install Now” and then “Activate”.
- Create a New Field Group:
- Go to Custom Fields > Add New.
- Give your field group a title; something like “Post Details” works well.
- Add Fields:
- Click on “+ Add Field” to start adding custom fields.
- Define a label (like “Rating” or “Author Bio”) and set its type—text, number, image, etc.
- Set Location Rules:
- Decide where you want this field group to appear. For instance, choose “Post Type is equal to Post” if you want it for blog posts.
- Publish Your Field Group:
- Click the “Publish” button to save your custom fields.
Now that you’ve created a custom field, it’ll be available in the post editor! You can input unique information for each post, which will later dynamically display based on your query loops. Remember, the possibilities here are almost endless, so have fun experimenting!
5. Querying Posts with Custom Fields
Querying posts with custom fields in WordPress can transform how you display content on your site. Custom fields allow you to add meta-information to your posts, providing more context and detail about your content. Whether you’re managing a portfolio, a review site, or any other type of content that requires specific data, custom fields can be tremendously useful.
To query posts with custom fields, you can use the WP_Query class. This powerful class allows you to customize queries based on various parameters, including custom fields. Here’s a simple breakdown of how to do this:
- Define Your Query: Start by creating a new instance of WP_Query and passing in the necessary parameters.
- Specify Your Custom Field: Utilize the ‘meta_query’ parameter to search for specific custom fields. You’ll usually specify the key (the name of your custom field) and the value you’re looking for.
- Loop Through Results: Use a loop to process the results returned by your query and display them as needed.
Below is a simple example of querying posts based on a custom field:
$args = array( 'post_type' => 'post', 'meta_query' => array( array( 'key' => 'custom_field_name', 'value' => 'desired_value', 'compare' => '=' ), ),);$query = new WP_Query( $args );if ( $query->have_posts() ) { while ( $query->have_posts() ) { $query->the_post(); // Display post content here }}With this method, you can effectively filter and display posts that match your specific criteria, helping you create a more tailored experience for your visitors.
6. Using the Query Loop Block in WordPress
The Query Loop Block in WordPress is a fantastic feature that streamlines the process of displaying posts. Introduced in the Gutenberg editor, this block allows you to create dynamic content sections that automatically pull in posts based on your selected criteria. It’s convenient for users who may not be comfortable with coding but still want to customize how their content is presented.
Here’s how you can get started with the Query Loop Block:
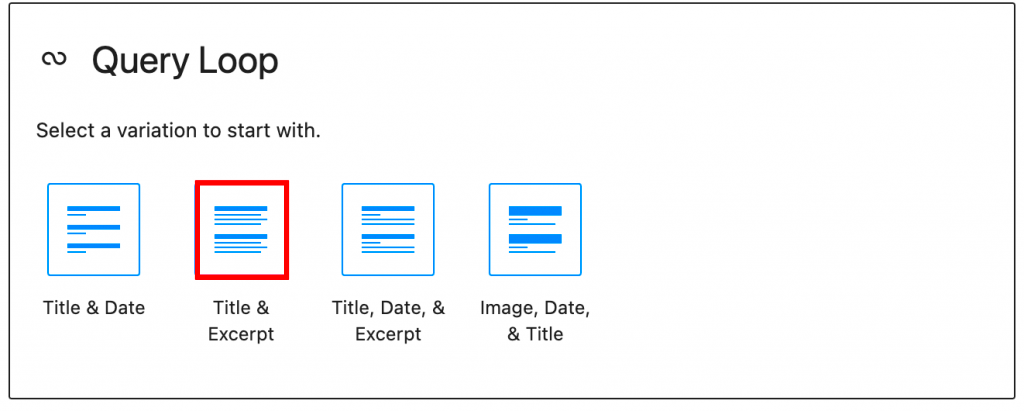
- Add the Query Loop Block: First, navigate to the post or page where you want to add the block. Click on the “+” icon to add a new block, then search for “Query Loop.”
- Choose a Layout: WordPress provides pre-designed layouts for the Query Loop Block. You can choose a layout that best fits your style and then customize it as needed.
- Configure Query Settings: Once you have your layout, you can configure the query settings. This includes selecting post types, categories, tags, and even whether to query based on custom fields.
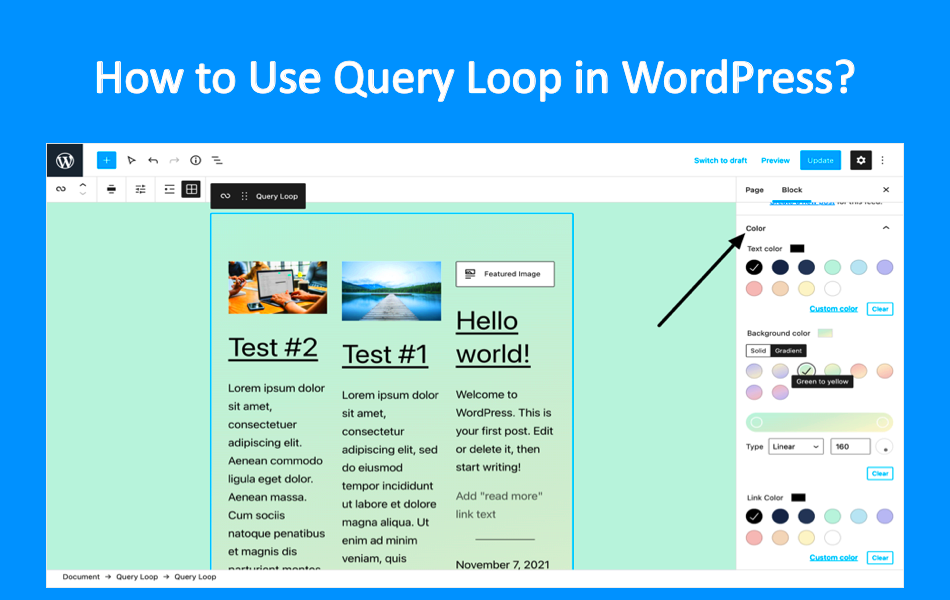
For instance, you might set the block to only display posts from a particular category or tag. You can also further customize the display elements, such as:
| Element | Description |
|---|---|
| Post Title | The title of the post displayed as a link. |
| Post Excerpt | A brief summary of the post. |
| Featured Image | An image associated with the post, serving as a visual representation. |
After configuring everything to your liking, simply publish or update your page. The Query Loop Block will now automatically display your selected posts with the settings you’ve chosen, making it easier than ever to keep your content fresh and dynamic. It’s an invaluable tool for building engaging, content-rich websites!
Integrating Custom Fields into Query Loops
Using custom fields in your WordPress Query Loops can elevate your site’s functionality, allowing you to pull in and display specific data tailored to your needs. This integration requires a little effort, but the payoff in terms of customization is huge!
Firstly, it’s crucial to ensure you have custom fields set up for your posts. You can use plugins like Advanced Custom Fields (ACF) or create custom meta boxes that allow you to add data to your posts. Once that’s in place, you can begin to integrate these fields within your query loop.
Here’s how you can do it:
- Get Your Custom Field Values: Use the
get_post_meta()function within your loop to retrieve the desired custom field data. For example: - Add it to Your Loop: You can then echo the custom field inside your loop by incorporating it into your output. For example:
- Use Conditional Tags: If the custom field may not be present for every post, you can use conditional statements to check if the field exists:
$custom_value = get_post_meta($post->ID, 'your_custom_field_name', true);echo '' . esc_html($custom_value) . '
';if (!empty($custom_value)) { echo '' . esc_html($custom_value) . '
'; }Integrating custom fields like this allows for greater flexibility, ensuring your query loops provide exactly the right information for your audience!
Styling the Output of Your Query Loop
Now that you’ve incorporated custom fields into your WordPress Query Loop, it’s time to focus on styling the output. Aesthetic presentation is just as important as functionality, and with a few CSS tweaks, you can make your content shine.
Here are some easy steps to enhance the visual appeal of your query loop output:
- Wrap Elements in HTML: Use semantic HTML tags to wrap your output. This not only improves readability but also makes it easier to apply styles using CSS. For example:
- Use CSS Classes: Assign classes to your elements for targeting in your CSS file. Example styles could include:
- Responsive Design: Don’t forget to make your styles responsive! Use media queries to ensure your content looks good on all devices. For instance:
<div class="custom-post"> <h2>Title of the Post</h2> <p class="custom-field">Your custom field output goes here</p> </div>| Class Name | Style Description |
|---|---|
| .custom-post | Styling for post containers, including margins and padding. |
| .custom-field | Font size and color adjustments for custom field data. |
@media (max-width: 600px) { .custom-post { font-size: 14px; } }With these styling techniques, your query loop outputs will not only be functional but also visually appealing, ensuring that your content stands out and engages your readers!
Common Issues and Troubleshooting
When working with WordPress Query Loop and custom fields, you may run into a few common problems. Let’s break down these issues and their solutions to help you navigate through your project smoothly.
1. Custom Field Not Displaying
One of the most frustrating issues is when your custom fields don’t show up as expected. Here are a few steps you can take:
- Check Field Registration: Ensure that your custom fields are properly registered using Advanced Custom Fields (ACF) or similar plugins.
- Verify Visibility Settings: Sometimes, visibility settings might prevent display. Double-check that the fields are set to public and accessible.
2. Loop Not Executing Properly
If your query loop isn’t pulling any data, it might be due to a few configuration issues:
- Incorrect Query Parameters: Ensure that your parameters in the query are correct. Double-check post types, taxonomies, and other filter options.
- Post Status: Make sure that the posts you’re querying are published and not in draft or pending status.
3. Performance Issues
Long or complex loops can slow down your site. To mitigate this:
- Optimize Queries: Look into optimizing your queries by using efficient parameters or caching mechanisms.
- Limit Posts Displayed: If your loop isn’t paginated, consider limiting the number of posts displayed per page.
Remember, troubleshooting is often about going back to basics and checking your configurations. Don’t hesitate to consult the documentation for the plugin you’re using or the WordPress Codex for additional guidance!
Conclusion and Next Steps
Congratulations! You’ve just delved into the world of WordPress Query Loops and custom fields. Understanding how to implement these elements significantly enhances your website’s functionality and user experience. Now that you have grasped the basics, it’s time to put your knowledge into practice.
Next Steps You Can Take:
- Experiment with Different Custom Fields: Try creating various field types—text fields, select boxes, galleries—and implement them in your query loops.
- Explore Advanced Query Techniques: Look into more complex queries, like multi-post type queries, to see how they can add depth to your website.
- Learn About Performance Optimization: Consider diving into caching plugins or optimizing your database to ensure your site runs smoothly.
Additionally, don’t forget to share your new skills! Teaching others or writing about your experiences can reinforce your own understanding. Be sure to keep up with WordPress updates, as the ecosystem is always evolving. Happy coding!

