In the world of web design, aesthetics play a significant role in capturing and retaining visitors’ attention. One of the latest trends that’s making waves is the use of video backgrounds in WordPress. If you’ve scrolled through websites lately, you may have noticed that many of them are opting for eye-catching video embeddings rather than simple images. This trend isn’t just a fad – it can greatly enhance user engagement and the overall experience of your site. Whether you’re showcasing a product, telling a story, or simply trying to create a lively atmosphere, a video background can add that extra layer of depth and interactivity. In this post, we’ll dive into how you can effortlessly add a video background to your WordPress site using HTML.
Benefits of Using Video Backgrounds
Now that we’ve introduced the concept of video backgrounds, let’s explore some of the compelling benefits they offer.
- Enhanced Engagement: Video backgrounds naturally catch the eye and can keep visitors on your page longer, leading to reduced bounce rates.
- Visual Storytelling: Videos can tell a story or convey emotions in a way that images can’t, making your content more relatable and memorable.
- Creative Appeal: A well-chosen video can elevate your site’s aesthetic, giving it a modern and polished look.
- Improved Conversion Rates: Captivating video backgrounds can motivate visitors to take action, boosting your conversion rates significantly.
- SEO Benefits: Engaging content can lead to increased dwell time, which may positively influence your search engine rankings.
It’s important, however, to consider your audience and ensure that the video aligns with your brand message. When done right, the benefits of video backgrounds can be substantial, transforming the way visitors interact with your site.
Prerequisites for Adding Video Backgrounds
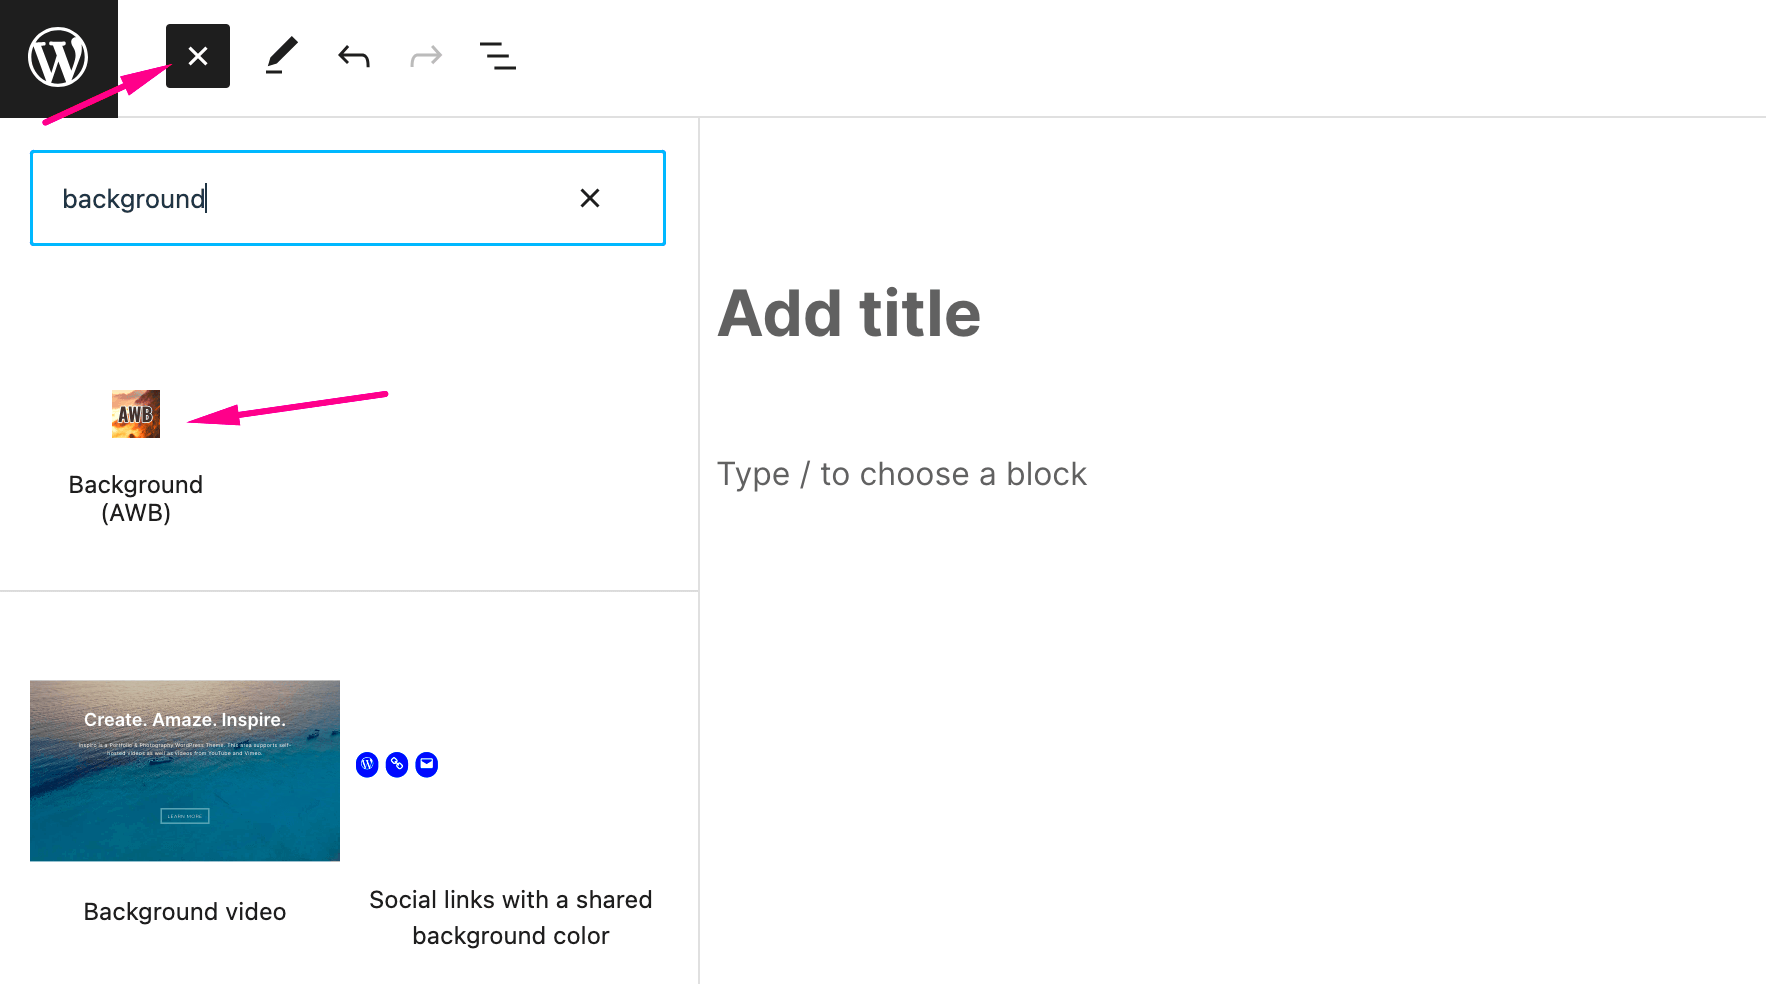
Before diving into the exhilarating world of video backgrounds in WordPress, you need to ensure that you have the right tools and settings in place. Let’s explore the prerequisites that will make this process a breeze!
- WordPress Installation: First and foremost, make sure you have a working WordPress site. Whether it’s on a local server or a live domain, having a functional WordPress installation is essential.
- Compatible Theme: Not all WordPress themes support video backgrounds. Hence, either choose a theme that explicitly mentions “video background support” or opt for a customizable theme. Popular themes like Astra, OceanWP, or Divi can handle video backgrounds with ease.
- Video Source: Decide on the video you want to use as the background. You can either host a video on your own server or embed it from platforms like YouTube or Vimeo. Always opt for optimized videos to maintain your website’s loading speed.
- File Format: If you’re uploading a video directly, ensure that the format is suitable (like MP4, WebM, or Ogg). MP4 is widely regarded as the most compatible format across different browsers.
- Good Internet Connection: Since video backgrounds can consume bandwidth, a stable internet connection during the setup will ensure smoother uploads and previews.
Now that you’ve got everything lined up, get ready to transform your website with captivating video backgrounds!
Step-by-Step Guide to Adding Video Backgrounds in WordPress
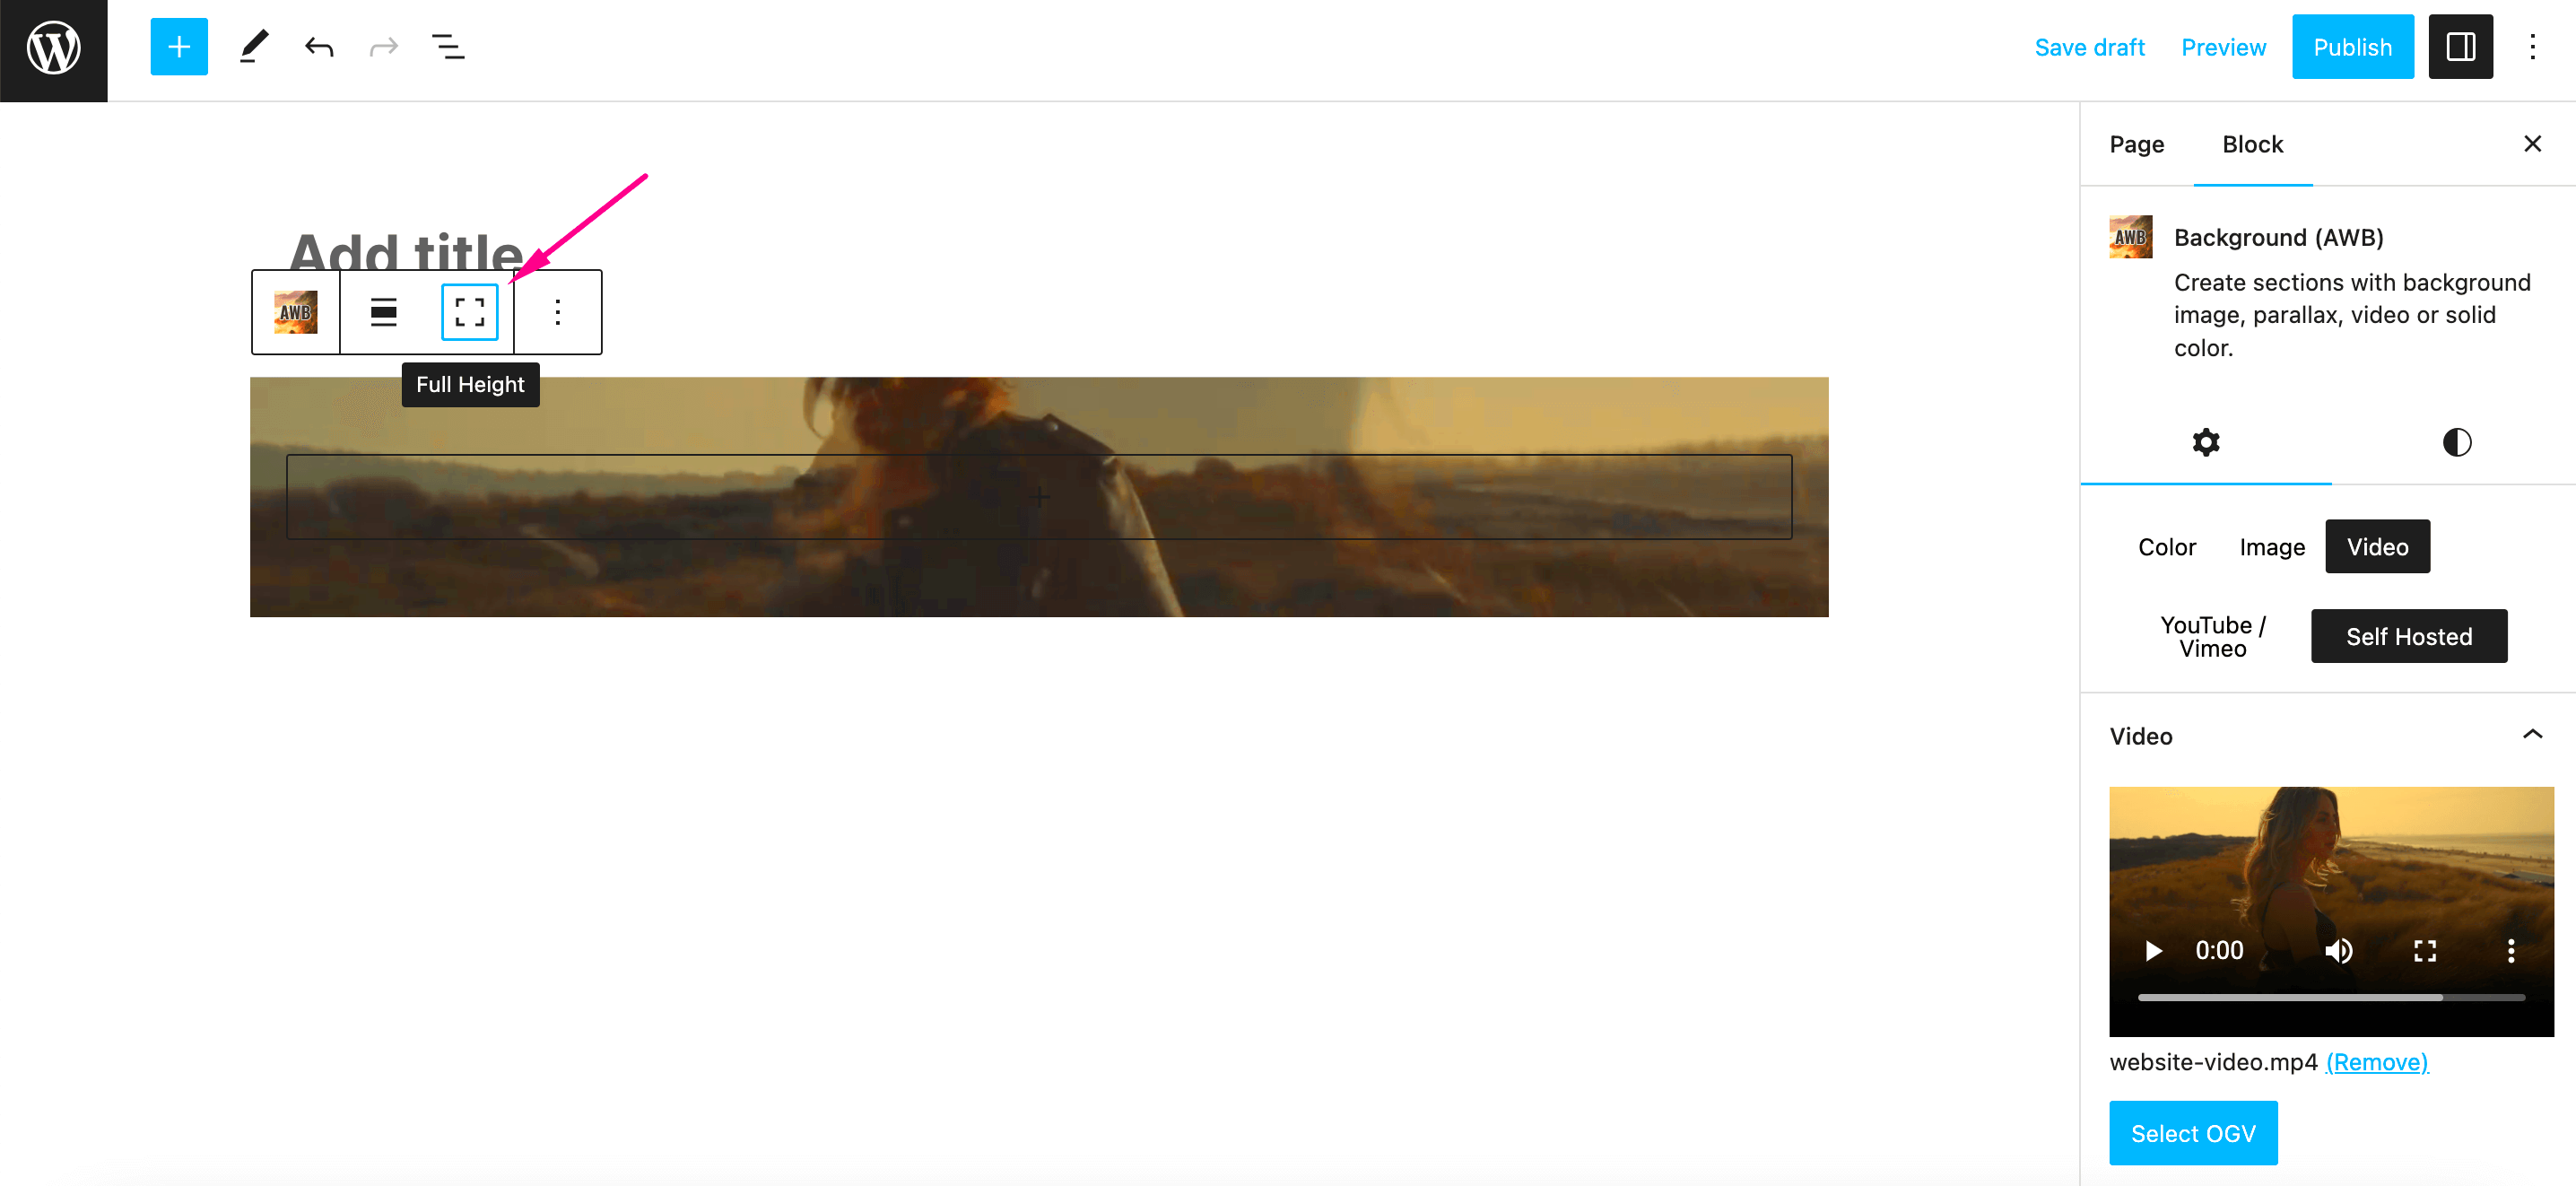
Ready to add some cinematic flair to your WordPress site? Follow this step-by-step guide, and you’ll have a stunning video background in no time!
- Choose Your Video: Start by selecting a visually appealing video that aligns with your website’s theme. Remember to keep it short and loopable for the best user experience.
- Optimize Your Video: If you’re uploading the video directly, consider compressing it to reduce loading times. Tools like HandBrake or online services can help with this.
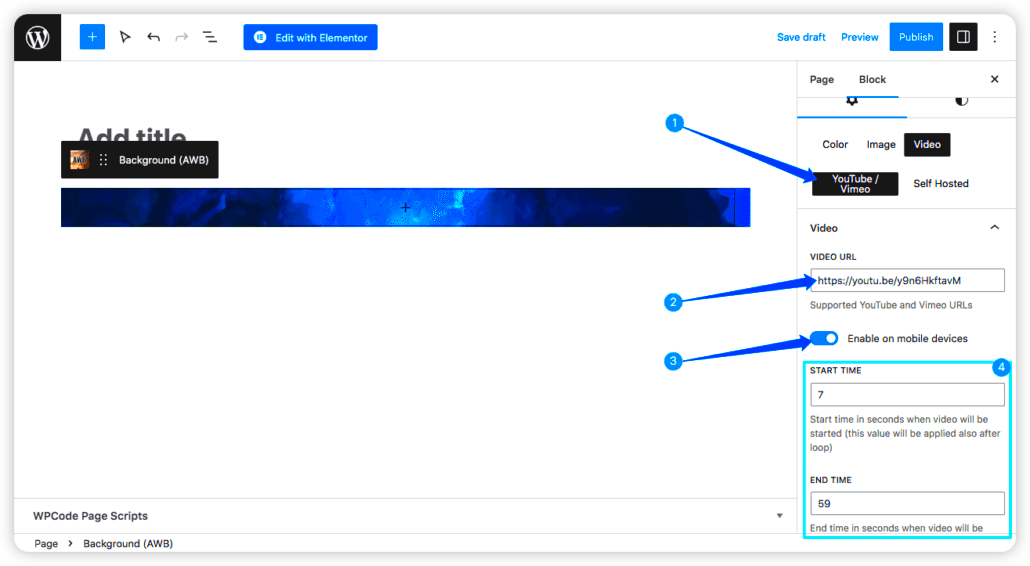
- Upload the Video: Head over to your WordPress dashboard, then click on Media > Add New. Upload your video file here.
- Get the Video URL: Once uploaded, click on the video. Copy the file URL from the details section, as you’ll need it in the next step.
- Set the Video as Background: Depending on your theme, this can differ slightly:
- If using a customizable theme, navigate to Appearance > Customize > Header Media or Video Background section. Here, you can paste the video URL.
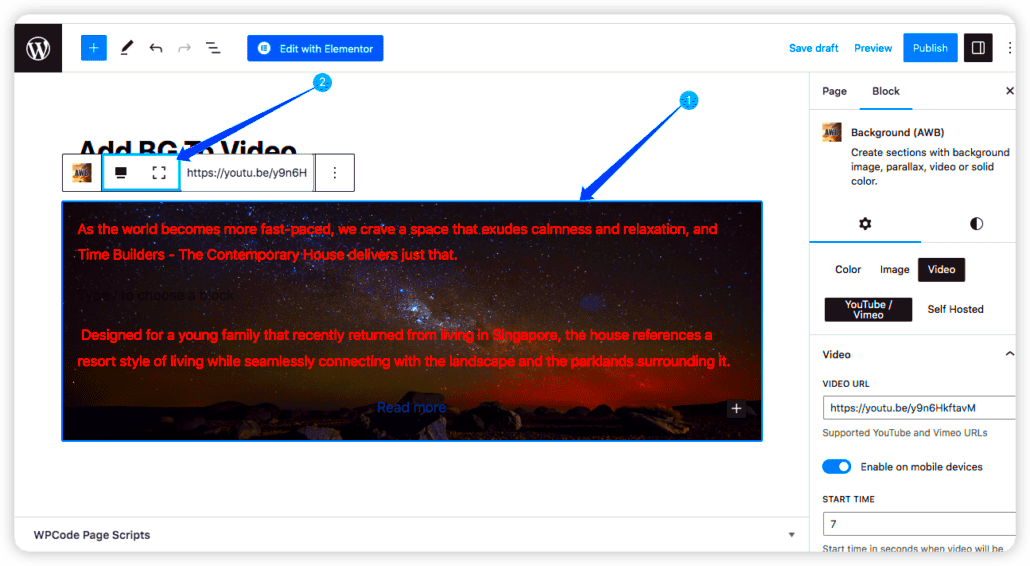
- For page builders like Elementor, drag and drop a section, go to the background settings, and select the video option to paste your URL.
- Adjust Settings: Configure the settings such as mute, autoplay, and loop. Muting ensures your viewers aren’t overwhelmed by sound as they land on your page.
- Preview Your Changes: Always preview your updates to ensure that everything looks and behaves as expected. Test it across different devices too!
- Publish: Once you’re satisfied with how everything looks, hit that publish button and watch your website come alive!
By following these steps, you’ve successfully added a dynamic video background to your WordPress site. Congratulations on enhancing your web presence!
5. Using HTML to Embed Video Backgrounds
Embedding a video background in WordPress using HTML might sound a bit tricky at first, but it’s actually quite simple once you get the hang of it! The beauty of HTML is that it allows for great flexibility, enabling you to create stunning visual effects for your website. So, let’s dive into the specifics.
To add a video background, start by uploading your video file to your WordPress media library. Once it’s uploaded, you’ll need the URL of that video. If you’re using a common format like MP4, it typically works smoothly across different browsers.
Here’s a straightforward step-by-step process to embed your video background in HTML:
- Go to your WordPress dashboard and select the page or post where you want to add your video background.
- Switch to the ‘Text’ or ‘HTML’ tab in the editor.
- Insert the following HTML code:
In this code snippet:
- autoplay makes the video play automatically when the page loads.
- muted is essential since most browsers block videos with audio from autoplaying.
- loop ensures that the video plays continuously until you navigate away.
Replace YOUR_VIDEO_URL.mp4 with the actual URL of your uploaded video. Now, save your changes and preview the page. Voilà! You should see your beautiful video background in action!
6. Styling Your Video Background with CSS
Once you’ve successfully embedded your video background in your WordPress site, it’s time to make it visually appealing with some CSS styling. CSS allows you to customize the appearance and layout of your video background seamlessly. Here’s how to do it!
To style your video background, you need to add some CSS rules to ensure the video looks great across different screen sizes and devices. You can either add this CSS directly in the ‘Additional CSS’ section under ‘Appearance’ > ‘Customize’ or within your theme’s stylesheet.
Here are some CSS properties you can use to style your video background:
.video-background { position: fixed; /* Keeps the video fixed to the viewport */ top: 0; left: 0; width: 100%; /* Full-width for responsiveness */ height: 100%; /* Full-height for coverage */ object-fit: cover; /* Ensures the video covers the container */ z-index: -1; /* Push the video behind other content */}Breakdown of the CSS properties:
- position: fixed; – This keeps your video anchored in place as users scroll.
- width: 100%; height: 100%; – Makes sure your video fills the entire screen, providing a seamless background.
- object-fit: cover; – This scales your video appropriately without stretching it, maintaining its aspect ratio.
- z-index: -1; – Ensures that your video doesn’t interfere with text or other content on your page.
With just a bit of CSS, you’ll have a well-styled video background that enhances your website’s visual appeal and keeps your visitors engaged. Happy coding!
7. Common Issues and Troubleshooting
While adding a video background in WordPress can transform your website’s aesthetics, you may encounter a few common issues along the way. Understanding these problems and how to troubleshoot them can save you a lot of time and frustration. Let’s dive into some of the issues you might face and how to address them:
- Video Not Playing: Sometimes, the video may not play at all. This could be due to an incorrect URL, unsupported file format, or browser compatibility issues. Ensure your video is hosted correctly and in a format like MP4, which is widely supported.
- Slow Loading Times: Large video files can significantly slow down your website. If visitors have to wait too long for your page to load, they might leave. To resolve this, consider compressing the video file or using a lower resolution.
- Audio Issues: It’s generally a good idea to mute the audio of a video background. If audio is playing, it can be distracting. Double-check your settings to ensure the video is set to mute.
- Responsive Design Concerns: A video that looks great on a desktop may not display well on mobile devices. Always test your video background on different screen sizes and adjust CSS settings for responsive design.
- Browser-Specific Problems: Not all browsers behave the same way with video backgrounds. Always test in multiple browsers like Chrome, Firefox, and Safari to catch any browser-specific issues.
If you still encounter problems after trying these troubleshooting tips, consider reaching out to community forums or WordPress support for further assistance.
8. Best Practices for Video Background Usage
Incorporating a video background can elevate your website’s design, but it’s crucial to do it right. Here are some best practices to keep in mind when using video backgrounds on your WordPress site:
- Keep It Short: Aim for brief video loops that convey your message quickly. A video that’s too long can distract visitors instead of engaging them.
- Optimize for Performance: Always choose a well-compressed video file to enhance loading times. Use online tools or software to minimize the file size without compromising quality.
- Choose Appropriate Content: Make sure the video’s content aligns with your site’s theme. A well-chosen video can reinforce your branding, while unrelated content can confuse your audience.
- Consider Accessibility: Not every visitor will have the same capabilities. Ensure your video background doesn’t hinder user experience for people with visual or auditory impairments. Mute the audio and offer alternative ways to consume your content, like text explanations.
- Test Across Devices: Always check how the video background looks and performs on various devices and screen sizes. Make adjustments as needed to ensure a smooth experience.
- Use CSS for Control: Employ CSS (Cascading Style Sheets) to control elements like video position and size. This allows you to achieve a polished look that blends well with your overall website design.
By following these best practices, you’ll ensure that your video background not only enhances your site’s visual appeal but also contributes to an engaging user experience.
Conclusion
Incorporating a video background in your WordPress site can greatly enhance its visual appeal and keep visitors engaged. Through the use of HTML and some simple WordPress adjustments, your website can stand out with dynamic content. Here’s a quick recap of the steps discussed:
- Choose the Right Video: Select a high-quality video that aligns with your site’s theme and enhances user experience.
- Upload Your Video: Use the WordPress media library to upload your video file. Ensure the video format is compatible, such as MP4 or WebM.
- Add HTML Code: Insert the HTML code for the video background within your WordPress theme. This includes using the
<video>tag with the appropriate attributes. - Adjust CSS: Fine-tune your site’s CSS to ensure the video runs smoothly in the background, covering all elements as needed.
- Test on Multiple Devices: Make sure to preview and test how the video background looks on various devices and screen sizes for responsiveness.
Additionally, it’s crucial to consider optimization settings to prevent slow loading times. Compress your video files, use autoplay features carefully, and consider whether you want sound to be muted by default. By following these guidelines, you can successfully implement a video background that not only captures attention but also complements your site’s overall design.

