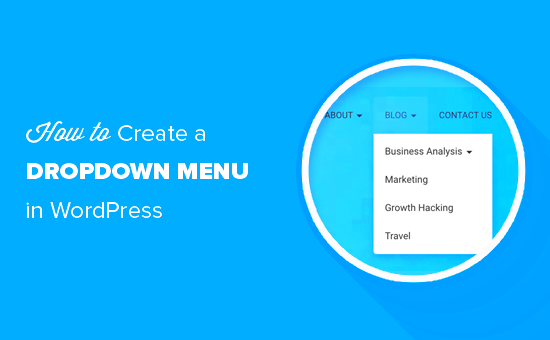
WordPress menu dropdowns are a key component of website navigation. They allow visitors to explore different sections of your site without overwhelming them with choices. By grouping related items together, dropdowns enhance user experience and make navigation seamless. But have you ever considered how the speed of these animations can affect usability? In this post, we’re diving into the world of WordPress menu dropdowns and animation speed adjustments to help you create a more fluid, engaging experience for your visitors.
Understanding the Importance of Animation Speed

Animation speed in dropdown menus is not just about aesthetics; it plays a significant role in user experience. A well-timed animation can make your site feel more responsive and intuitive. Here’s why adjusting animation speed matters:
- User Engagement: Faster animations can create an energetic atmosphere, while slower animations may lend a sense of sophistication. The right speed can keep users engaged, encouraging them to explore more content.
- Clarity and Visibility: Quick animations can help users see menu options quickly, preventing confusion. However, if too fast, they may miss important links. Striking the right balance is crucial.
- Accessibility: Different users have varied interaction speeds. By allowing adjustments, you cater to those who may need more time to read and select options.
- Brand Perception: Your site’s animation speed contributes to your brand’s personality. A site with playful, quick animations may be perceived as fun, while one with slow, smooth animations could feel premium.
In summary, the speed of dropdown animations is an essential factor that influences how users interact with your site. Balancing speed is key to creating an inviting and efficient navigation experience for all visitors.
How to Access Your WordPress Theme’s CSS

Accessing your WordPress theme’s CSS is an essential step to customize the aesthetics and functionality of your website. Fortunately, WordPress makes it pretty straightforward, so you can easily dive in and play around with styles to your heart’s content!
To get started, follow these simple steps:
- Log into your WordPress Dashboard: First, you need to enter your dashboard by going to
yourwebsite.com/wp-adminand entering your login details. - Navigate to Appearance: On the left-hand side, find the menu and hover over or click on Appearance. This will reveal a submenu.
- Open the Theme Editor: Click on Theme Editor from the submenu. Here, you’ll see a warning about editing code directly; just be cautious and back up your site if needed.
- Locate the Stylesheet: On the right side, look for
style.css. This is where the main CSS for your theme is stored. Click on it, and you’ll see the code in the editor window.
Alternatively, if you’re using a theme customizer, go to Appearance > Customize > Additional CSS. This section lets you add custom CSS without modifying theme files directly. Adjustments here will override the default styles.
Remember: Always preview your changes before publishing, and consider using a child theme if you’re making significant modifications, as this preserves your changes even after theme updates!
Identifying the Right CSS Selectors for Menu Dropdowns
Now that you know how to access your theme’s CSS, the next step is identifying the right selectors to target your menu dropdowns. Using the correct selectors ensures that any changes you make will impact the right elements without affecting other parts of your site. So, let’s dig into that!
Here are some steps to help you identify the right CSS selectors:
- Inspect Your Website: Open your website and right-click on the dropdown menu. Select Inspect or Inspect Element from the context menu. This will bring up the developer tools and allow you to see the HTML and CSS associated with that dropdown.
- Find the Right Classes: In the developer tools, look for the class names associated with the dropdown menu. For example, you might see something like
.menu-itemor.dropdown. These classes are essential for targeting the elements in your CSS. - Note Pseudo-Classes: If you want to customize the hover effect or active state of dropdowns, look for pseudo-classes like
:hoveror:focus. Adding these to your CSS selectors can create smooth transition effects.
Here’s a quick example of CSS rules you might develop:
| CSS Selector | Description |
|---|---|
.menu-item:hover |
Targets menu items on hover – perfect for changing colors. |
.dropdown-content |
Targets the content of your dropdown – useful for adjusting padding or background color. |
The right selectors will help ensure your CSS changes affect only the dropdown menu, providing a clean and efficient way to adjust your website’s animation speed or style. Happy styling!
5. Adjusting Animation Speed with CSS
When it comes to crafting an engaging user experience on your WordPress site, the speed of your dropdown menu animations can make a significant difference. By adjusting the animation speed using CSS, you can create smoother transitions that enhance usability and aesthetic appeal. Here’s how to go about it:
First, you’ll want to identify the CSS properties that control the animation of your dropdown menus. Typically, these would include properties like transition and transform. Here’s a simple example:
.menu-item { transition: all 0.3s ease; /* Adjusting duration and timing function */}.menu-item:hover .dropdown { transform: translateY(0); /* Replace with your desired translate values */}In the code above, the transition property specifies that all changes should take 0.3 seconds with an ease-in-out timing function, making it feel more natural. You can experiment with different durations, such as 0.5s for a slower effect or 0.2s for a snappier response.
Next, you might want to consider delays. Using transition-delay, you can stagger the appearance of your dropdown elements, further enhancing the user experience. For instance:
.menu-item:hover .dropdown { transition-delay: 0.1s; /* Adds a delay before the dropdown appears */}With these simple adjustments, you’ll not only improve aesthetics but also contribute to better site navigation. Remember to test your changes across different devices and browsers to ensure everything looks and works as intended!
6. Implementing jQuery for Enhanced Dropdown Control
If you’re looking for a way to enhance the interactivity of your dropdown menus beyond what CSS can offer, jQuery is your best friend. This JavaScript library provides a plethora of options to control both the speed and the behavior of your dropdowns. Let’s delve into how you can implement jQuery for better dropdown control.
First, make sure you have jQuery enabled on your WordPress site. Most themes include it by default, but you can add it manually in your theme’s functions.php file if needed:
function add_custom_scripts() { wp_enqueue_script('jquery');}add_action('wp_enqueue_scripts', 'add_custom_scripts');Now that jQuery is enabled, let’s add some animation to your dropdown menus. A common approach is using the slideDown method:
jQuery(document).ready(function($) { $('.menu-item').hover( function() { $(this).find('.dropdown').stop(true, true).slideDown(300); // Duration in milliseconds }, function() { $(this).find('.dropdown').stop(true, true).slideUp(300); } );});In this example:
- stop(true, true): This method is used to stop all animations on the dropdown, preventing queue buildup.
- slideDown(300): The duration here is set to 300 milliseconds; feel free to tweak it according to your needs!
Using these simple jQuery functions, you can control the dropdown animations in a way that’s much more dynamic than with CSS alone. You can even enhance it further by adding fade effects or customizing the menu behavior based on user interactions. Just remember — a good menu experience shouldn’t distract from your content; keep it intuitive and clean!
7. Testing Your Animation Adjustments
Once you’ve made your adjustments to the dropdown animation speed of your WordPress menu, it’s crucial to test them to ensure everything works as expected. This step is often overlooked, but it can save you a lot of headaches down the line. So, how do you effectively test your animations? Let’s break it down!
First, take a moment to view your site in multiple browsers. Different browsers may render animations slightly differently, so it’s essential to check that the experience is consistent across the board. Here’s a quick checklist to help you test your adjustments:
- Load Times: Observe whether the dropdown menus appear too quickly or take too long to show up. A well-balanced speed should feel natural.
- Responsiveness: Resize your browser window or check the site on various devices, like smartphones and tablets, to see if the animations still function smoothly.
- User Experience: Ask friends or colleagues to navigate your site. Getting a second opinion can provide valuable insights on the usability and perception of your dropdown animations.
- Accessibility: Ensure that users who may be sensitive to animations can still interact with your menu options comfortably.
Finally, consider using tools like Google PageSpeed Insights to evaluate any impact your animation adjustments might have had on loading times and overall site performance. After all, a smooth animation should enhance user experience without compromising site speed!
8. Common Issues and Troubleshooting
Even if you’ve followed all the right steps in adjusting your WordPress menu dropdown animation speed, sometimes things just don’t go as planned. Don’t worry; you’re not alone! Here are some common issues that users might face, along with tips for troubleshooting them.
One major issue many encounter is animations not working at all. If that’s the case, here are a few possible solutions:
- Check Your Code: Perhaps there’s a typo or syntax error in your CSS or JavaScript. Go through your code carefully.
- Plugin Conflicts: Sometimes, plugins might conflict with one another, affecting animations. Temporarily deactivate your plugins to see if the problem resolves.
- Browser Caching: Your browser might be showing you a cached version of your website. Clear your browser cache and reload your page.
Another issue you might face is that the speed adjustments feel unnatural—too quick or too slow. If this happens, don’t hesitate to revisit your settings and make small incremental changes for a better user experience.
Lastly, be aware of accessibility concerns. If animations are jarring or distracting, they can detract from usability. Always consider the user experience and make adjustments accordingly. By keeping these tips in mind, you should be well-equipped to troubleshoot and refine your animation settings effectively!
Alternative Plugins for Menu Animation Customization
While WordPress has built-in capabilities for menu animations, sometimes you need a little extra flair or functionality that the default settings can’t provide. Luckily, there are plenty of alternative plugins available that can help you customize your menu animations to better suit your site’s aesthetic and user experience. Let’s dive into some popular options!
1. Max Mega Menu
This is not just a menu plugin; it’s a full-blown mega menu that makes it easy to organize your complex navigation. Max Mega Menu allows for smooth animations, giving you the ability to adjust speeds and effects based on your design needs.
2. WP Responsive Menu
If responsiveness is a priority for you, WP Responsive Menu brings a ton of customization features for mobile users. This plugin focuses on smooth dropdown animations and great user interactions, allowing you to select your animation speed effortlessly.
3. Superfly Menu
Superfly is another strong contender for enhancing your menu experience. It features attractive slide-in and hover animations, with considerable flexibility in speed adjustments. You can choose from multiple layouts and still have control over how each interaction feels.
4. UberMenu
This is a premium option that takes your menu to the next level. UberMenu allows users to implement a variety of animations and speed settings across its extensive configuration options, ensuring that your menu is both functional and visually appealing.
Choosing the right plugin for menu animation customization can enhance your site’s usability and aesthetics. Before settling on one, it’s a good idea to try a few plugins to see which aligns best with your site’s overall design and user experience.
Conclusion
In conclusion, adjusting the animation speed of your WordPress menu can significantly enhance the overall user experience on your site. Not only do these adjustments make your navigation smoother and more appealing, but they also keep visitors engaged longer. Remember, the goal is to create an intuitive experience; a fast-loading, smoothly animated menu goes a long way in achieving that!
Whether you choose to modify settings in your theme or explore alternative plugins, there are plenty of options available to suit your needs. As you experiment with different speeds and animations, keep in mind the importance of consistency across your site’s design. A cohesive look makes for an enjoyable user experience.
So, don’t hesitate to dive in, play around with the settings, and discover what works for your specific website. Happy customizing, and may you create a menu that not only looks fantastic but feels just right for your audience!


