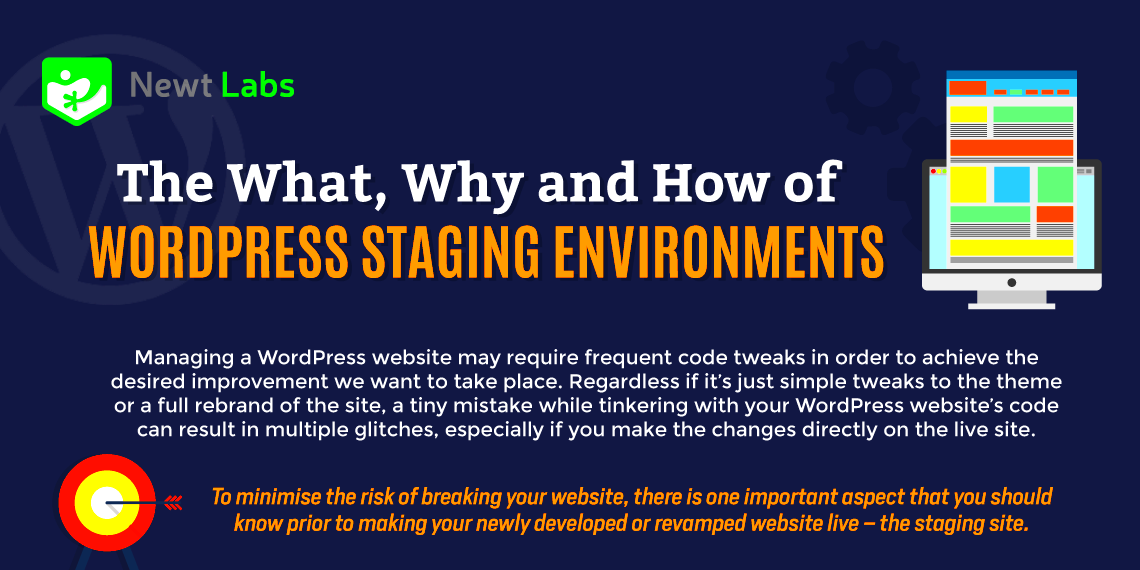
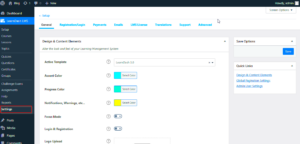
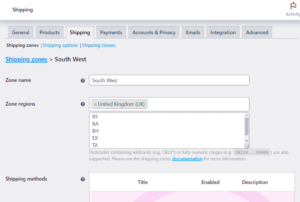
When it comes to WordPress development, understanding the various environments is essential for a seamless and efficient workflow. Whether you’re a seasoned developer or just starting, having a grasp of development, staging, and production environments can make a significant difference in your project management. These environments serve distinct purposes, and knowing the best practices for each can help you avoid potential pitfalls and ensure a smooth user experience. Let’s dive into what these environments are and why they matter!
Understanding Production, Staging, and Development Environments
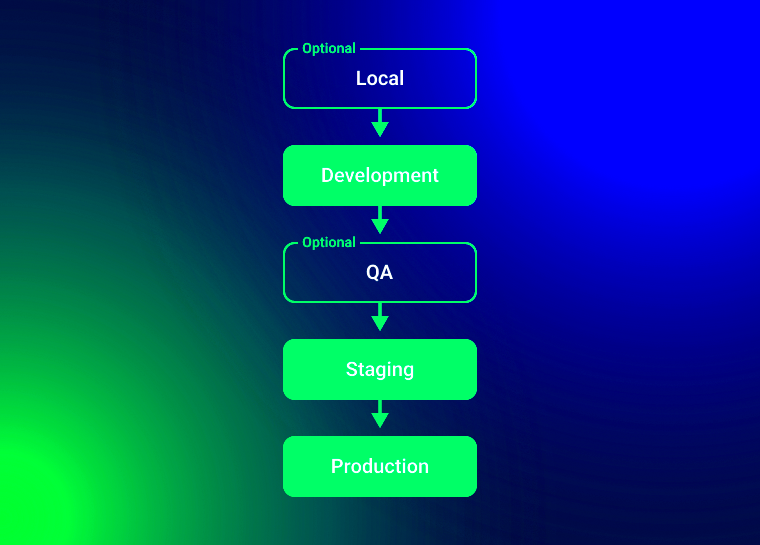
To master WordPress development, you need to understand the different environments—production, staging, and development. Each serves a unique role in the development lifecycle:
- Development Environment:
Your playground! This is where all the magic happens. You can experiment with themes, plugins, and custom code without worrying about affecting the live site. Development environments are usually set up on your local machine or a private server.
- Staging Environment:
Think of this as a rehearsal for your site. The staging environment mirrors your live site as closely as possible, allowing you to test changes, updates, and new features before pushing them live. It helps catch bugs and fixes before they go public.
- Production Environment:
This is the live site, where the world can access your content. Once you’re confident everything works smoothly in the staging environment, you move changes here. It’s essential to maintain a robust backup strategy to recover quickly in case issues arise.
By implementing these environments wisely, you can enhance collaboration, improve code quality, and ultimately deliver a better product. Think of them as layers of security and efficiency that pave the way for a successful WordPress journey!
Benefits of Using Separate Environments
When delving into WordPress development, it’s crucial to grasp the immense benefits of utilizing separate environments. By creating distinct environments for development, staging, and production, you ensure that your website remains stable and effective. Let’s break down the key benefits:
- Risk Mitigation: Having separate environments minimizes the chances of breaking your live site. You can test new features, plugins, or designs without the fear of negatively impacting your users.
- Enhanced Testing: Staging environments allow developers to rigorously test changes in a setup that closely resembles the production environment, ensuring that everything works seamlessly before going live.
- Improved Collaboration: When multiple team members are involved in development, separate environments help in managing and assigning tasks more effectively, avoiding conflicts and confusion.
- Streamlined Debugging: A development environment enables developers to debug issues without affecting the live site. Developers can investigate problems in isolation, making it easier to find solutions.
- Easier Rollbacks: If something goes wrong in production, having a staging environment allows you to quickly roll back to a previous version that’s been tested and verified, safeguarding your site from downtime.
- Security Enhancements: By using separate environments, sensitive data from your live site is less exposed during development and testing, which can enhance overall site security.
In summary, separate environments serve as a safety net in the WordPress development lifecycle, promoting better practices and leading to a more robust website overall.
Setting Up a Local Development Environment
Setting up a local development environment is one of the first steps in maximizing your WordPress development experience. It allows you to experiment, build, and test without the worry of affecting a live site. Here’s a straightforward guide to getting your local environment up and running:
- Choose a Local Development Tool: There are several popular tools to set up a local server:
- XAMPP
- Local by Flywheel
- MAMP
- Docker
- Install Your Chosen Tool: Follow the installation instructions provided by the tool’s website. Most of them offer step-by-step guides to streamline the process.
- Create a Database: Most local servers come with a tool like phpMyAdmin where you can create a new database. Name it appropriately for the project you’re working on.
- Download WordPress: Head to the WordPress.org website and download the latest version of WordPress. Extract the files and place them in your local server’s designated folder (often called ‘htdocs’ or ‘www’).
- Configure wp-config.php: Navigate to the extracted WordPress files and rename ‘wp-config-sample.php’ to ‘wp-config.php’. Open it and fill in your database details to connect WordPress to your local database.
- Run the Installation: Open your web browser and navigate to ‘localhost/yourfoldername’. You’ll see the WordPress installation process. Follow the prompts, and soon you’ll have a fully functional local version of WordPress!
With your local development environment up and running, you can freely explore, develop, and test various aspects of WordPress while keeping your live environments safe and sound. Happy coding!
Creating a Staging Environment
Building a staging environment is one of the most crucial steps in the WordPress development lifecycle. Think of it as a rehearsal space for your production site. It allows you to test changes and updates without impacting your live website. Here’s how you can create an effective staging environment:
- Choose the Right Hosting Provider: Many modern hosting providers like WP Engine, SiteGround, and Bluehost offer one-click staging setups, making it easier to create and manage your staging site.
- Use a Subdomain or Subfolder: To organize your staging site efficiently, consider using a subdomain (e.g., staging.yoursite.com) or a subfolder (e.g., yoursite.com/staging). This keeps it distinct from your production environment.
- Clone Your Production Site: Make an exact copy of your live site. This includes the database and all WordPress files. Most hosting providers have tools that help with this process.
- Secure Your Staging Environment: Don’t forget to protect your staging site to prevent unauthorized access. Use a password or restrict access via your web server settings.
- Regularly Sync Data: If your production site is frequently updated, ensure your staging environment is in sync by periodically cloning it anew.
By following these steps, your staging environment will serve as a safe space for testing, so you can roll out new features confidently and without the pressure of affecting your live audience!
Best Practices for Maintaining Production Environments
Having a well-maintained production environment is crucial for the success of your WordPress site. It ensures that users have a seamless experience while preventing potential downtime or data loss. Here are some best practices to keep your production environment in tip-top shape:
- Regular Backups: Make it a habit to schedule regular backups of your entire WordPress site, including both the database and files. Utilize plugins like UpdraftPlus or BackupBuddy to automate this process.
- Update WordPress, Themes, and Plugins: Always keep your WordPress core, themes, and plugins up to date. Updates often come with security patches and performance improvements that are vital for your site’s health.
- Monitor Site Performance: Use tools like Google PageSpeed Insights or GTmetrix to regularly assess the performance of your site. Identifying slow loading times can lead to immediate fixes.
- Implement Security Measures: Employ security plugins such as Wordfence or Sucuri to provide additional layers of security. Regular scans, firewall protection, and malware removal are a must.
- Optimize Database: Periodically clean up your WordPress database by removing unwanted post revisions, spam comments, and transient options. Plugins like WP-Optimize can help streamline this process.
By adhering to these best practices, you ensure that your production environment remains robust, secure, and reliable, ultimately benefiting both you and your users!
7. Version Control and Collaboration Tools
When it comes to managing WordPress development projects, utilizing version control and collaboration tools is essential. They help streamline workflows and ensure that everyone on your team is on the same page. The most commonly used version control system is Git, which allows developers to track changes in the code, collaborate effectively, and revert to previous versions if necessary.
Here are some of the key benefits of using version control:
- Collaboration: Multiple developers can work on the same project without overwriting each other’s work. They can create branches for different features, make changes independently, and merge their work seamlessly.
- History Tracking: With Git, you can see the entire history of changes made to your project. This can be invaluable for debugging or understanding the evolution of your codebase.
- Backup and Recovery: If a mistake is made, you can easily roll back to a previous version of your code, saving you from potential disasters.
- Code Reviews: Git integration with platforms like GitHub or Bitbucket allows for easy code reviews through pull requests, fostering team collaboration and code quality.
Alongside version control, collaboration tools like Slack, Trello, or Jira can enhance communication and project management. These tools help keep everyone updated on tasks, deadlines, and project progress, ultimately leading to a more organized and productive development environment.
8. Automating Deployments: Continuous Integration and Continuous Deployment
In today’s fast-paced web development landscape, automating deployments is a game-changer. Continuous Integration (CI) and Continuous Deployment (CD) are practices that streamline your workflow, allowing you to push code changes more frequently and confidently.
Let’s break down what CI and CD entail:
- Continuous Integration (CI): This practice involves automatically testing and integrating code changes from multiple contributors into a shared repository. Using CI tools like Jenkins or CircleCI, you can detect issues early by running automated tests every time a new change is committed.
- Continuous Deployment (CD): Once your code passes all tests in the CI stage, CD takes over by automating the process of deploying that code to production. This means that every change that passes testing is automatically released to your live site, eliminating the manual steps that can often lead to human error.
Here are some of the advantages of implementing CI/CD:
- Faster Release Cycles: Automating these processes enables quicker updates, allowing your team to respond to user feedback and market changes rapidly.
- Reduced Risk: Since each change is tested automatically, you can detect issues and bugs before they reach your users, reducing the risk of downtime.
- Improved Collaboration: Developers spend less time on manual tasks, which allows them to focus on writing code and innovating.
Integrating CI/CD into your WordPress development workflow can elevate your team’s efficiency and enhance the overall quality of your projects. So, why not give it a try?
Testing and QA Strategies for WordPress
Testing and quality assurance (QA) are essential components of any successful WordPress development process. They ensure that your website functions as intended and provides a seamless experience for users. Here are some key strategies to consider:
- Automated Testing: Implement automated testing frameworks such as PHPUnit or Behat. These tools help you run tests on your code regularly, catching issues early in the development cycle.
- Manual Testing: While automation is powerful, manual testing is equally important. Check key functionalities by navigating through the site as a user would. This involves inspecting forms, links, and interactive elements to ensure everything works smoothly.
- Cross-Browser Testing: Users access your WordPress site from various browsers. Use tools like BrowserStack or CrossBrowserTesting to verify that your site looks and functions well across all popular browsers.
- Device Testing: Don’t forget mobile! Test your site on various devices to ensure it’s responsive and user-friendly on different screen sizes.
- Performance Testing: Use tools like GTmetrix or Google PageSpeed Insights to assess your site’s speed and performance. A slow-loading site can deter users, so it’s crucial to optimize this aspect.
- User Acceptance Testing (UAT): Before going live, involve end-users or stakeholders to test your site. Their feedback can reveal insights you may have overlooked.
- Regression Testing: Whenever you make updates, perform regression tests to ensure that existing functionalities remain intact.
- Documentation: Keep detailed documentation on your testing processes and results. This aids transparency and helps when onboarding new developers.
By incorporating these testing and QA strategies, you can deliver a polished, high-quality WordPress site with minimal errors.
Monitoring and Performance Optimization in Production
Once your WordPress site is live, monitoring and performance optimization become crucial to maintaining its health and ensuring that users have a pleasant experience. Here’s how to handle it:
- Use Monitoring Tools: Tools like Google Analytics and New Relic can provide insights into your site’s performance, user behavior, and any potential bottlenecks.
- Regular Backups: Implement a robust backup strategy using plugins like UpdraftPlus or BackupBuddy. Regular backups are essential for disaster recovery.
- Performance Metrics: Focus on key metrics such as page load time, uptime, and server response time. Set benchmarks and routinely check to ensure you’re meeting them.
- Optimize Images: Large images can slow down your site significantly. Use image optimization plugins like Smush or EWWW Image Optimizer to compress images without losing quality.
- Minimize HTTP Requests: Reduce the number of elements on your page (like scripts and styles) to decrease HTTP requests, which helps improve load times.
- Caching Solutions: Implement caching plugins like WP Super Cache or W3 Total Cache. These plugins help serve cached versions of your pages, reducing server load and improving speed.
- Monitor Security: Use security plugins like Wordfence or Sucuri to monitor for vulnerabilities and ensure your site remains secure.
- Regular Updates: Keep WordPress core, themes, and plugins updated. Regular updates ensure that your site runs efficiently and is protected from security vulnerabilities.
By monitoring your WordPress site continuously and optimizing performance proactively, you can ensure a smooth experience for your users while maintaining the integrity of your application.
Conclusion and Key Takeaways
In the world of WordPress development, managing different environments—such as development, staging, and production—is crucial for ensuring a smooth workflow and safeguarding the integrity of your website. By implementing best practices for each environment, you can significantly reduce the risks of downtime, bugs, and performance issues.
Here are some key takeaways to consider:
- Separate Environments: Always maintain distinct environments for development, staging, and production to isolate changes and minimize risks.
- Version Control: Utilize version control systems like Git to track changes and collaborate effectively with your team.
- Automated Testing: Implement automated tests in your staging environment to catch errors before pushing updates to production.
- Backup Regularly: Always back up your production environment before deploying any changes, ensuring you have a rollback option if needed.
- Use Staging for QA: Thoroughly test features and updates in your staging environment, mimicking the production environment as closely as possible.
- Monitoring and Logging: Monitor performance and log errors in your production environment to quickly address any issues that arise.
By adhering to these best practices, you can streamline your WordPress development process, enhance collaboration among team members, and ensure a robust and reliable user experience for your visitors. In summary, creating appropriate boundaries between development, staging, and production environments is fundamental for any WordPress developer aiming for success.

