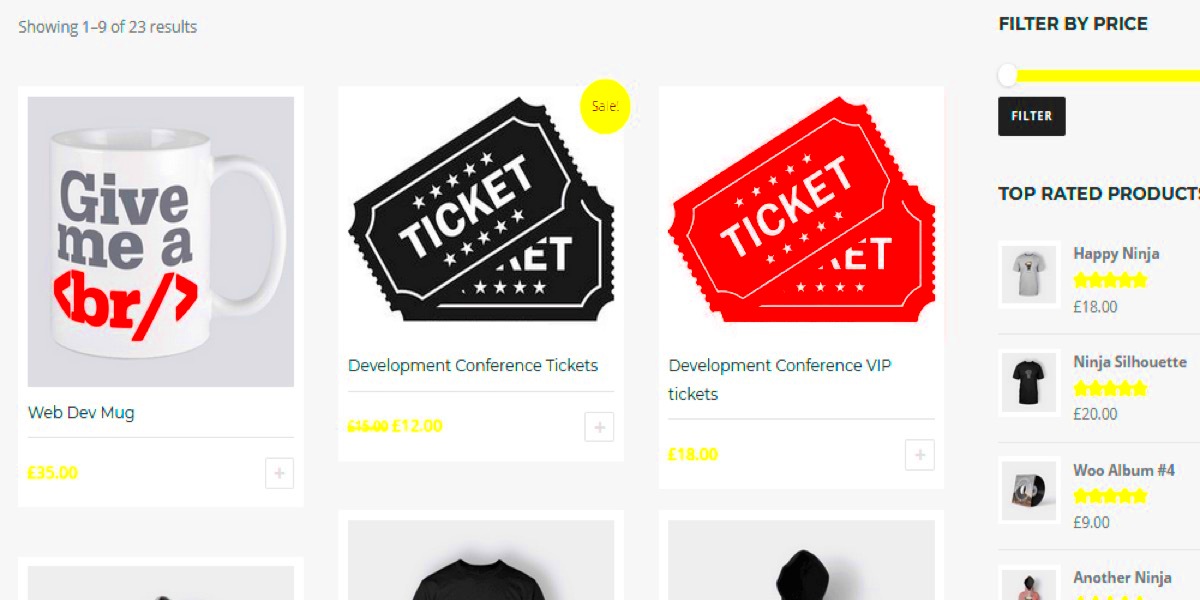
If you’re looking to sell event tickets online, you’ve stumbled upon the right solution! WooCommerce Tickets is a powerful extension for the WooCommerce platform, specifically designed to enhance your ticket-selling experience. It allows you to manage and sell tickets seamlessly right from your website. Whether you’re organizing a concert, workshop, or social event, this tool simplifies the process for both you and your customers. Best of all, it integrates smoothly with WordPress, making it an ideal choice for businesses that are already using this popular content management system.
Benefits of Selling Event Tickets with WooCommerce

Using WooCommerce to sell event tickets comes with a plethora of advantages. Let’s dive into some key benefits:
- Easy Integration: If you already use WooCommerce, adding ticket sales is like putting frosting on a cake. The integration process is straightforward!
- Full Control: Take charge of your ticket sales! You control pricing, inventory, and event details, allowing you to customize your offerings to fit your audience’s needs.
- Variety of Payment Options: WooCommerce supports multiple payment gateways, making it easier for customers to pay using their preferred method, from credit cards to PayPal.
- Responsive Design: WooCommerce Tickets is mobile-friendly, ensuring that customers can purchase tickets from their phones or tablets without any hassle.
- Robust Reporting Features: Access in-depth analytics to track sales, understand customer behavior, and optimize your marketing strategies.
- Event Management Tools: Take advantage of features like ticket types, seating arrangements, and discount codes to enhance your event experience.
In summary, WooCommerce Tickets provides you with a diverse set of tools to simplify event management and ticket sales. It’s user-friendly and packed with features that ensure your events are a hit!
Setting Up WooCommerce for Ticket Sales

Setting up WooCommerce for ticket sales is a fairly straightforward process, and once you get the hang of it, you’ll be selling tickets like a pro in no time! Here’s a step-by-step guide to help you navigate the setup seamlessly.
- Install WooCommerce: If you haven’t already, you’ll first need to install the WooCommerce plugin on your WordPress site. Simply head to the ‘Plugins’ section, search for WooCommerce, and click ‘Install Now.’
- Run the Setup Wizard: After installation, WooCommerce will prompt you to run a setup wizard. Follow the steps provided, which include configuring your store details, currency settings, and payment options.
- Add Your Products: In WooCommerce, tickets will be treated as products. Navigate to the ‘Products’ section and select ‘Add New.’ Here, you can enter the event details like name, description, and price.
- Configure Product Data: Choose ‘Simple Product’ and enable the ‘Virtual’ and ‘Downloadable’ options. This signifies that your product is an online ticket. Fill out the inventory, shipping, and linked products sections as needed.
- Create Ticket Variations: If you have multiple ticket types (e.g., VIP, General Admission), set these up as variations. In the ‘Product Data’ dropdown, select ‘Variable Product’ to manage different ticket types.
- Publish Your Tickets: After entering all necessary information, hit the ‘Publish’ button. Your tickets are now live and ready for purchase!
By following these steps, you’ve successfully set up WooCommerce for selling event tickets. Make sure to constantly monitor your sales and customer feedback to enhance your ticket selling experience!
Choosing the Right Ticketing Plugin for WooCommerce
When it comes to selling tickets online through WooCommerce, choosing the right ticketing plugin is critical. The right plugin can streamline your sales process, enhance your customers’ experience, and provide essential features for managing your events. Let’s explore how to make the best choice!
Here are some key features to consider when selecting a ticketing plugin for WooCommerce:
- Compatibility: Ensure that the plugin you choose integrates seamlessly with WooCommerce. Check for customer reviews and documentation to confirm compatibility.
- Customization Options: Look for plugins that allow you to customize your ticketing process and designs. This can include ticket types, pricing, and promotional offers.
- Inventory Management: A good ticketing plugin should offer inventory management features to track ticket sales and availability efficiently.
- Mobile Responsiveness: Since many people purchase tickets on their mobile devices, ensure that the plugin provides a user-friendly mobile interface.
- Check-In Features: Some plugins come with built-in check-in tools, allowing you to scan tickets at the event for easy entry management.
- Customer Support: Always consider the level of customer support that’s offered. Plugins with readily available support will save you headaches down the road.
Here are a few popular ticketing plugins you may want to consider:
| Plugin Name | Key Features | Price |
|---|---|---|
| Tickera | Custom QR codes, Easy check-in | Starting at $49 |
| Event Tickets Plus | RSVP management, Ticket scanning | $89/year |
| WooCommerce Box Office | Custom ticket creation, Voucher capabilities | $79/year |
By assessing your needs against these options and considering the features mentioned, you’ll be well on your way to finding the perfect ticketing plugin to complement your WooCommerce store. Happy selling!
5. Creating and Managing Event Tickets
Creating and managing event tickets in WooCommerce is a straightforward process, allowing you to focus on what matters most—making your event a success. Once you’ve installed the right plugins, such as WooCommerce and a ticketing extension like WooCommerce Box Office or Event Tickets, you’re ready to get started.
Firstly, you’ll want to head over to your WordPress dashboard and create a new product. Here’s a simplified breakdown of how to create your event tickets:
- Navigate to Products: Click on ‘Products’ and then ‘Add New’ to create a new product.
- Select Product Type: Choose a ‘Simple Product’ or a ‘Variable Product’ if you want to offer different types of tickets (like VIP, general admission, etc.).
- Set Pricing: Decide on your ticket price and any sale prices if you’re running promotions.
- Add Inventory: Keep track of how many tickets you have available. WooCommerce allows you to manage stock easily.
- Set Event Details: Include details such as date, location, and any special notes to inform attendees about what to expect.
Managing your event tickets is equally vital. With WooCommerce, you can easily monitor ticket sales, run reports, and adjust inventory as needed. You can even set up notifications to alert you when ticket sales are soaring or if you’re running low on stock.
6. Customizing Ticket Options and Pricing
In the world of event ticketing, customization plays a crucial role in attracting your audience. WooCommerce allows you to tailor your ticket options and pricing to fit your event’s specific needs and audience preferences.
Let’s explore how you can customize your ticket offerings:
- Variable Tickets: Create different ticket tiers (like early bird, regular, and last-minute) to cater to various buyer preferences. You can set distinct prices and features for each tier.
- Promotional Discounts: Use coupons or special promotions to entice attendees. Perhaps offer a discount for groups or for those who buy early—everyone loves a good deal!
- Seating Options: If your event has reserved seating, consider integrating a seating chart that allows attendees to choose their preferred seats at the time of purchase.
Additionally, you should focus on articulating the value of your tickets. Highlight the benefits attendees will enjoy—such as exclusive access, merchandise, or experiences that can make your event unforgettable.
| Ticket Type | Price | Benefits |
|---|---|---|
| Early Bird | $25 | Access to exclusive sessions |
| Regular Admission | $35 | General access to the event |
| VIP Pass | $75 | Front-row seats, merchandise gift bag |
In summary, customizing your ticket options and pricing can significantly impact your event’s success. With WooCommerce, you have the flexibility to design your ticketing experience in a way that draws attendees in and keeps them excited about your event!
Setting Up Payment Gateways
When it comes to selling event tickets online, setting up payment gateways is one of the most crucial steps to ensure a smooth transaction process for your customers. Managing payments efficiently not only enhances customer satisfaction but also increases your chances of making successful sales. So, how do you go about setting this up in WooCommerce?
First things first, you’ll need to choose a payment gateway that fits your needs. There are several options available, including:
- PayPal: Widely recognized and trusted, it offers a seamless checkout experience.
- Stripe: Perfect for businesses seeking an all-in-one solution with customizable options.
- Square: Great for those who also have a physical presence and need to manage both online and in-person sales.
Once you’ve selected your preferred gateway, navigate to your WooCommerce settings:
- Go to WooCommerce > Settings.
- Click on the Payments tab.
- Enable your chosen payment method by toggling the switch.
- Follow the on-screen instructions to integrate and configure your gateway with the necessary API keys.
It’s essential to ensure that your checkout process is user-friendly and secure. Take the time to test the payment flow using sandbox accounts provided by your gateway to catch any potential issues before going live.
And lastly, always offer multiple payment options to cater to all your customers’ preferences—this will certainly enhance your ticket sales!
Promoting Your Event and Tickets
Now that you have your WooCommerce tickets all set up, the next step is to get the word out about your event and tickets. Promotion plays a fundamental role in boosting sales and ensuring your event is a success. So where should you start?
First off, leverage social media platforms to create excitement around your event. Here are a few strategies to consider:
- Create Engaging Content: Use eye-catching images and videos showcasing what attendees can expect.
- Share Testimonials: If you’ve hosted events before, share positive feedback from past attendees.
- Run Contests or Giveaways: Encourage ticket shares or likes with the incentive of winning free tickets!
Next, don’t underestimate the power of email marketing. Reach out to your existing customer base to inform them about the upcoming event. Make sure your email is creative and includes:
- A catchy subject line to grab attention.
- Details about what makes the event special.
- A clear call to action with a direct link to purchase tickets.
Lastly, consider utilizing online event platforms and local event calendars. Getting your event listed can help increase visibility and drive sales.
Remember, consistent promotion is key! Keep your audience engaged and informed, and watch as your ticket sales soar.
Managing Attendees and Ticket Scanning
Once you have your event set up and tickets are being sold, the next big step is managing attendees. Efficient management ensures that everything runs smoothly on the day of the event and contributes to the overall experience for your attendees.
First, let’s talk about attendee management. Here are some aspects to consider:
- Tracking Sales: Keep an eye on your ticket sales through your WooCommerce dashboard. You can see who’s attending and how many tickets are left.
- Communication: Use automated emails to confirm purchases and keep attendees informed about event details, such as location changes or special announcements.
- Handling Refunds: Be prepared to address refund requests. Setting clear policies upfront can help manage expectations.
- Group Management: For larger events, consider managing groups of attendees. Know who’s coming as a group and whether they have special requests.
Now let’s discuss ticket scanning. Efficient scanning at the venue can greatly diminish wait times and enhance the guest experience. Here’s how to effectively manage this process:
- Using QR Codes: Each ticket can include a unique QR code. This makes checking in quick and painless since scanners can instantly read them.
- Mobile Apps: There are various apps available that can help scan tickets on-the-go. Ensure your staff is trained to use them beforehand.
- Check-in Lists: Have a printed list of attendees as a backup. This helps in case technology fails.
- Support Staff: Ensure you have enough staff at the entrance to manage ticket checks and answer any questions attendees may have.
By efficiently managing attendees and ticket scanning, you not only enhance the event experience but also build a positive reputation for your future events!
Conclusion and Final Thoughts
In the world of online event management, WooCommerce Tickets provides a powerful platform for selling event tickets with ease. From creating customizable ticket types to managing attendees and scanning tickets at the event, it’s designed to give you all the tools necessary to orchestrate a successful event.
Remember, the experience of your attendees matters. By taking time to set up and manage your event properly, you set the stage for smoother check-ins, fewer customer complaints, and ultimately, happier attendees. Here’s a quick recap of why WooCommerce Tickets is a fantastic choice:
- User-Friendly Setup: The WooCommerce interface is intuitive, making it easy for even novices to get started.
- Customization: Tailor your ticket sales to match your branding and event style.
- Analytics: Monitor sales and attendee data to improve future events.
- Scalability: Whether you’re hosting a small gathering or a large festival, you can scale your ticket sales in line with your event size.
In conclusion, offering an online ticketing solution with WooCommerce Tickets not only simplifies the process for you but also enhances the experience for your attendees. So go ahead, leverage this fantastic tool, and watch your events grow, thrive, and leave lasting impressions! Happy selling!


