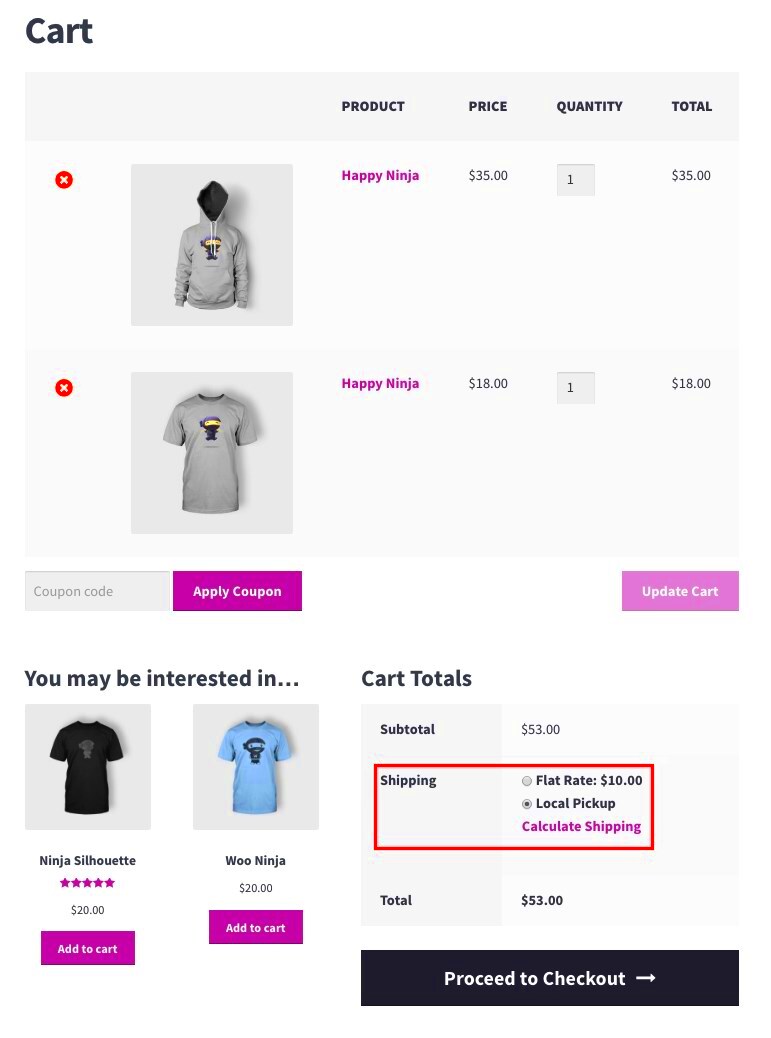
Welcome to our guide on setting fixed shipping fees in WooCommerce! If you’re running an online store, you know that shipping costs can significantly impact your sales and customer satisfaction. Having a transparent, fixed shipping fee can simplify the shopping experience for your customers and help you manage your logistics more effectively. In this post, we’ll walk you through everything you need to know about fixed shipping fees and how to set them up in WooCommerce. Let’s dive in!
Understanding Fixed Shipping Fees in WooCommerce
Fixed shipping fees in WooCommerce refer to predetermined charges that remain constant regardless of the order value or weight of the items being shipped. This model can be highly advantageous for both business owners and customers for several reasons:
- Simplicity: Fixed shipping fees provide clarity for customers about the total cost upfront, ensuring there are no surprises at checkout.
- Ease of Management: For store owners, calculating shipping costs becomes more straightforward, allowing for better budgeting and forecasting.
- Cost Control: Fixed fees can help mitigate losses during fluctuating shipping rates, allowing you to have consistent pricing for your customers.
Here are some common scenarios in which fixed shipping fees work well:
| Scenario | Description |
|---|---|
| Local Deliveries | For stores servicing specific geographic areas, a fixed rate can cover costs efficiently. |
| Single Product Stores | If your store sells one type of product, a fixed fee can simplify the process. |
| Promotional Offers | Offering free shipping above a certain order value while maintaining a fixed rate below can encourage larger purchases. |
By understanding the value of fixed shipping fees, you can enhance your WooCommerce store’s operations and customer experience. So, let’s get into the nitty-gritty of setting this up!
3. Prerequisites for Setting a Fixed Shipping Fee
Before diving into the process of setting a fixed shipping fee in WooCommerce, it’s vital to ensure you have a few essentials in place. While WooCommerce makes things pretty straightforward, having the right prerequisites can save you time and help streamline the process. So, let’s break down what you’ll need:
- WooCommerce Plugin Installed: First and foremost, you need to have the WooCommerce plugin installed and activated on your WordPress site. This is essential because without WooCommerce, you won’t be able to set any shipping fees.
- Product(s) Added: Make sure you have at least one product added to your store. It doesn’t have to be published just yet; it simply needs to exist in your WooCommerce catalog for the shipping settings to apply.
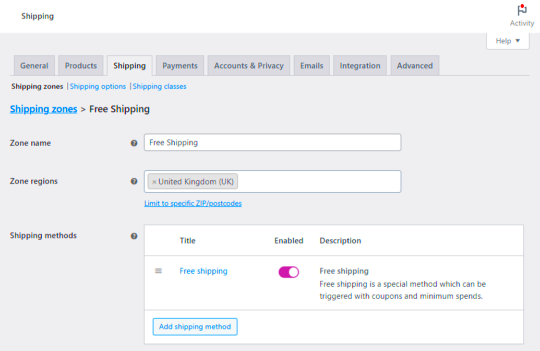
- Shipping Zones Configured: You’ll also want to have your shipping zones set up. Shipping zones allow you to define specific geographical areas where you deliver your products, so this step is crucial before setting fees.
- Access to WordPress Admin: Ensure that you have administrative access to your WordPress site. This means you can log in and make changes to your WooCommerce settings.
- A Clear Understanding of Shipping Fees: Think about how much you want to charge for shipping. It’s important to decide on a fixed amount based on your products, target market, and shipping costs.
By having these prerequisites sorted out, you’ll lay a solid foundation for successfully setting your fixed shipping fee in WooCommerce. It’s all about making the process as smooth and efficient as possible!
4. Step 1: Accessing the WooCommerce Settings
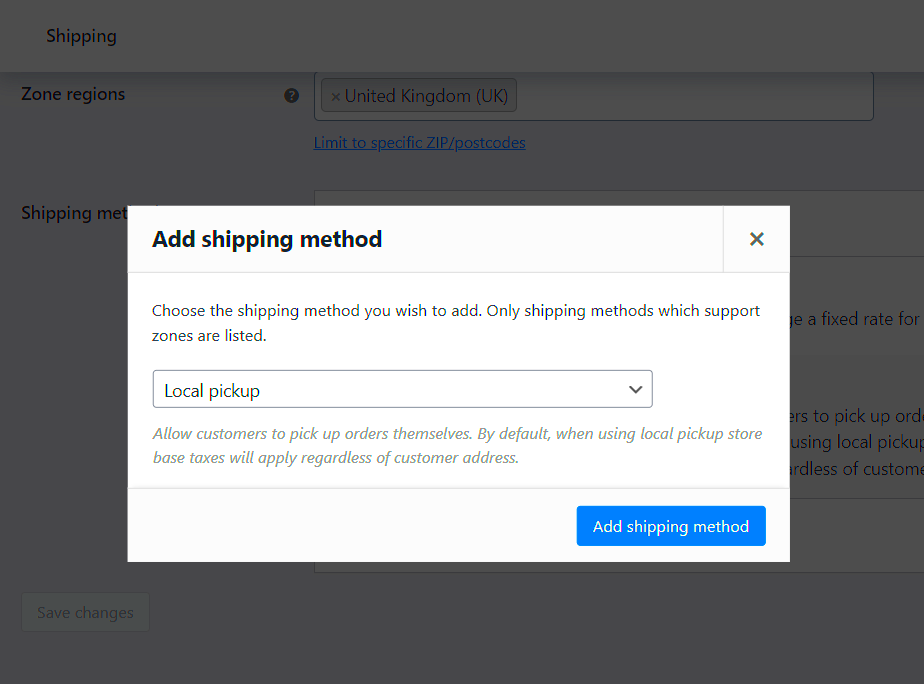
Now that you’ve covered the prerequisites, it’s time to take the first step toward setting your fixed shipping fee. Accessing your WooCommerce settings is simple, and this guide will walk you through it seamlessly!
- Log into Your WordPress Dashboard: Start by logging into the dashboard of your WordPress site. This is where the magic happens! You’ll need your admin credentials to enter your control panel.
- Navigate to WooCommerce: Once you’re logged in, look for the menu on the left side of your dashboard. Scroll down until you see ‘WooCommerce.’ Click on it to reveal a submenu of options.
- Go to Settings: In the WooCommerce submenu, click on ‘Settings.’ This will take you to the main settings page where all the important configurations are housed.
- Select the Shipping Tab: Once you’re in the settings window, you’ll notice several tabs at the top. Click on the ‘Shipping’ tab. This is where all your shipping settings, including fixed fees, will be configured.
That’s it for Step 1! Once you’re in the shipping settings, you’ll be well on your way to customizing your fixed shipping fees to fit your business needs. Just follow along as we delve deeper into the next steps in the upcoming sections!
Step 2: Navigating to Shipping Settings
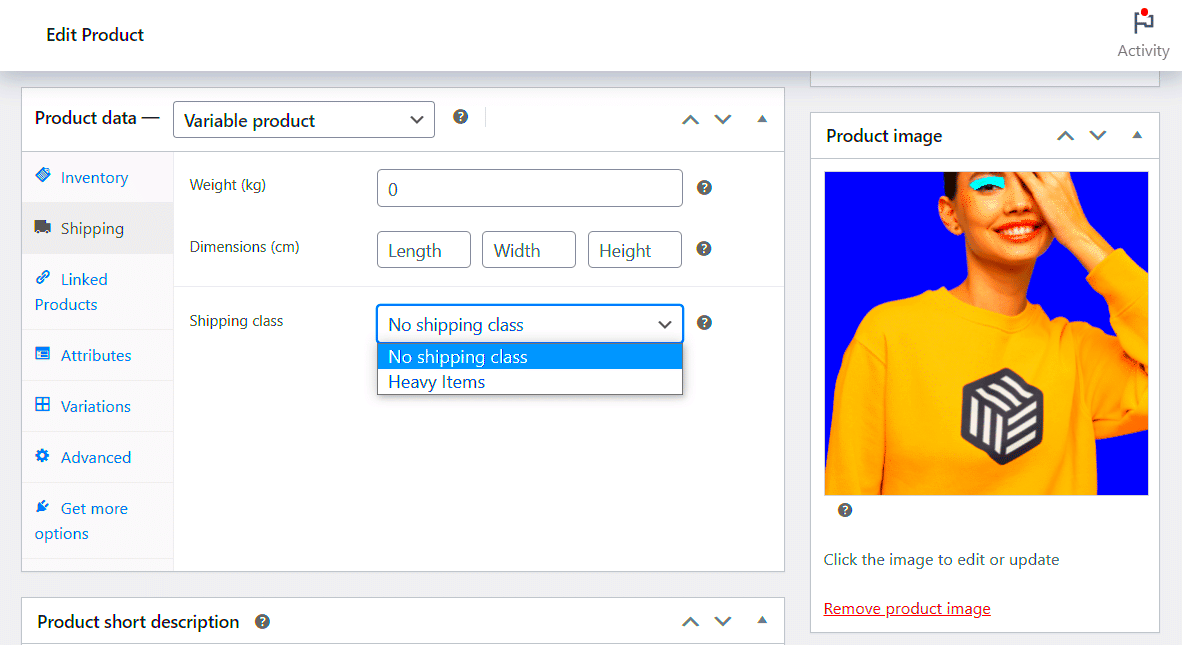
Now that you’ve accessed your WooCommerce dashboard, it’s time to find your way to the shipping settings. Don’t sweat it; this part is quite straightforward! Here’s how you can go about it:
- First, look for the “WooCommerce” option in the left sidebar of your dashboard. It’s usually the first item in the menu.
- Next, hover over it, and a dropdown menu will appear. From there, click on “Settings.” This will take you to a page where you can tweak various settings for your store.
- Now, locate the “Shipping” tab at the top of the settings page. Click on it to dive into the shipping options. This is where all the magic happens!
Once you’re in the shipping tab, you should see options related to shipping zones, methods, and other important settings. In this area, you can easily configure everything from shipping classes to rates. It’s a good idea to take a moment to explore these options to get familiar with what’s available. You’ll be amazed at how much control you have over your shipping processes!
And if you ever feel lost, remember that there are helpful resources and community forums where you can seek guidance. Navigating settings can seem daunting at first, but with a little patience, you’ll grasp the ins and outs in no time!
Step 3: Adding a New Shipping Zone
Alright, we’ve made it to the exciting part—adding a new shipping zone! This is crucial for setting your fixed shipping fees, as shipping zones determine which regions your shipping methods will apply to. Let’s lay down the steps:
- Click on “Shipping Zones.” Within the Shipping settings, you’ll see a button labeled “Add Shipping Zone.” Click it to start creating a new zone.
- Name Your Zone. A dialog will pop up asking for a zone name. Choose a name that makes sense, like “US Mainland” or “International Shipping.” This helps you organize and identify zones easily.
- Select Regions. Under the “Region(s)” section, you can specify which areas this zone will cover. You can select individual countries, states, or even continents. Just start typing, and suggestions will pop up!
Once you’ve set your zones, click “Save Changes” to ensure everything is stored correctly. You’ll notice your new shipping zone appears in the list below.
After adding your zone, you’ll also be able to configure which shipping methods apply within that zone, including your fixed shipping fee setup. It’s a vital step to ensure that your customers have accurate shipping options available.
With only a few clicks, you will have tailored shipping options for your store that cater to your target audience. Plus, it allows you to be more flexible in your shipping strategies moving forward!
7. Step 4: Configuring the Fixed Shipping Method
Now that you’ve set the stage, it’s time to dive into the nitty-gritty of configuring your fixed shipping method in WooCommerce. This step is crucial because it allows you to personalize how shipping costs are applied during checkout, making it clear for your customers.
First, locate the ‘Shipping Zones’ section in your WooCommerce settings. You can find this by navigating to WooCommerce -> Settings -> Shipping. Click on the shipping zone where you want to apply the fixed shipping method. If you haven’t created any zones yet, you can do that by clicking on Add Shipping Zone.
Once you’re in the correct shipping zone, you can add a shipping method by clicking on the Add Shipping Method button. A pop-up will appear, allowing you to select ‘Fixed Shipping’ from the list of options. Choose it and hit Add Shipping Method.
Now you should see your new shipping method listed. To configure it, click on the Edit link beside the fixed shipping method. Here, you can set the fixed shipping cost. For example:
- Enter a shipping fee, say $5.00.
- Customize title text, such as “Standard Shipping”.
- Optionally, you can add a description that will appear during checkout – this is a great opportunity to communicate estimated delivery times.
Don’t forget to save these settings. You’re almost there! This step ensures your customers know what they’ll pay for shipping, contributing to a transparent and user-friendly shopping experience.
8. Step 5: Saving Your Changes
Congratulations on configuring your fixed shipping method! Now, before you get ready to launch your site, there’s one last important step: saving your changes. It’s easy to overlook this, but it’s essential for making sure all your hard work doesn’t go to waste.
After you’ve made all your adjustments—like setting the shipping cost and customizing your title—the next step is simple. On the shipping method edit page, look for the Save Changes button, typically located at the bottom of the settings page. Give that button a click!
It’s always a wise idea to double-check everything before you log out. Here’s a quick checklist:
- Ensure your shipping fee is accurate.
- Have you provided a descriptive title and a helpful description?
- Is the shipping method enabled for the correct shipping zone?
Once you’ve confirmed all details look good, save your changes again just to be sure. After completing this, go ahead and run a test order on your site to see the shipping method in action. Trust me, this final step makes a significant difference in your customers’ experience. Now you’re ready to roll out your fixed shipping fee!
Step 6: Testing the Fixed Shipping Fee
Now that you’ve set a fixed shipping fee for your WooCommerce store, it’s time to put it to the test! Testing is a crucial step to ensure everything is functioning as you intended. You wouldn’t want to lose potential sales because of a glitch, would you?
Here’s how to effectively test your fixed shipping fee:
- Add Products to Cart: Start by navigating to your storefront. Pick a product, throw it in the cart, and get ready for the checkout process. Make sure you select a product that falls under the shipping categories you’ve defined. If you’re offering free shipping on certain products, it’s best to test those, too!
- Proceed to Checkout: Once you’ve added the desired products to your cart, click the checkout button. This is where you’ll get to see your shipping fee in action. Check if the fixed fee is applied correctly.
- Test Different Scenarios: To ensure full functionality, try testing various scenarios. Add multiple products, change shipping addresses, and apply different coupon codes if applicable. These actions help you see if the fixed shipping fee is consistently applied.
- Check the Order Summary: Before finalizing your purchase, look for the order summary. Verify that the shipping cost is correctly displayed along with the total amount. Ensure everything adds up!
After you’ve gone through these steps, you can rest assured knowing that your fixed shipping fee is good to go. Remember, a little testing can go a long way in improving the customer experience!
Troubleshooting Common Issues
Even with the best intentions, setting a fixed shipping fee can sometimes lead to unexpected headaches. Luckily, knowing how to troubleshoot can make all the difference. Here are some common issues and how you can resolve them:
| Issue | Solution |
|---|---|
| Shipping Fee Not Displaying | Check if your shipping zones are correctly set up and that the fixed shipping method is enabled for those zones. |
| Incorrect Shipping Fee Calculated | Ensure that the fixed fee was entered correctly in the shipping settings and verify any added tax settings. |
| Fee Adjustments Not Applying | Look into other shipping methods that might be overriding your fixed fee, and ensure they are correctly prioritized. |
| Issues with Multiple Items | If the fee isn’t adjusting for multiple items, check your configuration in shipping class settings and adjust the rates accordingly. |
If you encounter any issues, don’t panic! Most can be resolved by double-checking your settings or consulting the WooCommerce documentation. Happy selling!
Conclusion
In summary, setting a fixed shipping fee in WooCommerce is a straightforward process that can greatly enhance the customer experience and streamline the checkout process. By following the step-by-step guide outlined above, you can effectively manage shipping costs and cater to your business’s needs while ensuring that your customers have a clear understanding of shipping charges. Remember to consider various factors when determining your fixed shipping fee, such as order size, destination, and your overall pricing strategy. Doing so will not only promote transparency but also help you stay competitive in the eCommerce landscape.

