If you’re running an online store using WooCommerce, you know that customer reviews can make or break your business. Enter the WooCommerce Auto Product Reviewer—a fantastic tool designed to help automate the process of collecting and displaying product reviews. Imagine being able to enhance your store’s credibility, boost sales, and reduce manual work all at once. This plugin takes the hassle out of gathering feedback by allowing customers to leave reviews seamlessly, which can then be displayed on your product pages automatically. Sounds great, right? Let’s dive deeper into understanding how it works and its impressive benefits!
Benefits of Using Auto Product Reviewer

Implementing an Auto Product Reviewer for your WooCommerce store offers a plethora of advantages. Here are some of the standout benefits:
- Time-Saving Automation: Say goodbye to manually collecting, verifying, and posting reviews. This plugin automates the entire process, leaving you with more time to focus on other important business areas.
- Increased Customer Engagement: Automatically sending reminders for reviews encourages customers to engage more with your products, leading to higher review volumes.
- Improved Credibility: A higher number of reviews, especially authentic ones, boosts your store’s credibility, making it more appealing to potential buyers.
- SEO Optimization: Customer reviews contribute to unique content on your site, enhancing SEO and making your products more visible in search engine results.
- Better Insights: With a wealth of reviews at your disposal, you can gain valuable insights into customer preferences and areas needing improvement.
In short, with the WooCommerce Auto Product Reviewer, you’re not just automating a process; you’re setting your store up for greater success!
Getting Started with WooCommerce Auto Product Reviewer

Alright, so you’ve decided to boost your WooCommerce store’s efficiency by utilizing the WooCommerce Auto Product Reviewer. Awesome choice! This nifty tool can help automate the process of collecting and displaying product reviews, saving you time while increasing customer trust. But before you dive in, let’s go over a few things to get you set up and ready.
First off, ensure your WooCommerce site is up and running. If you haven’t installed WooCommerce yet, you’ll need to do that. Simply head over to your WordPress dashboard, navigate to Plugins, and search for WooCommerce. Click ‘Install Now’ and then activate it; it’s pretty straightforward!
Next, you’ll want to check your theme and ensure it’s compatible with WooCommerce. Most modern themes work well, but it’s always a good idea to double-check for compatibility to avoid any hiccups down the line.
Once that’s done, it’s time to think about the reviews themselves. Consider what type of reviews you want to showcase. Do you prefer user-generated content, professional critiques, or a mix of both? This decision can help guide your setup process later on.
Lastly, make sure to have the WooCommerce Auto Product Reviewer plugin handy. You can download it from the WordPress repository or purchase it from a trusted provider. With the plugin in mind and your WooCommerce store ready, you’re set to delve into the setup process!
Step-by-Step Setup Process

Let’s jump right into the nitty-gritty of setting up your WooCommerce Auto Product Reviewer! Following a step-by-step process makes everything less overwhelming. Just like a cake recipe, let’s break it down into simple steps.
- Install the Plugin: Start by navigating to Plugins > Add New in your WordPress dashboard. Search for “WooCommerce Auto Product Reviewer,” then click Install Now followed by Activate.
- Configure Basic Settings: After activation, go to Settings > WooCommerce Auto Product Reviewer. Here, you’ll find options to set the number of reviews to display, customize text styles, and more. Be sure to save your changes!
- Connect Review Sources: You can add sources of reviews like Amazon or other eCommerce platforms. Simply enter your API keys or authentication details per the plugin’s documentation.
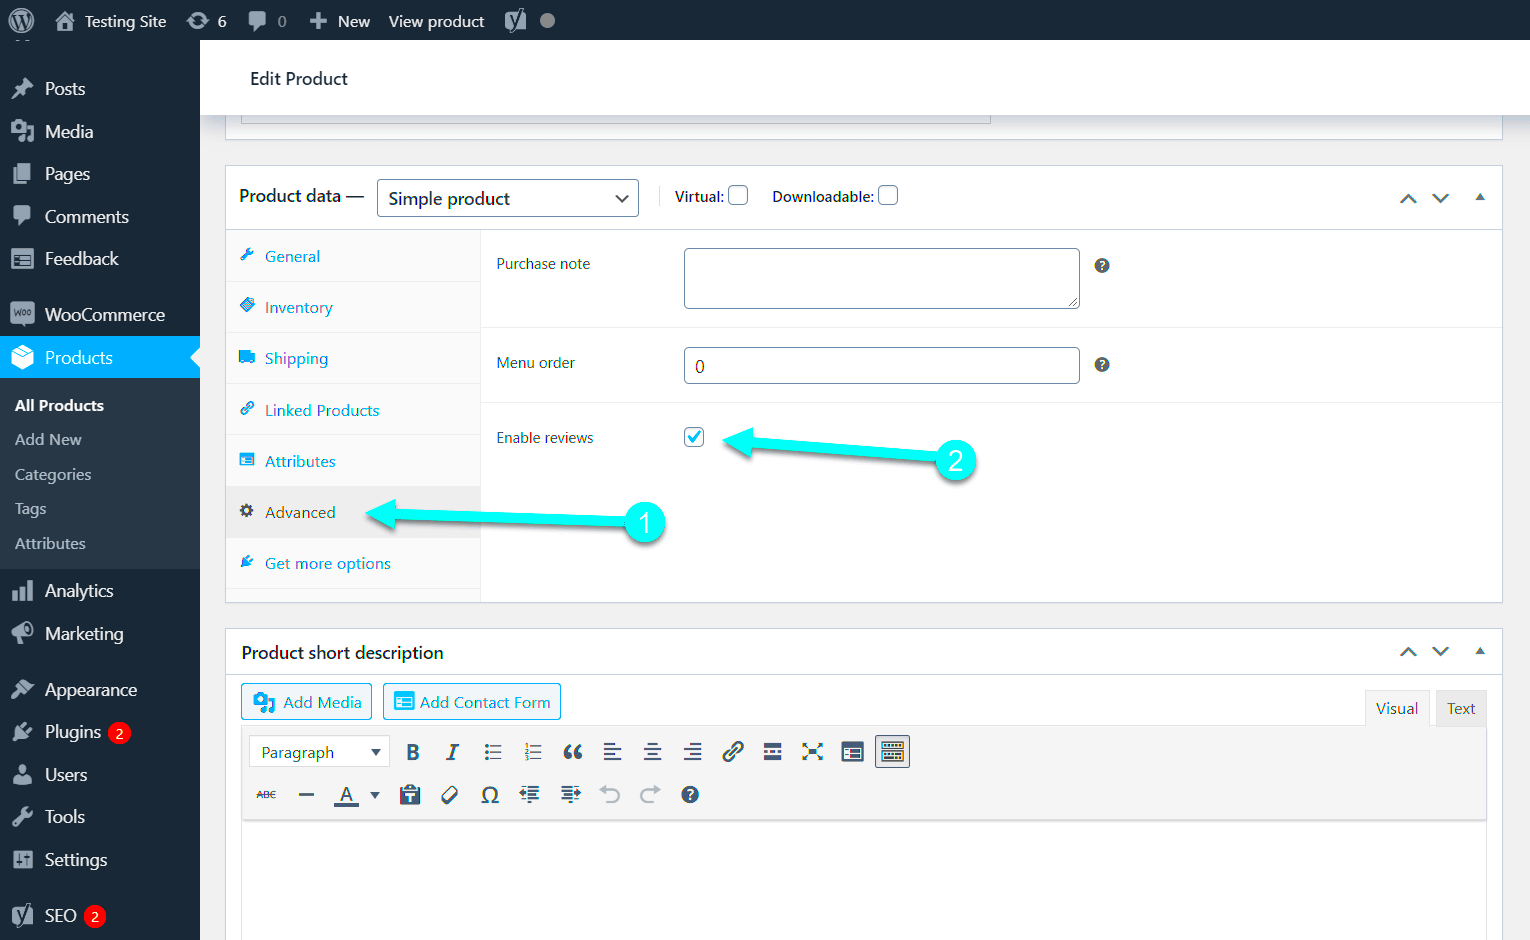
- Product Selection: Decide which products will have the auto reviews. This can be done individually or in bulk. Go to your products list, select the items, and enable the auto review option.
- Styling Reviews: If you want your reviews to stand out, customize the styling options. You can change fonts, colors, and layout to match your branding. Check the Customization section in the plugin settings.
- Testing: Always perform a test run to ensure everything looks good on the frontend. Check if the reviews are pulling correctly and displaying as intended.
- Launch: Once you’re satisfied with the setup, it’s time to launch! Evaluate the performance over the next few days to ensure it’s working smoothly.
And there you have it! By following these steps, you’ll have your WooCommerce Auto Product Reviewer up and running in no time. You’re on your way to adding credible reviews to your products, enhancing customer trust, and potentially boosting sales!
Configuring Auto Review Settings
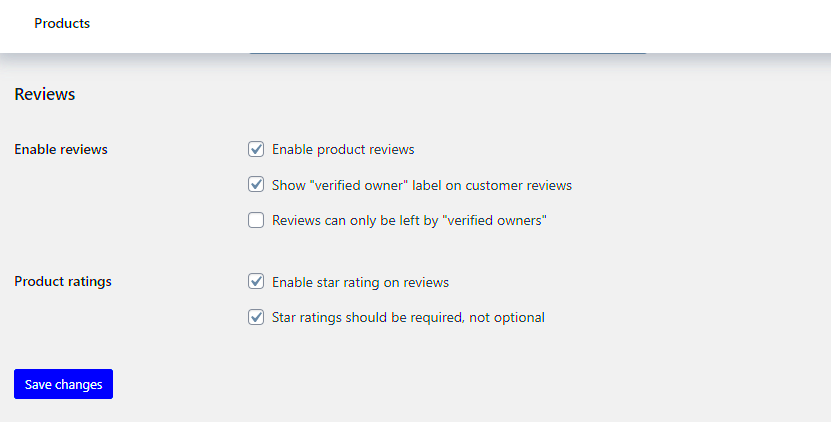
Setting up your WooCommerce Auto Product Reviewer is crucial for managing how reviews are collected and displayed on your product pages. The configuration process is designed to be user-friendly, allowing you to tailor the experience to your customers’ needs. Here’s a step-by-step guide on how to configure your auto review settings:
- Access the Settings Panel: Start by navigating to the WooCommerce settings within your WordPress dashboard. You’ll find an option for ‘Auto Review Settings’ where all the magic happens.
- Select Review Triggers: Decide when you want the auto-review prompts to be sent out. Options typically include after a purchase, a specific time period post-purchase, or after a customer has viewed the product multiple times.
- Customize Email Notifications: This is where you can craft personalized messages. Use a friendly tone, and consider including incentives for writing a review, like a discount on their next purchase.
- Set Review Frequency: It’s important to find a balance. You don’t want to spam customers, but sending prompts too infrequently might mean missed opportunities for feedback. A popular choice is once a month after the purchase.
- Integrate with Third-party Tools: If you’re using marketing tools or CRM systems, make sure they’re linked with your auto review settings to streamline the process further.
When these settings are configured correctly, you’ll not only enhance customer engagement but also generate valuable insights to improve your product offerings!
Customizing Review Templates
Your product reviews are often one of the first things potential customers read. This makes it vital that they are not only informative but also visually appealing! Customizing your review templates can significantly enhance the overall look and feel of your store. Here’s how you can do it:
- Access Template Editor: Head to the WooCommerce settings and locate the ‘Review Templates’ section. You’ll see options for both general and product-specific templates.
- Select a Template Style: Choose from various available styles that complement your store’s theme. Whether you prefer a minimalistic look or something more vibrant, there’s usually a suitable template.
- Add Custom Fields: Consider adding extra fields for specific details customers might want to share. For instance, allowing them to rate the packaging, shipping time, or specific features of the product can yield more comprehensive feedback.
- Incorporate Visual Elements: Use images or icons next to ratings to provide an instant visual cue. You can also include customer photos or videos to enhance credibility.
- Preview and Test: It’s always wise to preview how your customized templates will appear live. Send test emails or check the product pages to ensure everything looks as expected.
By taking the time to customize your review templates, you’ll create a more engaging experience for your customers, turning potential buyers into loyal fans!
Integrating with Other WooCommerce Features
When it comes to making the most out of the WooCommerce Auto Product Reviewer, integration is key! By combining this tool with other WooCommerce features, you can create a seamless shopping experience for your customers while boosting your sales. Here’s how you can do it:
- Product Reviews and Ratings: Leverage the power of customer feedback to enhance your product listings. The Auto Product Reviewer can pull in reviews from various platforms, making your products more trustworthy in the eyes of potential buyers.
- SEO Optimization: Integrating with SEO plugins ensures that the product reviews generated are not just fantastic for engagement but also optimized for search engines. This drives organic traffic to your site, increasing visibility.
- Social Sharing: Allow customers to easily share their reviews on social media. This not only helps in building your brand’s credibility but also attracts new customers who are influenced by social proof.
- Email Marketing: Pair your product reviews with email marketing campaigns. Send personalized emails featuring popular products along with customer reviews to entice past buyers to return.
- Customer Support Integration: Set up alerts for negative reviews to ensure your customer support team can respond swiftly. Addressing concerns quickly can turn a dissatisfied customer into a loyal one.
By blending the Auto Product Reviewer with these WooCommerce features, you’re not just automating reviews; you’re creating a holistic ecosystem that nurtures customer relationships and drives sales.
Testing the Auto Product Reviewer
Once you’ve set up the WooCommerce Auto Product Reviewer, it’s crucial to test it to ensure everything is working smoothly. Here’s how to effectively carry out your testing phase:
- Check the Integration: Before diving into real-world testing, double-check that the Auto Product Reviewer is properly integrated with your WooCommerce setup. Ensure that it pulls data like product names, descriptions, and images accurately.
- Simulate Customer Activities: Act as a customer! Go through your website, make a purchase, and leave a review. Look for errors in the review process or issues with the display of reviews on product pages.
- Monitor Review Generation: Wait for the Auto Product Reviewer to generate real-time reviews. Ensure that reviews are reflective of customer feedback and that the tool handles multiple reviews without glitches.
- Analyze Load Times: Testing means not just functionality but performance too. Use tools like GTmetrix or Pingdom to analyze page load times, especially on product pages with multiple reviews.
- Gather Feedback: Don’t hesitate to solicit feedback from a small group of beta testers. Their insights can spotlight any issues that you might not have noticed.
Testing is a critical step that ensures your WooCommerce Auto Product Reviewer functions flawlessly, delivering a positive experience for both you and your customers!
Common Issues and Troubleshooting Tips
Setting up and running a WooCommerce Auto Product Reviewer can be an exciting journey, but sometimes things don’t go as smoothly as planned. Here’s a breakdown of common issues you might encounter and helpful troubleshooting tips to navigate them effectively.
1. Plugin Compatibility Issues
One frequent problem many users find is the incompatibility between the Auto Product Reviewer plugin and other plugins or themes. If your website starts showing errors after installation, consider these steps:
- Check for Updates: Make sure all your plugins are up-to-date.
- Test for Conflicts: Temporarily deactivate other plugins to see which one might be causing the issue.
- Change Themes: Switch to a default theme to check if the issue persists.
2. Product Review Not Displaying Correctly
If your reviews are not showing or displaying incorrectly, consider the following:
- Settings Check: Go to the Auto Product Reviewer settings and ensure everything is configured correctly.
- Shortcode Issues: Double-check any shortcodes you’re using; they should be correctly placed and formatted.
- Clear Cache: If you’re using a caching plugin, clear your cache to see the changes.
3. Import Errors
If the plugin fails to import reviews, here’s what you can do:
- File Format: Ensure that the files you’re importing are in the correct format.
- Check Server Limits: Sometimes server settings restrict imports, so check with your host.
- Debugging Errors: Enable debugging mode in WordPress to gather more information on the error.
Don’t hesitate to reach out to support forums or documentation if you encounter persistent issues. Many other users may have faced the same challenges, and you might find solutions just a click away!
Conclusion and Final Thoughts
Setting up the WooCommerce Auto Product Reviewer can be a real game-changer for your eCommerce business. It streamlines the review process, builds trust with your customers, and ultimately boosts sales. However, as with any tool, understanding its features and addressing potential issues are key to maximizing success. Here’s a quick recap:
- Efficient Review Management: Automates the process of collecting and displaying reviews.
- User Engagement: Encourages customer participation and interaction on your site.
- SEO Benefits: Enhances your website’s visibility through user-generated content.
As you wrap things up, remember to periodically check performance and user feedback. A successful implementation not only hinges on setting it up correctly but also on fine-tuning it for ongoing improvements.
So, are you ready to take the leap and set up your WooCommerce Auto Product Reviewer? Dive in, troubleshoot common issues if they arise, and watch your online store garner the praise it deserves. Happy reviewing!


