If you’re looking to streamline your lead generation process in WordPress, you’ve come to the right place! Auto-populated HubSpot embeds can play a crucial role in converting casual visitors into enthusiastic leads. But what exactly are these embeds? Simply put, they are snippets of HubSpot content—such as forms or landing pages—that you can insert directly into your WordPress site. What’s amazing is that these embeds can be automatically populated with data, making it easier for your visitors to engage without filling out their information repeatedly. It’s a game-changer for boosting your conversion rates!
Benefits of Using HubSpot Embeds for Lead Generation

Now that we know what auto-populated HubSpot embeds are, let’s dive into the exciting benefits they offer for lead generation. By leveraging these powerful tools, you can unlock a range of advantages:
- Saves Time for Users: Auto-populated fields reduce the amount of information users need to input. This convenience makes it more likely that they will complete the forms.
- Improved Conversion Rates: When visitors see that their information is already filled in, they’re more likely to go ahead and submit their details, thus boosting your conversion rates.
- Streamlined Data Collection: HubSpot seamlessly integrates with WordPress, making data collection easy and efficient. All lead information flows directly into your HubSpot dashboard, simplifying lead management.
- Customization Options: You can customize the embeds to suit your brand’s aesthetic, ensuring consistency across your digital presence. This helps to build trust with your audience.
- Automation Capabilities: Combine the power of HubSpot’s automation features with your embeds to nurture leads automatically, sending follow-up emails or updates without manual effort.
By incorporating auto-populated HubSpot embeds into your WordPress site, you’re setting the stage for a more efficient and effective lead generation process. So, why wait? Get started today!
Setting Up HubSpot for Auto-Populated Embeds
Setting up HubSpot to effectively use auto-populated embeds for lead generation is easier than you might think! All you need is a HubSpot account and some basic familiarity with the platform. Let’s break it down into simple steps.
- Create or Log into Your HubSpot Account: If you don’t have an account yet, head over to HubSpot’s website and sign up for a free or paid plan. For those already registered, just log in.
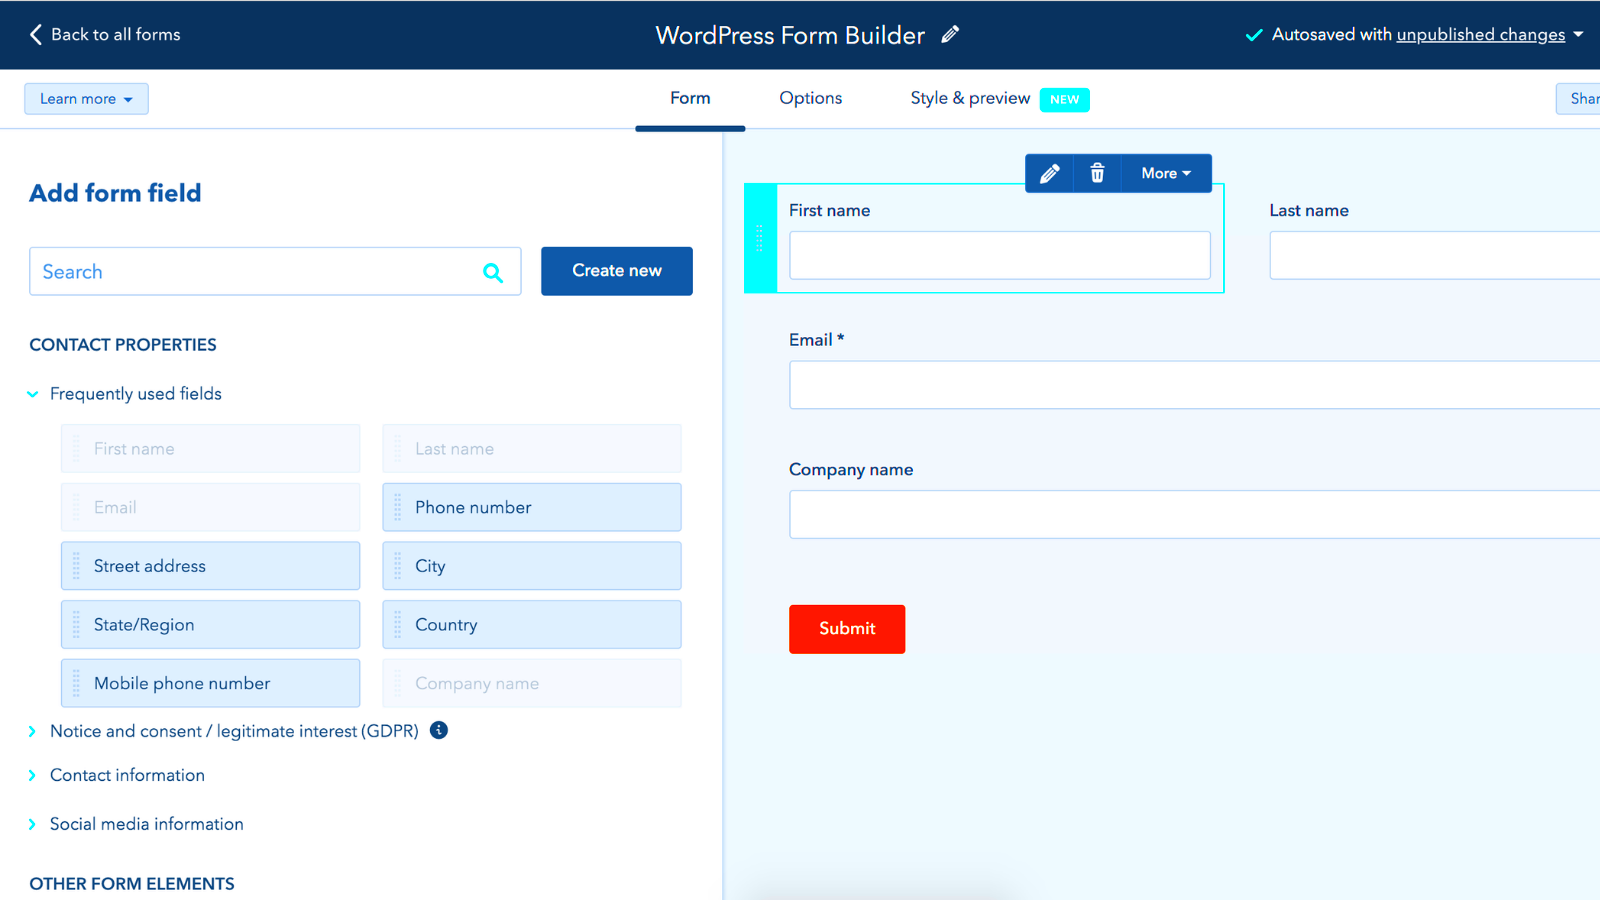
- Create a New Form: Navigate to the “Marketing” tab and select “Forms.” Click on the “Create Form” button and choose the form style that suits your needs (like embedded or pop-up). Add fields that you think would help in capturing leads, such as name, email, and phone number.
- Enable Auto-Population: To enable auto-population, go to the “Options” tab within your form settings. Here, you’ll find an option that allows HubSpot to pull data from known visitors. Make sure to enable this feature!
- Customize Your Form: Personalization increases conversions! Customize your form’s appearance by updating colors, fonts, and images to match your brand identity.
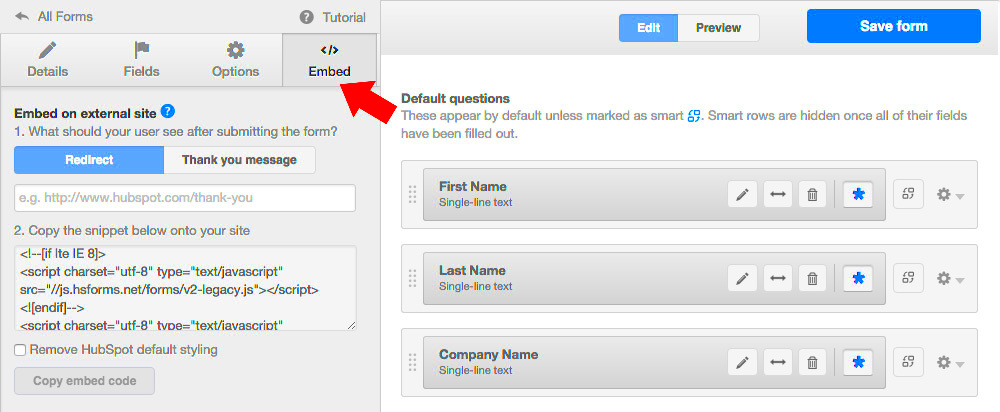
- Get the Embed Code: Once your form is ready, save it and click on the “Embed” option. Copy the generated embed code; you’ll need this in the next steps!
- Test Your Form: Before you go live, test your form within HubSpot to make sure everything works as intended. Check if the auto-population feature is pulling in the right data!
By the end of this setup, you’ll have a finely-tuned HubSpot form ready to work its magic on your website, seamlessly capturing leads with auto-filled information when available.
Integrating HubSpot with WordPress
Integrating HubSpot with your WordPress site can seem daunting, but trust me, it’s a straightforward process that opens the floodgates to powerful lead generation opportunities. Let’s walk through this step by step!
- Install the HubSpot Plugin: Start by logging into your WordPress dashboard. Navigate to the “Plugins” area, click “Add New,” and search for the “HubSpot” plugin. Install and activate it. This plugin connects your HubSpot account directly to WordPress, simplifying the embed process.
- Connect Your HubSpot Account: Once the plugin is active, you’ll be prompted to connect your HubSpot account. Click on the “Connect” button and authenticate with your HubSpot credentials to link both platforms.
- Add Your Embed Code: After connecting, you can simply go to the “HubSpot” section in your WordPress dashboard. Here, click on “Forms” and paste the embed code you copied earlier. This action will pull your newly created HubSpot form right into WordPress.
- Select a Placement: Decide where on your site you’d like your form to appear. You can insert it into a page or post, or opt for a sidebar/widget area. Make sure it’s prominently displayed to attract traffic.
- Use Shortcodes and Blocks: For greater flexibility, you can use HubSpot’s shortcodes or Gutenberg blocks. Simply insert the shortcode into your desired page or use the provided HubSpot block if you’re using the Gutenberg editor.
- Test the Integration: Finally, just like with your HubSpot form, test the integration by visiting the page or post where your form is located. Ensure everything works, especially focusing on how auto-population is functioning!
After completing these steps, your WordPress site will be fully integrated with HubSpot, allowing for seamlessly auto-populated forms that enhance lead generation efforts. You’re now equipped to grow your audience effectively!
How to Create and Customize Your HubSpot Embed
If you’re looking to enhance your WordPress site’s lead generation capabilities with HubSpot embeds, creating and customizing them is a breeze! Here’s a step-by-step guide to get you started:
- Create a HubSpot Account: If you haven’t already, sign up for a HubSpot account. It’s free and provides you with tools to manage leads effectively.
- Access the Embed Tool: Once you’re logged in, navigate to your HubSpot dashboard. Look for the “Marketing” tab, then find “Lead Capture” and select “Forms.”
- Create or Choose a Form: You can either create a new form or choose from existing ones. Keep in mind the purpose of the form; try to keep it simple and focused.
- Customize Your Form: Customize the fields you want to include (like name, email, etc.). Make it visually appealing with branding colors, fonts, and any necessary calls to action (CTAs).
- Generate Embed Code: Once your form is customized, click on the “Embed” option. HubSpot will generate a piece of HTML code.
- Paste Code into WordPress: Now head over to your WordPress site. In the editor of the page or post where you want the form to appear, switch to the “HTML” view and paste your HubSpot embed code.
Your HubSpot embed should now appear on your WordPress site! Make sure to preview it to check its appearance and functionality.
Best Practices for Optimizing Lead Generation
Creating a HubSpot embed is just the beginning; now, you’ll want to ensure your forms are optimized for lead generation. Here are some best practices to consider:
- Keep it Simple: Avoid asking for too much information at once. A simple form with minimal fields typically sees higher conversion rates. Stick to essential fields, like name and email.
- Use Compelling CTAs: Your call to action should be clear and persuasive. Phrases like “Get Your Free Quote” or “Sign Up for Exclusive Content” encourage users to take that leap.
- Test Different Versions: A/B testing your forms can reveal what works best. Change one element at a time, like color or wording, and see which version performs better.
- Place Forms Strategically: Think about where the form will be most visible. Consider placing it in the sidebar, at the end of blog posts, or as a pop-up to capture users’ attention.
- Mobile Optimization: Ensure your embed looks good on mobile devices. Most users browse on their phones, so forms need to be user-friendly and responsive.
- Follow Up: After capturing leads, make sure to follow up promptly! Use automation tools in HubSpot to send thank-you emails or relevant content that nurtures these leads.
Incorporating these best practices will enhance your lead generation efforts, helping you to turn casual visitors into valuable leads.
7. Monitoring and Analyzing Your Lead Generation Efforts
Once you’ve set up your auto-populated HubSpot embeds in WordPress, the next step is monitoring and analyzing your lead generation efforts. This step is crucial because it allows you to see what’s working, what isn’t, and where to adjust your strategy accordingly. Let’s dive into some effective ways to keep tabs on your progress.
First off, you’ll want to utilize HubSpot’s built-in analytics tools. Here are some key metrics to track:
- Conversion Rates: Measure how many visitors are filling out your forms compared to how many are seeing them.
- Traffic Sources: Identify where your leads are coming from—whether it’s social media, organic searches, or paid ads.
- User Behavior: Analyze how visitors interact with your site and the embedded forms: how much time they spend, where they click, etc.
Additionally, integrating Google Analytics can provide even deeper insights. Setting up goals in Google Analytics can help you see which pages are converting leads best. This data can reveal if your content needs tweaking, or if a particular embed is not performing as expected.
Finally, remember to regularly revisit your strategy based on the data you collect. Monthly or quarterly reviews can help you refine your efforts. Sometimes, even small changes can lead to substantial improvements.
8. Case Studies: Success Stories Using Auto-Populated HubSpot Embeds
Nothing speaks louder than real-world success stories that highlight the effectiveness of auto-populated HubSpot embeds. Let’s take a closer look at a couple of case studies to illustrate how businesses have achieved remarkable results.
Case Study 1: Acme Corp
Acme Corp, a SaaS company, implemented auto-populated HubSpot forms on their landing pages to streamline their lead capture process. They reported:
- 30% increase in conversion rates within the first month after implementation.
- A significant reduction in bounce rates, as users were more engaged due to the tailored content from the auto-populated forms.
By nurturing these leads effectively through HubSpot’s CRM, Acme Corp doubled their lead quality, which ultimately boosted their sales pipeline.
Case Study 2: Green Thumb Landscaping
This landscaping business used auto-populated embeds to offer potential clients customized quotes based on their input. The results were quite enlightening:
- They saw a 50% increase in inquiries due to the seamless experience provided by the forms.
- User feedback indicated a higher satisfaction score because the forms catered to individual customer needs.
This approach not only increased leads but also allowed Green Thumb to personalize their communications, leading to increased customer loyalty.
These case studies demonstrate that with the right tools and strategies, utilizing auto-populated HubSpot embeds can lead to substantial gains in lead generation, making it a worthy consideration for any business aiming for growth.
Common Challenges and Troubleshooting Tips
Integrating HubSpot with WordPress for lead generation is a powerful strategy, but it’s not without its challenges. Here are some common hurdles you may encounter, along with simple troubleshooting tips to keep your campaign on track.
- Embedding Issues: Sometimes the HubSpot embed code doesn’t render correctly on your WordPress site.
- Tip: Double-check the embed code for any missing elements or typos. Ensure that you’re placing the code in the correct block on a page or post.
- Form Submission Problems: Users may report issues with submitting forms created in HubSpot.
- Tip: Ensure that all required fields in the form are filled out and that no restrictions are preventing the submission. Also, check your HubSpot account for any notification about submission limits or errors.
- Styling and Responsiveness: Your HubSpot forms and embeds might look great on desktop but not so much on mobile.
- Tip: Use CSS to customize the appearance of your forms to make sure they look good and are fully functional on all devices.
- Tracking and Analytics Issues: Tracking form submissions and lead data might sometimes not show up as expected in HubSpot.
- Tip: Ensure that analytics settings in HubSpot are correctly configured and that you’ve linked your WordPress website in your HubSpot account for proper tracking.
- API Connectivity: If you’re using advanced integrations, connectivity issues may arise.
- Tip: Review your API settings in both HubSpot and WordPress. Ensure they are connected correctly and are using the latest API versions.
By being aware of these challenges and having troubleshooting tips at your disposal, you can effectively manage the integration of HubSpot embeds into your WordPress site, leading to a smoother experience when capturing leads.
Conclusion: Maximizing Lead Generation with HubSpot and WordPress
As we wrap up our discussion on using auto-populated HubSpot embeds in WordPress, it’s clear that this combination holds incredible potential for lead generation. With the right strategies in place, you can streamline user interactions and capture valuable information effortlessly.
Utilizing HubSpot’s powerful CRM tools and form capabilities, paired with the flexibility of WordPress, creates a dynamic environment for your marketing efforts. Here are a few key takeaways:
- Ease of Use: HubSpot embeds make it simple to collect leads without extensive technical know-how. Anyone can do it!
- Customization: Tailor your forms to fit your brand and customer needs. This personalized approach can significantly boost conversion rates.
- Automated Data Management: Automatically populate and manage lead data in your CRM, saving time and reducing the risk of errors.
- Integration Capabilities: HubSpot’s robust integration options allow for seamless workflows, ensuring that your marketing efforts are cohesive and effective.
- Analytics and Performance Tracking: Leverage HubSpot’s powerful analytics features to monitor your forms and optimize them for better results.
In conclusion, by leveraging HubSpot embeds within WordPress, you’re not just enhancing your website’s functionality. You’re setting the stage for robust lead generation that can drive your business forward. Remember to stay proactive in troubleshooting issues and continuously refine your strategy. Happy lead generating!


