Elementor has truly transformed the way we think about website design. This powerful page builder for WordPress enables users of all skill levels to create stunning, responsive websites without needing to know a single line of code. In this post, we’ll dive deep into useful Elementor hacks that can take your webpage from basic to extraordinary. Whether you’re a seasoned web designer or a beginner, these tricks will help you to master
Understanding Elementor’s Interface

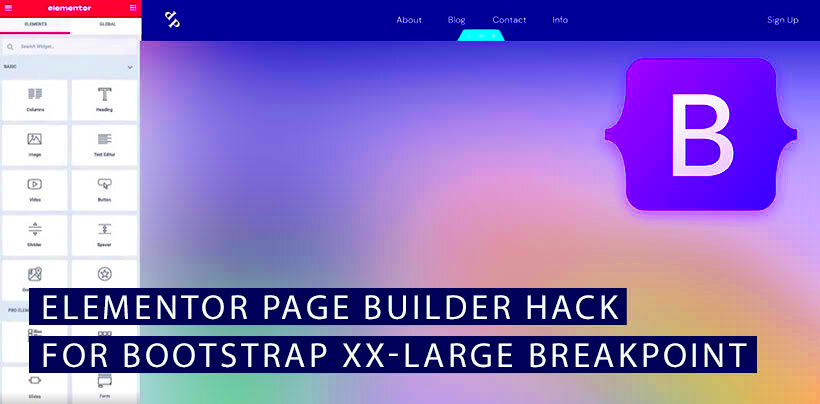
Getting familiar with Elementor‘s interface is your first step toward creating breathtaking page designs. At first glance, it might seem overwhelming, but once you understand the layout and functionality, you’ll find it incredibly user-friendly. Let’s break it down into manageable sections:
- The Editor Panel: Located on the left side of your screen, this is where you’ll find all your design tools.
- The Canvas: This is the main area where you’ll add and adjust your content. Think of it as your blank canvas where creativity flows.
- Sections, Columns, and Widgets: Elementor uses a straightforward structure of sections (the largest containers), columns (within sections), and widgets (the actual elements like text, images, and buttons). Familiarize yourself with this hierarchy.
Here’s a quick rundown of some important features in Elementor’s interface:
| Feature | Description |
|---|---|
| Navigator | A tool for quick access and organization of your layout elements. |
| Responsive Mode | Allows you to preview and edit your design for different devices like tablets and mobile. |
| Global Settings | Manage typography, colors, and other design elements globally to ensure consistency across your site. |
When you take the time to really understand Elementor‘s interface, you’ll unlock the platform’s full potential. Happy designing!
Customizing Widgets for Better Functionality
When it comes to using Elementor, widgets are your best friends. They not only allow you to add content but also play a crucial role in the overall functionality of your website. By customizing widgets, you can enhance their appearance and behavior to better meet your needs.
Here are some tips to customize widgets effectively:
- Style Adjustment: Every widget comes with various styling options. Dive into the Style tab and explore settings for borders, colors, typography, and spacing. Don’t hesitate to play around until it feels just right.
- Advanced Settings: The Advanced tab is where the magic happens. You can add custom CSS, set margins, padding, and handle responsive settings. Adjusting these settings can make a world of difference in how your widget behaves on different devices.
- Custom Icons and Images: Make your widgets pop by using custom icons or images. It adds a personal touch that can capture your audience’s attention more effectively than generic options.
- Dynamic Content: If you really want to take your widgets to the next level, consider integrating dynamic content. This feature pulls information from your site, allowing for real-time updates and greater user engagement.
By taking the time to customize your widgets, you empower yourself to create a more functional and visually appealing website that resonates with your audience!
Using Global Settings for Consistent Design
Consistency is key when it comes to web design, and Elementor makes it super easy to achieve this through its Global Settings feature. By setting global styles, you can maintain a unified look across every page without repetitive work.
Let’s break down how to effectively use Global Settings:
- Set Global Colors: Instead of picking colors for individual widgets, go to Global Settings and define your primary, secondary, and accent colors. This ensures your brand colors are always on point.
- Define Typography: Fonts can significantly affect the feel of your site. Set your global typography settings to ensure that headings, body text, and other textual elements maintain the same font style throughout your pages.
- Consistent Spacing: Customize padding and margin settings globally. This ensures that spacing looks uniform, which can greatly enhance the overall aesthetic of your website.
- Reusable Templates: Create or save templates for sections or entire pages. You can then reuse them across your site to maintain consistency in layout, style, and structure.
Utilizing Global Settings not only saves you time but also helps in creating a professional-looking site that reflects your brand’s identity. So next time you’re designing in Elementor, remember to harness the power of global settings!
Advanced CSS Techniques for Unique Styles
When it comes to designing your website with Elementor, knowing how to apply advanced CSS techniques can make a world of difference. CSS allows you to express your creativity by implementing unique styles that can set your website apart from the competition. Plus, it gives you the flexibility to customize elements in ways that basic Elementor settings simply can’t achieve. Here are some nifty CSS techniques to consider:
- CSS Grid and Flexbox: Use CSS Grid to create complex layouts and Flexbox for responsive designs. These techniques provide excellent control over spacing, alignment, and positioning.
- Custom Fonts and Text Effects: Go beyond standard font options. Use Google Fonts or upload custom typefaces to enrich your typography. Don’t hesitate to use text-shadow for depth or transform for rotating text.
- Hover Effects: Make your website interactive! Custom hover effects using transitions can engage users. Try changing colors, dragging animations, or subtle enlargements when hovering over buttons or images.
- Animations: Implement CSS animations to bring elements to life. You can fade in, slide, or bounce elements as they scroll into view, adding a dynamic feel to your site.
- Media Queries: Tailor your styles for different screen sizes. Use media queries to create responsive designs that look great on both mobile devices and desktop displays.
Experimenting with these advanced CSS techniques in Elementor can help you achieve that professional, polished look that sets your website apart!
Creating Custom Layouts with Sections and Columns
One of the standout features of Elementor is its intuitive drag-and-drop editor, which allows you to create stunning custom layouts using sections and columns. This flexibility enables you to design a layout that perfectly suits your content and goals. Let’s explore how to maximize this feature:
- Sections: Think of sections as the building blocks of your layout. You can add as many sections as you need, each serving as a foundation for your content. Adjust the height, background, and borders of sections to create unique visual scenarios.
- Columns: Each section can be divided into multiple columns—perfect for a grid-like structure. You can create anything from a simple two-column layout to a complex five-column design!
- Column Widths: Adjust column widths by dragging the handles. This allows for asymmetrical layouts that look modern and fresh. Use the responsive settings to dictate how columns stack on mobile devices.
- Custom Padding and Margins: Precision is key! Customize the spacing for each column and section using padding and margin settings. This can help you control the flow of content and create a well-structured layout.
- Background Overlays: Enhance sections by adding background images or colors. Utilize overlays for better text readability against dynamic backdrops.
By mastering sections and columns in Elementor, you can create custom layouts that not only look great but also function seamlessly, leading to a more engaging user experience!
Integrating Custom Fonts and Icons
If you’re looking to elevate the design of your Elementor websites, integrating custom fonts and icons is a game-changer. Not only do personalized fonts add a unique touch to your brand, but custom icons can enhance navigation and overall user experience. So how do you get started?
First, let’s talk about custom fonts. Elementor makes it pretty easy to add custom typography:
- Navigate to the Elementor Editor.
- Open the “Settings” panel.
- Go to the “Custom Fonts” section, where you can upload your font files.
- Once uploaded, apply these fonts across your site by heading to the Typography settings for each widget.
When choosing fonts, it’s essential to maintain readability and ensure the stylings align with your brand identity. Popular options include Google Fonts, Adobe Fonts, or even self-hosted fonts.
Now, let’s not forget about icons! Custom icons can help communicate your message at a glance. Here’s how you can integrate them:
- Icon Packs: Install an icon pack like Font Awesome or Material Icons to expand your icon selection.
- SVG Uploads: If you have custom-designed icons, upload them as SVGs for crisp resolution and lightweight loading.
- Elementor’s Icon Widget: Use the widget to insert and customize your icons seamlessly!
So, whether you’re using custom fonts or icons, integrating them in Elementor opens up a world of possibilities, allowing your creativity to shine through and making your site truly one-of-a-kind!
Utilizing Add-ons and Plugins for Extended Features
If you want to maximize what Elementor can do for your site, diving into add-ons and plugins is a fantastic option! With thousands of plugins available, you can easily enhance your design capabilities and functionality without needing to write a single line of code.
First off, let’s discuss what types of add-ons are out there:
- Premium Add-ons: These offer advanced widgets, effects, and customization options that go beyond the standard Elementor features.
- Third-Party Element Packs: Find packages that bundle multiple useful widgets tailored for various purposes like marketing, portfolios, or e-commerce.
- Performance Plugins: For faster load times and improved SEO, consider plugins that optimize your site’s performance.
Here are some popular add-ons to consider:
| Plugin | Features |
|---|---|
| Astra Pro | Customization options, header/footer builders, and more templates. |
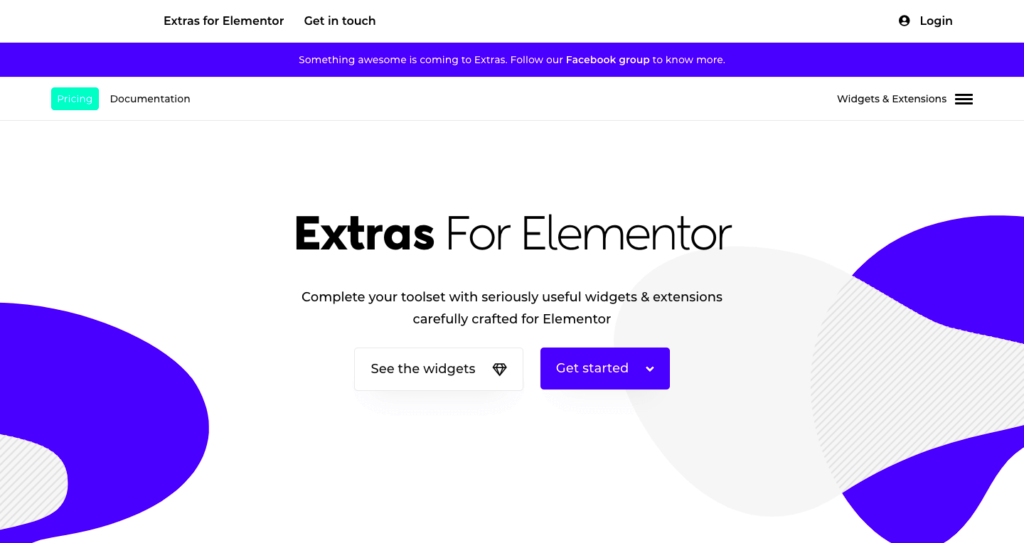
| Elementor Extras | Additional widgets and extensions for added flexibility. |
| Essential Addons for Elementor | A variety of widgets, such as post grids, and interactive features. |
Lastly, don’t forget about compatibility! Always ensure that the plugins you choose are compatible with your version of Elementor and regularly updated. Using add-ons and plugins is a great way to unlock new features for your Elementor site, making it stand out and perform better!
9. Optimizing Performance for Faster Loading Times
When you’re creating a stunning website with Elementor, one of the most critical aspects to keep in mind is performance. Nobody wants to wait around for slow-loading pages; it could mean the difference between a visitor sticking around or hitting the back button. So, let’s dive into some effective hacks to optimize your website’s performance and ensure your pages load faster than ever!
Here’s a handy checklist to boost your site’s speed:
- Image Optimization: Large images can drastically slow down your site. Use tools like TinyPNG or ShortPixel to compress images without sacrificing quality.
- Cache Everything: Leverage caching plugins like WP Rocket or W3 Total Cache. These tools create a static version of your site that loads much faster.
- Minify CSS and JS: Reduce file sizes by minifying your CSS and JavaScript. You can use plugins like Autoptimize for this purpose.
- Use a CDN: A Content Delivery Network (CDN) stores copies of your site across the globe, allowing users to access it from a server closest to them.
- Limit Plugins: While plugins are awesome, too many can slow you down. Only keep the ones that are essential.
- Database Optimization: Regularly clean your database by removing old revisions, spam comments, and unnecessary data. Plugins like WP-Optimize can help with this.
By implementing these strategies, you’re not just enhancing the speed of your website; you’re also improving the overall user experience, which could lead to better engagement and higher conversion rates. Who doesn’t want that?
10. Responsive Design Tips for Mobile Optimization
As more and more users browse websites on their mobile devices, ensuring your site is responsive has never been more crucial. Elementor makes it easy to create mobile-friendly designs, but there are some essential tips to keep in mind to ensure that your site looks great on any device!
Here are some key considerations for optimizing your Elementor site for mobile:
- Use Elementor’s Responsive Controls: Elementor offers responsive settings for each widget. Make use of these to customize settings specifically for mobile, tablet, and desktop.
- Font Size Adjustments: Text that looks great on a desktop may be difficult to read on a mobile screen. Adjust your font sizes for different devices to make your content more legible.
- Padding and Margins: Responsive design isn’t just about the elements’ sizes; it also pertains to spacing. Ensure you adjust the padding and margins to avoid cluttered designs on smaller screens.
- Ensure Clickable Elements are User-Friendly: Make sure buttons and links are large enough to tap easily on mobile devices, preferably at least 44×44 pixels.
- Test Across Multiple Devices: Always preview your site on various mobile devices and screen sizes to ensure everything looks just as you intended. Tools like BrowserStack can help with this.
By taking these responsive design tips into account, you’ll provide a seamless browsing experience for your mobile users. This not only enhances user satisfaction but also boosts your SEO ranking, as Google values mobile responsiveness. It’s a win-win!
11. Best Practices for Backup and Version Control
When you’re diving into the intricate world of Elementor customization, ensuring that your work is safe and can be reverted if necessary is crucial. Implementing a solid backup and version control strategy can save you hours of frustration. Here are some best practices to keep in mind:
- Regular Backups: Make it a habit to back up your website regularly. Use plugins like UpdraftPlus or BackupBuddy to automate this process. Set up a schedule—daily, weekly, or monthly depending on how often you make changes.
- Use Version Control Systems: If you’re familiar with coding, consider using version control systems like Git. This allows you to track changes, revert to previous versions, and collaborate with others seamlessly.
- Store Backups Off-Site: While most backup plugins will store your files on your server, it’s wise to use cloud storage options like Google Drive or Dropbox as well. This way, your backups remain safe even if your server faces issues.
- Document Your Changes: Keeping a log of major updates or design changes will help you trace back your steps if something goes wrong. A simple spreadsheet or a note-taking app will do the trick!
- Test Your Backups: Regularly check that your backups can be restored without issues. Nothing’s more stressful than when a backup fails right when you need it most.
Making these practices a part of your workflow enhances your peace of mind. It allows you to experiment and showcase creativity, knowing that you can always revert back to a previous state if needed.
12. Conclusion and Additional Resources
In conclusion, Elementor is a robust tool bursting with possibilities for customizing your WordPress site. With a little creativity and some hacks up your sleeve, you can transform an ordinary website into something truly spectacular. Remember, the key takeaway here is to always combine your innovative ideas with the solid foundation of best practices in backup and version control.
As you journey through your Elementor adventure, don’t hesitate to tap into additional resources that can aid your learning:
- Elementor Documentation: The official Elementor website has a comprehensive library of tutorials and guides that can help you tackle specific questions.
- Online Courses: Platforms like Udemy or Skillshare offer courses on Elementor where you can pick up advanced tricks and techniques.
- YouTube Channels: There are numerous YouTube channels dedicated to WordPress and Elementor tutorials. These can provide visual guidance and new ideas for customization.
- Community Forums: Join Elementor users’ forums or Facebook groups. Engaging with a community allows you to share experiences and gather insights that may help you on your journey.
By equipping yourself with knowledge and best practices, you’re set to create amazing websites that not only look professional but also function seamlessly. Happy building!


