WebP images are becoming more popular for websites due to their smaller file sizes and excellent image quality. However, WordPress users sometimes face issues when uploading WebP images, with the images appearing blank or broken. This can be frustrating, especially if you rely on these optimized images for faster loading times and better performance. In this blog post, we’ll walk through the common causes of these issues and offer practical solutions to fix them. Whether you’re a beginner or an experienced WordPress user, this guide will help you troubleshoot and resolve WebP image upload problems effectively.
Understanding the WebP Image Format
WebP is a modern image format developed by Google. It’s known for providing both lossless and lossy compression, meaning it can maintain high-quality images while reducing file sizes significantly compared to traditional formats like JPG or PNG. WebP images are ideal for websites, as they help improve loading speeds, which can enhance user experience and SEO rankings. Here’s why WebP is beneficial:
- Smaller File Sizes: WebP images can be up to 30% smaller than JPG and PNG images without sacrificing quality.
- Support for Transparency: Similar to PNG, WebP supports transparent backgrounds while keeping the file size small.
- Better Compression: WebP provides both lossy and lossless compression options, making it flexible for different image needs.
Despite these advantages, WebP images may not always display correctly in WordPress, leading to issues that need to be resolved for optimal performance.
Common Causes of WebP Images Appearing Blank
There are several reasons why WebP images might appear blank after uploading to WordPress. Understanding the root causes can help you troubleshoot more effectively. Here are the most common reasons:
- Theme or Plugin Incompatibility: Some older themes and plugins may not fully support the WebP format, leading to blank or broken images on your site.
- Outdated WordPress Version: If you’re running an older version of WordPress, it may not support WebP images by default. WebP support was added in WordPress 5.8, so updating to a newer version is essential.
- Server Configuration Issues: If your web server isn’t configured to serve WebP images properly, the images might not display at all. This can be the case with shared hosting or servers without proper MIME type settings.
- File Upload Restrictions: Some hosting providers have file upload restrictions that might block WebP images, preventing them from being uploaded or displayed correctly.
- Missing WebP Support in the Browser: WebP is supported by most modern browsers, but some older browsers (like Internet Explorer) don’t support it, causing blank images for users of those browsers.
Identifying the specific cause of the blank WebP images will guide you toward the right solution to get your images up and running.
How to Check WebP Image Compatibility with Your WordPress Site
Before diving into solutions for WebP upload issues, it’s essential to check if your WordPress site is compatible with WebP images. This will help you understand whether the problem lies with your site’s settings or the images themselves. Here are a few ways to check WebP compatibility:
- Check WordPress Version: Make sure your WordPress site is running version 5.8 or higher, as WebP support was added in this version. You can check this by going to Dashboard > Updates.
- Test a WebP Image: Upload a WebP image manually via Media > Add New and check if it displays properly in the media library. If it shows up, WebP support is likely enabled.
- Check Server Configuration: Ensure your server is configured to serve WebP images by checking the MIME type settings. You can do this by contacting your hosting provider or using a plugin like Health Check & Troubleshooting to test various server configurations.
- Use Browser Dev Tools: Inspect how WebP images load in your browser’s developer tools. If the image doesn’t load, the issue might be on the server side or within the browser.
Once you confirm the compatibility, you can move on to troubleshooting or fixing the issue more efficiently.
Fixing WebP Upload Issues Using Plugins
If you’re facing problems with WebP uploads, plugins can offer a quick and easy solution. There are several WordPress plugins available that can help you manage and troubleshoot WebP image issues. Here are some of the most popular ones:
- WebP Converter for Media: This plugin automatically converts your images into WebP format and ensures compatibility across various devices and browsers. It also allows you to display WebP images only to browsers that support them.
- ShortPixel Image Optimizer: ShortPixel not only compresses images but also converts them into WebP format. It has built-in support for WebP image delivery and can help resolve compatibility issues.
- EWWW Image Optimizer: This plugin supports WebP image optimization and delivery. It provides an option to enable WebP support, making sure your images load properly across all browsers.
- Imagify: Imagify offers easy WebP conversion and optimization. It automatically generates WebP versions of your images and delivers them when supported, ensuring seamless compatibility.
Using these plugins, you can automate much of the process, saving time and effort while ensuring your WebP images display properly. Install and configure one of these plugins to resolve upload issues quickly.
Manually Fixing WebP Image Issues in WordPress
Sometimes, you might need to take a more hands-on approach to fix WebP image issues in WordPress. Here are some steps you can take to manually resolve upload problems:
- Enable WebP Support in WordPress: If you’re using an older WordPress version (prior to 5.8), you may need to manually enable WebP support. This can be done by updating your WordPress core or adding custom code to the functions.php file. However, it’s generally recommended to update WordPress to the latest version.
- Update Server MIME Types: WebP images need the correct MIME type to be served by the server. You can add the necessary MIME type by editing the .htaccess file. Add this line of code:
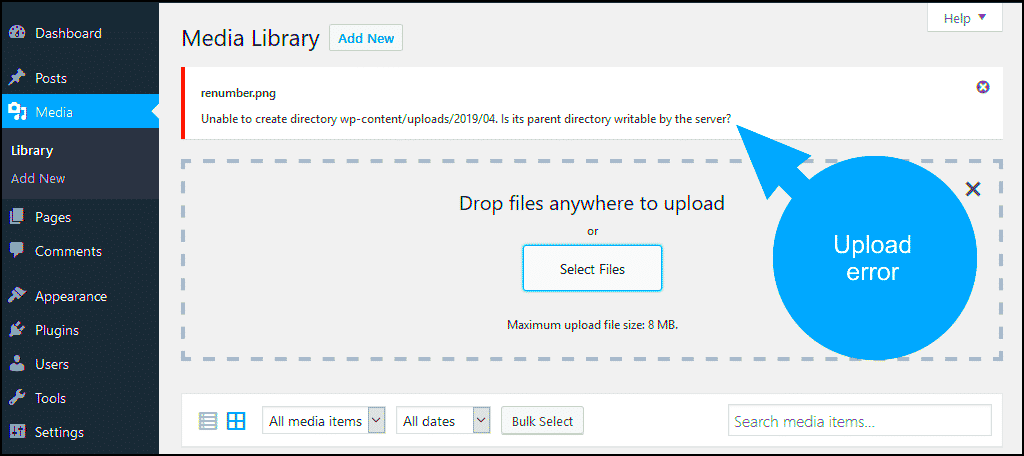
AddType image/webp .webpto enable WebP on Apache servers. If you’re on NGINX, you’ll need to adjust your server block configuration. - Check File Permissions: Sometimes, WebP images may not upload due to incorrect file permissions. Ensure the wp-content/uploads folder has the correct permissions (755 for folders and 644 for files) so images can be uploaded and displayed correctly.
- Check Image File Size: If your WebP image is too large, WordPress may fail to upload it. Try reducing the image size using an image editor or an online tool and re-upload it. You can also increase the upload file size limit in your php.ini file if needed.
- Clear Cache and Test: After making changes, clear your website’s cache (using a caching plugin or your hosting provider’s control panel). Then, check if the WebP images load correctly on your site.
If you follow these steps and the issue persists, it may be time to contact your hosting provider or seek help from a developer who can help you resolve more complex issues with WebP images.
How to Avoid Future WebP Upload Problems
Preventing future WebP upload issues is all about taking the right steps to ensure your WordPress site and server are configured properly from the start. With a few proactive measures, you can avoid running into the same problems down the line. Here’s how:
- Keep WordPress Updated: Ensure that your WordPress installation is always up-to-date. Updates often include bug fixes, security patches, and enhancements to features like WebP image support. This is one of the easiest and most effective ways to prevent compatibility issues.
- Use Compatible Themes and Plugins: Before installing a theme or plugin, check if it fully supports WebP images. Regularly update your themes and plugins to ensure they stay compatible with new WordPress versions and WebP support.
- Choose the Right Hosting Provider: Make sure your hosting provider supports WebP images and has the necessary configurations (like MIME types) in place to serve these images. You can contact your hosting provider to confirm this or switch to one that provides better support for modern formats.
- Optimize Images Regularly: Automate the image optimization process using plugins like ShortPixel or EWWW Image Optimizer. These plugins can ensure that all images, including WebP, are correctly formatted, compressed, and compatible with your site.
- Test Uploads After Changes: After updating plugins, themes, or WordPress itself, always test if WebP images are uploading and displaying correctly. This will help you spot any issues before they affect your site’s performance.
By following these best practices, you’ll minimize the risk of encountering WebP upload issues and keep your site running smoothly with high-performance images.
FAQ
Q1: Why are my WebP images showing up blank in WordPress?
A1: This could be due to several reasons such as compatibility issues with your theme, outdated WordPress version, server configuration problems, or plugin conflicts. Check your server settings, update WordPress, and ensure that your theme and plugins support WebP.
Q2: Can WebP images be used for every image on my WordPress site?
A2: While WebP images are great for performance, they may not be supported by older browsers like Internet Explorer. However, most modern browsers support WebP, and you can use a fallback system to deliver JPG or PNG images to users with unsupported browsers.
Q3: Do I need a plugin to use WebP images in WordPress?
A3: Not necessarily. WordPress 5.8 and above supports WebP images natively. However, using a plugin can simplify image conversion, ensure better compatibility, and optimize the loading speed of your images.
Q4: How do I check if WebP is supported by my hosting provider?
A4: You can check by contacting your hosting provider or inspecting the server’s MIME types. You can also try uploading a WebP image to see if it loads properly or use a plugin to test for WebP support.
Conclusion and Next Steps
WebP images offer many advantages for website performance, but when things go wrong, it can cause frustration. By understanding the causes of WebP upload issues and taking proactive steps to ensure compatibility, you can prevent most problems from occurring. If you follow the troubleshooting steps outlined here, you should be able to fix most WebP-related issues in WordPress.
Going forward, make sure to:
- Keep your WordPress version and plugins up-to-date.
- Ensure your hosting supports WebP images properly.
- Test uploads after making changes to avoid compatibility issues.
If the issue persists, don’t hesitate to reach out for help, whether through a WordPress support forum, plugin developer, or professional developer. With a bit of effort, your WebP images will load seamlessly and improve the performance of your WordPress site.


