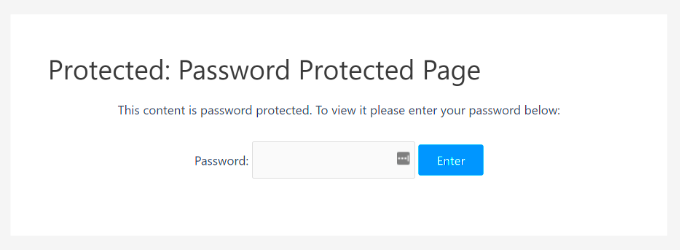
Password protected pages are an essential feature in WordPress, offering a simple way to restrict access to specific content. Whether you’re running a private blog, exclusive membership site, or want to protect sensitive information, this feature allows you to control who can see your pages. However, by default, WordPress doesn’t offer many styling options for these pages. This blog post will guide you through customizing the look and feel of password protected pages, ensuring they align with your site’s overall design while providing a seamless user experience for visitors.
Understanding Password Protected Pages in WordPress
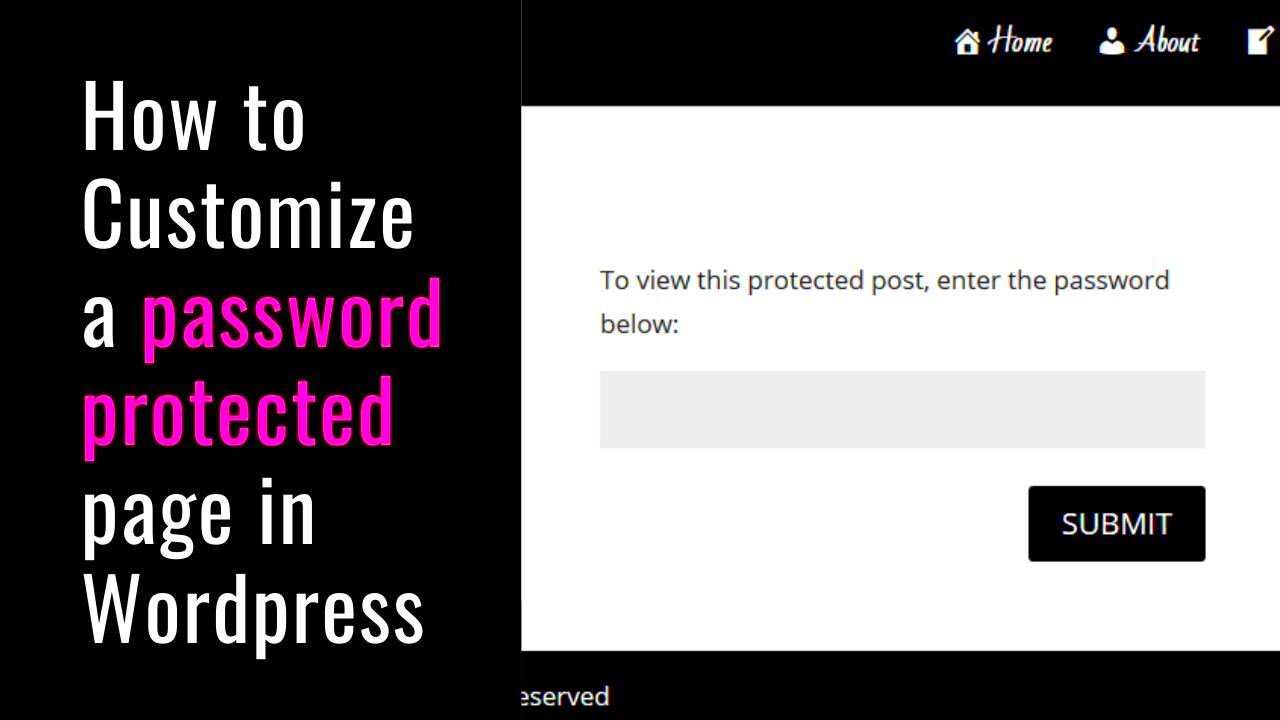
In WordPress, password protected pages allow site owners to restrict access to specific content. This feature is useful when you want to hide certain pages from the general public but still want authorized users to access them with a password. Here’s how it works:
- When you publish a page, you can set it to be password protected.
- Visitors will be prompted to enter a password to view the content.
- Only those who have the password can access the page.
While this is a convenient option, the default styling of these pages is quite basic. WordPress will display a standard password prompt and may not blend well with your website’s theme. Fortunately, you can easily customize the appearance of these pages by adding custom CSS or using a plugin to enhance the design.
Why You Might Want to Style Password Protected Pages
Styling your password protected pages can make a big difference in the overall user experience. By default, WordPress doesn’t provide much customization for these pages, which can make them look out of place or bland compared to the rest of your website. Here are a few reasons why styling password protected pages is beneficial:
- Consistency with Website Design: Customizing the look ensures the password prompt and page layout match the overall aesthetic of your website.
- Improved User Experience: Visitors will appreciate a more professional, cohesive look when they are prompted for a password. It also reduces confusion about whether they are on the correct page.
- Branding: Styled pages reflect your brand identity, offering a more polished and branded experience even for restricted content.
- Better Communication: With some styling, you can add instructions or a message explaining why the page is password protected, which makes the process smoother for users.
Overall, taking the time to style password protected pages can help ensure that even restricted content maintains a high-quality user experience and fits seamlessly into your website’s design.
How to Access Password Protected Pages in WordPress
Accessing password protected pages in WordPress is a straightforward process for both site owners and visitors. When you set a page to be password-protected, WordPress adds a prompt asking users to enter a password before they can view the content. Here’s how you can access these pages:
- Step 1: Go to the page URL. When you visit the page, you’ll be greeted with a password entry field.
- Step 2: Enter the correct password. Only those who have been given the password will be able to view the page’s content.
- Step 3: Click the Submit button, and you’ll be redirected to the content if the password is correct.
For site administrators or editors, accessing password-protected pages in the WordPress dashboard is no different from accessing any other page. Just log in to your WordPress dashboard, go to the page editor, and you’ll see the option to set or change the password protection under the “Visibility” settings in the page editor.
It’s important to note that these pages will display the default WordPress styling unless you make customizations, which leads us to the next section on how to modify these pages to better fit your site’s design.
Basic Customization Options for Password Protected Pages
Although WordPress doesn’t provide extensive options for styling password protected pages by default, there are several basic customizations you can make to improve their appearance and user experience. These customizations can be done easily through the WordPress editor or by adding custom CSS to your theme. Here are some basic options:
- Change the Password Prompt: You can modify the default password prompt message to something more fitting to your site’s tone. This can be done via the theme’s language files or by using a plugin.
- Modify the Background and Text: By adjusting the background color, text style, or font, you can make the password page look more cohesive with your site’s branding.
- Add Instructions: A short description or message explaining why the page is password protected can help visitors understand the purpose of the restriction.
- Custom Login Button: Changing the button text or its style, such as adding a custom color or hover effect, can make the password form feel more integrated with your site’s design.
To make these changes, you might need to tweak your theme’s template files or use custom CSS. Alternatively, some plugins are available to help you easily customize the password protected pages without needing to write code.
Using CSS to Style Password Protected Pages
If you want complete control over how your password protected pages look, CSS is the way to go. With CSS, you can customize the layout, typography, colors, and more to ensure that the password prompt blends seamlessly with the rest of your site. Here’s how you can use CSS to style password protected pages:
- Step 1: Locate the Password Protection Element – WordPress adds a unique class or ID to password protected pages, typically something like `.post-password-required`. You can target this class in your theme’s CSS file to apply styles specifically to the password form.
- Step 2: Add Custom Styles – You can adjust the appearance of various elements, such as the password input field, submit button, and the background of the page. Here’s an example of CSS to style the form:
  .post-password-required {
      background-color: #f0f0f0;
      padding: 20px;
      border-radius: 8px;
  }

  .post-password-required input[type="password"] {
      border: 2px solid #ccc;
      padding: 10px;
      width: 100%;
      margin-bottom: 10px;
  }

  .post-password-required input[type="submit"] {
      background-color: #0073e6;
      color: white;
      padding: 10px 20px;
      border: none;
      cursor: pointer;
  }

  .post-password-required input[type="submit"]:hover {
      background-color: #005bb5;
  }
- Step 3: Add CSS to Your Theme – You can add the CSS code above to your theme’s custom CSS section (usually found under Appearance > Customize > Additional CSS) or directly in the theme’s stylesheet.
- Step 4: Test the Page – After saving your changes, visit the password protected page to see how your custom styles have been applied.
With CSS, the possibilities are endless. You can customize the page to match your website’s theme, making the password protected area feel just as polished and professional as the rest of your site. Plus, CSS gives you a lot of flexibility to create unique designs tailored to your needs.
Common Issues and How to Troubleshoot Styling Problems
Styling password protected pages in WordPress can be a great way to enhance your website’s design, but it’s not always a smooth process. Sometimes, issues can arise that prevent your custom styles from being applied correctly. Here are some common problems you may encounter and how to troubleshoot them:
- Issue 1: CSS Not Loading – If your styles aren’t showing up, the first thing to check is whether the CSS is properly linked to your theme. Ensure that your custom CSS is placed in the right section of your theme settings or stylesheet. If you’re using a caching plugin, clear the cache to ensure your changes take effect.
- Issue 2: CSS Conflicts – Sometimes, your custom styles might conflict with other CSS rules on your website. This can cause certain styles to not apply correctly. You can resolve this by using more specific CSS selectors or by using the `!important` rule to override conflicting styles.
- Issue 3: Default Theme Styles Overriding Custom Styles – Many themes come with their own built-in styles for password protected pages. These may override your custom styles. To fix this, inspect the page using your browser’s developer tools and identify which styles are being applied. Then, adjust your custom CSS accordingly to ensure it has higher priority.
- Issue 4: Not Being Able to Style the Password Prompt – WordPress uses dynamic content for password prompts, which can sometimes be tricky to style. You may need to target the form specifically by using the correct class or ID. Inspect the page source code to find the right selectors.
If you continue to experience issues, consider deactivating plugins or switching to a default theme to check if something is causing a conflict with the styling. A methodical approach will help you resolve most problems.
FAQ: Frequently Asked Questions About Styling Password Protected Pages
Styling password protected pages can raise a few questions, especially if you’re new to WordPress or web design. Here are some of the most frequently asked questions:
- Q1: Can I use plugins to style password protected pages?
- Q2: How do I target only the password protection form with CSS?
- Q3: Can I style the password prompt message?
- Q4: Will custom styles affect the functionality of the password protection?
- Q5: How do I test if my custom styles are working?
Yes, several WordPress plugins allow you to easily customize password protected pages without writing custom code. Plugins like “Password Protected” or “Custom Login Page Customizer” can help you change the design of the login page, including colors, fonts, and more.
WordPress automatically adds a unique class to pages with password protection. You can target this class in your CSS to style the password form. For example, the class `.post-password-required` allows you to apply custom styles specifically to the password prompt area.
Yes, you can modify the password prompt text by editing your theme’s language files or using a plugin. If you want more control, you can use custom PHP code to change the default message.
No, customizing the design of your password protected pages will not interfere with the functionality. As long as you’re only changing the visual elements, the password protection itself will remain intact.
To test your custom styles, simply visit the password protected page in an incognito or private browsing window. This will allow you to see the password prompt as a user would and confirm whether your styles are applied correctly.
Conclusion: Enhancing the User Experience with Styled Password Protected Pages
Styling password protected pages in WordPress is a small but powerful way to improve your website’s overall user experience. By customizing the look and feel of these pages, you can ensure they match your website’s design and provide a seamless, professional experience for visitors. Whether you’re looking to add a branded touch, improve accessibility, or simply make the password prompt more visually appealing, the right customizations can make a significant difference.
In this guide, we’ve explored how to access, customize, and style your password protected pages. We’ve also covered troubleshooting tips and answered common questions to help you along the way. Remember, styling these pages doesn’t just make them look better; it also builds trust and enhances the user experience, making your visitors feel more comfortable while interacting with restricted content.
So, take the time to apply some custom CSS or explore plugin options to style your password protected pages. Your site’s visitors will appreciate the attention to detail, and it will contribute to a polished, professional online presence.

