Have you ever scrolled through a WordPress blog and noticed those eye-catching images that accompany each post? Those are called featured images! They serve as a visual front for your content, drawing readers in and giving them a taste of what to expect. Having the right featured image is integral to a blog’s aesthetic and functionality. But here’s the kicker: not all featured images are created equal. Selecting the right size can make a world of difference in how your site looks and performs. So, let’s dive into the nuts and bolts of featured images!
Importance of Using Standard Featured Image Sizes

When it comes to WordPress websites, using standard featured image sizes is not just a suggestion—it’s essential for several reasons:
- Consistency: Using standardized sizes ensures that your images display uniformly across all devices. This consistency is crucial for maintaining a professional appearance.
- Faster Loading Times: Optimized image sizes can significantly improve your site’s loading speed, which is vital for user experience and SEO rankings. Heavy images can slow down your site, frustrating visitors.
- Better SEO: Properly sized images contribute to better search engine optimization. Google favors websites that load quickly and display well on all devices, so using the right sizes can help boost your visibility.
- Improved User Experience: Visitors appreciate clear, high-quality images. When your featured images are appropriately sized, they appear sharp and appealing, making readers more inclined to engage with your content.
- Ease of Use: When you adhere to standard sizes, you simplify the process of uploading and placing images in your posts. This can speed up your workflow and save you a lot of time.
| Feature | Benefits |
|---|---|
| Consistency | Uniform appearance across devices |
| Faster Loading Times | Improves user experience and SEO |
| Better SEO | Boosts Google rankings |
| Improved User Experience | High-quality, engaging visuals |
| Ease of Use | Simplifies uploading and placement process |
In summary, sticking to standard featured image sizes isn’t just about aesthetics; it impacts everything from load times to SEO performance. So why not give your WordPress website the edge it needs by selecting the right image sizes? It’s a small step that can lead to big results!
Common Standard Featured Image Sizes
When you’re setting up a WordPress website, one of the most important aspects to consider is the featured image sizes you’ll be using. Featured images draw attention to your content and enhance the overall aesthetic of your site. Different platforms and themes may have varying size requirements, but there are some common standard sizes you should keep in mind. Here’s a quick rundown:
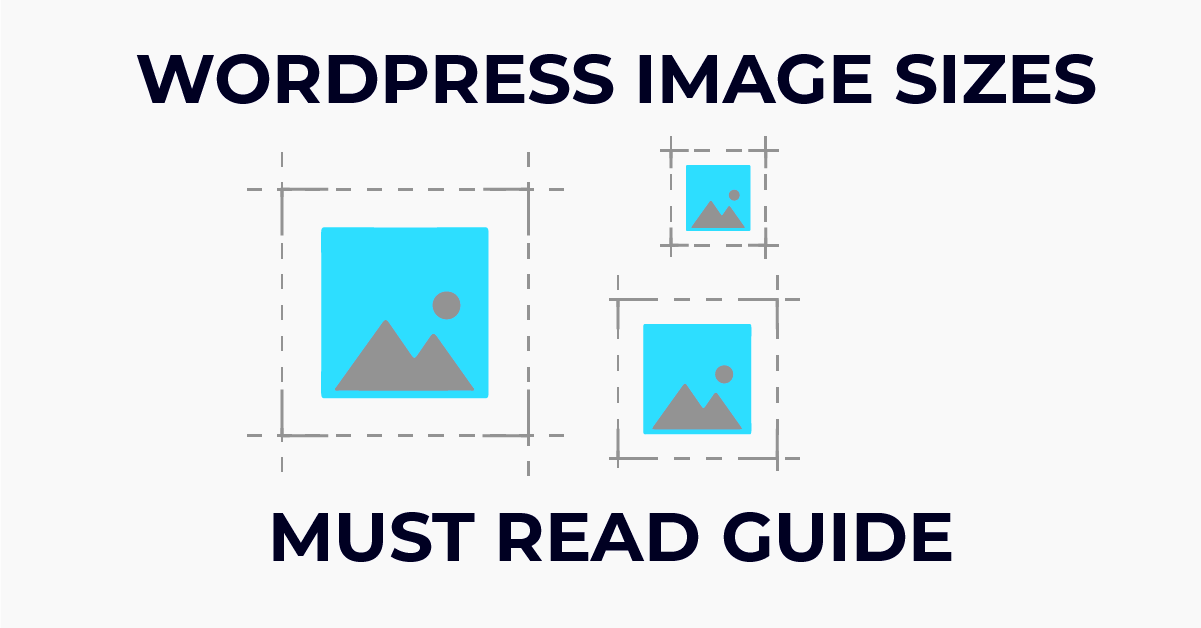
- Thumbnail Size: Typically 150 x 150 pixels. This is a small square version of your featured image, often used in blog lists or widgets.
- Medium Size: Generally set at 300 x 300 pixels for square images or 300 x 200 pixels for landscape images. Medium images can be used within posts or pages without taking up too much screen space.
- Large Size: Usually 1024 x 1024 pixels or 1024 x 768 pixels for landscape orientations. Large images are great for making a statement and can be used in full-width layouts.
- Full-Size: This is the original image size uploaded, which can vary depending on the source. Full-size images are useful for galleries or when you want to maintain higher resolution for visual impact.
Additionally, many WordPress themes offer their own recommended sizes, so it’s always good practice to check the theme’s documentation. Having the right images at the right sizes can improve load times and enhance user experience, making your site more appealing and efficient!
How to Set Featured Image Sizes in WordPress
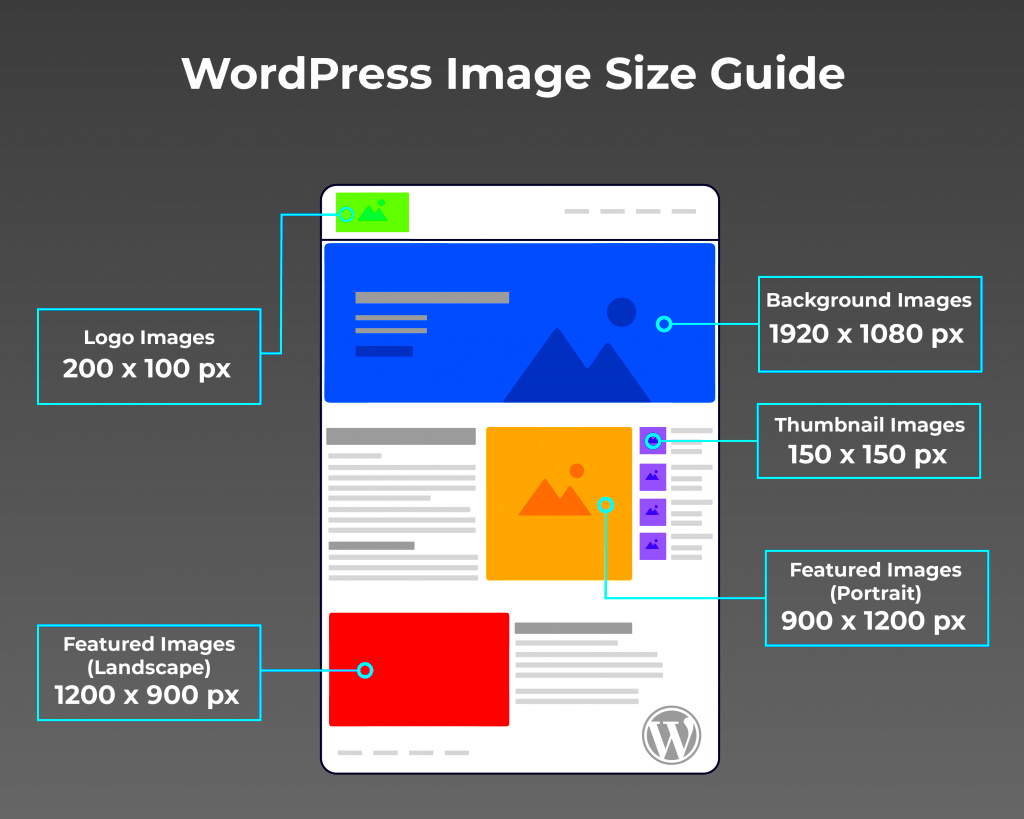
Setting featured image sizes in WordPress isn’t as complicated as it may seem! With just a few clicks, you can customize how your images display across your site. Here’s a step-by-step guide to help you navigate this process and make your site look stunning:
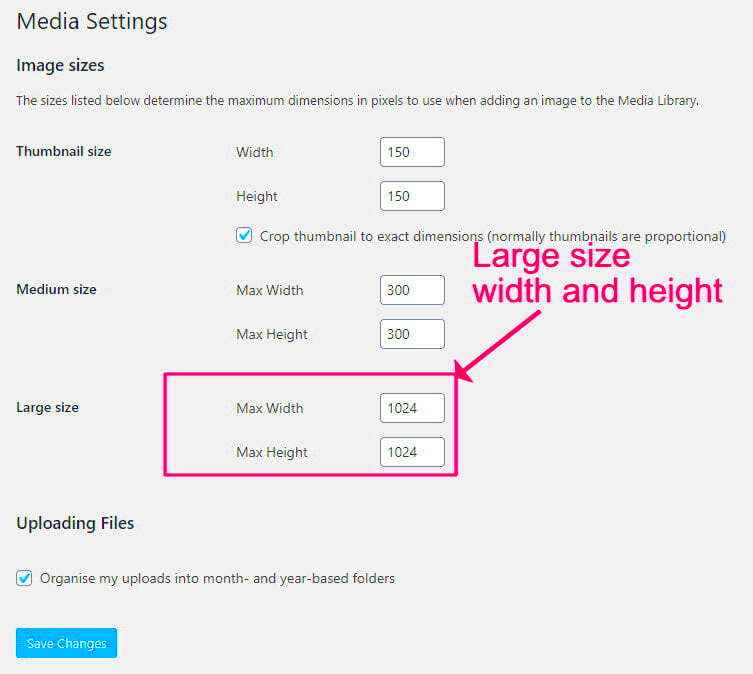
- Go to Settings: First, log in to your WordPress dashboard. Navigate to Settings > Media. Here you will find options to specify image sizes.
- Adjust Size Settings: In this menu, you can define the sizes for thumbnail, medium, and large images. Adjust the pixel dimensions to fit your design needs.
- Save Changes: Once you’ve set your preferred sizes, don’t forget to click the Save Changes button at the bottom of the page.
- Regenerate Thumbnails: If you’ve changed the dimensions, you might want to regenerate your existing thumbnails. This can be done using a plugin like Regenerate Thumbnails.
| Image Type | Width (pixels) | Height (pixels) |
|---|---|---|
| Thumbnail | 150 | 150 |
| Medium | 300 | 300 |
| Large | 1024 | 1024 |
And there you have it! A quick guide to setting your featured image sizes in WordPress. By ensuring that your images are perfectly sized, you’ll not only improve your site’s appearance but also optimize its performance. Happy blogging!
Adjusting Featured Image Sizes in Themes
When you start working with a WordPress website, one crucial aspect to get a grip on is the featured image sizes in your theme. Almost all WordPress themes come with a default setting for image dimensions, and while they provide a good starting point, you may find that these sizes don’t quite align with your vision for your site. Adjusting featured image sizes can significantly enhance your site’s aesthetics and improve the user experience.
Here’s what you need to consider when adjusting featured image sizes:
- Theme Settings: Many themes come with built-in options to customize image sizes. Navigate to your theme’s settings to see if you can find any options for altering the featured image dimensions. This is often the simplest method.
- Custom CSS: If your theme doesn’t support changing image sizes directly, you can use custom CSS to manipulate the display. However, this may require a bit of coding knowledge.
- Image Regeneration Plugins: After adjusting the dimensions, it’s essential to regenerate your thumbnails. Utilizing a plugin like “Regenerate Thumbnails” can help to ensure your new image sizes are applied across existing images.
- Responsive Design Considerations: As mobile traffic continues to surge, ensure that the featured images you select are responsive. Test your site on different devices to see how images are displayed.
- Optimization: Don’t just adjust sizes arbitrarily; ensure the images remain optimized for quick loading times. Using proper compression techniques is key here.
Ultimately, the goal is to find that sweet spot where your featured images look stunning and load efficiently. Small tweaks can make a massive difference!
Best Practices for Uploading Featured Images
Now that you know about standard featured image sizes, let’s explore the best practices for uploading them efficiently. Featured images serve as the first impression of your posts and are vital for engagement. Implementing best practices not only enhances your site’s visual appeal but also supports SEO efforts.
Here are some top tips to keep in mind:
- Image Resolution: Always aim for high-resolution images. A good rule of thumb is to upload images that are at least 1200 pixels wide for better quality, especially on retina displays.
- File Format: Use the appropriate file format based on your image type—JPEG for photographs, PNG for graphics with transparency, and GIF for animations.
- Image Compression: Large file sizes can slow down your website. Leverage tools like TinyPNG or WP Smush to compress images without sacrificing quality.
- Use Descriptive Filenames: Before uploading, rename your images with relevant keywords. Instead of ‘IMG_1234.jpg,’ try ‘best-pasta-recipe-image.jpg’ to aid SEO.
- Add Alt Text: Always include alt text with relevant keywords for accessibility. This helps screen readers describe the image to users and improves SEO.
By adhering to these best practices, you’ll ensure your featured images enhance not just the look of your website but also its performance in search engines.
7. Responsive Design Considerations for Featured Images
When it comes to creating a compelling WordPress website, responsive design is key. As more users browse the web on various devices, making sure your featured images look great on all screen sizes is crucial. Let’s explore some essential considerations to keep in mind:
- Aspect Ratios: Maintain consistent aspect ratios for your featured images. Common ratios like 16:9 or 4:3 work well across different devices and screen sizes.
- Image Resizing: Use CSS and HTML attributes to resize images for different viewports. This ensures that images look crisp and fit seamlessly within your site’s layout.
- Lazy Loading: Consider implementing lazy loading for your featured images. This technique loads images only when they come into the viewport, drastically improving the website’s loading speed.
- Media Queries: Utilize media queries in your CSS to modify the featured image styles for different devices. You can set different sizes or formats based on the user’s screen dimensions.
- Image Formats: Use modern image formats like WebP that offer excellent quality at smaller file sizes. This can enhance the responsive experience by speeding up loading times.
By keeping these considerations in mind, you ensure that your featured images not only resonate with your site’s branding but also provide a consistently engaging experience across all devices. After all, an adequately optimized featured image can make or break the first impression on a viewer!
8. Tools for Creating and Optimizing Featured Images
Crafting the perfect featured image isn’t just about taking a great shot; it’s also about using the right tools to enhance and optimize those images effectively. Here’s a list of fantastic tools you can leverage:
| Tool Name | Type of Tool | Key Features |
|---|---|---|
| Canva | Graphic Design Tool | User-friendly interface, templates, drag-and-drop design. |
| Photoshop | Photo Editing Software | Advanced editing capabilities, layers, and filters. |
| GIMP | Open-source Image Editor | Free alternative to Photoshop, rich editing features. |
| TinyPNG | Image Compression Tool | Reduces image file size without losing quality. |
| Squoosh | Image Compression Tool | Interactive, compares image formats and sizes. |
Using these tools, you can create stunning featured images that not only look great but are also optimized for performance. A well-optimized featured image can significantly improve your site’s loading speed, enhancing user experience and SEO potential. Invest some time in mastering these tools, and you’ll be well on your way to creating eye-catching imagery for your WordPress site!
Standard Featured Image Sizes for WordPress Websites
When it comes to WordPress websites, featured images play a crucial role in enhancing visual appeal and engaging visitors. These images not only serve as a focal point on posts and pages but also significantly impact SEO and social sharing. Understanding the standard featured image sizes is essential for achieving optimal results. Below are some common featured image dimensions based on various themes and use cases:
| Theme Type | Recommended Size | Aspect Ratio |
|---|---|---|
| Blog | 1200 x 628 pixels | 1.91:1 |
| Portfolio | 800 x 600 pixels | 4:3 |
| E-commerce | 1200 x 1200 pixels | 1:1 |
| Magazine | 600 x 400 pixels | 3:2 |
| Landing Page | 1600 x 900 pixels | 16:9 |
In addition to using the right dimensions, it’s beneficial to consider the following tips for featured images:
- Optimize File Size: Reduce the image file size without sacrificing quality to improve load times.
- Use High-Quality Images: Always select sharp, high-resolution images that resonate with your brand.
- Test Responsiveness: Ensure your featured images look great on all devices, including mobile.
- Consistency: Maintain a consistent size across posts for cohesive visual content.
By adhering to these standard image sizes and best practices, you can create engaging, attractive featured images that enhance the overall user experience on your WordPress website.
Conclusion: Achieving the Perfect Featured Image
To achieve the perfect featured image, it’s essential to use the standard sizes tailored to your site’s themes and objectives while optimizing for quality and user experience.

