Managing your media files effectively is crucial when working with WordPress. The Media Library is where all your images, videos, PDFs, and other files are stored. As your website grows, so does the number of media files. Proper organization and management can save you time, improve website performance, and make it easier to find files when needed. Sorting media by size is an essential aspect of managing a clutter-free and fast-loading WordPress website. In this post, we’ll discuss why sorting by size matters and how to do it effectively.
Importance of Sorting Media by Size

Sorting your media by size in WordPress helps in several ways. Here’s why it’s important:
- Improved website speed: Large media files can slow down your website, affecting user experience and SEO. Sorting media by size lets you identify and optimize the largest files.
- Better organization: With a large number of files, it becomes hard to find specific items. Sorting them by size allows for a quick view of the biggest files and helps you keep your library organized.
- Efficient storage management: WordPress sites can easily accumulate large media files that consume storage space. Sorting by size helps you spot unnecessary or oversized files to delete or compress.
- SEO benefits: Large images that aren’t optimized can impact your site’s SEO. Identifying these files and reducing their size can improve your page load time, which is an important factor for SEO rankings.
How to Sort Media Files by Size in WordPress

WordPress doesn’t offer a built-in feature to sort media files by size, but there are ways to do it. Here are the steps you can follow:
- Manually Sorting in the Media Library: By default, WordPress lets you sort files by different criteria like name, date, or author, but not by file size. However, you can use the media library filter options to make it easier to find large files, such as by sorting by upload date and size manually checking the file details.
- Using Plugins: The easiest way to sort media files by size is by using a plugin. Plugins like WP Media Folder or Media Library Assistant allow you to organize your media files by size with just a few clicks.
- Using FTP or File Manager: If you’re comfortable with FTP or file manager, you can access your wp-content/uploads folder, where media files are stored. From here, you can sort files by size directly on your server.
After identifying large files, consider compressing or deleting them to save space and optimize your site’s performance. Plugins like Smush or ShortPixel can help compress images without losing quality.
Using Plugins to Sort Media Library Files
WordPress plugins make managing and sorting your media library much easier. While WordPress doesn’t offer a native way to sort files by size, several plugins provide this functionality along with additional features to optimize your media files. Here are a few popular plugins you can use:
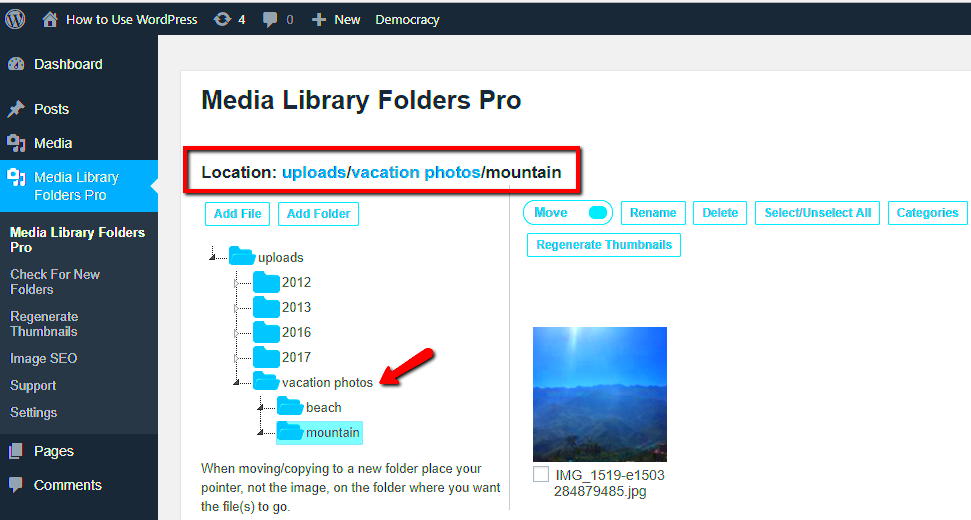
- WP Media Folder: This plugin allows you to organize your media files into folders, making it easy to sort and manage large files. It also has an option to filter files by size, which can help you quickly identify large files that need attention.
- Media Library Assistant: This plugin offers extensive filtering and sorting options, including the ability to sort media by file size. It also provides additional tools to manage media metadata, improving the overall organization of your files.
- Enhanced Media Library: With this plugin, you can easily sort your media files by type, size, and other filters. It allows for seamless media management, helping you keep your library organized while boosting your website’s performance.
- FileBird: A simple yet effective plugin for organizing media files. While it doesn’t directly sort by file size, it provides a neat folder structure to make sorting and organizing your files much easier.
By using any of these plugins, you’ll save time and improve your media library’s overall performance. Some plugins also provide additional features like bulk file optimization and easy deletion of unnecessary files, ensuring your WordPress site runs smoothly.
Tips for Efficient File Management in WordPress
Managing your media files effectively can significantly improve your website’s performance and make your workflow more efficient. Here are some tips for better file management in WordPress:
- Use Descriptive File Names: Avoid generic file names like “image1.jpg.” Instead, name files based on their content, e.g., “summer-vacation-beach.jpg.” This makes it easier to find and understand the files.
- Optimize Files Before Uploading: Before uploading images or other large files, optimize them for the web. Tools like Photoshop or online services like TinyPNG can help reduce file sizes without compromising quality.
- Delete Unused Files: Periodically clean up your media library by deleting files that are no longer in use. This helps free up space and improves your site’s speed.
- Use Folders to Organize Files: For better organization, group files into folders by category, such as “Images,” “Videos,” or “Documents.” This makes it easier to locate specific files later.
- Enable Automatic Image Compression: Plugins like Smush or ShortPixel can automatically compress images upon upload, reducing their size and improving website speed.
- Limit the Number of Files Uploaded: Avoid uploading too many media files at once. Instead, upload files in smaller batches, which makes it easier to keep track of your media and avoid cluttering your library.
By following these tips, you’ll maintain an organized and efficient media library that boosts your WordPress site’s performance.
Benefits of Organizing Your Media Library
Organizing your media library in WordPress has several benefits, not just for your website’s performance, but also for your workflow. Here are some key advantages:
- Improved Website Speed: Large, unoptimized media files can slow down your site. By organizing and compressing media files, you reduce the load time, leading to a faster and more responsive website.
- Easier Navigation: An organized media library makes it easy to find and reuse files. This is especially helpful as your website grows and the number of files increases. Instead of scrolling endlessly, you can use folders and filters to quickly access what you need.
- Better User Experience: A faster website means a better user experience. Visitors are more likely to stay and engage with your content if your site loads quickly. Organizing your media library helps maintain that speed.
- Enhanced SEO: Search engines, like Google, favor fast-loading websites. By optimizing and organizing media files, you improve your site’s performance, which can lead to better search engine rankings.
- Reduced Server Load: Storing large, unoptimized files on your server can eat up resources and slow down your site. Organizing and compressing files reduce the strain on your server, keeping things running smoothly.
- Improved Backup Management: When your media files are organized, backing up your site becomes easier and more efficient. You’ll have a clearer picture of what’s stored and can avoid unnecessary duplicates.
By taking the time to organize your media library, you set the foundation for a more efficient, faster, and user-friendly WordPress website. The benefits are worth the effort in the long run!
Common Issues and Solutions
While managing your media library in WordPress can be straightforward, there are some common issues that may arise. Fortunately, there are simple solutions to most of them. Here’s a list of problems you might encounter and how to fix them:
- Issue: Large Media Files Slowing Down Your Website
Large image and video files can significantly slow down your site. This happens because heavy files take longer to load, affecting the overall page speed.
Solution: Use image compression tools like Smush or ShortPixel to reduce the file size without losing quality. You can also convert images to more efficient formats like WebP. - Issue: Duplicate Media Files
As your site grows, you might find that some media files are uploaded more than once, cluttering your library and wasting storage space.
Solution: Regularly check for duplicates using plugins like Media Cleaner or WP Clean Up. These plugins help identify and delete duplicate media files from your library. - Issue: Difficulty Finding Files in a Cluttered Library
If you have a large media library, it can be hard to find specific files quickly.
Solution: Organize your media files into folders or categories. Using a plugin like WP Media Folder can help you create folders, making it easier to navigate and manage your files. - Issue: Files Not Showing in Media Library
Sometimes files you’ve uploaded might not appear in the WordPress Media Library.
Solution: This could be due to permissions issues. Check your file permissions via FTP or file manager. Ensure that your wp-content/uploads folder is set to 755, and try re-uploading the files. - Issue: Upload Limits on Media Files
If you’re uploading large files, you might run into upload size limits set by your hosting provider.
Solution: You can increase your file upload limit by editing your php.ini file or by contacting your hosting provider to lift the restriction.
By staying aware of these common issues and knowing how to solve them, you can maintain an efficient and well-organized media library, ensuring your WordPress site runs smoothly.
Frequently Asked Questions (FAQ)
Here are some frequently asked questions related to managing the media library in WordPress:
- Q: How do I sort my media files by size in WordPress?
A: WordPress doesn’t have a built-in feature to sort media by size. However, you can use plugins like WP Media Folder or Media Library Assistant to easily sort and filter media files by size. - Q: Can I organize my media files into folders?
A: Yes! Plugins like WP Media Folder allow you to create folders in the media library, making it easier to manage your files. Without these plugins, WordPress doesn’t provide a folder system by default. - Q: What is the best plugin to optimize media files?
A: Plugins like Smush and ShortPixel are great for automatically compressing and optimizing images as you upload them. These plugins help improve your site’s speed without compromising on image quality. - Q: How can I find and delete duplicate media files?
A: You can use plugins like Media Cleaner to scan your media library for duplicates. This helps you reclaim storage space and ensures your library remains clean and organized. - Q: Can I recover deleted media files?
A: Unfortunately, once media files are deleted from the media library, they cannot be recovered directly through WordPress. However, if you have a backup solution in place, you can restore your media files from a backup.
Conclusion: Improve Your WordPress Site’s Performance with Organized Media
Efficiently managing your media library in WordPress is essential for maintaining a fast, well-organized, and user-friendly website. By sorting and optimizing media files, you can ensure better performance, faster load times, and improved user experience. Using plugins to help you organize files, compress images, and remove duplicates can make the entire process easier and more efficient.
Here’s a quick recap of the benefits of a well-organized media library:
- Improved website speed: By reducing the size of images and other media, you can boost your site’s performance.
- Better file management: With an organized library, you can quickly find, edit, and reuse files without hassle.
- Enhanced SEO: Faster websites tend to rank better in search engines, giving you an edge in the competitive online space.
- More efficient workflow: An organized library makes it easier to manage content and keep your website running smoothly.
Take the time to optimize your media library, and you’ll see improvements in both performance and overall site management. It’s a small step that leads to big benefits!


