Managing a website can sometimes feel like a juggling act, especially when it comes to updating content like menus. Fortunately, WordPress offers a convenient feature that allows you to schedule menu updates. Imagine being able to set changes in advance so your website can operate smoothly while you focus on other important tasks. In this post, we’ll explore how you can take advantage of this feature to enhance your site’s functionality and user experience.
Understanding the Importance of Menu Management

Proper menu management is essential for any effective website. It’s often the first point of interaction for your visitors, guiding them toward important information, products, and services. A well-structured menu contributes to better user experience, which can lead to higher conversion rates. Let’s dive into why managing your menu effectively is so important:
- User Experience: A clear and accessible menu helps visitors find what they’re looking for quickly, reducing frustration and bounce rates.
- SEO Benefits: Search engines consider how easily users can navigate your site, so a well-organized menu can improve your rankings.
- Brand Consistency: Your menu should reflect your brand’s identity and message, reinforcing your image across the site.
- Dynamic Content Management: Regularly updating your menu keeps your site fresh and relevant, showcasing new offerings or seasonal items.
In a nutshell, effective menu management isn’t just about aesthetics; it’s a crucial part of enhancing the overall quality of your website. The next time you consider a menu update, think about how much you could improve your site’s performance with just a few adjustments!
How to Access the Menu Editor in WordPress

Accessing the Menu Editor in WordPress is a straightforward process. Follow these simple steps to get to where you can customize your site’s menus quickly!
- Log into Your Dashboard: Begin by logging into your WordPress admin dashboard. This is usually found by going to yourwebsite.com/wp-admin.
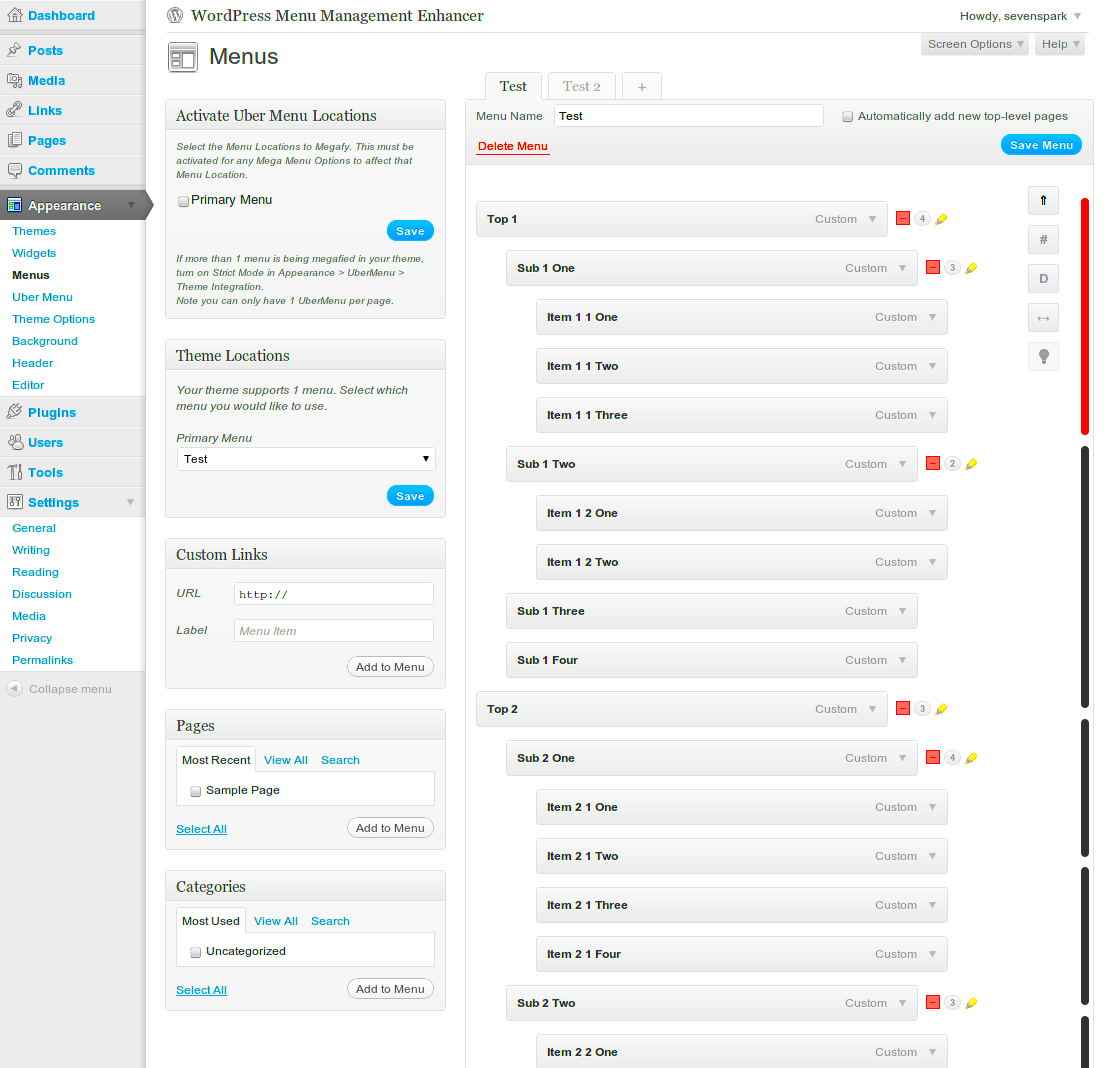
- Navigate to Appearance: Once you’re logged in, look for the “Appearance” option on the left-hand side of the screen.
- Select Menus: After clicking on “Appearance,” you’ll see a drop-down list. Click on “Menus” to access the Menu Editor.
- Choose the Menu to Edit: If you have multiple menus, you’ll need to select the one you want to edit from the dropdown menu at the top of the page. Click “Select” to load your chosen menu.
- Add or Remove Items: Here’s where the fun begins! You can add new items to your menu, like pages, categories, or custom links, by using the options on the left side of the screen. Just check the boxes next to the items you want and click “Add to Menu.” To remove items, simply click the down arrow next to the item, and hit “Remove.”
- Save Your Changes: Don’t forget to hit the “Save Menu” button at the bottom right after making your adjustments!
And that’s it! You’ll now be proficient in accessing the Menu Editor in WordPress, setting the groundwork for even more exciting updates ahead.
Step-by-Step Guide to Schedule Menu Updates

Now that you know how to access the Menu Editor, let’s dive into the process of scheduling menu updates. This is a fantastic feature for ensuring your site remains fresh and relevant without you needing to be constantly online!
- Open the Menu Editor: As outlined above, start by navigating to Appearance > Menus.
- Create a New Menu Item: In the Menu Editor, choose “Add Items” and select what you want to add to your menu. This can be new pages, posts, or custom links.
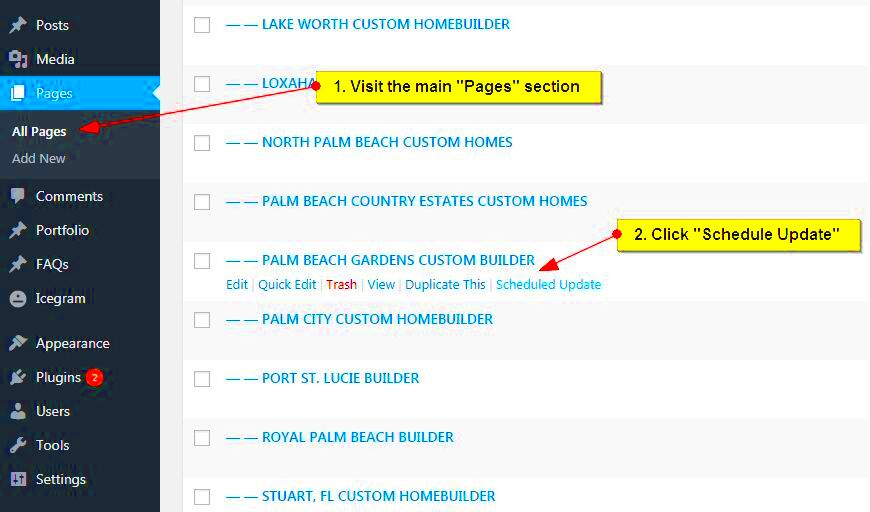
- Set the Date and Time for Updates: Once you’ve added your desired menu items, look for the option to schedule. In the block where you create your post or page for the new menu item, you can find the “Publish” box on the right. Click “Immediately” next to “Publish,” and then select the date and time you want.
- Save the Schedule: After setting the date and time, make sure to click “OK,” and then hit “Schedule” instead of “Publish.” This will ensure that your new menu items are added at the designated time.
- Review Your Scheduled Updates: To confirm your scheduled menu updates, return to the Menu Editor. You should see your pending changes listed there until they go live.
With these steps, you can keep your website lively with minimal ongoing effort. It’s like setting it and forgetting it, with the added bonus of still being able to check in anytime!
5. Best Practices for Effective Menu Management
Managing your WordPress menu can be an art form in itself! To make sure your navigation is smooth and your visitors are happy, here are some best practices to keep in mind:
- Keep It Simple: A cluttered menu can confuse your visitors. Aim to keep your menu items to a minimum. Typically, 5-7 main items are ideal.
- Prioritize Content: Place your most important pages at the top of the menu. This ensures that visitors can find what they’re looking for without digging around.
- Use Descriptive Labels: Instead of generic terms like “Products” or “Services,” try to be more descriptive, like “Organic Skincare” or “Custom Web Design.” This not only aids navigation but also helps with SEO.
- Implement Drop-down Menus: If you have subcategories or multiple services, consider using drop-down menus. This keeps your main menu clean while still providing access to additional information.
- Regular Updates: Just like you wouldn’t let your blog or website grow stale, your menu also deserves a fresh review every now and then. This helps to reflect new offerings, seasonal items, or changes in your business focus.
- Test on Mobile: Ensure that your menu is mobile-friendly. Many users browse websites on their phones, and a difficult-to-navigate mobile menu can lead to lost visitors.
By following these best practices, you’ll create a menu that not only enhances user experience but also helps in effective management of your WordPress site!
6. Using Plugins to Enhance Menu Scheduling
Now that we’ve covered some best practices, let’s delve into how you can further enhance your menu management using plugins. WordPress boasts a range of plugins that can make scheduling and updating menus a breeze. Here are some prime choices to consider:
| Plugin Name | Description | Key Features |
|---|---|---|
| Menu Item Visibility Control | A plugin that allows you to control the visibility of menu items based on various conditions. | – Time-based visibility – User roles control – Conditional logic |
| Advanced Menu Widget | This plugin lets you create highly customizable menus with numerous layout options. | – Drag and drop interface – Custom styling options – Multiple menu layouts |
| WP Mega Menu | A powerful tool for creating stunning mega menus that can display images and forms. | – Responsive design – Integration with page builders – Built-in icons and widgets |
| Menu Schedule | A handy plugin that allows you to schedule when menu items appear or disappear. | – Date and time scheduling – Automatic updates – User-friendly interface |
Utilizing these plugins not only streamlines your menu management process but also adds an extra layer of functionality to suit your website’s needs. Remember, the right plugin can save you tons of time and improve your site’s user experience!
Troubleshooting Common Issues with Menu Scheduling
Menu scheduling in WordPress can significantly enhance your site’s functionality and user experience. However, like any feature, it can present some hiccups along the way. Here are some common issues you might encounter and how to solve them:
- Menus Not Displaying: One common issue is when scheduled menus don’t appear. Ensure the menu is set to the correct location. Check if the assigned theme location matches the menu you’re trying to display.
- Incorrect Dates and Times: Sometimes, scheduled menus might not show up at the expected time. Double-check your WordPress time settings under Settings > General. Make sure your timezone aligns with your scheduled plan.
- Draft Menus Stuck in Limbo: If your new menu is still in draft mode, it won’t activate automatically. Make sure to publish it and set the appropriate schedule using the “Publish immediately” option.
- Server or Cache Issues: If changes aren’t reflecting, consider clearing your server cache. Caching plugins can also cause old menus to show. Always clear the cache after making changes.
- Plugin Conflicts: Conflicts with other plugins can create chaos in menu scheduling. Temporarily disable plugins to identify the culprit. Look for compatibility issues and update any outdated plugins.
- Revisions and Changes Not Saving: Sometimes, WordPress might fail to save your menu changes. Make sure to frequently click “Save Menu” after making edits.
By keeping these common issues in mind—and having a handy troubleshooting kit ready—you’ll navigate WordPress menu scheduling like a pro!
Conclusion: Optimizing Your WordPress Menu Strategy
As we wrap up, it’s essential to recognize just how important your menu strategy is for enhancing your WordPress site. An optimized menu not only improves user navigation but also contributes to your site’s overall aesthetic and effectiveness. Here are some key takeaways you should consider for optimizing your menu strategy:
- Evaluate User Experience: Regularly assess how users interact with your menu. Are they finding what they need? Tools like Google Analytics can provide insights into user behavior.
- Use Clear and Descriptive Labels: Your menu items should be straightforward. Avoid technical jargon and keep labels intuitive to enhance usability.
- Consider Mobile Users: Ensure your menu is mobile-friendly. Test it on various devices, adjusting as necessary to maintain usability.
- Regularly Update Content: Just as you schedule menu updates, maintaining and managing your content is vital. Regular updates keep your site fresh and engaging, encouraging return visits.
- Plan for Seasonality: Consider aligning your menu updates with holidays or promotional events. Scheduled menus can help you make timely adjustments effortlessly.
By integrating these strategies into your WordPress menu management, you’ll create a seamless and engaging experience for your visitors. Keep experimenting and refining your menu strategy, and watch your site’s engagement soar!


