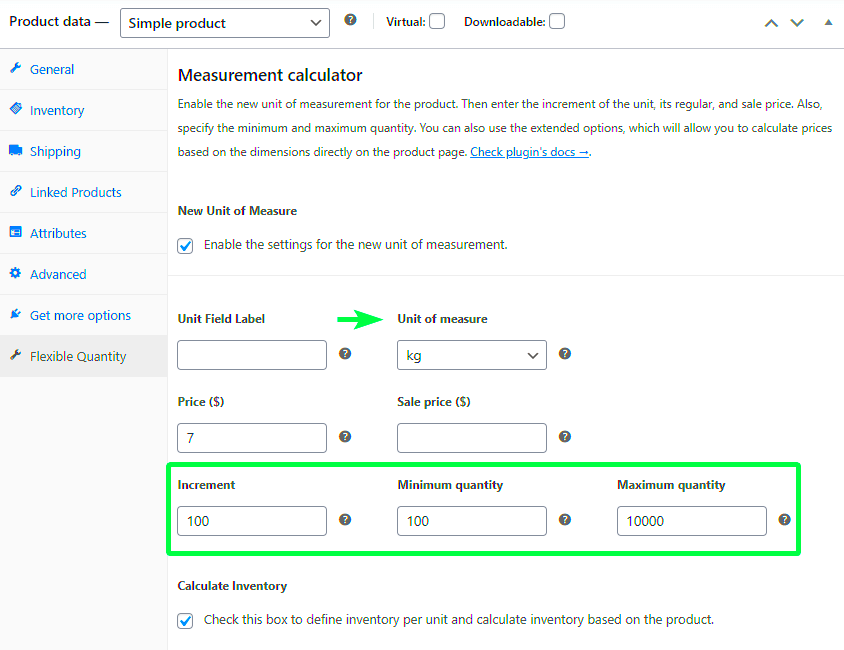
Hey there, WooCommerce users! If you’re looking to add a little more control over how your customers purchase products, you’ve landed in the right place. Today, we’re diving into the world of restricting the quantity per product attribute in WooCommerce. It might sound technical, but don’t worry! We’ll break it down step-by-step so you can enhance your store’s functionality with ease. Let’s get started!
Understanding the Need for Quantity Restrictions
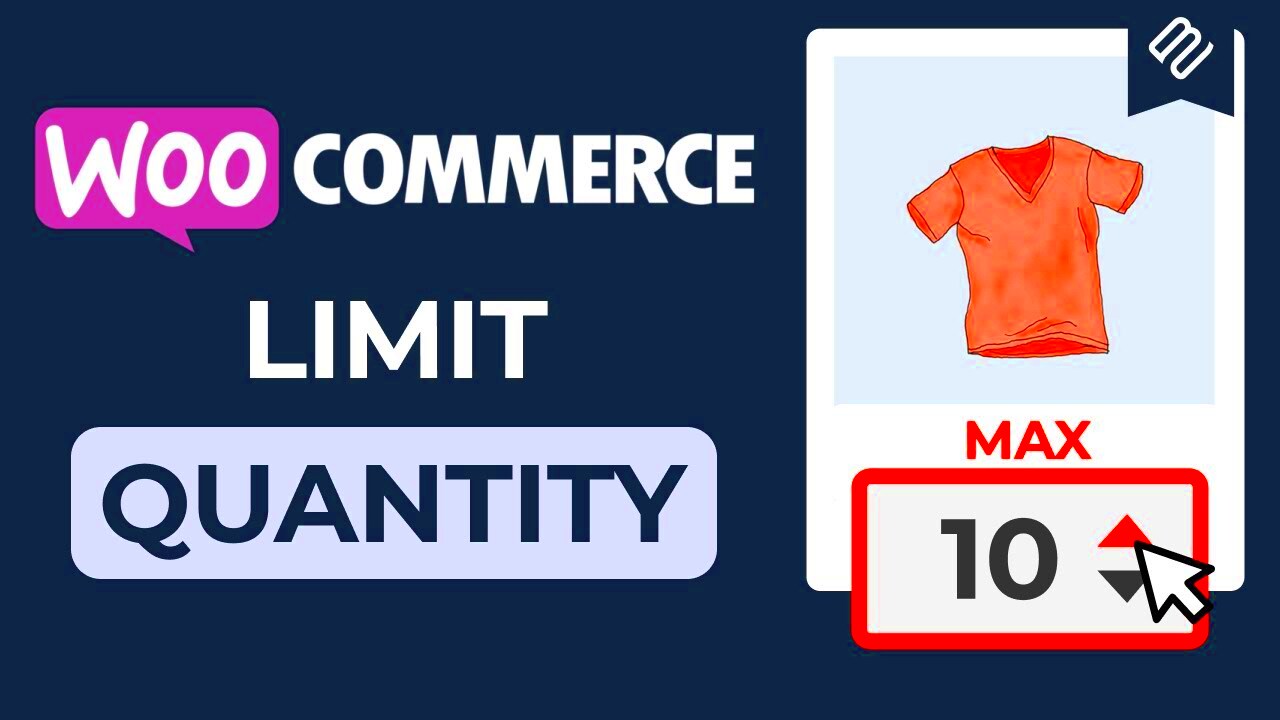
Why would you want to put limits on how many of a specific product attribute customers can buy? Well, there are quite a few reasons! Here’s a rundown of some scenarios where quantity restrictions can come in handy:
- Preventing Product Scarcity: If you’re selling limited-edition items or products with low stock, restricting quantities ensures that more customers can get their hands on these popular goods.
- Promoting Fairness: By capping the quantity, you help prevent hoarding behavior where a single customer buys everything, leaving others empty-handed.
- Managing Inventory: If you have varying stock levels for different product attributes (like colors or sizes), quantity restrictions can assist in balancing available items.
- Encouraging Upselling: When customers see a limit, they might be more inclined to explore other products or variations, potentially increasing your overall sales.
- Enhancing User Experience: Clear quantity limits lead to a smoother shopping experience, reducing the chance of frustration related to out-of-stock items.
So, as you can see, implementing quantity restrictions isn’t just about creating rules; it’s about improving customer satisfaction and overall shop efficiency. Ready to learn how to set this up in WooCommerce? Let’s continue!
Overview of WooCommerce Product Attributes
When you think about selling products online, the way you categorize and display them is crucial. Enter WooCommerce Product Attributes—a powerful feature that lets you tailor your inventory to best fit your customers’ needs. So, what exactly are these attributes? In simpler terms, attributes in WooCommerce are the extra details you provide about a product. They can be anything from size and color to materials and special features.
Using attributes not only enriches the product listings but also enhances the customer experience. For instance, think of a t-shirt that’s available in several colors and sizes. By setting up attributes, you can allow your customers to filter their search by their preferred options, making the shopping process smoother.
Here are a few examples of common product attributes:
- Size: S, M, L, XL
- Color: Red, Blue, Green
- Material: Cotton, Polyester, Wool
One of the best things about WooCommerce is its flexibility. You can create global attributes that can be reused across multiple products, or you can set specific attributes for individual items. Not only does this save time, but it also keeps your store organized. In short, product attributes are an essential tool to improve your eCommerce experience, allowing both store owners and customers to navigate the shopping landscape with ease.
How to Restrict Quantity Per Product Attribute
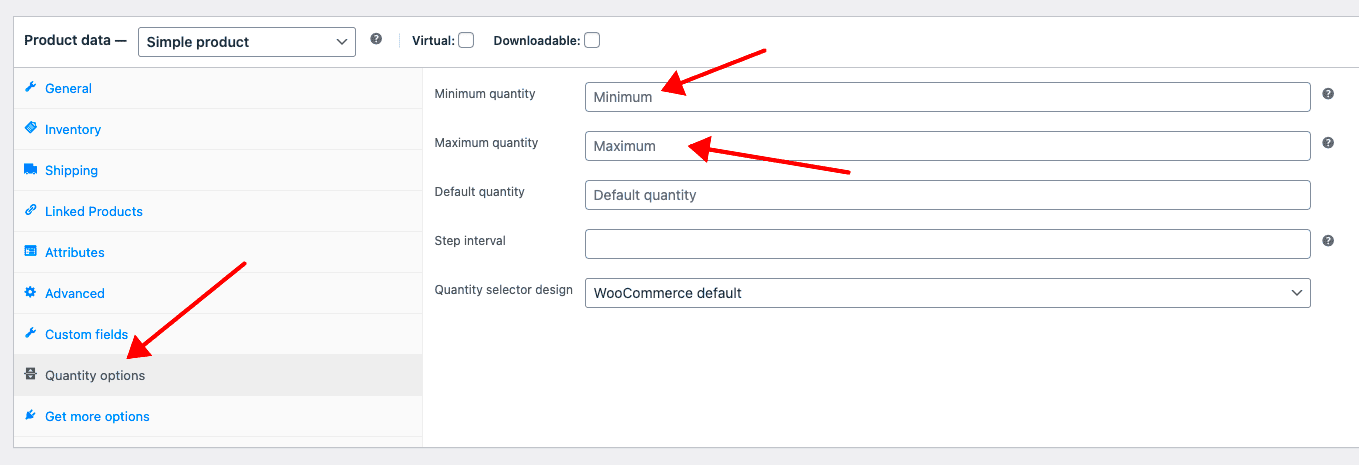
Now that we understand the significance of WooCommerce product attributes, let’s dive into how you can take it a step further by restricting the quantity of products purchased based on these attributes. This feature is particularly useful in preventing stockouts on popular items and managing your inventory better.
Imagine this: you have a limited number of a certain color or size of a product. To ensure fairness and reduce the chances of someone buying out all the stock, you can set up restrictions. Here’s how you can do that:
- Install a Plugin: The easiest way to implement quantity restrictions is through a dedicated plugin. Popular options include WooCommerce Wholesale Prices or WooCommerce Product Add-Ons.
- Configure the Plugin: After installation, navigate to the plugin settings. Most plugins will have specific tabs for setting product quantities based on attributes.
- Select Your Products: Choose the products for which you want to restrict quantities. Highlight important attributes like color or size during the configuration.
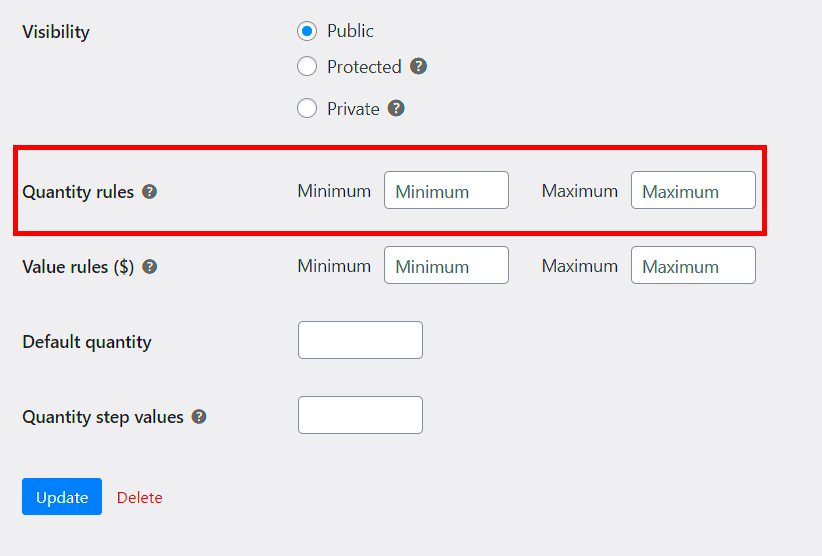
- Set Quantity Limits: Enter the maximum allowable quantities for each selected attribute. This can be done per user role or overall, depending on your business strategy.
- Test Functionality: After configuration, perform a few test purchases to ensure everything is working as expected!
Restricting quantities per product attribute not only helps you maintain stock control but also builds a sense of fairness among your customers. No one wants to see their favorite item snapped up in bulk by someone else! So go ahead and leverage this feature to enhance your WooCommerce store’s efficiency and customer satisfaction.
Step-by-Step Guide to Implementing Quantity Restrictions
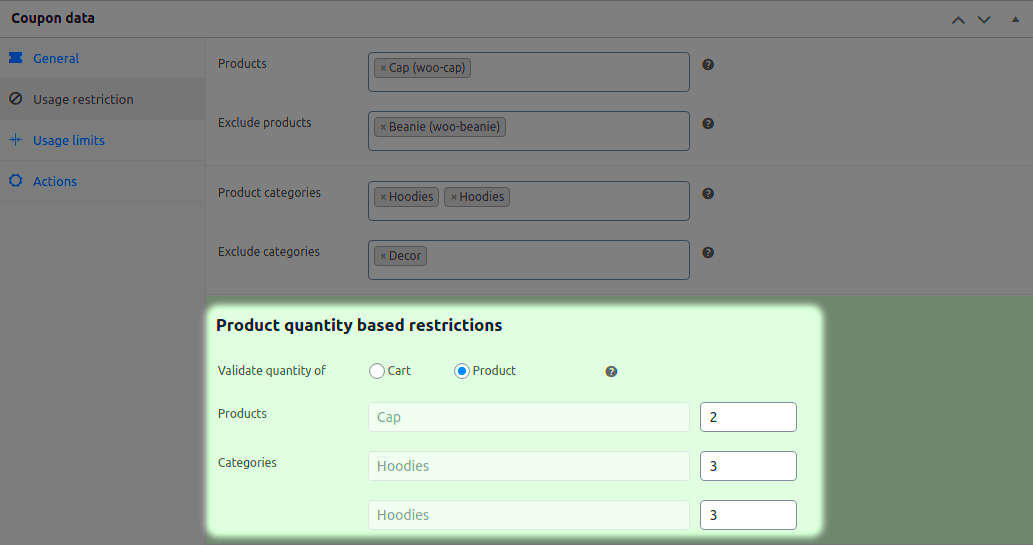
Implementing quantity restrictions for products in WooCommerce can seem a bit daunting at first, but I’m here to walk you through it with a simple, step-by-step guide. Just follow these easy instructions and you’ll have those quantity limits in place in no time!
- Log into Your WordPress Dashboard:
Start by logging into your WordPress website. From your dashboard, navigate to the WooCommerce settings to get started.
- Select the Product:
Next, go to the “Products” section. Here, you will find a list of all your products. Choose the product you want to set quantity restrictions for and click “Edit.”
- Go to Product Data:
Scroll down to the “Product Data” section. If you’re using the standard WooCommerce product settings, you’ll see a tab for “Inventory.”
- Set Stock Quantity:
In the Inventory tab, you can set the stock quantity. If you want to limit how much can be purchased at once, you’ll need to check the “Sold Individually” option.
- Use a Plugin for Advanced Limits:
If you want more control over the quantity limits, consider using a plugin. Some popular options include WooCommerce Min/Max Quantities and WooCommerce Product Add-Ons. Install and activate the plugin, then follow its instructions for setting up quantity restrictions.
- Save Changes:
Don’t forget to click “Update” to save your changes! This ensures that your quantity restrictions are live on your product page.
And there you have it! Following these simple steps, you can easily implement quantity restrictions on your WooCommerce products.
Testing the Quantity Restrictions
Once you’ve set up quantity restrictions in WooCommerce, it’s crucial to test them to ensure everything works smoothly. Here’s a straightforward approach to effectively test those restrictions.
- Access the Product Page:
Start by navigating to the product page where you implemented the restrictions. This should be easily accessible from your shop page or through the dashboard.
- Select a Quantity:
Attempt to select a quantity above the limit you set. For instance, if you capped it at three, try entering four and see how the system reacts.
- Add to Cart:
Click on the “Add to Cart” button. If the restrictions are in place correctly, the system should either prevent you from adding that quantity or display a message indicating the limit.
- Adjust Quantity:
Next, try adding the maximum allowed quantity. Ensure that this works without errors and that the correct number of items shows up in the cart.
- Check Cart Summary:
Proceed to the cart page. Verify that the quantities match what you set and check to see if the same restrictions are visible during checkout.
- Browser Testing:
It’s also a good idea to test using different browsers or devices. This will help ensure a seamless experience for all users regardless of how they access your store.
By following these steps, you can confidently test the quantity restrictions you’ve put in place, ensuring a smooth experience for you and your customers!
Common Issues and Troubleshooting
When it comes to managing product quantities in WooCommerce, you might encounter a few hiccups along the way. But don’t worry, many of these issues are common and have straightforward solutions. Understanding these problems can save you time and hassle.
Here are some typical issues you might face:
- Inconsistent Quantity Limits: Sometimes the quantity limits you set don’t appear to apply correctly on the front end. This usually happens if caching plugins are in play. Clearing your cache can often resolve this.
- Product Attributes Not Responding: You might set quantity restrictions based on product attributes, yet they don’t seem to apply. Double-check your settings in the product data section. Ensure that the attributes are linked correctly to the variations.
- Conflict with Other Plugins: If you’ve installed multiple plugins that manage inventory or pricing, conflicts may arise. Disable other plugins temporarily to see if the issues persist. If they resolve, re-enable them one at a time to identify the culprit.
- Theme Compatibility Issues: Sometimes, the theme you’re using might not fully support the quantity restrictions you’ve set. Switching to a default theme like Storefront can help you determine if your theme is the cause.
If you encounter any of these issues, check the WooCommerce documentation or forums. The support community is vibrant and can offer insights that can help you troubleshoot effectively.
Additional Plugins for Enhanced Quantity Management
If you’re looking to take your quantity management in WooCommerce to the next level, several plugins can enhance your experience. These tools not only provide better control over product quantities but also add features that can significantly improve your store’s functionality.
Here are some recommended plugins:
| Plugin Name | Description | Key Features |
|---|---|---|
| WooCommerce Min/Max Quantities | This plugin allows you to set minimum and maximum quantity settings for each product. | – Set precise limits per product – Customizable notifications for users |
| Purchase Quantity for WooCommerce | Enhances your store by allowing you to set different purchase quantities for products or variations. | – Introductory quantity discounts – User-friendly interfaces |
| Quantity Manager for WooCommerce | A robust plugin that provides options for managing product stock levels effectively. | – Advanced stock control – Bulk editing capabilities |
By integrating these plugins, you can create a shopping environment that suits your business needs while enhancing customer experience. Always ensure that any plugins you choose are compatible with your current WooCommerce setup to avoid conflicts.
Conclusion
In the world of eCommerce, flexibility and control over product attributes are vital for optimizing sales and managing inventory effectively. By implementing quantity restrictions per product attribute in WooCommerce, you’re not just enhancing your store’s functionality, but you’re also creating a better shopping experience for your customers. This feature helps in addressing several scenarios—be it limiting the purchase of popular items to ensure a wider distribution among customers or managing stock levels more effectively with variations that may come in different attributes such as size or color.
To sum up, restricting quantities per product attribute can lead to:
- Enhanced Inventory Control: Monitor your stock levels better and avoid running out of items.
- Increased Fairness: Ensure that all customers have a fair chance to purchase popular items.
- Improved Customer Satisfaction: Tailor shopping experiences based on customer behavior and preferences.
As you take the leap to implement this feature, keep in mind that communication is key. Make sure your customers are aware of any restrictions in place, and consider using engaging notifications on product pages to clarify these limits. In conclusion, adopting quantity restrictions in WooCommerce is not just a technical adjustment, but a strategic move that can lead to happier customers and more robust operations. Happy selling!
Further Reading and Resources
If you found this guide helpful and want to dive deeper into WooCommerce and its myriad features, you’re in the right place! There are plenty of resources available to help you enhance your online store’s performance and functionality. Here are some recommended resources:
- WooCommerce Documentation – Official documentation covers everything from basics to advanced features that can help you maximize your store.
- WooCommerce Extensions – Discover various plugins that can add unique functionalities to your store, including quantity restrictions and much more.
- WPBeginner’s WooCommerce Guide – A comprehensive resource for beginners looking to get started with WooCommerce.
- WooCommerce Product Extensions – Explore product-specific extensions tailored to add unique attributes and restrictions.
- YouTube Tutorials – Visual learners will find a plethora of videos dedicated to exploring WooCommerce features and enhancing your online store.
With the right knowledge and tools, you can ensure that your WooCommerce store does not just survive, but thrives!

