If you’re looking to create a stunning website without diving deep into code, Elementor might just be your best friend. This powerful page builder plugin for WordPress helps you design professional-looking websites with ease. With a simple drag-and-drop interface, you can create custom layouts, add various elements, and make your vision come to life in no time. In this post, we’ll explore what Elementor is, its benefits, and how you can get started using it to enhance your WordPress experience.
What is Elementor?
Elementor is a popular, feature-rich WordPress page builder that allows users to design functional and visually appealing websites without needing extensive coding knowledge. It offers a user-friendly experience, catering to both beginners and experienced web designers. Here’s a closer look at what makes Elementor stand out:
- Drag-and-Drop Interface: The core benefit of Elementor is its intuitive drag-and-drop interface. You can easily add, remove, and rearrange elements on your page with just a few clicks.
- Built-In Widgets: Elementor comes with a wide variety of pre-designed widgets, including text boxes, image galleries, headings, buttons, and more. You can combine these elements to create complex layouts.
- Responsive Design: You can customize how your website looks on different devices. Elementor offers responsive design options, ensuring your site looks great on desktops, tablets, and smartphones.
- Templates and Blocks: Elementor provides numerous templates and blocks that you can use as starting points for your designs. This helps to save time and spark creativity while building your website.
- Custom CSS: For those who are a bit more tech-savvy, Elementor allows the addition of custom CSS, giving greater control over styling and design.
Whether you’re a small business owner, a freelancer, or a blogger, Elementor can help you transform your digital presence. Ready to dive in? Let’s get started with the basics of using Elementor in your WordPress site!
Why Choose Elementor for Your WordPress Site?
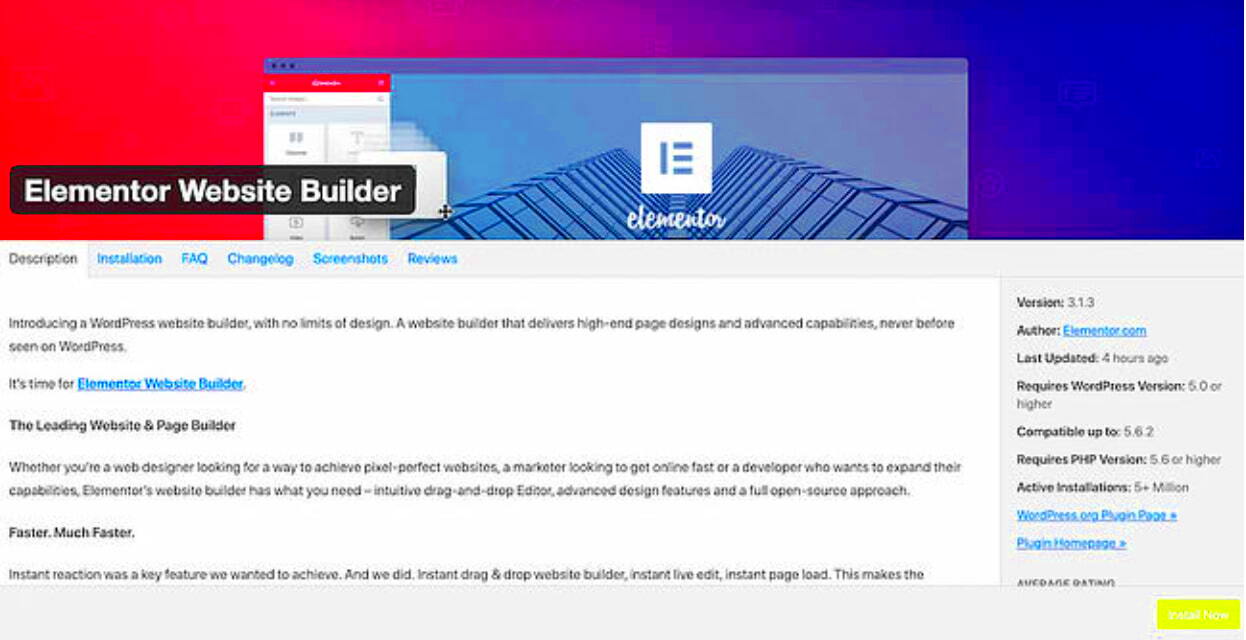
When it comes to building a WordPress site, you have many options. However, Elementor stands out as one of the most popular page builders available today. Let’s dive into why you should consider using Elementor for your WordPress website:
- User-Friendly Interface: Elementor features a drag-and-drop interface that makes designing your site as easy as pie! With no coding knowledge required, it allows users of all skill levels to craft beautiful web pages effortlessly.
- Responsive Design: Today’s internet users access sites from various devices. Elementor ensures that your site looks stunning on every screen size, offering tools to adjust your design according to mobile, tablet, and desktop formats.
- Wide Range of Widgets: Elementor comes packed with a plethora of widgets. Be it buttons, forms, sliders, or testimonials, you’ll find everything you need to create interactive elements on your site.
- Theme Builder Feature: Elementor’s Theme Builder allows you to create headers, footers, and even archive pages. This means you have full creative control over your entire site, not just the posts and pages.
- Pre-Made Templates: If you’re short on time or inspiration, Elementor offers an extensive library of pre-designed templates. These templates can be customized to match your brand without having to start from scratch.
- Live Editing: With Elementor, what you see is what you get (WYSIWYG). You can preview all changes in real-time, giving you immediate insight into your design adjustments.
Whether you’re a beginner or a seasoned pro, Elementor provides the perfect blend of ease and functionality, making it an excellent choice for any WordPress site!
Installing Elementor on Your WordPress Site
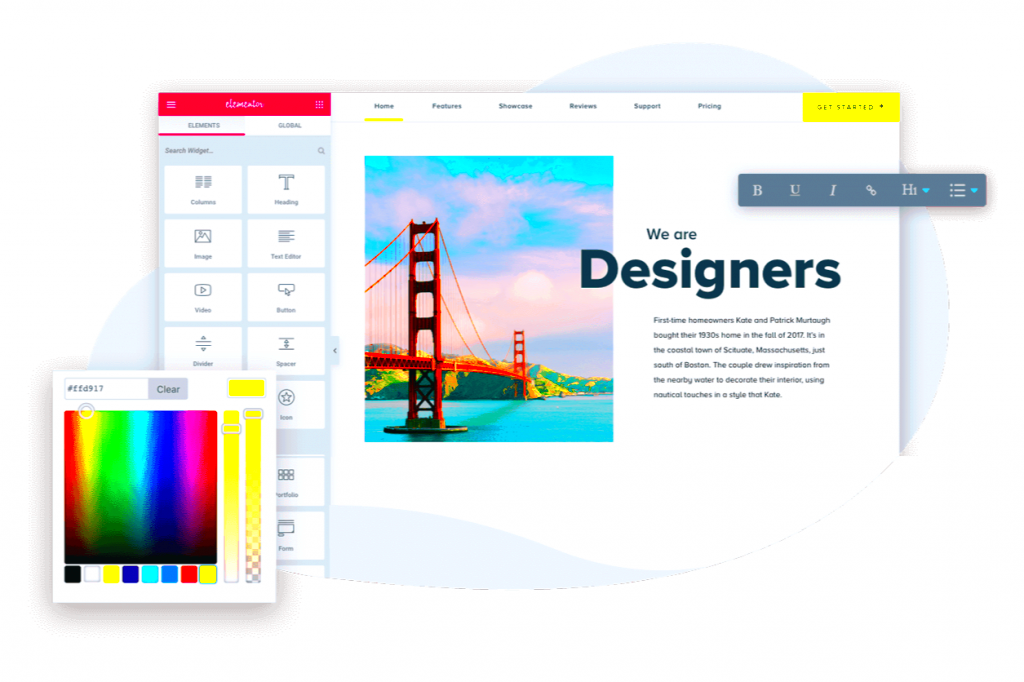
Ready to unlock the power of Elementor? Installing it on your WordPress site is super straightforward. Follow these steps to get started:
- Log into Your WordPress Dashboard: First things first, you need to access your WordPress admin area. Just go to
www.yoursite.com/wp-adminand log in with your credentials. - Navigate to Plugins: On your dashboard, find the left sidebar. Look for the “Plugins” menu and click on it, then select “Add New.” This is where you can find all the cool plugins you need.
- Search for Elementor: In the search bar located at the top right, type in “Elementor.” You’ll see the Elementor Page Builder plugin pop up in the search results.
- Install the Plugin: Click on the “Install Now” button next to the Elementor plugin. WordPress will handle the rest and take a few moments to install it.
- Activate Elementor: After installation, the “Install Now” button will change to an “Activate” button. Click on that to activate Elementor on your site.
Voila! You’ve now installed Elementor on your WordPress site. You can start creating stunning pages right away. Isn’t that exciting?
Getting Started with Elementor: The Basics
Jumping into the world of Elementor is like stepping into a powerful tool that can transform your WordPress site from ordinary to extraordinary. If you’re new to this fantastic page builder, don’t worry! We’re here to guide you through the basics.
First things first, you’ll need to install the Elementor plugin on your WordPress site. Just follow these steps:
- Log in to your WordPress dashboard.
- Go to Plugins and click on “Add New.”
- Search for “Elementor” in the search bar.
- Click “Install Now,” and once installed, hit “Activate.”
With Elementor activated, you can start creating stunning pages. Here’s how:
- Navigate to “Pages” in your dashboard and click “Add New.”
- You’ll see a button labeled “Edit with Elementor.” Click it to enter the Elementor editor.
- Now you’re in the visual editor where you can drag and drop elements to create your layout.
Elementor offers a wide variety of widgets to enhance your design, including text, images, buttons, and much more. You can customize these elements easily to fit your vision. Don’t forget to save your changes regularly!
Finally, once you’re satisfied with your design, you can preview your page. If everything looks good, hit the “Publish” button, and voilà! Your first Elementor page is live. Remember, experimentation is key, so don’t hesitate to play around with different features and settings!
Exploring the Elementor Interface
Now that you’ve dipped your toes into Elementor, let’s dive deeper and explore its interface. Understanding the layout of the Elementor editor is crucial for unleashing your creativity effectively.
When you first enter the Elementor editor, you’ll notice three main sections: the editing area, the sidebar (widget panel), and the bottom panel. Each part plays a unique role:
- Editing Area: This is where the magic happens. You’ll see your live page here and can manipulate each element in real-time.
- Sidebar (Widget Panel): On the left, you’ll find a variety of widgets organized into categories like Basic, General, WordPress, and more. Just drag your desired widget onto the editing area to get started!
- Bottom Panel: This panel includes options for responsive settings, global settings, and more. You can also find the “Publish” and “Preview” buttons here to save and view your work.
Additionally, Elementor offers a handy Navigator feature that allows you to see a hierarchical view of all elements on your page. Just click the navigator icon in the bottom panel to open it up. It’s a great way to manage complex layouts!
| Feature | Description |
|---|---|
| Widgets | Drag-and-drop elements used to build your layout. |
| Sections & Columns | Structure your layout with customizable sections and columns. |
| Responsive Editing | Optimize your design for different devices with a click of a button. |
By familiarizing yourself with the Elementor interface, you’ll be well on your way to creating impressive layouts tailored exactly to your needs. So let’s get designing!
Creating Your First Page with Elementor
Creating your first page with Elementor is an exciting adventure, especially if you’re eager to design a stunning website. Let’s dive into the process step by step, ensuring you have everything you need to get started!
First off, make sure the Elementor plugin is installed and activated on your WordPress site. If you haven’t done this yet, head over to your dashboard, click on ‘Plugins’, then ‘Add New’, and search for Elementor. Once installed, activate it, and you’re ready to roll!
To create your first page, navigate to ‘Pages’ in the WordPress dashboard, and click on ‘Add New’. You’ll see a prompt to edit the page with Elementor. Click that button, and you’ll be taken to the elegant Elementor editing interface, a canvas where your creativity will shine!
Now, let’s build your page:
- Choose a Layout: Before adding elements, decide the layout of your page. You can use one of the pre-designed templates or start from scratch.
- Add Sections: Elements in Elementor are grouped into sections. Add a new section by clicking the ‘+’ icon, then select the column structure that best fits your design.
- Insert Widgets: With your sections in place, it’s time to add content. Drag and drop widgets from the left sidebar into your sections. Whether it’s text, images, or buttons, the choices are plenty!
- Customize: Click on any widget to customize its style, layout, and advanced settings. Remember to preview your changes as you go to see how fantastic it looks!
- Publish: Once happy with your design, hit the ‘Publish’ button, and voilà! Your first Elementor page is live.
Creating your first page with Elementor is as simple as that! Have fun experimenting with different layouts and styles—they’re just a click away!
Using Elementor Widgets and Sections
Understanding how to use Elementor widgets and sections is the key to crafting beautiful, functional web pages that engage visitors. So, let’s unravel the magic behind these essential tools!
In Elementor, a section acts as a container for all your content. You’ll often start by adding a section to your page, which can then be customized in various ways to fit your vision. Here’s how sections work:
- Adding a Section: Click on the ‘+’ icon to create a new section. You’ll see options for choosing the column structure, from a single column to multiple columns.
- Editing Sections: Click on the section to access its settings. From there, you can adjust the layout, style, background, and even add advanced options like motion effects.
Now onto widgets. Widgets are the building blocks of your design, packed with functionality for various content types. Here’s a brief overview of how to use them:
- Choosing Widgets: From the Elementor sidebar, you’ll find an impressive library of widgets—everything from text editors, headings, and images to buttons, maps, and social icons.
- Dragging and Dropping: To add a widget, simply drag it from the sidebar and drop it into your chosen section or column. It’s as easy as that!
- Customizing Widgets: Once placed, click on the widget to tweak its settings. You can modify its content, style it to match your brand, and even add custom CSS for that extra flair.
To really understand how to make the most out of Elementor, start experimenting with different combinations. The beauty of Elementor lies in its flexibility—don’t be afraid to play around and find what resonates with you!
Customizing Your Design with Elementor
One of the incredible features of Elementor is the way it allows you to customize your website’s design effortlessly. Whether you’re a complete newbie or a seasoned web designer, the drag-and-drop interface is intuitive and user-friendly, making it a breeze to create stunning layouts.
To start customizing, you can choose from various elements known as “widgets.” Here are some popular widgets:
- Text Editor: For adding paragraphs or headings.
- Image: Perfect for incorporating visuals to boost engagement.
- Button: Helps to create call-to-action buttons.
- Video: Embed videos directly into your layout.
- Forms: A vital tool for collecting user information.
Each widget comes with a variety of settings you can tweak. For example, you can adjust padding, margins, typography, and colors with just a few clicks. Don’t hesitate to experiment with backgrounds and borders! In Elementor, you can also apply global settings to maintain consistency across your site. For instance, once you set a specific font and color scheme, those choices can be applied site-wide.
For more advanced customization, you can use the Custom CSS feature available in the pro version. This gives you even greater control over your design, allowing you to further refine styles beyond the standard options.
Lastly, don’t forget about the responsive settings. This feature lets you adjust how your design looks on different devices, ensuring a seamless experience for your audience. Remember, a well-designed website is not just about aesthetics; functionality and user experience are crucial too!
Responsive Design in Elementor
In today’s world, mobile traffic dominates, which makes responsive design essential for any website. Elementor shines in this regard, offering various tools to ensure your site looks stunning across all devices—be it a desktop, tablet, or smartphone.
First, let’s talk about the responsive editing feature in Elementor. This lets you visually adjust how each section and widget appears on different screen sizes. You can access this feature by clicking on the responsive mode icon. You’ll get a preview of how your design looks on different devices without having to leave the editor!
Elementor provides several options for customizing your design across devices:
- Hide/Show Elements: You can choose to hide or show specific sections on certain devices. This is helpful if a particular element doesn’t translate well on mobile.
- Custom Breakpoints: Elementor allows you to adjust the breakpoints, so you can fine-tune how your design reacts when the screen size changes.
- Margins and Padding Adjustments: You can set unique margins and padding for different devices, ensuring there’s no awkward spacing.
- Text Size Adjustments: Make sure your text is readable on smaller screens by adjusting font sizes accordingly.
Once you’ve made your adjustments, it’s prudent to preview your work. The Preview Changes option shows how your site will look live. Testing your design on actual devices is also recommended, as that’s where your visitors will experience your site.
By prioritizing responsive design in Elementor, you’re not just enhancing aesthetics; you’re improving usability, which is key to retaining visitors and driving conversions. After all, happy users are more likely to engage and return!
11. Advanced Features of Elementor
If you’re looking to take your WordPress website to the next level, mastering the advanced features of Elementor is a must. Elementor is a versatile page builder that not only helps you design stunning pages but also enhances your site’s functionality. Here are some of the standout advanced features:
- Theme Builder: With the theme builder, you can design your entire WordPress site, including headers, footers, and archive pages, all without writing a single line of code. This feature allows for complete customization across every aspect of your design.
- Dynamic Content: Elementor enables you to use dynamic content, bringing your designs to life with data from your posts, custom fields, or user profiles. This is particularly beneficial for creating templates that display different content based on the user’s interaction or data.
- Custom CSS: For those with a bit of tech-savvy, adding custom CSS directly within Elementor is a game changer. You can fine-tune your designs with precision, ensuring that everything looks exactly as you envisioned.
- Responsive Design Controls: Making your website mobile-friendly is essential. Elementor offers dedicated controls for responsive design, allowing you to adjust settings for different screen sizes quickly and easily.
- Advanced Motion Effects: Captivate your visitors by adding sophisticated motion effects like scrolling effects, mouse effects, and entrance animations. These features can enrich the user experience, making your website feel dynamic and engaging.
By harnessing these advanced features, you can create a unique and professional-looking website that stands out from the crowd. The learning curve might seem steep at first, but with a little practice, you’ll find that Elementor’s advanced capabilities can effortlessly elevate your design game.
12. Integrating Elementor with Other Plugins
One of the most powerful aspects of Elementor is its ability to integrate seamlessly with a multitude of other plugins. This means you can extend its functionality and tailor your website to meet your specific needs. Here’s how to effectively integrate Elementor with some popular plugins:
| Plugin Name | Integration Method | Benefits |
|---|---|---|
| Astra | Activate Astra theme and customize using Elementor. | Lightweight, SEO-friendly, and custom layouts. |
| WooCommerce | Use WooCommerce widgets for product layout. | Create stunning online stores with drag-and-drop ease. |
| Advanced Custom Fields (ACF) | Link ACF fields with Elementor dynamic content. | Display custom post types and fields effectively. |
| Yoast SEO | Optimize pages for SEO within Elementor. | Boost site visibility with easy SEO management. |
Integrating Elementor with these plugins not only enhances functionality but also improves user experience. For instance, if you’re leveraging WooCommerce, your product pages can be transformed into an eye-catching online shop, engaging customers more effectively. Likewise, tools like ACF allow you to innovate with custom fields while maintaining the flexibility of Elementor.
Integrating with a range of plugins ensures that you can build a site tailored specifically to your audience’s needs. Take the time to explore these options, and you will find that the real power of Elementor lies in its versatility and integrations!
Common Issues and Troubleshooting Tips
As with any powerful tool, using Elementor in WordPress can sometimes come with its share of challenges. Whether you’re facing minor glitches or more significant concerns, knowing how to troubleshoot effectively can save you a lot of time and frustration. Let’s take a look at some of the common issues users encounter and how to resolve them.
1. Elementor Not Loading
This is often a common complaint. If you find that the Elementor editor isn’t loading, try the following:
- Clear Your Cache: Browser and server cache can sometimes conflict with new updates. Clear both and try again.
- Disable Plugins: Conflicts with other plugins can cause loading issues. Temporarily disable them to see if that helps.
- Check PHP Version: Ensure your hosting provider is offering a compatible PHP version (at least 7.0 or higher).
2. Preview Changes Not Reflecting
If you’ve made changes, but they’re not appearing on the live site, consider these steps:
- Update and Save: Ensure that changes are saved properly and that you’re viewing the most current version of your site.
- Flush Caches: Both browser and site cache can prevent you from seeing updates.
3. Compatibility Issues
If you’re experiencing layout problems, it might be due to a theme or plugin conflict:
- Switch to a Default Theme: Temporarily switch to a WordPress default theme like Twenty Twenty-One to see if the issue persists.
- Inspect Console Errors: Use your browser’s developer tools to check for JavaScript errors that might indicate a specific problem.
Many issues can be resolved with these simple troubleshooting techniques. Don’t forget to check out Elementor’s support forums and documentation for more tailored solutions!
Conclusion and Next Steps
Learning how to use Elementor in WordPress is both empowering and rewarding. Now that you have a solid foundation, it’s time to harness the full potential of this incredible tool. Whether you’re building your first website or refining an existing one, Elementor offers the flexibility and creativity you need.
As we wrap up, here are some actionable steps you can take:
- Practice Regularly: The best way to get comfortable with Elementor is through practice. Spend some time experimenting with different widgets and features.
- Explore Templates: Elementor provides a wide range of pre-designed templates. Use them as a starting point or inspiration for your creations.
- Join the Community: Engage with community forums, Facebook groups, or local meetups. Sharing experiences and insights can greatly enhance your learning.
- Stay Updated: Elementor frequently updates its features. Subscribe to newsletters or follow relevant blogs to stay on top of the latest developments.
Finally, don’t hesitate to reach out for help when needed. The vast community and support options available can make a big difference in your WordPress journey with Elementor. Now, go ahead and let your creativity shine!

