Integrating Google Maps with a form address dropdown in Elementor can be a game changer for your website. Imagine your users effortlessly selecting their location without needing to type it out. Not only does it enhance the user experience, but it also streamlines the data collection process. In this post, we will guide you through the entire setup, making it easy and straightforward—even if you’re not a tech wizard!
What You Need Before Starting

Before diving into the integration process, it’s important to gather a few essentials. Having the right tools and resources at your disposal will ensure a smooth and successful setup. Here’s what you’ll need:
- Elementor Plugin: You’ll need to have the Elementor page builder installed on your WordPress website. Make sure you’re using the latest version to access the newest features.
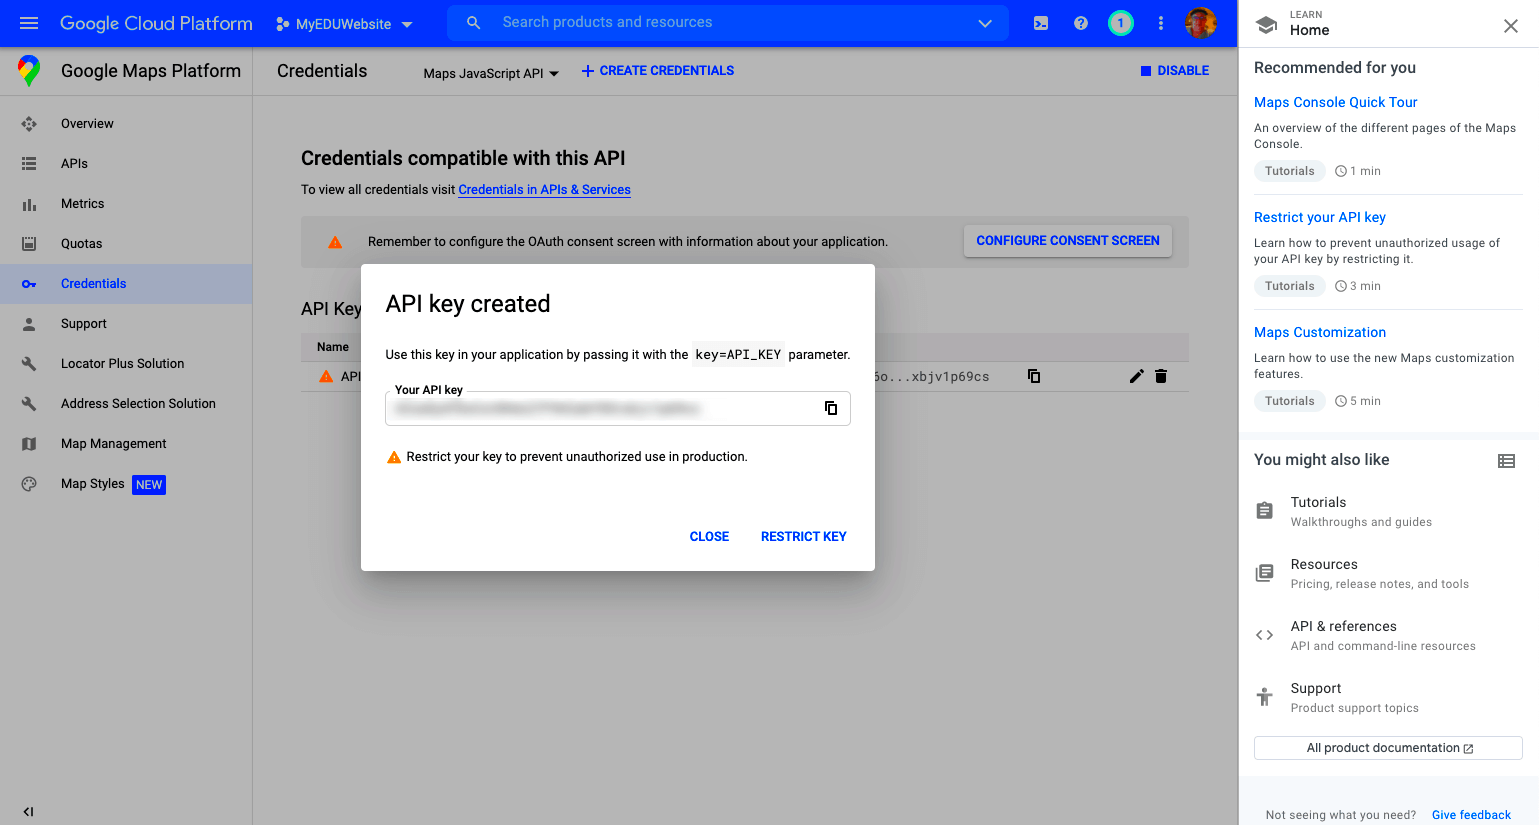
- Google Maps API Key: This is critical! You can generate an API key by visiting the Google Cloud Platform. Don’t worry, it’s free for basic use. Just follow these steps:
| Step | Description |
|---|---|
| 1 | Create a Google Cloud account if you don’t have one. |
| 2 | Enable the Google Maps JavaScript API and Places API. |
| 3 | Create an API key and copy it for later use. |
- Elementor Add-ons: Some add-ons can enhance functionality! Consider plugins like ‘Elementor Pro’ or ‘Essential Addons’ for added features.
- Basic HTML/CSS Knowledge: While not mandatory, a little understanding of HTML and CSS will help you tweak the design if needed.
Once you have these essentials, you’ll be ready to start integrating Google Maps with your Elementor form address dropdown!
Setting Up Google Maps API

Integrating Google Maps with your website starts with setting up the Google Maps API. This is a vital step that allows your website to access Google’s mapping services. Let’s break it down into manageable steps:
- Create a Google Cloud Account: If you don’t already have a Google Cloud account, head over to the Google Cloud Platform and sign up. It’s straightforward and typically requires just your email and a password.
- Enable the Google Maps JavaScript API: Once your account is set up, navigate to the API & Services dashboard. Here, you’ll find the option to Enable APIs and Services. Search for “Maps JavaScript API” and enable it.
- Get Your API Key: After enabling the API, you’ll need to create your authentication credentials in the form of an API key. Go to Credentials > Create Credentials > API Key. Keep this key private, as it’s necessary for your integration.
- Restrict Your API Key: To keep your project secure, consider setting restrictions for your API key. You can restrict it by IP addresses, HTTP referrers (websites), or specific APIs that can use the key.
- Test Your API Key: Before moving forward, testing your API key is essential. You can do this with a simple HTML file that includes the Maps JavaScript API to ensure everything is working smoothly.
Once you’ve set up your Google Maps API and obtained the API key, you’re ready to move on to the next step: creating an address dropdown in Elementor!
Creating an Address Dropdown in Elementor
Now that you have your Google Maps API set up, let’s dive into creating an address dropdown in Elementor. This feature enhances user experience by allowing users to select their address from a pre-populated list, which can reduce errors and improve accuracy. Here’s how to do it:
- Open Elementor: First, navigate to the page or post where you want to add the address dropdown. Open the Elementor editor to start customizing your layout.
- Drag and Drop the Form Widget: From the Elementor panel on the left, locate the Form widget. Drag and drop it onto your desired section of the page.
- Add a Dropdown Field: In the form settings, click on Add Item. Set the type to Dropdown and label it something user-friendly, like “Select Your Address.”
- Integrate Google Maps for Suggestions: You’ll have to add a bit of custom JavaScript for fetching addresses from the Google Maps API. A simple approach would be using the
autocompletefeature provided by the Google Maps API. - Customizing the Dropdown: Make sure to customize the options that will populate the dropdown. You can even set default placeholders, and styles to match your site’s theme.
Once you’ve set up the dropdown, you can preview the page to check how it looks. Users will appreciate the convenience of selecting their address right from a dropdown list, making their experience much smoother.
Integrating Google Maps with the Address Dropdown
Integrating Google Maps with an address dropdown in Elementor can significantly enhance the user experience on your website. By providing visitors with an interactive map alongside an address selection feature, you not only help them find directions but also streamline the process of inputting their address. This integration can be particularly useful for businesses that rely on local customers or service areas.
First off, you’ll need to ensure you have the Google Maps API enabled. Here’s how to get started:
- Create a Google Cloud account if you don’t have one.
- Navigate to the Google Maps Platform and enable the API.
- Obtain your API key and keep it secure; this key will allow your website to request data from Google Maps.
Once you have the API key, you can start the integration:
- Use Elementor’s HTML widget to add your custom code.
- Create an address dropdown using the Elementor Dropdown widget, where users can select their addresses.
- Write a JavaScript function that listens for a dropdown change event to update the Google Map location based on the selected address.
By setting up this integration, you not only provide a user-friendly interface but also a responsive method for locating addresses in real-time. Users can navigate easily, making for a more efficient web experience.
Customizing the Map Display
Customizing your map’s display can significantly influence user engagement. Google Maps offers a variety of options to tailor the appearance and functionality of your map to better align with your site’s design and user needs. Here’s how you can take advantage of these customization options:
First, focus on the following key elements:
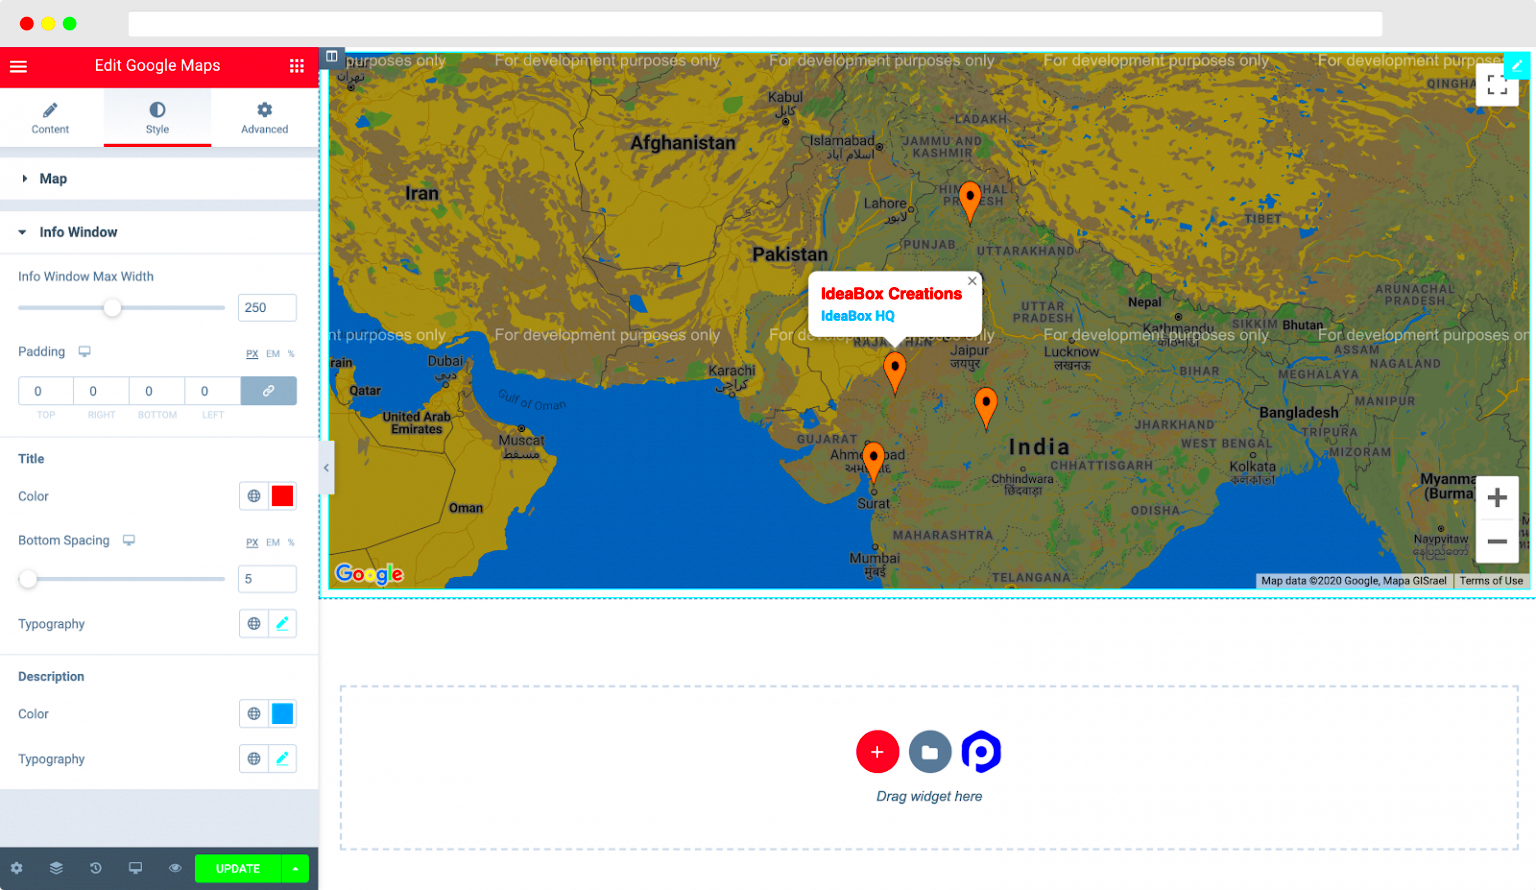
- Map Style: Choose from different map styles such as retro, silver, or standard to fit your branding. You can also create a custom style using tools like Snazzy Maps.
- Marker Icons: Customize your map markers by using unique icons that can represent your business or service locations, making it easier for users to identify points of interest.
- Zoom Levels: Adjust the initial zoom level depending on how detailed you want the map to be. A closer view can be useful for neighborhood maps, while a wider view may be better for showing greater areas.
Moreover, you can include interactivity:
| Feature | Description |
|---|---|
| Info Windows | Add informative pop-ups that display when users click on markers, offering additional details or links. |
| Directions | Integrate a directions feature that allows users to get navigational guidelines from their selected address to the desired location. |
By taking the time to customize your Google Map, you enhance usability and create a visually appealing interface that can make a lasting impression on your visitors. This added personalization can be a win-win for both you and your users!
Testing the Integration
Once you’ve successfully set up Google Maps with your Form Address Dropdown in Elementor, it’s crucial to test the integration to ensure everything works smoothly. Testing is your chance to spot any issues before your users do, making sure they have a seamless experience.
Here’s a simple step-by-step process for thoroughly testing your integration:
- Open Your Website: Navigate to the page where you’ve added the form with the address dropdown.
- Select an Address: Click on the dropdown to see if the addresses populate correctly from Google Maps. Ensure they are relevant and accurate.
- Fill Out the Form: Enter the necessary details and submit the form. Pay attention to how the dropdown behaves when you start typing an address.
- Check for Errors: After submission, see if the data has been processed correctly. You can do this by checking your emails or backend forms. Look out for error messages or validation issues that might pop up.
- Test on Different Devices: Don’t forget to test the form on mobile, tablet, and desktop. The user experience can differ, so ensure it’s responsive and performs well across all devices.
By following this testing guide, you can identify and rectify any potential problems, ensuring your users have a hassle-free experience when filling out your forms.
Troubleshooting Common Issues
During the integration of Google Maps with your Form Address Dropdown in Elementor, you might encounter some typical issues. But don’t worry! We’re here to help you troubleshoot these problems.
Here are a few common issues and their possible solutions:
| Issue | Solution |
|---|---|
| Dropdown Not Populating | Check your Google Maps API key. Ensure it’s not restricted incorrectly and is enabled for the Places API. |
| Address Suggestions Are Inaccurate | Review your location settings in the Google Maps console. Make sure you’re using the right parameters for your dropdown. |
| Form Submission Errors | Double-check your form settings in Elementor. Ensure all fields are correctly configured and required fields are filled out. |
| API Quota Issues | If you’re hitting your API quota limits, consider upgrading your plan or optimizing your usage. |
By being proactive and addressing these common issues, you can ensure that your integration remains user-friendly and efficient.
Conclusion
Integrating Google Maps with a form address dropdown in Elementor can significantly enhance user experience on your website. By enabling users to select locations effortlessly, you not only streamline the input process but also minimize errors associated with manual entry. This approach effectively combines the power of Google Maps and the flexibility of Elementor, offering seamless navigation and addressing functionality.
Through this integration, you can ensure that:
- User Convenience: Users can easily select their address, saving time and minimizing frustration.
- Increased Accuracy: Reduces the risk of incorrect address inputs, which can save both you and your users hassle in the future.
- Enhanced Aesthetic: Elementor allows for a visually appealing setup that can match your site’s branding.
- Mobile-Friendly: This integration works smoothly on mobile devices, accommodating users on different platforms.
To summarize the integration steps:
| Step | Description |
|---|---|
| 1 | Set up Google Maps API key. |
| 2 | Install the necessary plugins in Elementor. |
| 3 | Create a custom address dropdown in Elementor forms. |
| 4 | Connect the form with Google Maps for address suggestions. |
| 5 | Test the functionality on multiple devices. |
By following these steps and leveraging Elementor’s capabilities, you will create a more interactive and efficient form experience for your users.


