Are you looking to showcase your products in a way that grabs attention and looks super professional? Shutterstock mockups are a game-changer! They’re pre-designed templates that let you display your designs, logos, or photos in real-life settings—think of a coffee mug with your logo or a smartphone showing your app. Using these mockups makes your presentations more appealing, saves you time, and helps clients or customers visualize the actual product. Whether you’re a designer, marketer, or small business owner, Shutterstock mockups are an easy and effective way to elevate your product displays without the hassle of creating everything from scratch.
How to Find High-Quality Shutterstock Mockups
Finding the perfect mockup can feel overwhelming with so many options out there, but Shutterstock makes it pretty straightforward. Here’s how you can find high-quality mockups that suit your needs:
- Use Specific Search Terms: Instead of just searching “mockup,” include details like the product type, style, or setting. For example, try “minimalist coffee mug mockup” or “urban smartphone mockup.”
- Filter Results: Shutterstock offers filters to narrow down your search by orientation, color, style, and even the file type (PSD, JPEG, etc.). Use these to find exactly what you need faster.
- Check the Resolution and File Quality: Always look for mockups with high resolution and layered PSD files. Layers let you easily replace your designs without hassle.
- Read the Descriptions and Reviews: Good mockups will have clear descriptions about what’s included. Reviews can also give you insights into how easy they are to use or if there are any issues.
- Preview Before Downloading: Take advantage of preview images to see how the mockup looks in different angles or settings. This helps ensure it matches your vision.
Once you’ve found a mockup that fits your project, download it and customize it using software like Adobe Photoshop. Remember, investing a little time in selecting high-quality mockups pays off in the final presentation—your product will look more polished and appealing to your audience!
Step-by-Step Instructions for Using Shutterstock Mockups in Your Projects
Getting started with Shutterstock mockups might seem a bit overwhelming at first, but once you understand the process, it’s pretty straightforward and super rewarding. Here’s a simple, step-by-step guide to help you incorporate these mockups seamlessly into your projects:
Step 1: Find the Perfect Mockup
Start by heading over to Shutterstock and searching for mockups that align with your product. Use keywords specific to what you’re showcasing — whether it’s a mug, a business card, a t-shirt, or a packaging design. You can filter results by orientation, style, or even color to narrow down options.
Step 2: Purchase and Download
Once you find the mockup you love, purchase it and download the high-resolution file. Most Shutterstock mockups come in PSD format, which means they’re layered files compatible with Adobe Photoshop. Make sure your software is ready for editing!
Step 3: Open the Mockup File
Open the downloaded PSD file in Photoshop. You’ll see various layers, often including smart objects, adjustment layers, and background options. Take some time to familiarize yourself with the layer panel — it’s your toolkit for customization.
Step 4: Insert Your Design
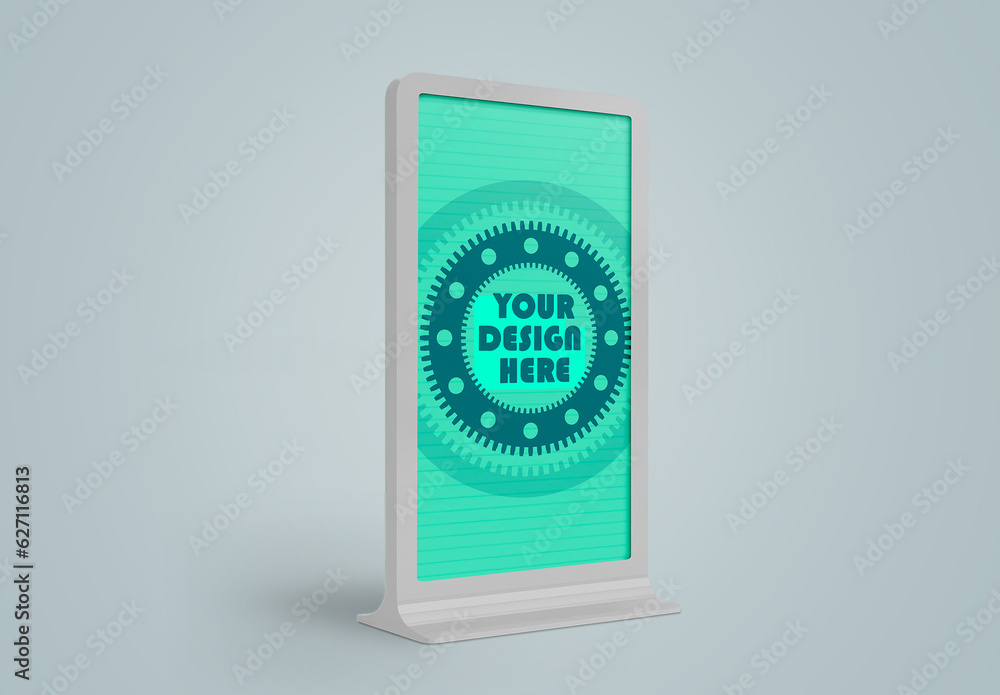
Locate the smart object layer — it’s usually labeled something like “Your Design Here” or “Place Logo/Design.” Double-click this layer thumbnail, and Photoshop will open a new window. Paste or create your artwork in this window, resize as needed, then save and close it.
Step 5: Adjust and Fine-Tune
Back in the main mockup file, your design should now appear perfectly on the product. Use adjustment layers, opacity controls, or filters to make sure the mockup looks natural and matches your vision. You can also change background colors or add shadows for extra realism.
Step 6: Export Your Final Image
Once you’re happy with how everything looks, save your finished mockup as a JPEG or PNG. Now you’re ready to showcase your product in marketing materials, social media posts, or client presentations!
And that’s it — a simple process that, with a bit of practice, becomes second nature. Mockups are a fantastic way to create professional-looking visuals without the need for complex photography or graphic design skills!
Tips for Customizing Mockups to Match Your Brand

Customizing mockups isn’t just about making the product look good — it’s about ensuring the visuals resonate with your brand identity and appeal to your target audience. Here are some friendly tips to help you tailor Shutterstock mockups to fit your unique style:
1. Match Colors and Themes
- Use consistent color schemes: Change background colors or product hues to align with your brand palette.
- Adjust lighting and shadows: Play with brightness and contrast to create a mood that reflects your brand personality.
2. Incorporate Your Branding Elements
- Add logos or taglines: Use the smart object technique to insert your logo or slogan directly onto the mockup.
- Use brand fonts and styles: When adding text, stick to your brand’s typography for consistency.
3. Personalize Backgrounds and Settings
Many mockups come with editable backgrounds. Change these to match your brand’s aesthetic — whether it’s a sleek modern office, a cozy home setting, or a vibrant outdoor scene. This helps your product feel authentic and relatable.
4. Use Consistent Style and Filters
Apply filters or effects that match your typical visual style. If your brand has a minimalist vibe, keep mockups clean and uncluttered. If you prefer a playful look, add some fun overlays or textures.
5. Keep it Real and Relatable
While customizing, aim for realism. Avoid over-editing or adding elements that distract from your product. Authentic, natural-looking mockups tend to connect better with viewers and potential customers.
6. Save Custom Templates
If you frequently showcase similar products, consider creating your own mockup templates. Save layered files with your brand-specific adjustments, so you can quickly swap out designs for future projects.
By following these tips, your mockups won’t just look professional — they’ll also tell your brand story in a compelling way. Remember, personalization is key to making your visuals stand out and truly connect with your audience!
Common Mistakes to Avoid When Using Mockups for Product Displays
Using mockups can be a game-changer for showcasing your products, but it’s easy to fall into some common traps that can diminish their effectiveness. Let’s chat about some pitfalls to watch out for so you can make the most of your mockup game.
1. Ignoring Image Quality: Nothing screams unprofessional like pixelated or blurry images. Always choose high-resolution mockups that look sharp and clear. If your mockup is blurry or pixelated, it’ll distract viewers and make your product seem less appealing.
2. Overcrowding the Mockup: Less is often more. Avoid cramming too many elements into your mockup. Keep it clean and focused on your product. A cluttered mockup can confuse viewers and dilute your message.
3. Using Inappropriate or Low-Quality Mockups: Not all mockups are created equal. Using outdated or poorly designed mockups can hurt your brand image. Invest in high-quality, professional mockups that match your product style.
4. Forgetting to Match the Mockup Style to Your Brand: Your mockup should reflect your brand’s personality. Whether it’s minimalistic, vibrant, or rustic, ensure the style aligns with your overall branding to create a cohesive look.
5. Not Customizing Mockups Enough: Some people just swap out the placeholder image and call it a day. But personalization can make a big difference. Adjust angles, backgrounds, or add subtle effects to make the mockup truly stand out and feel tailored to your product.
6. Ignoring Lighting and Shadows: Lighting can make or break your mockup. Ensure that shadows and lighting in the mockup match your product’s real-world appearance. Mismatched lighting can make the display look fake or disconnected.
7. Forgetting Mobile Optimization: With many people browsing on their phones, check how your mockups look on smaller screens. If they don’t scale well or become hard to see, you’re missing out on potential customers.
By avoiding these common mistakes, you’ll ensure your mockups serve as powerful tools that genuinely elevate your product displays and attract more customers.
Conclusion and Final Tips for Maximizing Mockup Effectiveness
Using mockups effectively can really boost your product presentation and help you stand out in a crowded marketplace. Here’s a quick wrap-up with some final tips to help you get the most bang for your buck:
- Choose the Right Mockups: Select mockups that fit your product style and target audience. Whether you’re selling tech gadgets, fashion, or home decor, the mockup should complement your brand.
- Focus on High Quality: Opt for high-resolution images and realistic lighting to make your products look as authentic as possible. This builds trust and professionalism.
- Customize Thoughtfully: Take the time to tweak mockups—adjust angles, backgrounds, and shadows—to make your product shine and feel natural within the scene.
- Maintain Consistency: Use a consistent style across all your mockups to create a cohesive visual brand. This helps in building brand recognition and professionalism.
- A/B Testing: Don’t be afraid to experiment with different mockup styles or layouts. See which ones resonate most with your audience and refine accordingly.
- Keep It Simple: Sometimes, a clean and straightforward mockup does the job better than a complicated one. Focus on highlighting your product without unnecessary distractions.
- Optimize for All Devices: Ensure your mockups look great on desktops, tablets, and smartphones. Responsive mockups can dramatically improve user experience.
Remember, the goal of using mockups is to showcase your product in the best possible light, enticing viewers to imagine owning or using it. With thoughtful selection, customization, and attention to detail, your mockups can become powerful marketing tools that drive engagement and sales.
If you stay aware of common pitfalls and follow these final tips, you’ll be well on your way to creating compelling product displays that truly resonate with your audience. Happy mockup creating!