Introduction to Imgur Image Hosting

Imgur is a popular image hosting platform that allows users to upload, store, and share photos easily. Whether you want to share images on social media, forums, or simply store them online, Imgur provides a user-friendly interface and enjoyable experience. With a vast community and various features that enhance the sharing experience, Imgur is a go-to service for casual users and professionals alike.
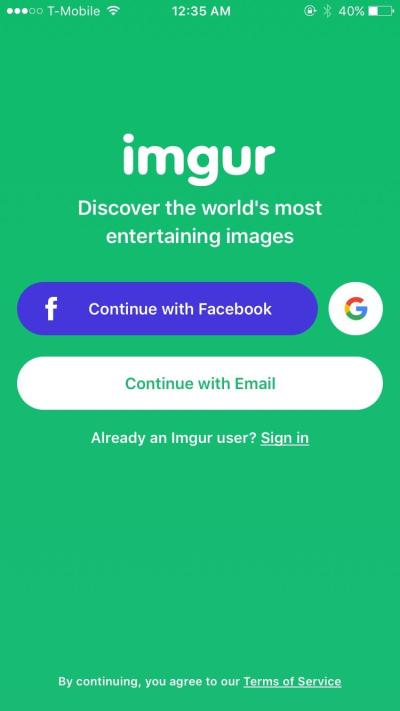
Creating an Imgur Account
To get started with Imgur, you’ll need to create an account. Follow these steps to create your own:
- Visit the Imgur website: Go to imgur.com.
- Click on ‘Sign Up’: Locate the ‘Sign Up’ button, usually found in the top-right corner.
- Choose a sign-up method: You can register using an email address, Google account, or Apple ID.
- Complete the form: If signing up with email, provide the required information such as username, email, and password.
- Verify your account: After registering, check your email for a verification link and click it to confirm your account.
- Explore features: Once your account is set up, you can begin uploading images, creating albums, and exploring Imgur‘s vast galleries.
Having an Imgur account allows for added features such as managing your uploaded images, creating albums, and engaging with the community through comments and upvotes. Enjoy the ease of sharing your images with friends and followers!
3. Uploading Images to Imgur
Uploading images to Imgur is a breeze, and the platform is designed to make the process as straightforward as possible. Whether you’re sharing a funny meme or showcasing your latest photography work, you’ll find that Imgur has you covered. Here’s a quick guide on how to get your images uploaded:
- Create an Account (Optional): While you can upload images without an account, creating one allows you to manage your uploads better, access your history, and keep your images private if you choose.
- Go to the Imgur Homepage: Head over to imgur.com and look for the upload button; it’s usually in the top right corner and looks like a big green button that says “New post.”
- Select Your Files: You can either drag and drop your images into the box that appears or click to browse your computer. You can upload multiple images at once—just remember that there’s a size limit of up to 20MB per file.
- Choose a Privacy Setting: Before finalizing your upload, you can decide whether you want your images to be public, hidden, or private. Public images appear in the gallery for everyone to see, while hidden images won’t be listed but can still be shared via link.
- Add a Title and Description: Once your images are uploaded, enhance them with a catchy title and a brief description. This is especially helpful for giving context to your photos or engaging your viewers.
- Finish and Share: Finally, hit the “Post” button. After uploading, you’ll receive a shareable link that you can distribute via social media, blogs, or emails.
And there you have it! Uploading images to Imgur is simple and quick, allowing you to share your photos with the world in just a few clicks.
4. Organizing Your Photos with Albums
Managing your photos can get chaotic quickly, especially if you’re sharing a lot of content on Imgur. That’s where albums come into play! Creating albums helps you keep your images organized and makes it easier for viewers to navigate your content. Here’s how to do it effectively:
- Create a New Album: After you’ve logged into your Imgur account, head over to your profile and look for the option to create an album. It’s usually straightforward; just click on “New Album” and you’re set!
- Add Images: You can add images to your album just like you did when uploading—whether it’s from your gallery or fresh uploads. This allows you to compile related images in one location.
- Customize Your Album: Give your album a catchy title and a fun description. You can also choose the cover image, so it’s eye-catching when shared!
- Set Privacy Settings: Like individual uploads, albums can also be set to public, hidden, or private. You can adjust these settings based on who you want to see your album.
- Edit and Rearrange: Imgur allows you to edit your album later on, so you can add new photos, remove outdated ones, or change the order to keep things fresh.
By organizing your photos into albums, you enhance the viewing experience for your audience and make it easier for yourself to manage your images. It’s a great way to keep everything neat and ensure your best work gets the attention it deserves!
5. Sharing Your Images on Social Media
Once you’ve uploaded your images to Imgur, one of the best things you can do is share them on your social media platforms. Imgur makes this incredibly easy, enabling you to reach a wider audience and showcase your work. Here’s how you can share your images effectively:
- Direct Links: Every image you upload gets its own unique link. You can copy this link and paste it directly into your social media posts, allowing followers to view your image instantly.
- Embed Codes: For platforms that support embedding, like blogs or websites, Imgur provides HTML embed codes. Just click on the image, select “Embed,” and you’re ready to go!
- Social Media Buttons: Imgur offers share buttons for popular networks like Facebook, Twitter, and Reddit. Use these to streamline the sharing process and encourage your audience to engage with your images.
Remember, when sharing your images, add a little context or a fun caption. Engaging descriptions can attract more viewers and spark conversations! Also, consider the timing of your posts—analytics show that posting during peak times can increase visibility.
6. Best Practices for Using Imgur
To get the most out of your Imgur experience, following some best practices can make a significant difference. Here are some tips to keep in mind:
- Optimize Your Images: Use appropriate image sizes and formats to maintain quality while keeping load times fast. JPEGs are great for photos, while PNGs are ideal for images with transparency.
- Organize Your Albums: If you have multiple images, consider creating albums. This not only helps you keep your photos organized but also makes it easier for viewers to browse through related content.
- Be Mindful of Privacy: Before uploading, think about the content you’re sharing. Imgur is public, so avoid sharing personal or sensitive information.
- Engage with the Community: Imgur has a vibrant community where users comment and react to images. Don’t be shy—respond to comments and engage with fellow Imgurians!
By adhering to these best practices, you’ll enhance both your image quality and the overall experience for your audience. Happy sharing!
7. Understanding Imgur Community Features
Imgur isn’t just a simple image hosting platform; it’s a thriving community where users can engage, share, and explore content. Understanding these community features can enhance your experience and allow you to connect with others who share your interests. Here are some key elements to consider:
- Comments: Every post on Imgur allows users to leave comments. This is a great way to express your thoughts, ask questions, or interact with the creator and other commenters. Joining in on discussions can be rewarding and even lead to new friendships!
- Upvotes and Downvotes: The voting system helps determine the visibility of an image or post. Upvoting content you like encourages the creator and helps showcase quality content to others. Conversely, downvoting content helps keep the platform clean of inappropriate or low-quality posts.
- Albums: Users can create albums to share multiple images at once. This is particularly useful for storytelling or sharing event highlights. Albums can foster a deeper connection with viewers as they delve into a curated experience.
- Hot, Trending, and New Sections: Imgur organizes content into different categories based on popularity. The ‘Hot’ section features the most upvoted posts, while ‘Trending’ showcases content gaining rapid popularity. The ‘New’ section is great for discovering fresh uploads.
Being a part of the Imgur community means you can participate in challenges, create memes, and even contribute to discussions in various sub-communities. Engaging with others enhances your overall experience and can lead to so much more than just sharing photos!
8. Exploring Imgur’s Privacy Settings
Your privacy is important, especially when sharing images online. Imgur offers several privacy settings to help you control who can see your uploads. Here’s a breakdown of the options available:
- Public Uploads: By default, images uploaded to Imgur are public. This means anyone can view and share your photos. If you want to reach a wider audience, this option is great but may be less suitable for personal photos.
- Hidden Links: If you want to share photos privately but still use Imgur, consider uploading your images as “hidden.” These images won’t appear in any public gallery or search results, but anyone with the direct link can view them. This is perfect for sharing with select friends or family.
- Delete or Edit Posts: You can always manage your content. If you change your mind about an upload, you have the option to delete or edit your post at any time. This gives you control over your presence on the platform.
- Profile Settings: You can adjust your profile settings to manage who interacts with you. From blocking users to making your profile less visible, every little tweak can help ensure a more comfortable experience.
By familiarizing yourself with Imgur’s privacy settings, you can have peace of mind while enjoying the benefits of this vibrant community. Whether you want to keep things private or share openly, Imgur has options to fit your needs.
9. Troubleshooting Common Issues with Imgur
While Imgur is generally user-friendly, you might encounter a few bumps along the way. Here are some common issues users face and how to troubleshoot them:
- Upload Failures: If your images refuse to upload, check your internet connection first. Sometimes, a slow or unstable connection can halt the process. Additionally, ensure that the file size does not exceed Imgur’s limit of 20 MB for uploads.
- Account Access Problems: If you’re having trouble logging in to your Imgur account, double-check your username and password. If you’ve forgotten your login details, try the “Forgot Password” feature. You can also verify that there are no issues with your email provider affecting email retrieval.
- Images Not Displaying: If your uploaded images are not showing up, it could be due to caching issues. Clear your browser’s cache or try viewing your images in a different browser or device. If the problem persists, check if Imgur is experiencing downtime by visiting their official support page or social media for updates.
- Content Guidelines Violations: Sometimes, images can be removed from the platform if they violate Imgur’s community guidelines. Make sure you’re familiar with these guidelines to avoid any surprises. If your image is mistakenly removed, you can appeal this decision through Imgur’s support.
By keeping these troubleshooting tips in mind, you can navigate common hiccups and enjoy a smoother experience with Imgur!
10. Conclusion and Final Thoughts on Imgur
Imgur is a fantastic platform that serves as a robust hub for photo storage and sharing. Whether you’re looking to showcase your art, share memes, or simply host family photos, Imgur offers a straightforward approach with helpful features.
To sum it all up:
- User-Friendly Interface: The simple design makes it easy to upload and manage your images.
- Social Features: Engage with a community of like-minded individuals who appreciate creative content.
- Privacy Options: You can choose to share your images publicly or keep them private, depending on your needs.
- High Quality: Imgur preserves the quality of your images, ensuring that your photos look great no matter where you share them.
In conclusion, Imgur stands out as a versatile and reliable platform for anyone looking to store and share photos effortlessly. With its combination of community engagement, ease of use, and excellent features, it makes photo management enjoyable. So go ahead, dive into the world of Imgur, and start sharing your visual stories today!