Thinking about turning your photography hobby into a source of income? Shutterstock is one of the most popular platforms where you can sell your photos to a global audience. It’s a fantastic way to showcase your talent, reach potential buyers, and earn royalties every time someone licenses your work. Whether you’re a seasoned pro or just starting out, understanding how the process works is key. In this guide, we’ll walk you through the steps to upload your photos and get them ready for sale on Shutterstock. Let’s get started and turn your passion into profit!
Creating a Shutterstock Contributor Account

Setting up your contributor account is the first step toward selling your photos online. It’s a straightforward process, but there are a few important details to keep in mind to make sure your account is set up correctly and ready to go.
To begin, visit the Shutterstock Contributor Portal. Click on the “Join Now” button and fill out the registration form. You’ll need to provide some basic information such as your name, email address, and create a secure password. Make sure to use a professional email address that you check regularly, as this will be the main way Shutterstock contacts you.
Next, you’ll be asked to review and accept Shutterstock‘s Contributor Agreement. It’s a good idea to read through this document carefully so you understand the terms regarding royalties, licensing, and rights. Once you’ve accepted, you’ll be prompted to verify your email by clicking on a link sent to your inbox. This step is crucial to activate your account.
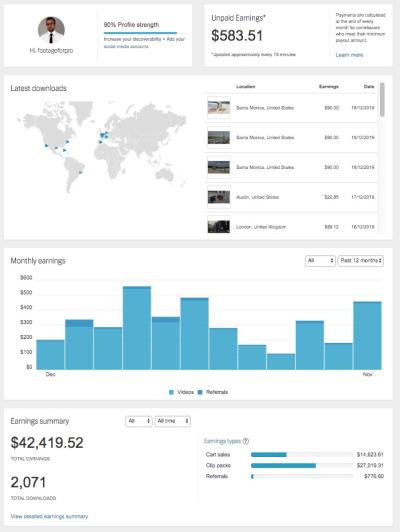
After email verification, you’ll need to complete your profile by adding relevant details such as your location, preferred payout method, and tax information. Shutterstock supports various payout options like PayPal, Skrill, and bank transfers, so choose the one that works best for you. Additionally, they may ask for some identification documents to verify your identity, which helps prevent fraud and ensures you receive your earnings smoothly.
Finally, before you start uploading, take a moment to review the contributor guidelines and best practices. Shutterstock has specific requirements for image quality, content, and metadata. Familiarizing yourself with these rules will help you avoid rejected submissions and increase your chances of making sales. Once your profile is complete and verified, you’re all set to upload your first photos and begin your journey as a Shutterstock contributor!
Preparing Your Photos for Upload

Before you hit that upload button, it’s super important to make sure your photos are ready to impress. Think of this step as giving your images a little makeover so they shine in the Shutterstock marketplace. First things first—resolution matters. Shutterstock recommends images to be at least 4 megapixels in size, but higher resolution is always better. This ensures your photos look sharp and professional across various platforms.
Next, let’s talk about image quality. Make sure your photos are in focus, well-lit, and free of noise or grain. Use photo editing software like Adobe Lightroom or Photoshop to fine-tune brightness, contrast, and colors. Remove any distracting elements or imperfections—less is more when it comes to clean, compelling images.
Another critical aspect is the file format. Shutterstock prefers images in JPEG format with a quality setting of around 70-80%. Save your photos with a sRGB color profile, which displays colors accurately across devices. Avoid overly compressed or overly edited files, as they can lose detail and look unprofessional.
Don’t forget about metadata! Adding relevant keywords, titles, and descriptions helps your photos get discovered. Think about what a buyer might search for—be specific and accurate. For example, instead of just “beach,” try “sunset at tropical beach with palm trees.” Proper keywords can make all the difference in boosting your photo’s visibility.
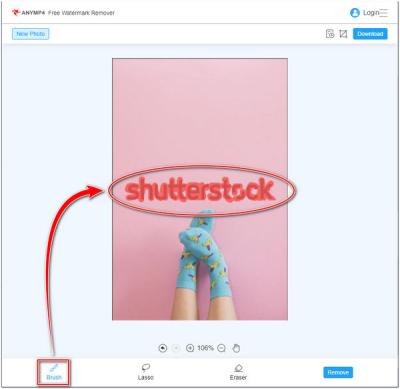
Lastly, review your photos carefully. Check for any watermarks, logos, or embedded metadata that might prevent approval. Once everything looks perfect—sharp, well-edited, properly labeled—you’re ready to move on to the upload process!
Uploading Your Photos to Shutterstock
Now that your photos are polished and ready, it’s time to upload them to Shutterstock. First, log in to your contributor account. If you haven’t created one yet, it’s quick and easy—just follow the sign-up prompts on Shutterstock’s website.
Once logged in, head over to the “Upload” section. You’ll see options to upload individual files or batches, which is handy if you want to upload multiple images at once. Drag and drop your JPEG files into the upload window or click to browse your folders.
After selecting your photos, Shutterstock will prompt you to add detailed information for each image. This includes:
- Title: Be descriptive but concise.
- Description: Explain what’s happening in the photo, including context or details.
- Keywords: Add relevant tags to improve discoverability. Use a mix of broad and specific keywords.
Take your time here—accurate and keyword-rich descriptions can significantly increase your chances of sales. Remember, the more relevant your keywords, the better your images will perform in searches.
Next, select appropriate categories and licenses. Shutterstock offers various licensing options—most contributors choose the standard license unless your photo fits a specialized niche. Confirm that your images comply with Shutterstock’s content guidelines—no copyrighted material, recognizable people without model releases, or inappropriate content.
Finally, review all the details and hit the “Submit for review” button. Shutterstock will then process your images, which typically takes a few days. Once approved, your photos will go live on the platform, ready to be discovered by buyers worldwide!
And that’s it! Uploading your photos might seem straightforward, but taking the time to prepare properly ensures your images have the best chance of success. Happy uploading!
Adding Titles, Descriptions, and Keywords for Better Visibility
Alright, you’ve uploaded your stunning photos—great job! Now, let’s talk about how to make sure they get noticed by the right buyers. The secret lies in adding compelling titles, detailed descriptions, and relevant keywords. Think of this as giving your photos a little bit of personality and making it easier for people to find them.
Titles should be clear and straightforward. They need to accurately describe what’s in the photo without being too lengthy. For example, instead of “Beautiful Scene,” go with “Sunset Over Mountain Lake with Reflection.” This helps buyers searching for specific images find yours easily.
Next up, descriptions are your chance to tell a story or provide context. Keep it natural and engaging. Mention the location, the mood, or any interesting details that might appeal to potential buyers. For example, “This serene sunset captures the vibrant colors reflected on a peaceful mountain lake, perfect for travel or nature-themed projects.”
Now, onto keywords. Think of keywords as tags that connect your photo to search terms. Be specific and relevant—use words that accurately describe the scene, objects, or mood. Instead of generic tags like “nature,” try “mountain lake,” “sunset,” “reflection,” “peaceful,” “outdoor,” and “scenery.” Use a mix of broad and niche keywords to maximize exposure.
Tips for selecting keywords:
- Use all available keyword slots—more keywords mean better chances of discovery.
- Include synonyms or related terms.
- Avoid spammy or irrelevant keywords—they can hurt your visibility.
- Research popular search terms in your niche to see what buyers are looking for.
Remember, well-crafted titles, descriptions, and keywords not only improve your photo’s visibility but also set the right expectations for buyers. Spend a little extra time here, and you’ll see your images attract more views and downloads.
Submitting Your Photos for Review and Approval
Once you’ve perfected your titles, descriptions, and keywords, it’s time to submit your photos for review. Shutterstock has a review process to ensure that only high-quality, copyright-compliant images are available on their platform. Don’t worry—it’s straightforward, but a few tips can help you get approved faster.
First, double-check your images for quality. Shutterstock prefers sharp, well-exposed photos with good lighting and minimal noise or artifacts. Make sure your photos are correctly cropped and free from watermarks, logos, or any overlays that weren’t part of the original shot.
Next, review your metadata—your titles, descriptions, and keywords—to ensure everything is accurate and relevant. This helps the reviewers understand what your image is about and why it’s a good fit for Shutterstock’s collection.
Here’s a quick overview of the submission process:
| Step | Action |
|---|---|
| 1 | Click the “Upload” button on your dashboard and select your photos. |
| 2 | Fill in the metadata fields: titles, descriptions, keywords. |
| 3 | Choose the appropriate categories and model releases if applicable. |
| 4 | Review your submission for accuracy and completeness. |
| 5 | Click “Submit for Review.” |
Once submitted, your images will go into the review queue. Shutterstock’s review team usually takes a few days to evaluate your images. During this time, avoid making major changes to the files or metadata, as that could delay the process.
While waiting, it’s a good idea to keep uploading new content. Consistency helps build your portfolio and increases your chances of success. If your images are rejected, don’t get discouraged! Shutterstock typically provides feedback, so review their comments, learn from any mistakes, and try again with improved versions.
Remember, patience and attention to detail are key. The review process is a quality control measure, so think of it as a chance to showcase your best work and ensure your photos meet Shutterstock’s standards. Keep refining your images and metadata, and soon enough, your photos will be live and available for purchase!
Tips for Increasing Your Stock Photo Sales on Shutterstock
So, you’ve uploaded some photos and are eager to see those sales roll in. While uploading quality images is key, there are several savvy strategies you can use to really boost your sales on Shutterstock. Let’s dive into some practical tips that can help you stand out and attract more buyers.
Focus on Trends and Popular Themes
Stay current with what’s trending. Whether it’s remote work, sustainability, or health and wellness, creating images that align with popular themes can increase their visibility and appeal. Browse Shutterstock’s trending collections to get inspiration, and consider capturing those themes in your own unique style.
Use Relevant and Descriptive Keywords
Keywords are your main tool for getting discovered. Be thorough and precise—think about what a buyer might type in when searching for your image. Use a mix of broad and specific keywords, and include synonyms to maximize your reach. Remember, the more relevant your keywords, the higher the chance your images will appear in search results.
Create a Consistent Portfolio
Build a cohesive collection of images that showcase your style and expertise. Buyers often look for photographers who have a recognizable aesthetic or specialize in certain niches like lifestyle, food, or business. A consistent portfolio not only attracts repeat customers but also helps you become known for a particular niche.
Engage with the Shutterstock Community
Participate in forums, groups, and challenges within the Shutterstock community. Networking with other contributors can provide feedback, inspiration, and even collaborations. Plus, engaging actively can increase your profile’s visibility on the platform.
Promote Your Work Outside Shutterstock
Don’t rely solely on Shutterstock’s internal traffic. Share your top-performing images on your social media channels, website, or blog. Building your personal brand can drive more traffic to your portfolio and attract buyers who might not have found you otherwise.
Keep Uploading Regularly
Consistency is key. Regular uploads keep your portfolio fresh and give the platform more opportunities to surface your images. Plus, Shutterstock’s algorithms tend to favor active contributors, which can lead to more exposure.
Conclusion and Final Tips for Success
Wow, you’ve made it through the step-by-step process of uploading your photos to Shutterstock! Now, the journey is just beginning. Success in stock photography isn’t just about one good shot; it’s about persistence, strategy, and continuous improvement.
Here are some final tips to keep in mind:
- Keep Learning: Stay updated on market trends, new techniques, and platform changes. The more you learn, the better your images will perform.
- Be Patient: Building a solid portfolio and steady income takes time. Don’t get discouraged if sales are slow initially.
- Analyze Your Data: Pay attention to which images sell best. Use this insight to guide your future shoots and keyword choices.
- Maintain Quality: Always upload high-resolution, well-edited images. Quality always wins over quantity.
- Stay Consistent: Regular uploads and active engagement keep your portfolio relevant and attractive to buyers.
Remember, success in stock photography is a marathon, not a sprint. Keep honing your craft, stay engaged with the community, and don’t be afraid to experiment with new ideas. With dedication and perseverance, your Shutterstock portfolio can become a steady source of income and a showcase for your creative talents. Happy shooting and uploading!