If you’re thinking about submitting your stock photos to Shutterstock, the first thing you want to do is get familiar with their guidelines. Trust me, this step can save you a lot of headaches down the line. Shutterstock is pretty specific about what they accept, and knowing their rules will help ensure your photos aren’t rejected just because of a small oversight.
Shutterstock’s guidelines cover several key areas:
- Image Quality: Your photos need to be high resolution, sharp, and well-exposed. Blurry, pixelated, or noisy images are a no-go.
- Content Restrictions: They don’t accept images with offensive or controversial content, or pictures that infringe on copyrights or trademarks.
- Model and Property Releases: If your photos feature recognizable people or private property, you need proper releases. Without these, your images might be rejected or removed later.
- Technical Requirements: Files should be in JPEG format, with a minimum of 4 megapixels, and should not have watermarks or borders.
It’s also helpful to review their detailed submission guidelines regularly, as they can update their rules. Remember, the more you understand what they’re looking for, the better your chances of getting approved on the first try!
Preparing Your Photos for Upload

Now that you know what Shutterstock wants, it’s time to get your photos ready for the upload. Think of this as the final polish before you send your images off into the world. Proper preparation can dramatically reduce rejection rates and get your photos approved faster.
Here are some key tips to prepare your images:
- Check and Enhance Image Quality: Use editing software to ensure your images are sharp, well-exposed, and free of noise. Adjust brightness, contrast, and color balance if needed, but avoid over-editing.
- Resize and Compress: Make sure your photos meet Shutterstock’s resolution requirements (minimum 4 MP). Save your files as JPEGs with a high-quality setting (around 80-90%) to keep the file size manageable without losing detail.
- Remove Watermarks and Borders: Double-check your images—they should be clean, with no watermarks, logos, or borders. These are common causes for rejection.
- Organize Your Metadata: Prepare descriptive, accurate titles, tags, and descriptions. Think about what keywords buyers might search for. Well-tagged images are more discoverable and increase your chances of sales.
- Get Model and Property Releases: If your photo features people or private property, ensure you have the necessary releases. Scan and save them properly; Shutterstock may ask to review these during the submission process.
Finally, do a quick quality check before uploading—look at your images on different screens if possible, and ensure they look professional and polished. Taking a little extra time to prepare your photos can make a big difference in avoiding rejections and building a successful portfolio on Shutterstock.
Optimizing Image Quality and Metadata

When it comes to getting your stock photos approved on Shutterstock, quality is king. No matter how stunning your shot is, if it’s not optimized properly, it might get rejected. So, let’s talk about how to ensure your images meet the platform’s standards and how to make your metadata work in your favor.
Image Quality Tips:
- Resolution: Make sure your images are at least 4 MP (megapixels). Shutterstock recommends a minimum of 4,000 pixels on the longest side. Higher resolution images tend to perform better and are more versatile for buyers.
- Focus & Sharpness: Your photos should be sharp and in focus. Avoid blurry or soft images unless intentionally artistic. Use a tripod if needed and check focus before uploading.
- Lighting & Exposure: Proper lighting makes a huge difference. Bright, well-exposed images with good contrast are more appealing. Avoid over- or under-exposed shots.
- Color & Noise: Colors should be vibrant but natural. Use editing tools to reduce noise, especially in low-light images, so they look polished.
- Editing: Minor enhancements are okay, but avoid heavy filters or over-editing that makes the image look unnatural. Keep it clean and professional.
Metadata Optimization:
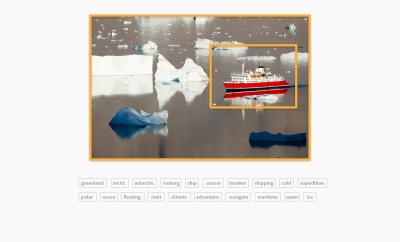
Metadata helps buyers find your images, so don’t skip this step. Use descriptive and accurate titles, keywords, and descriptions:
| Element | Best Practices |
|---|---|
| Title | Be clear and specific. Include relevant keywords naturally. |
| Description | Provide context, details about the scene, mood, and use cases. Incorporate keywords naturally. |
| Keywords | Use relevant, specific keywords. Think about what buyers might search for. Avoid spammy or irrelevant tags. |
Tip: Use Shutterstock’s keyword suggestions to find popular search terms related to your image. Also, keep your metadata honest—misleading info can lead to rejection or removal later.
By focusing on high-quality images and well-crafted metadata, you increase your chances of approval and make your photos more discoverable. Remember, quality and clarity are your best friends here!
Common Reasons for Rejections and How to Avoid Them
Understanding why images get rejected is half the battle won. Shutterstock, like other stock platforms, has strict standards to ensure only the best content makes it to their marketplace. Knowing the common pitfalls can save you time and frustration.
Here are some of the most frequent reasons for rejections and how to steer clear of them:
1. Poor Image Quality
- Rejection Cause: Blurry, pixelated, or soft images that don’t meet resolution standards.
- How to Avoid: Always shoot in high resolution, use a tripod for stability, and do thorough editing to sharpen and enhance clarity. Preview your images at 100% zoom before uploading.
2. Model & Property Releases Missing
- Rejection Cause: Photos featuring recognizable people or private property without proper releases.
- How to Avoid: Obtain signed releases for all recognizable individuals and private property. Keep scanned copies and upload them if required.
3. Inappropriate or Irrelevant Content
- Rejection Cause: Content that doesn’t fit Shutterstock’s guidelines—offensive, violent, or controversial themes.
- How to Avoid: Review Shutterstock’s content guidelines thoroughly. Only upload content that’s professional, family-friendly, and non-offensive.
4. Overly Promotional or Watermarked Images
- Rejection Cause: Logos, watermarks, or images that contain promotional content.
- How to Avoid: Remove all watermarks and logos before uploading. Stock photos should be neutral and generic unless showcasing a specific product with proper licensing.
5. Incorrect or Misleading Metadata
- Rejection Cause: Titles, descriptions, or keywords that are inaccurate or misleading.
- How to Avoid: Be honest and precise with your metadata. Describe the scene accurately and use relevant keywords without stuffing or spammy tactics.
6. Duplicate or Similar Content
- Rejection Cause: Uploading multiple versions of the same or very similar images.
- How to Avoid: Aim for variety. If you have similar shots, choose the best one or edit them differently to add value.
By familiarizing yourself with these common pitfalls, you can significantly improve your success rate. Take your time during the review process, double-check your images and metadata, and always aim for professionalism. Remember, patience and attention to detail are key to turning rejection into acceptance!
Best Practices for a Successful Upload Process
Uploading stock photos to Shutterstock can be a smooth experience when you follow some simple best practices. Think of it as setting yourself up for success right from the start. Here’s what you should keep in mind:
Choose High-Quality Images
First and foremost, only upload images that are sharp, well-lit, and free of distractions. Shutterstock has high standards because they want to provide their customers with top-notch visuals. Make sure your photos are in focus, properly exposed, and free of noise or grain. Use a good camera or smartphone with a decent camera, and consider editing your photos for brightness, contrast, and color correction before uploading.
Follow Technical Guidelines
Shutterstock has specific technical requirements you should adhere to:
- File Format: JPEG (JPEG/Exif) is the standard.
- Resolution: Minimum of 4 megapixels, but higher is better.
- Color Mode: RGB color space.
- File Size: Usually up to 50MB, but check the guidelines for specifics.
Using the right format and resolution ensures your images look great across all platforms and meet the quality standards of Shutterstock.
Accurate and Detailed Metadata
When uploading, fill out the metadata carefully. Use descriptive titles, relevant keywords, and clear descriptions. Think about what someone searching for that image would type. This not only helps your image get found but also reduces rejections due to poor keywording. Be honest and precise—avoid keyword stuffing or irrelevant tags.
Respect Copyright and Model Releases
Ensure you own the rights to all images you upload. If your photo includes recognizable people or private property, you’ll need a signed model or property release. Failing to provide these can lead to rejection or even legal issues down the line. Keep copies of your releases organized and ready to upload if needed.
Review and Preview Before Upload
Finally, take a moment to review your image and metadata before hitting upload. Check for typos, make sure the image looks correct, and ensure all fields are filled out accurately. Preview it if possible to see how it will appear to buyers. Small details matter — a polished upload increases your chances of acceptance.
Final Tips to Increase Your Acceptance Rate
If you want to boost your chances of getting your photos accepted on Shutterstock, these final tips can make a real difference:
Study the Market and Trends
Spend some time browsing Shutterstock’s top-performing images. Notice what styles, subjects, and compositions are popular. Tailor your uploads to fit current trends while maintaining originality. For example, if minimalistic lifestyle images are trending, consider capturing those themes with your unique twist.
Consistency and Portfolio Building
Building a diverse and consistent portfolio can improve your acceptance rate. Upload a variety of images across different themes and styles, but keep quality high. Over time, Shutterstock’s reviewers will recognize your work pattern, and a solid portfolio may lead to fewer rejections.
Learn from Rejections
Rejections aren’t the end of the world. Carefully read the rejection email to understand what went wrong. It could be technical issues, lack of relevance, or quality concerns. Use this feedback to improve your future uploads. Sometimes, rejections are simply a reminder to tighten your editing or enhance your subject matter.
Stay Updated with Shutterstock Guidelines
Platform standards evolve, so regularly check Shutterstock’s contributor guidelines. Updates might include new technical specs or content restrictions. Staying informed helps you stay compliant and avoid unnecessary rejections.
Engage with the Contributor Community
Join forums or social media groups where Shutterstock contributors share tips and experiences. Learning from others can provide valuable insights and help you troubleshoot common issues. Plus, celebrating small wins and sharing successes keeps you motivated.
Be Patient and Persistent
Success doesn’t usually happen overnight. Keep uploading, learning, and refining your skills. The more high-quality images you submit, the better your chances of acceptance. Remember, every rejection is a step closer to understanding what works best for Shutterstock.


