If you’re a videographer or content creator, you know how exciting it is to share your work with a wider audience. Shutterstock is a fantastic platform to showcase your Red Raw video files, but uploading these high-quality, large files can seem daunting at first. Don’t worry! In this guide, we’ll walk you through each step to make the process smooth and stress-free. Whether you’re new to Shutterstock or just new to Red Raw files, you’ll find tips and tricks to ensure your videos look their best and get approved quickly. Let’s get started on turning your stunning footage into earning opportunities!
Preparing Your Red Raw Video Files for Upload
Before you hit that upload button, it’s essential to prepare your Red Raw files properly. These files are known for their incredible quality and large size, so a little prep work can save you time and frustration down the line.
Step 1: Review Your Footage
Start by watching your Red Raw videos carefully. Look for any issues like focus problems, unwanted shadows, or shaky shots. Only upload the best footage that meets Shutterstock’s quality standards. Remember, high-quality content is more likely to be accepted and appreciated.
Step 2: Edit and Color Correct
While Red Raw files have a lot of flexibility, basic editing can enhance your footage. Use professional editing software like Adobe Premiere Pro or DaVinci Resolve to make adjustments. Focus on:
- Color correction to ensure accurate and vibrant colors
- Stabilization if needed to smooth out shaky footage
- Cropping or framing to improve composition
Also, consider adding a subtle watermark if you want to protect your work before upload, but remember that copyrighted watermarks are generally not allowed on Shutterstock submissions.
Step 3: Convert or Export to Compatible Formats
Red Raw files are large and proprietary, so you’ll need to export your footage to a widely accepted format for upload. Shutterstock recommends using formats like MP4, MOV, or AVI with H.264 or H.265 codecs for optimal compatibility and quality. When exporting:
- Set the resolution to at least 4K if possible, as Shutterstock favors high-resolution videos
- Maintain a high bitrate to preserve quality—aim for at least 50 Mbps
- Ensure your aspect ratio matches your footage’s intended display (commonly 16:9)
Step 4: Compress Your Files if Necessary
Large Red Raw exports can be hefty, and some platforms have file size limits. Use compression tools like HandBrake or Adobe Media Encoder to reduce file size without significantly sacrificing quality. Keep in mind:
- Check Shutterstock’s maximum file size (typically around 50 GB, but always verify)
- Balance compression settings to retain visual fidelity
Once your videos are edited, corrected, and properly formatted, they’re ready for the upload process. Preparing your files thoroughly ensures a smoother submission and increases your chances of approval. Now, you’re all set to move forward with uploading your stunning Red Raw footage to Shutterstock!
Creating a Shutterstock Contributor Account
So, you’ve got your stunning red raw video files ready to go—awesome! Before you can start sharing your work with the world, you’ll need to set up a Shutterstock Contributor account. Don’t worry; it’s a straightforward process, and I’ll walk you through each step to make it as smooth as possible.
Step 1: Visit the Shutterstock Contributor Website
Head over to the official Shutterstock Contributor page at submit.shutterstock.com. Here, you’ll find all the info you need about becoming a contributor and how the platform works.
Step 2: Click on the Sign Up Button
Look for the “Sign Up” or “Join Now” button. It’s usually in a prominent spot on the page. Click it to start your registration process.
Step 3: Fill Out Your Details
You’ll be prompted to provide some basic information, including:
- Your full name
- Email address
- Country of residence
- Creating a strong password
Make sure to use an active email address you check regularly, as Shutterstock will send important notifications there.
Step 4: Agree to Terms and Conditions
Read through the Shutterstock Contributor Agreement. It covers important details about rights, royalties, and responsibilities. If you’re happy with the terms, check the box indicating your agreement.
Step 5: Verify Your Email
Shutterstock will send a verification email. Head to your inbox, find the email, and click the verification link. This step confirms your account and gets you one step closer to uploading your videos.
Step 6: Complete Your Profile
Once verified, log into your new account. Fill out your profile details, including:
- Your contributor profile picture (optional but recommended)
- Payment information (bank details, PayPal, etc.)
- Tax information, depending on your country
This info helps ensure you get paid smoothly once your videos start earning royalties.
That’s it! With your account created and profile set up, you’re ready to start uploading your incredible red raw videos to Shutterstock. Next, let’s dive into how to actually upload those files and make sure they’re ready for approval.
Uploading Red Raw Videos to Shutterstock Platform
Now that your account is all set up, it’s time to upload your amazing red raw video files. The process is designed to be user-friendly, but there are a few tips to keep in mind to make sure your videos meet Shutterstock’s standards and get approved quickly.
Step 1: Prepare Your Video Files
Before uploading, double-check your videos:
- Format: Shutterstock accepts various formats, but MP4 is the most common for video uploads.
- Resolution: Aim for at least 1920×1080 (Full HD) or higher for the best quality.
- File Size: Keep files under 500MB for easier uploads, but larger files are sometimes acceptable.
- Color Profile: Make sure your red raw videos are color-corrected and look vibrant, as Shutterstock loves high-quality visuals.
Having your videos properly prepared saves time during the review process.
Step 2: Log Into Your Contributor Dashboard
Once logged in, click on the “Upload” button—usually a prominent icon or link on your dashboard. This takes you to the upload interface.
Step 3: Select Your Files
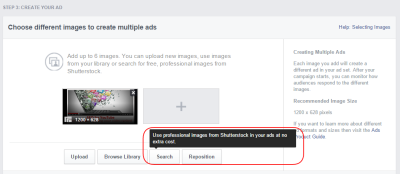
Click “Choose Files” or drag and drop your red raw videos into the upload box. You can upload multiple files at once, which is great if you have a collection ready to go.
Step 4: Fill Out Video Details
As your videos upload, you’ll need to provide important metadata:
- Title: Make it descriptive but concise. For example, “Vibrant Red Raw Footage of Sunset”
- Description: Add details about the content, mood, or unique aspects of your video.
- Keywords: Use relevant keywords like “red,” “raw footage,” “sunset,” “cinematic,” “nature,” etc. This helps buyers find your videos easily.
- Category: Choose the most appropriate category from Shutterstock’s options.
Step 5: Set Licensing and Usage Options
- Standard License: Suitable for most uses, including online or TV.
- Enhanced License: For more extensive commercial use.
Most contributors start with the standard license, but consider the enhanced license if your footage is highly sought after or used in high-value projects.
Step 6: Review and Submit
Before hitting “Submit,” double-check all your details. Shutterstock also offers a preview option so you can see how your video will appear to buyers.
Step 7: Upload Processing and Review
Once submitted, your videos will go into Shutterstock’s review queue. This process can take anywhere from a few days to a week, depending on their workload and your content quality. During this time, avoid making changes to the files you uploaded.
And that’s it! You’re now officially in the game of contributing stunning red raw videos to Shutterstock. Keep an eye on your dashboard for updates on your submissions, and once approved, your videos will be available for licensing worldwide. Happy uploading!
Ensuring Your Video Meets Shutterstock Submission Guidelines
Before you hit that upload button, it’s super important to double-check that your red raw video files align with Shutterstock’s submission guidelines. Think of these rules as the checklist to ensure your video has the best chance of getting approved and making it to the platform without any hiccups.
First things first, let’s talk about file specifications. Shutterstock typically accepts video files in formats like MOV, MP4, or AVI. Since you’re working with red raw footage, make sure your final exported version is in one of these formats, with the right codec—usually H.264 for MP4 files. Keep the resolution high; Shutterstock recommends a minimum of 1920×1080 (Full HD), but if you have 4K footage, go for it! Just ensure your file size doesn’t exceed their maximum limit, which is generally around 50GB.
Next, check your video quality. Shutterstock is all about professional, high-quality content. So, ensure your footage is sharp, well-lit, and free from pixelation or compression artifacts. Avoid shaky footage unless it’s intentionally artistic and well-structured. Also, make sure your audio is clear—background noise or muffled sound can be a deal-breaker.
Another key point is to remove any branding, watermarks, or logos, unless they are part of the content and you have rights to include them. Shutterstock prefers videos that are clean and free of embedded graphics that don’t belong to you.
Finally, review your content for copyright issues. Only upload footage you own or have licensing rights to. Shutterstock is strict about intellectual property, so avoid any copyrighted music, logos, or proprietary content unless properly licensed.
In summary, to ensure your video meets Shutterstock guidelines:
- Use accepted formats like MOV or MP4 with H.264 codec
- Maintain high resolution (Full HD or 4K)
- Ensure clean, high-quality visuals and audio
- Avoid watermarks or embedded branding
- Confirm you hold rights or licenses for all content
- Keep file size within platform limits
Taking these steps might seem a bit meticulous, but it pays off by reducing the chances of rejection and speeding up the review process. Remember, submission guidelines are there to keep the marketplace high-quality and professional—your video deserves to stand out for the right reasons!
Adding Metadata and Tags to Optimize Your Video Listing
Now that your video is ready to go, let’s talk about how to make sure it gets found by the right buyers. This is where metadata and tags come into play. Think of metadata as the SEO of your video—it helps Shutterstock understand what your content is about and matches it with relevant searches.
First, craft a compelling and accurate title. Keep it clear and descriptive. For example, instead of “Video1,” try “Red Raw Filmmaking Footage of Sunset over Mountains.” This not only helps users understand what your video depicts but also boosts visibility in search results.
Next, write a detailed description. Use natural language to describe what’s happening in the video. Mention the key elements, such as the location, mood, colors, or any specific activity. For instance, “A stunning shot of a vibrant sunset over mountain ranges captured in rich red tones during golden hour.” The more relevant details you include, the better it is for discoverability.
Then, focus on tags—these are the keywords that help categorize your video. Be specific and include a mix of broad and niche tags. For example:
| Tag Type | Examples |
|---|---|
| General | sunset, mountains, red, landscape |
| Specific | golden hour, mountain range, vibrant colors, nature footage |
| Contextual | travel video, outdoor scenery, cinematic footage |
Remember, avoid vague tags like “video” or “footage”—be as specific as possible. Also, include relevant keywords related to the content’s mood, setting, or usage (e.g., “background”, “cinematic”, “nature”). This strategic tagging helps your video show up in searches when buyers are looking for exactly what you’ve captured.
Lastly, some platforms allow you to add custom metadata or categories. Choose the most appropriate categories for your footage, such as “Nature & Outdoors” or “Travel & Adventure,” to further refine your listing.
By investing a little time in crafting thoughtful titles, descriptions, and tags, you significantly increase the chances of your red raw video being discovered by potential buyers. Think of metadata as your video’s digital storefront—make it inviting, accurate, and keyword-rich to attract the right audience. Happy uploading!
Reviewing and Submitting Your Red Raw Video for Review
Once you’ve uploaded your Red Raw video files to Shutterstock, the next step is to review your submissions carefully before sending them off for review. Think of this as giving your work a final once-over—it’s your chance to catch any issues and make sure everything is just right.
First, take a moment to double-check the uploaded files. Ensure that the videos are properly processed and play smoothly. Shutterstock typically provides a preview option—use it! Watching your video from start to finish can help you spot any glitches, color inconsistencies, or technical issues. Remember, high-quality footage stands out and increases your chances of approval.
Next, review the metadata you’ve entered. This includes the title, description, keywords, and categories. Make sure your descriptions accurately reflect what’s in the video, and your keywords are relevant and specific. Well-optimized metadata helps your video get discovered by the right buyers.
After confirming everything looks good, proceed to submit your video for review. Shutterstock’s review team will then evaluate your submission based on quality, originality, and adherence to their content guidelines. While waiting for approval, it’s a good idea to keep an eye on your email or dashboard for any feedback or requests for revisions.
Remember, patience is key here. The review process can take anywhere from a few days to a couple of weeks, depending on the volume of submissions. If your video gets rejected, don’t be discouraged—review the feedback carefully, make necessary adjustments, and try again. Every submission is a learning experience that gets you closer to success!
Tips for Successful Video Uploads and Approvals
Uploading your Red Raw video files to Shutterstock is just the beginning. To maximize your chances of getting approved and make the process smoother, here are some handy tips:
- Ensure High-Quality Files: Use the highest possible resolution and quality settings when exporting your Red Raw footage. Clear, sharp videos stand out and meet Shutterstock’s standards.
- Follow Technical Guidelines: Pay close attention to Shutterstock’s technical requirements—file formats, codecs, frame rates, and aspect ratios. Adhering to these specs prevents unnecessary rejections.
- Optimize Metadata: Craft compelling titles and detailed descriptions. Use relevant keywords that accurately describe your footage. Think about what buyers might search for.
- Maintain Consistency: Consistent color grading and smooth editing can make your videos more appealing. Avoid abrupt cuts or distracting artifacts.
- Be Original and Authentic: Shutterstock values unique content. Avoid overused themes or stock footage clichés. Original, fresh content has a better chance of approval.
- Preview Before Upload: Always review your video on different devices or screens to spot issues you might miss on your editing monitor.
- Use Descriptive Titles and Tags: Instead of generic descriptions, be specific. For example, instead of “Red Raw Video,” try “Cinematic Red Raw Footage of Mountain Landscape at Sunset.”
- Stay Updated on Guidelines: Shutterstock’s policies can evolve. Regularly check their contributor resources to stay aligned with the latest standards.
Finally, be patient and persistent. Not every video will be accepted on the first try, and that’s okay. Use any feedback you receive as a learning opportunity to improve your future uploads. With attention to detail and a bit of practice, you’ll find that uploading and getting your Red Raw videos approved becomes a smoother, more rewarding process.
Conclusion and Additional Resources for Shutterstock Contributors
Uploading red raw video files to Shutterstock can significantly enhance the quality and appeal of your portfolio, attracting more buyers and increasing your earning potential. Remember, ensuring your files meet Shutterstock’s technical specifications and quality standards is crucial for a smooth submission process. Consistently reviewing their guidelines and best practices will help you stay compliant and improve your chances of acceptance.
To further support your journey as a Shutterstock contributor, consider exploring the following resources:
- Shutterstock Contributor Help Center: Comprehensive guides on submission policies, technical requirements, and troubleshooting tips.
- Video Editing Software Tutorials: Learn how to efficiently process and export red raw videos using tools like Adobe Premiere Pro or DaVinci Resolve.
- Community Forums: Engage with experienced contributors to share tips, ask questions, and stay updated on industry trends.
- Online Courses: Platforms like Udemy or Skillshare offer courses on video production, color grading, and licensing essentials.
By leveraging these resources and maintaining high-quality standards, you can maximize your success as a Shutterstock contributor. Keep practicing, stay informed about industry updates, and continue to refine your skills to create compelling content that stands out in the marketplace.