Thinking about turning your photography passion into a source of income? Shutterstock is one of the biggest platforms for photographers to showcase and sell their images. Uploading your pictures might seem straightforward, but there are some key steps and best practices to follow to make sure your images stand out and get approved quickly. In this guide, we’ll walk through the essentials of uploading your photos to Shutterstock and share tips to boost your chances of making sales. Whether you’re just starting out or looking to improve your process, you’ll find valuable advice here!
Preparing Your Images for Upload
Before you hit that upload button, it’s crucial to get your images ready. Proper preparation makes a huge difference in whether your photos get accepted and how they perform once live. Here’s what you should focus on:
- High-Quality Resolution: Shutterstock prefers images that are at least 4 megapixels (for example, 2000 pixels on the shortest side). Aim for high-resolution, sharp images with good detail. Avoid pixelation or blurriness, as these can hurt your chances of approval.
- Proper File Format and Size: Save your images as JPEG files with a minimum of 8-bit color depth. Keep your file size under 50MB to ensure smooth upload and processing. Use sRGB color space for accurate color representation across devices.
- Consistent Editing and Style: Maintain a consistent style or theme if you’re uploading multiple images. This can help your portfolio look professional and attract buyers looking for particular aesthetics.
- Metadata is Key: Use descriptive and accurate keywords, titles, and descriptions. Think about what a buyer might search for—be specific and relevant. Avoid keyword stuffing; instead, focus on meaningful tags that genuinely describe your image.
- Check for Technical Issues: Remove any watermarks, logos, or distracting objects from your images. Make sure there are no dust spots or blemishes unless they add to the artistic effect. Use editing tools to enhance overall quality without overdoing it.
Taking the time to prepare your images properly not only increases your chances of approval but also helps your photos perform better in searches. Remember, quality and relevance are king in the stock photography world, so invest some time in polishing your images before uploading. Happy shooting!
Creating an Effective Shutterstock Contributor Account

Getting started on Shutterstock as a contributor is an exciting step toward sharing your creative work and earning some extra income. But before you dive into uploading, it’s essential to set up an account that’s optimized for success. Think of your contributor profile as your digital storefront — the more professional and inviting it looks, the more likely clients are to choose your images.
First off, head over to the Shutterstock Contributor Sign-Up Page and create your account. Make sure to use a valid email address that you check regularly — you’ll receive important notifications and updates there. When filling out your profile, take your time to complete all the fields, especially your bio and portfolio description. Be clear about your skills, style, and what type of images you specialize in. This helps buyers understand what you offer and can lead to more targeted downloads.
Here are some tips to make your contributor profile stand out:
- Choose a professional profile picture: A clear, friendly headshot helps build trust.
- Write a compelling bio: Share your background, passions, and what inspires your work. Keep it authentic and engaging.
- Organize your portfolio: Upload a diverse but cohesive set of images that reflect your style. Quality always beats quantity!
- Set your keywords wisely: Use relevant, descriptive keywords for each image to improve discoverability.
Remember, your profile is also your branding. Consistency in style and professionalism encourages buyers to explore more of your work. Regularly update your portfolio with fresh images, and respond promptly to any inquiries or comments. Building a strong presence on Shutterstock takes time, but with a well-crafted account, you’ll be well on your way to boosting your sales.
Step-by-Step Guide to Uploading Your Photos
Ready to share your photos with the world? Uploading images to Shutterstock is straightforward, but doing it right can make all the difference in how your photos perform. Here’s a simple step-by-step guide to help you get your images uploaded and optimized for sales.
Step 1: Log into Your Contributor Account
Go to the Shutterstock Contributor Portal and sign in using your registered email and password. Once logged in, you’ll see your dashboard, which is your hub for managing uploads, earnings, and account settings.
Step 2: Click on “Upload Files”
Locate the “Upload” button, usually at the top of the dashboard. You can choose to upload multiple images at once, which is a huge time-saver. Shutterstock supports various formats, but JPEG is the standard for photos. Ensure your images are high-resolution and meet the minimum requirements (generally 4MP or higher).
Step 3: Select Your Photos
Choose the photos you want to upload from your computer. You can drag and drop files directly into the upload window or browse your folders. Before uploading, double-check that your images are properly edited, sharp, and free of watermarks or logos.
Step 4: Add Titles, Descriptions, and Keywords
This is where your images start to stand out in search results. For each photo, you’ll need to:
- Write an engaging title: Be specific and descriptive.
- Add a detailed description: Highlight the context, mood, or story behind the image.
- Insert relevant keywords: Think about what potential buyers might search for. Use both broad and specific terms.
Tip: Use Shutterstock’s keyword suggestions or research popular searches to improve your chances of being discovered.
Step 5: Choose the Appropriate Category and Model Releases
Select the most fitting category for each image to help buyers find it easily. If your photo features recognizable people, animals, or private property, you’ll need to upload model or property releases. This step is crucial for images intended for commercial use.
Step 6: Submit for Review
Once everything is filled out, hit the “Submit” button. Your images will enter Shutterstock’s review process, which typically takes a few days. During this time, reviewers check for quality, relevance, and adherence to guidelines. If approved, your photos go live, and you’ll start earning royalties whenever they are downloaded.
Remember, patience and consistency are key. Keep uploading high-quality images, optimize your keywords, and stay updated with Shutterstock’s guidelines. Over time, this effort will pay off with increased visibility and sales.
Optimizing Your Image Titles, Descriptions, and Keywords
When it comes to selling your images on Shutterstock, one of the most important steps is making sure they’re easy to find. Think of it like setting up a shop window — you want to catch the eye of potential buyers and give them a clear idea of what’s inside. That’s where optimizing your image titles, descriptions, and keywords comes into play.
Start with a clear and descriptive title. Your title should be concise but informative, highlighting the main subject of the image. Instead of something vague like “Beautiful Scene,” go for something specific like “Sunset Over Mountain Lake with Reflections.” This helps users searching for that exact scene find your photo easily.
Next, craft a detailed yet natural-sounding description. Explain what’s happening in the image, the mood, setting, and any relevant details. For example:
- Location: Mountain lake during sunset
- Colors: Warm orange and pink hues reflecting on water
- Subjects: Serene landscape with no people
- Usage ideas: Travel blogs, nature websites, outdoor magazines
This gives potential buyers context and helps Shutterstock’s search algorithm understand your image better.
Then come the keywords — these are the magic words that connect your images with what users are searching for. Be thorough but relevant. Use a mix of broad and specific keywords like:
- Sunset
- Lake
- Mountain
- Reflection
- Nature
- Outdoor
- Serene
Remember, avoid keyword stuffing or adding irrelevant tags; Shutterstock’s algorithms favor accuracy and relevance. Using well-chosen keywords can significantly boost your image’s visibility, leading to more downloads and higher sales.
Understanding Shutterstock’s Content Guidelines and Quality Standards
Before you upload your images, it’s crucial to understand Shutterstock’s strict content guidelines and quality standards. They want high-quality, professional images that meet certain criteria — because their reputation depends on it, and so does your potential earnings.
Here’s what you need to keep in mind:
- Technical Quality: Your images should be sharp, well-exposed, and free of noise or artifacts. Use high-resolution files (at least 4 MP, but higher is better) to ensure they look good on various platforms and sizes.
- Originality and Authenticity: Shutterstock values authentic, original content. Don’t upload images that are heavily edited or manipulated to the point where they no longer look natural. Avoid stock photos that are overly staged or cliché.
- Model and Property Releases: If your images feature recognizable people or private property, you must have proper releases. This is essential to protect rights and ensure your images can be sold legally.
- Content Restrictions: Shutterstock prohibits certain content, such as hate speech, violence, or explicit material. Make sure your images don’t contain any prohibited content.
Additionally, Shutterstock has specific guidelines on composition, lighting, and subject matter. They prefer images that are well-composed, with good lighting and clear focus. Avoid overly busy backgrounds or distracting elements unless they are intentional and add value to the image.
Lastly, review Shutterstock’s Content Guidelines and Submission Policies regularly. Keeping up-to-date ensures your submissions meet the standards and reduces the chances of rejection. Remember, high-quality, compliant images have a better chance of being accepted and selling well.
Tips for Increasing Visibility and Sales of Your Photos
So, you’ve uploaded some fantastic photos to Shutterstock — that’s a great start! But now, the real question is: how do you make sure your images get seen by the right people and actually start selling? Increasing visibility isn’t just about uploading; it’s about smart strategies and consistent effort. Let’s dive into some practical tips to boost your photos’ exposure and, ultimately, your sales.
Optimize Your Metadata: Think of metadata as your photos’ digital signposts. Use relevant, descriptive keywords that accurately reflect what’s in your image. Include specific terms, popular search phrases, and avoid overstuffing. For example, instead of just “dog,” try “Golden Retriever puppy playing in the park.” Well-optimized tags help your photos appear in more searches.
Create High-Quality, Unique Content: Shutterstock favors images that stand out. Invest time in capturing high-resolution, well-composed, and visually appealing photos. Unique perspectives or niche topics can help you target specific markets and reduce competition.
Consistent Uploading: Regular uploads keep your portfolio fresh and give you more chances to appear in search results. Think of it like planting seeds; the more you plant, the more chances you have for one to grow into a sale.
Leverage Social Media and Personal Networks: Share your Shutterstock portfolio on your social media channels, blogs, or website. Engage with communities that share your photography interests. Sometimes, a simple share can drive traffic and boost visibility.
Participate in Trends and Seasonal Themes: Keep an eye on current trends, holidays, or seasonal events. Uploading relevant images during peak times can increase their chances of being noticed and purchased.
Offer Diverse Content: Cover various topics, styles, and themes. A diverse portfolio appeals to a wider audience and can tap into different markets, increasing your overall sales potential.
Remember, boosting visibility isn’t an overnight process. It requires patience, consistency, and a proactive approach. Keep refining your keywords, stay current with trends, and continue uploading quality content. Over time, your images will gain the recognition they deserve!
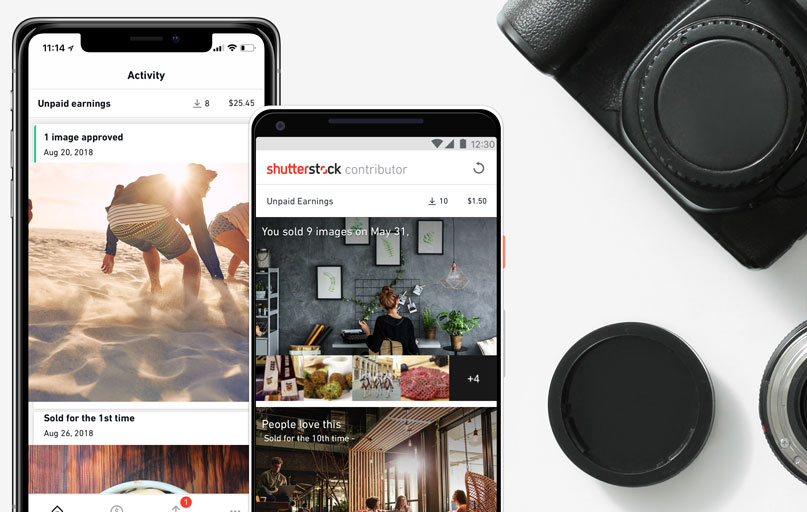
Monitoring Your Performance and Managing Your Portfolio
Once you’ve started uploading and promoting your photos, it’s essential to keep a close eye on how they’re performing. Monitoring your performance helps you understand what’s working, what needs improvement, and how to optimize your future uploads. Think of it as steering your photography business in the right direction — data-driven and strategic.
Use Shutterstock’s Contributor Dashboard: This is your central hub for tracking sales, views, downloads, and earnings. Regularly reviewing this data gives you insight into which images resonate most with buyers.
Analyze Your Top Performers: Identify your best-selling photos. Ask yourself:
- What themes or topics do they cover?
- Are there specific styles or colors that perform better?
- Which keywords are driving traffic?
Use these insights to guide your future uploads, focusing on what works and refining what doesn’t.
Adjust Your Metadata and Keywords: If certain images aren’t performing well, revisit their metadata. Sometimes, tweaking keywords or descriptions can improve search visibility. Don’t be afraid to experiment — small adjustments can make a big difference.
Manage Your Portfolio Strategically: Keep your portfolio organized. Remove outdated or underperforming images if they’re not adding value. Highlight your best work by pinning or featuring those images if the platform allows. Consistently adding new content while pruning less successful images keeps your collection fresh and relevant.
Set Goals and Track Progress: Whether it’s reaching a certain number of sales each month or expanding into new niches, setting clear goals helps you stay motivated. Use your data to measure progress and adjust your strategies accordingly.
Stay Updated with Shutterstock News and Trends: The platform often updates its policies, features, or trending topics. Being aware of these changes can help you adapt quickly and stay competitive.
In essence, managing your Shutterstock portfolio isn’t a one-time task — it’s an ongoing process. By monitoring your performance regularly, making informed adjustments, and staying organized, you’re setting yourself up for sustained success. Remember, every photo you upload and tweak is a step toward building a thriving photography business!
Conclusion and Best Practices for Successful Uploads
Successfully uploading your images to Shutterstock can significantly enhance your portfolio and increase your sales potential. To achieve the best results, it’s essential to follow some key best practices. First, ensure your images are of high quality—sharp, well-lit, and free of noise or distractions. Use appropriate keywords and accurate titles to improve discoverability; consider including relevant tags such as themes, colors, and subjects. Before uploading, review Shutterstock’s content guidelines to avoid rejections. Consistency is also vital; regularly update your portfolio with fresh content to attract repeat buyers and stay competitive.
Here are some best practices for successful uploads:
- File Format & Size: Upload images in JPEG or TIFF formats with a minimum resolution of 4 MP.
- Keyword Optimization: Use descriptive, relevant keywords to increase visibility in searches.
- Metadata Accuracy: Provide precise titles, descriptions, and categories.
- Quality Control: Review images for technical issues using Shutterstock’s review tools before submission.
- Consistency & Variety: Maintain a steady upload schedule with diverse content types.
By adhering to these best practices, you can maximize your image visibility, reduce rejection rates, and ultimately boost your Shutterstock sales. Remember, patience and persistence are key—building a successful portfolio takes time, but with dedication, your efforts will pay off in increased earnings and recognition in the creative community.