Getting your photos onto Shutterstock can be a fantastic way to earn passive income and share your creative work with a global audience. But, the process might seem a bit overwhelming at first—what to include, how to prepare, and understanding the approval timeline. Don’t worry! In this guide, I’ll walk you through each step so you can upload your images confidently and speed up that approval process. Whether you’re a seasoned photographer or just starting out, these tips will help you get your photos online quickly and efficiently. Let’s dive in!
Preparing Your Photos for Upload
Before you even think about clicking the upload button, it’s crucial to prepare your photos properly. This means ensuring they meet Shutterstock’s quality standards and are optimized for quick approval. Here’s what you need to focus on:
- High-Quality Images: Shutterstock prefers images that are sharp, well-exposed, and free from noise or pixelation. Always use a good camera or a smartphone with a high-resolution sensor to capture your shots.
- Proper Resolution and Size: Images should be at least 4 megapixels (e.g., 2400×1600 pixels). Larger images are preferable because they offer more flexibility for buyers.
- Correct File Format: Save your photos as JPEG files with high-quality compression (around 80-100%). Avoid PNG or TIFF formats unless specifically requested.
- Consistent Style and Focus: Make sure each photo is well-composed, with a clear subject and minimal distractions. Crop your images to eliminate unnecessary borders or empty space if needed.
- Metadata and Keywords: Prepare relevant keywords that accurately describe your photo. Well-tagged images are more likely to be approved and found in searches.
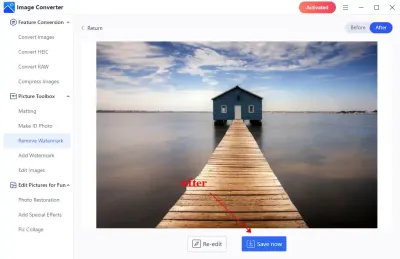
Additionally, double-check your images for any watermarks, logos, or copyrighted content that you don’t own. Shutterstock is strict about originality and copyright compliance. Take the time to review your photos for any imperfections or issues, because uploading high-quality, well-prepared images is the key to faster approval and satisfied customers.
Creating a Shutterstock Contributor Account
So, you’re ready to start sharing your photos with the world and earn some extra cash? Great! The first step is creating a Shutterstock contributor account. It’s a straightforward process, but there are a few things to keep in mind to make it smooth sailing.
First, head over to the Shutterstock Contributor Sign-Up Page. You’ll need to provide some basic info like your name, email address, and create a password. Make sure to choose a strong password to keep your account secure.
Once you’ve filled out the registration form, Shutterstock will ask you to verify your email address. Check your inbox for the verification email and click the link to confirm your account. This step is super important because it activates your account and allows you to start uploading.
After verifying your email, you’ll be guided through a few additional steps, including sharing some details about your photography background and the types of images you’ll be submitting. Don’t worry—this helps Shutterstock understand your style and might even improve your chances of approval.
Now, here’s a quick tip: make sure to use a professional-looking profile picture and fill out your profile info completely. Having a polished profile can make a good first impression and increase trust with buyers and Shutterstock staff.
Lastly, before you dive into uploading, review Shutterstock’s contributor guidelines. These guidelines are essential—they specify what kinds of images are accepted, the technical standards, and the legal requirements. Getting familiar with these will save you time and frustration later on.
And voilà! Your contributor account is all set up. Now you’re officially part of the Shutterstock community and ready to share your photography magic with the world.
Uploading Your Photos to Shutterstock
Now that your account is ready, it’s time to upload your photos! This part is pretty straightforward, but a few tips can help you get your images approved faster and increase your chances of making sales.
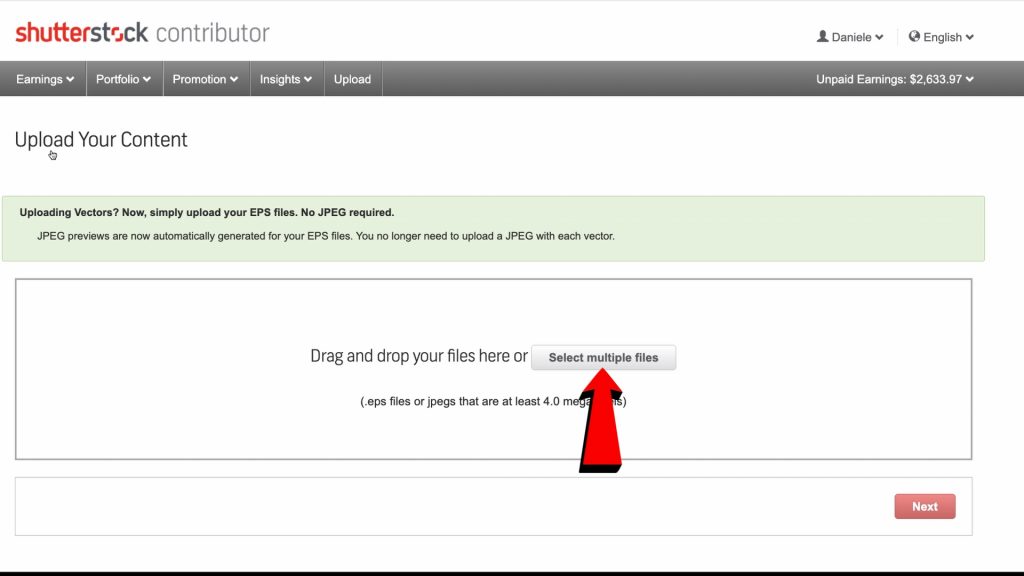
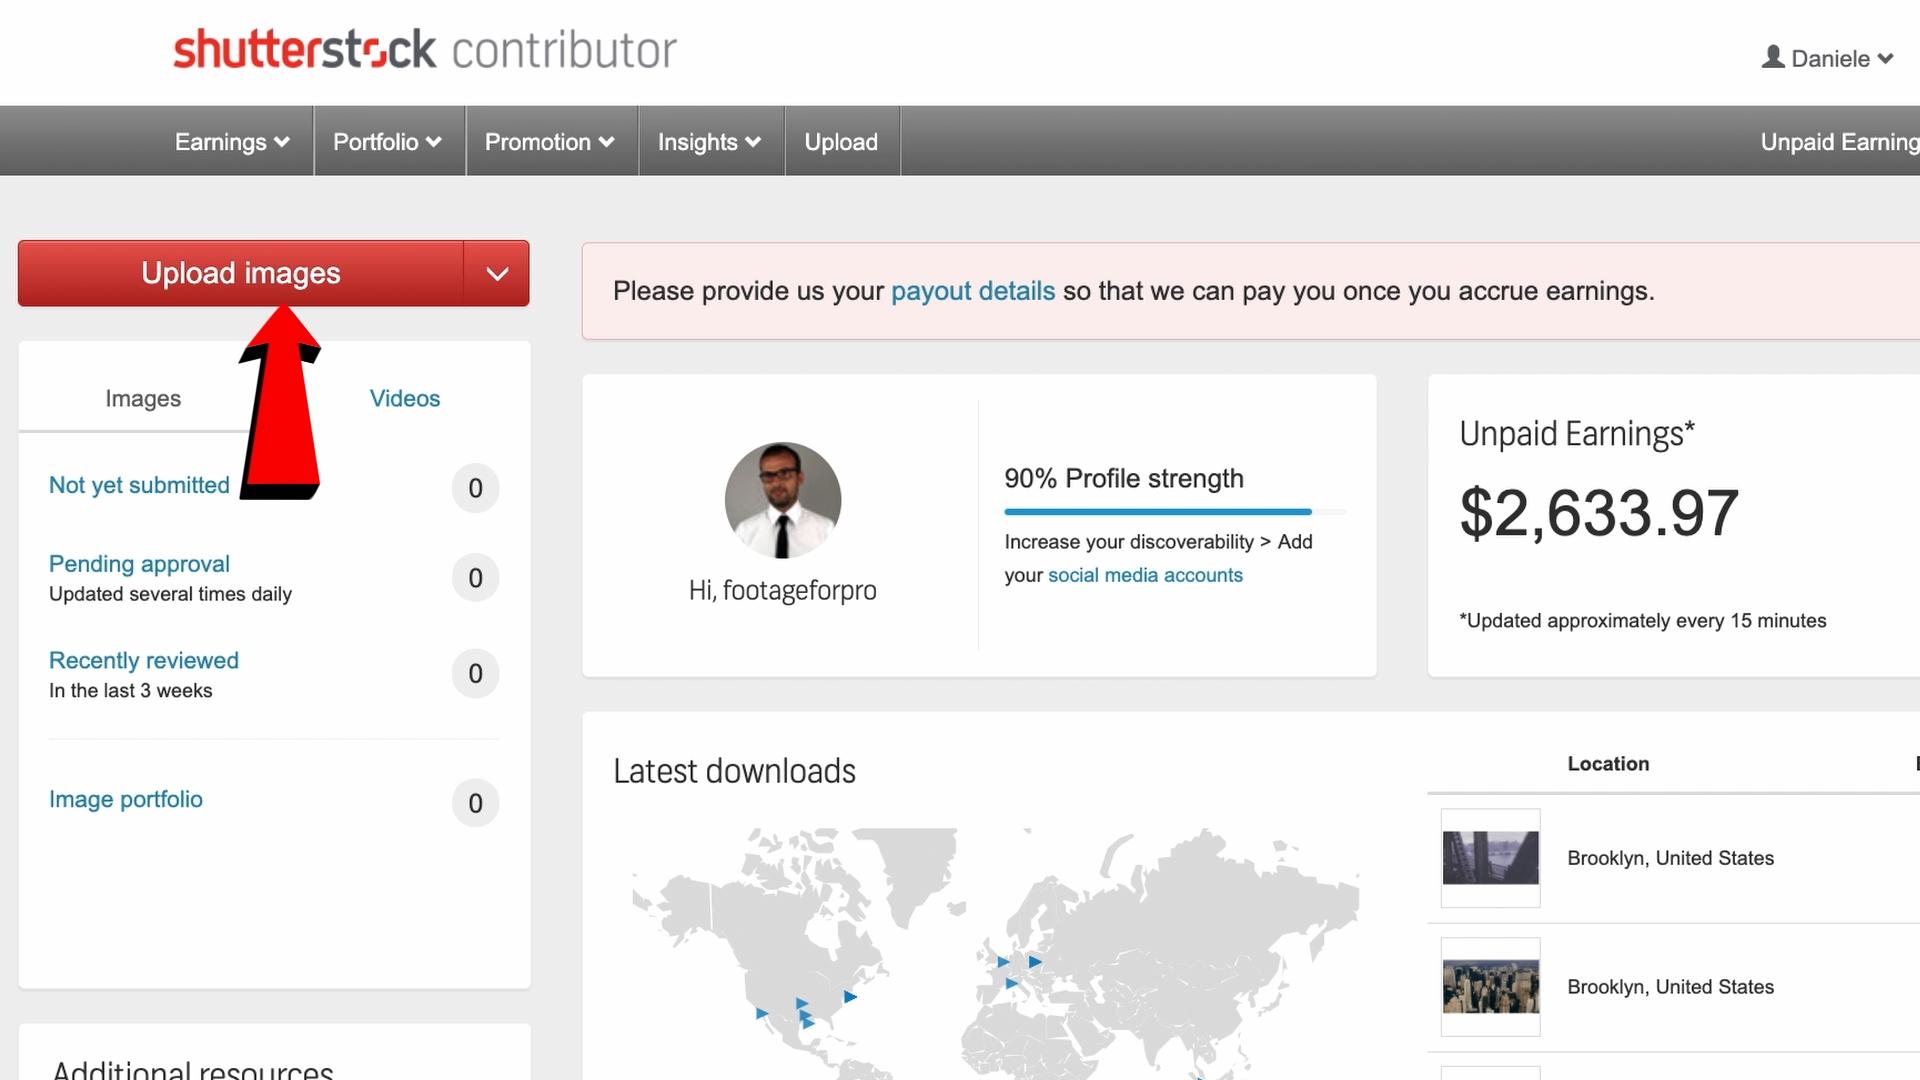
First, log in to your Shutterstock contributor dashboard. You’ll see an “Upload” button—click it to get started. Shutterstock allows bulk uploads, which is fantastic if you have a lot of images ready to go. Just select multiple files from your computer and upload them all at once.
Before you upload, make sure your photos meet Shutterstock’s technical requirements:
- File format: JPEG for images.
- Resolution: Minimum 4MP (megapixels), but higher is better for quality.
- Color profile: sRGB is preferred.
- File size: No larger than 50MB per image.
When uploading, you’ll be prompted to add detailed information about each photo:
- Title: Make it descriptive and relevant.
- Description: Include keywords that accurately describe the image.
- Keywords: Use relevant tags to increase discoverability. Think about what someone might search for—location, subject, colors, style, etc.
Don’t forget to select the appropriate model and property releases if your image contains recognizable people or private property. Skipping this step can delay approval or lead to rejection, so be thorough!
Once you’ve filled out all the info, review your uploads to ensure everything looks good. Shutterstock’s review team will then evaluate your images based on quality, relevance, and compliance with guidelines.
Pro tip: upload images in batches of around 10-20 for quicker processing. Larger batches are fine, but smaller groups tend to get reviewed faster. Also, avoid uploading images that are blurry, poorly lit, or have distracting elements—quality is key for fast approval.
After submitting, keep an eye on your dashboard for feedback or approval notifications. If some images are rejected, don’t get discouraged! Shutterstock usually provides reasons, so you can learn and improve your next batch.
And that’s pretty much it! With a little practice, uploading becomes second nature, and you’ll be on your way to building a solid portfolio. Happy uploading!
Optimizing Photo Titles, Descriptions, and Keywords

Once your photos are ready to go, it’s time to make sure they’re easily discoverable by potential buyers. This is where optimizing your titles, descriptions, and keywords comes into play. Think of it as giving your images a friendly, clear sign that says, “Hey, here’s what I am!”
Start with a descriptive and accurate title. Your photo title should briefly and precisely describe what’s in the image. For example, instead of a vague title like “Beautiful Scene,” go for something like “Sunset over Mountain Lake with Reflection.” This helps both Shutterstock’s algorithms and people browsing the site understand what your image depicts.
Next up, craft a detailed yet concise description. This is your chance to add context or highlight specific elements that might not be obvious from the title. For example, mention the location, mood, or any unique features. Keep it natural and conversational — think about what someone might search for if they wanted an image like yours.
Then come the keywords — the backbone of your image’s discoverability. Use relevant keywords that describe the main subjects, setting, colors, and mood. Shutterstock allows multiple keywords (up to 50), so be thorough but avoid keyword stuffing. Use a mix of broad and specific terms. For instance, if your photo is of a “blue bicycle in a park,” include keywords like:
- bicycle
- park
- outdoor
- blue
- cycling
- nature
Tip: Use synonyms and related terms to broaden your image’s reach. For example, “bike,” “cycle,” or “two-wheeler” can all help attract different search queries.
Remember, well-optimized titles, descriptions, and keywords can dramatically improve your chances of your photos being found quickly and approved faster. Take your time here — it’s worth the extra effort!
Understanding Shutterstock’s Content Guidelines and Quality Standards
Before you upload, it’s crucial to understand what Shutterstock looks for in a high-quality, approved image. Their content guidelines and quality standards are designed to ensure that only professional, clear, and relevant images make it onto their platform.
Let’s break down the main points:
- Technical Quality: Your photos should be sharp, well-exposed, and free of noise or artifacts. Use a good camera and editing software to enhance clarity and color accuracy. Avoid over-compression, which can cause pixelation.
- Focus and Composition: Center your main subject and pay attention to framing. A strong composition with a clear focal point makes your image more appealing and marketable.
- Relevance and Originality: Shutterstock favors original content that isn’t widely available elsewhere. Avoid generic or cliché shots unless you add a unique perspective or creative touch.
- Model and Property Releases: If your images feature recognizable people or private property, you need the proper releases signed and uploaded. This is essential for legal compliance and approval.
- Content Restrictions: Shutterstock prohibits images that include copyrighted logos, trademarks, or sensitive content like violence, hate symbols, or illegal activities. Ensure your images adhere to their content policies.
Pro Tip: Use their Quality Guidelines page for detailed info and checklists. This resource helps you understand exactly what they’re looking for and avoid rejections.
In summary, familiarizing yourself with these standards not only helps your photos get approved faster but also increases their chances of being accepted at a higher quality level, making your portfolio more attractive to buyers. Quality matters—so take the time to review each image before hitting submit!
Tips for Ensuring Quick Approval of Your Photos
Getting your photos approved quickly on Shutterstock can feel like a bit of a mystery, but there are definitely some tried-and-true tips to help speed up the process. Think of it like preparing your photos for a big audition—you want to put your best foot forward from the start!
First impressions matter. Make sure your images are sharp, well-lit, and properly exposed. Blurry, pixelated, or poorly lit photos are likely to be rejected, which can delay approval. Invest a little extra time in editing to ensure your photos look professional.
Follow Shutterstock’s technical requirements. This might sound obvious, but double-check things like resolution (usually at least 4 MP), file format (JPEG), and color profile (sRGB). Ignoring these details can lead to unnecessary rejections.
Focus on originality and relevance. Shutterstock prefers unique, high-quality images that tell a story or fill a specific need. Avoid overly generic shots or images that are heavily edited or look staged. Think about what buyers are searching for and how your photos can meet those needs.
Pay attention to model and property releases. If your photo includes recognizable people or private property, make sure you have the proper releases uploaded. Without these, your images will be rejected, and that can slow down the approval process.
Use descriptive and accurate keywords. When uploading, include relevant keywords that accurately describe your photo. This not only helps your image get found more easily but also indicates to reviewers that you’ve put thought into your submission.
Keep an eye on content guidelines. Shutterstock has strict rules about prohibited content, such as graphic violence, hate symbols, or copyrighted logos. Familiarize yourself with their content guidelines to avoid rejections.
By following these tips, you’ll give your photos a better chance of passing the review process swiftly. Remember, quality, relevance, and attention to detail are your best friends here!
Reviewing and Submitting Your Photos for Approval
Once you’ve uploaded your photos, the next step is to review everything carefully before hitting that submit button. It might be tempting to rush through, but taking a few extra minutes can save you time in the long run.
Start with a thorough review of each image. Check for any technical issues like blurriness, poor lighting, or unwanted objects in the frame. Use your editing software if needed to make small adjustments—sometimes, a quick crop or brightness tweak can make a big difference.
Verify your metadata and keywords. Ensure that your title, description, and keywords are accurate and descriptive. Think about what potential buyers might search for and include those terms naturally. Avoid keyword stuffing, which can look spammy and may lead to rejection.
Check your releases. Confirm that you’ve uploaded all necessary model and property releases for images that include people or private property. Without these, your images won’t be approved.
Preview your submission. Shutterstock’s upload platform usually allows you to review your images before final submission. Use this feature to double-check everything looks good and that all required info is filled out correctly.
Set the right licensing options. Decide whether you want to license your photos under standard or enhanced licenses, depending on how you want your images to be used. Make sure you’re comfortable with your choice before submitting.
Final step—submit with confidence. Once everything looks perfect, click the submit button. Remember, after submission, Shutterstock’s review team will evaluate your images, which typically takes a few days. If your images are rejected, don’t get discouraged—review the feedback, make necessary adjustments, and try again.
Reviewing your photos carefully before submission might seem like extra work, but it pays off by reducing rejection delays and increasing your chances of quick approval. Think of it as polishing your work to shine just right!
Monitoring Your Submission Status and Managing Your Portfolio
Once you’ve uploaded your photos to Shutterstock, it’s time to keep an eye on how they’re doing. Monitoring your submission status helps you stay in the loop and understand whether your images are progressing toward approval or if there are any issues needing your attention.
Shutterstock provides a straightforward dashboard where you can view the status of each submission. Here’s what to look out for:
- Pending Review: Your photo is in the queue, awaiting review by the Shutterstock review team.
- Approved: Congrats! Your photo has been accepted and is now available for licensing.
- Rejected: Unfortunately, your image didn’t meet Shutterstock’s standards. You’ll receive feedback on why it was rejected, which is invaluable for future submissions.
Managing your portfolio effectively is just as important as submitting high-quality images. Keep your portfolio organized by regularly reviewing your uploaded photos. Remove outdated or low-performing images, and update your portfolio with fresh, diverse content to attract more buyers.
Here are some tips for managing your portfolio:
- Categorize your images: Use clear keywords and categories to make your photos easily discoverable.
- Track performance: Use Shutterstock’s analytics tools to see which images sell best and focus on creating similar content.
- Update regularly: Upload new images consistently to keep your portfolio vibrant and appealing.
- Respond promptly: If Shutterstock contacts you for additional information or requests edits, respond quickly to maintain a good standing.
By regularly monitoring your submissions and managing your portfolio, you increase your chances of earning royalties and building a strong presence on Shutterstock. Remember, patience and organization are key in this process!
Conclusion and Best Practices for Successful Uploads
Congratulations! You’ve now got a clear understanding of the step-by-step process to upload photos to Shutterstock for fast approval. But before you start submitting en masse, let’s review some best practices that can boost your success rate and help you stand out.
Here are some essential tips:
- Focus on quality over quantity: Upload only your best, high-resolution images that meet Shutterstock’s standards.
- Follow technical guidelines: Use the recommended file formats, sizes, and color profiles to ensure your images are review-ready.
- Be thorough with keywords and descriptions: Use relevant, specific keywords to improve discoverability. Avoid keyword stuffing—stick to accurate and descriptive terms.
- Stay updated with Shutterstock’s requirements: Platform policies can change. Regularly review their contributor guidelines to stay compliant.
- Maintain originality: Submit unique content that fills a niche or offers something different from existing images.
- Handle rejections positively: If your images are rejected, review the feedback carefully, learn from it, and try again with improvements.
- Be consistent: Regular uploads keep your portfolio fresh and increase your chances of being noticed by buyers and reviewers alike.
Remember, patience is key. Building a successful portfolio on Shutterstock takes time, but with dedication and attention to detail, you’ll find yourself earning royalties sooner than you think. Keep learning, stay inspired, and happy uploading!