Thinking about turning your photography hobby into a source of income? Shutterstock is one of the leading platforms where photographers and creators can sell their images to a global audience. It’s a fantastic way to showcase your work, earn royalties, and expand your reach. But before you start uploading, it’s helpful to understand how the platform works, what kind of images are in demand, and the steps involved in getting your photos listed. Don’t worry—it’s straightforward, and with a little guidance, you’ll be on your way to making sales in no time!
Preparing Your Photos for Upload
Before you hit that upload button, take some time to prepare your photos properly. Quality is king on Shutterstock, and well-prepared images stand a much better chance of getting accepted and sold. Here’s what you should keep in mind:
- Choose the Right Files: Use high-resolution files, ideally 4 MP or larger, to ensure your images look sharp and professional. JPEG format is recommended, with a high-quality setting (around 12-15). Avoid overly compressed or low-quality images.
- Ensure Proper Composition: Focus on clear, well-composed shots. Avoid cluttered backgrounds unless intentional, and make sure your main subject is prominent and in focus.
- Pay Attention to Lighting and Colors: Good lighting makes a huge difference. Bright, well-lit photos tend to perform better. Also, keep colors natural or tastefully edited—avoid over-saturation or unnatural hues unless they serve a creative purpose.
- Remove Watermarks and Logos: Make sure your images are free of any watermarks, logos, or branding that you don’t own or have permission to use.
- Check for Technical Errors: Look out for noise, blurriness, or pixelation. Use photo editing software to enhance details, correct exposure, and straighten horizons if needed.
- Metadata and Keywords: Prepare relevant keywords and descriptions. Think about what buyers might search for—location, mood, subject, colors, themes, etc. Proper metadata increases your chances of discovery.
Once your photos are polished and ready, you’re set to upload them confidently, knowing they meet Shutterstock’s standards. Remember, quality and proper preparation are key to standing out and making sales!
Creating a Shutterstock Contributor Account
Getting started on Shutterstock is pretty straightforward, but it’s important to set up your contributor account correctly so you can start uploading your photos and earning money. Think of this as your online storefront — you want it to be welcoming, professional, and easy to navigate.
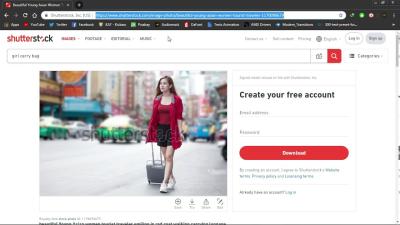
First things first, head over to the Shutterstock Contributor Portal. Click on the “Sign Up” button, and you’ll be prompted to fill out some basic information. You’ll need:
- Your full name
- Email address
- Create a strong password
- Choose your country of residence
- Agree to Shutterstock’s Contributor Terms & Conditions
Once you’ve filled out the initial sign-up form, Shutterstock will send a verification email. Be sure to check your inbox (and spam folder if you don’t see it), then click the verification link to activate your account.
After verifying your email, you’ll be asked to complete your profile. This includes providing:
- Tax information — depending on your country, you might need to submit tax forms for earnings purposes
- Payment details — PayPal is a popular option, but Shutterstock also offers other methods like Payoneer or bank transfer
- Sample portfolio — don’t worry, you can add this later, but it’s a good idea to prepare some high-quality images beforehand
Remember, the quality of your profile can influence how quickly your images are reviewed and approved. So, use a professional-looking profile picture and fill out your bio with a little bit about your photography style. This helps buyers understand what kind of images you create and can boost your credibility.
Finally, once your account is set up, you’re officially a Shutterstock contributor! Now, it’s time to prepare your photos for upload and get them ready to sell to a global audience. But first, let’s go through the step-by-step process of uploading your photos.
Uploading Photos to Shutterstock Step by Step
Uploading your photos to Shutterstock might seem like a daunting task at first, but once you get the hang of it, it’s pretty quick and straightforward. Here’s a step-by-step guide to help you navigate the process smoothly.
Step 1: Log Into Your Contributor Account
Visit the Shutterstock Contributor Portal and sign in with your email and password. Once logged in, you’ll see your dashboard where you can manage your portfolio.
Step 2: Prepare Your Photos
Before uploading, make sure your images:
- Are high-resolution (generally at least 4 MP)
- Have been edited for color, sharpness, and overall quality
- Are in the correct format (JPEG is standard)
- Are free of watermarks, borders, or logos
Also, ensure your photos comply with Shutterstock’s content guidelines to avoid rejection during review.
Step 3: Click “Upload”
On your dashboard, locate the “Upload” button — usually found at the top right corner. Click it to start adding your images.
Step 4: Select Files from Your Computer
A file browser window will open. Navigate to where your images are stored, select the photos you want to upload, and click “Open.” You can upload multiple images at once, which makes the process faster.
Step 5: Add Metadata (Titles, Descriptions, and Keywords)
Once your images are uploaded, you’ll need to provide details to help buyers find your photos:
| Field | What to Include |
|---|---|
| Title | Brief, descriptive name of the image |
| Description | Detailed explanation of what the image depicts |
| Keywords | Relevant tags that relate to the image (e.g., “sunset,” “mountains,” “business meeting”) |
Use specific, relevant keywords to increase your chances of your images appearing in searches. Think about what a buyer might search for when looking for a photo like yours.
Step 6: Select Model and Property Releases (if applicable)
If your images feature recognizable people or private property, you’ll need to upload the appropriate releases. Without these, your photos might be rejected or restricted from certain markets.
Step 7: Submit for Review
After filling out all the necessary information, review your uploads to ensure everything is accurate. When ready, click “Submit for Review.” Your images will then go into Shutterstock’s review queue.
Step 8: Wait for Approval
The review process usually takes a few days. During this time, Shutterstock’s team assesses your images for quality and compliance. If approved, your photos will go live and available for licensing.
And that’s it! Keep uploading consistently, and over time, you’ll build a solid portfolio that can generate passive income. Remember, the key is to upload high-quality images with relevant metadata — the more you upload, the better your chances of success.
Understanding Shutterstock’s Submission Requirements and Guidelines
Before you start uploading your stunning photos to Shutterstock, it’s super important to get a clear understanding of their submission requirements and guidelines. Think of it as the rulebook that helps ensure your images meet their standards and have the best chance of getting accepted and seen by buyers.
Shutterstock is pretty particular about the quality and content of the images they accept. Here’s what you need to keep in mind:
- Image Quality: Your photos should be sharp, well-exposed, and free of noise or pixelation. Use a good camera or smartphone with high resolution. Generally, images should be at least 4 megapixels in size, but bigger is always better.
- File Format: Upload in JPEG format with the highest quality setting. Keep the file size below 50MB.
- Color Profile: Use sRGB color profile for accurate colors across devices.
- Content Restrictions: Avoid images with watermarks, logos, or copyrighted material unless you have permission. Be cautious with sensitive or trademarked items.
- Model and Property Releases: For images featuring recognizable people or private property, you need proper releases. Shutterstock requires these for certain types of content, especially if they could be used commercially.
- Metadata and Keywords: Providing accurate titles, descriptions, and keywords helps your images get found. Be honest and specific—don’t stuff keywords!
It’s also a good idea to review Shutterstock’s Stock Photo Submission Guidelines regularly, as they update their standards from time to time. Following these rules not only increases your chances of acceptance but also helps you build a professional reputation on the platform.
Optimizing Your Photos for Better Visibility and Sales
Once your photos are uploaded and accepted, the real fun begins—getting them noticed and making sales! Optimization is key here. Think of it like setting up your shop window to attract passersby. The more appealing and discoverable your images are, the more likely they are to be purchased.
Here are some tips to help you optimize your photos for better visibility:
Use Accurate and Descriptive Keywords
Keywords are the main way buyers find your images. Be specific and relevant—if your photo is of a “sunset over mountain range,” include keywords like sunset, mountain, landscape, nature, sky. Avoid generic or irrelevant tags, as they can hurt your credibility and search ranking.
Craft Engaging Titles and Descriptions
Your title should be clear and descriptive, capturing the essence of the image. For example, instead of “Beautiful photo,” try “Colorful autumn leaves in Central Park.” Your description can provide additional context or details that might help buyers decide.
Choose the Right Categories
Properly categorizing your images makes it easier for buyers to discover them. Shutterstock offers categories like “Travel,” “Business,” “Food,” and more. Select the one that best fits your image.
Maintain Consistent Quality and Style
Building a cohesive portfolio with a recognizable style can attract repeat buyers. Whether you prefer vibrant landscapes, professional business shots, or candid lifestyle photos, consistency helps your work stand out.
Engage with Trends and Seasonal Content
Stay attuned to current trends, holidays, or seasonal themes. Uploading timely content related to events like Christmas, summer vacations, or back-to-school can boost your visibility and sales.
Promote Your Portfolio Outside Shutterstock
Share your work on social media, personal websites, or blogs. The more exposure your photos get, the higher the chance of someone clicking through and making a purchase.
Remember, optimization is an ongoing process. Regularly review your keywords, update your portfolio with fresh content, and analyze what works best. Over time, these efforts can significantly improve your sales and help you build a thriving photography business on Shutterstock.
Managing Your Portfolio and Tracking Earnings
Once you’ve uploaded a good number of photos to Shutterstock, managing your portfolio effectively becomes essential. Think of your portfolio as your digital storefront—it’s what potential buyers see first, so you want it to be organized, appealing, and up-to-date. Plus, keeping track of your earnings helps you understand what’s working and where you can improve.
Managing Your Portfolio
- Organize Your Files: Regularly review your collection and categorize images based on themes, styles, or keywords. This way, you can quickly locate your best work or update older images with new keywords or descriptions.
- Remove or Update Underperforming Images: If some photos aren’t getting downloads, consider replacing them with new, more relevant content. You can also update the keywords or descriptions to improve visibility.
- Showcase Your Best Work: Shutterstock allows you to select featured images. Use this feature to highlight your top-performing photos or new uploads to attract more attention.
Tracking Your Earnings
Staying on top of your earnings helps you gauge your progress and plan your future uploads. Shutterstock provides a user-friendly dashboard with detailed analytics.
- Use the Dashboard: Regularly log in to view your earnings, download stats, and performance metrics for each image.
- Set Goals: Based on your stats, set realistic monthly or quarterly earnings goals. This can motivate you to upload more or refine your keywords and tags.
- Monitor Trends: Notice which types of images generate the most income. Do certain themes, styles, or subjects perform better? Use this insight to guide your future uploads.
Additional Tips:
- Keep Your Profile Updated: Make sure your bio, keywords, and contact info are current. A professional profile can attract more buyers and potential clients.
- Engage with the Community: Shutterstock has forums and groups where contributors share tips and experiences. Engaging here can provide valuable insights and inspiration.
Managing your portfolio and tracking your earnings might seem like a lot at first, but once you establish a routine, it becomes second nature. The key is consistency—keep your portfolio fresh, analyze your performance regularly, and adapt your strategy accordingly. Over time, you’ll see your efforts translate into more sales and higher income.
Tips for Increasing Your Success as a Shutterstock Contributor
Stepping up your game on Shutterstock isn’t just about uploading lots of photos; it’s about strategic, thoughtful contributions that resonate with buyers. If you want to boost your success, here are some practical tips to help you stand out and make the most of your efforts.
1. Focus on Quality Over Quantity
While uploading many photos can increase your chances, quality always trumps quantity. Make sure each image is sharp, well-composed, and properly edited. Avoid over-compressing images, as poor quality can lead to rejections or fewer downloads.
2. Use Effective Keywords and Descriptions
Keywords are your primary way for buyers to find your images. Be specific and thorough—think about what a buyer might search for. Use a mix of broad and niche keywords, and include relevant details like location, mood, or activity.
| Example | Effective Keywords |
|---|---|
| Beach scene during sunset | beach, sunset, ocean, vacation, summer, seaside, twilight |
| Professional business meeting | business, meeting, conference, professionals, teamwork, corporate |
Clear, accurate descriptions complement your keywords and boost visibility.
3. Stay Current with Trends
Pay attention to current events, seasons, and popular themes. For example, during holidays, themed images tend to sell well. Similarly, trending topics like remote work or sustainability can inspire content that buyers are actively searching for.
4. Diversify Your Portfolio
Don’t put all your eggs in one basket. Upload images across various subjects, styles, and formats. This broadens your reach and increases the chances of your work being purchased.
5. Be Patient and Persistent
Success on Shutterstock doesn’t happen overnight. Keep uploading consistently, optimize your images, and analyze what works best. Over time, your portfolio will grow, and so will your sales.
6. Engage with the Contributor Community
Join forums, webinars, or social media groups dedicated to Shutterstock contributors. Sharing experiences and learning from others can give you fresh ideas and motivation.
Remember, becoming a successful Shutterstock contributor is a marathon, not a sprint. By focusing on quality, relevance, and persistence, you’ll gradually build a thriving portfolio and grow your income. Keep experimenting, learning, and refining your approach—that’s the surest path to success.
Conclusion and Additional Resources for Selling Photos on Shutterstock
Successfully selling your photos on Shutterstock can be a rewarding way to monetize your photography skills. Remember, the key steps include understanding the platform’s requirements, optimizing your images for quality and relevance, and consistently uploading high-quality content. Don’t forget to familiarize yourself with Shutterstock’s content guidelines and best practices to increase your chances of approval and sales.
To further enhance your success, consider exploring the following resources:
- Shutterstock Contributor Blog: Offers tips, news, and updates directly from Shutterstock.
- Photography Forums and Communities: Engage with fellow contributors to share insights and feedback.
- Online Tutorials and Courses: Websites like Udemy or Skillshare provide comprehensive tutorials on stock photography and editing techniques.
- Social Media Groups: Join groups dedicated to stock photography for networking and support.
By staying informed and continually improving your portfolio, you can increase your chances of success on Shutterstock. Remember, patience and persistence are essential—building a profitable stock photography business takes time, but with dedication, your efforts will pay off. Happy uploading!