If you’re a musician or a composer looking to showcase your work and earn some extra income, Shutterstock is a fantastic platform to consider. Not only does it give your music exposure to a global audience, but it also offers a straightforward way to monetize your talent. Uploading music to Shutterstock might sound daunting at first, but once you get the hang of the process, it becomes a simple and rewarding experience. In this guide, we’ll walk you through every step, from preparing your tracks to getting them approved and earning money. Ready to share your music with the world? Let’s get started!
Prerequisites for Uploading Music

Before you dive into uploading your tracks to Shutterstock, it’s important to make sure you meet a few basic requirements. Think of these as the foundation for a smooth and successful submission process. First off, you’ll need a Shutterstock Contributor account. If you haven’t signed up yet, head over to their website and create one — it’s free and easy to do.
Next, you’ll want to have your music files ready. Shutterstock accepts high-quality audio formats like WAV or MP3, but WAV files are preferred because they maintain the best sound quality. Make sure your tracks are properly mastered, meaning they sound clear, balanced, and professional. This increases the chances of your music getting accepted and sold.
Another crucial thing is to ensure you hold the rights to your music. Shutterstock is strict about copyright, so you need to be the owner or have the necessary licenses for every track you upload. If your music features samples, loops, or other copyrighted elements, make sure you have permission to use them or replace those parts with original content.
Additionally, some technical details are worth keeping in mind:
- Track Length: Typically, Shutterstock prefers tracks between 30 seconds and 5 minutes.
- Metadata: Prepare descriptive titles, tags, and categories to help buyers find your music easily.
- Artwork: While music files don’t require cover art, providing a compelling track description can boost visibility.
Finally, ensure your account information is complete and accurate. This helps maintain professionalism and trustworthiness, which are key for approval and sales. Once you’ve checked all these prerequisites, you’re all set to start uploading your music to Shutterstock and making your creative work pay off!
Preparing Your Music Files for Submission
Before you jump into uploading your music to Shutterstock, it’s essential to make sure your files are polished and properly prepared. Think of this step as getting your music ready for a big audition—you want everything to be in top shape so it catches the attention of buyers and Shutterstock reviewers alike.
First things first, check your audio quality. Shutterstock accepts high-quality files, so aim to export your music in a lossless format like WAV or AIFF. These formats preserve the richness of your sound without compression artifacts. If you’re working with compressed formats like MP3, ensure they are at least 320 kbps for the best quality.
Next, consider the length of your tracks. Shutterstock generally prefers music clips that are between 15 seconds and 5 minutes long. Short, catchy pieces are more likely to be used in videos, commercials, or other multimedia projects. If your track is longer, think about trimming or creating shorter versions to maximize its usability.
Another critical step is metadata. Properly tagging your files with relevant information helps buyers find your music easily. This includes:
- Title: Clear and descriptive
- Artist Name
- Genre: e.g., pop, ambient, corporate
- Keywords: Think about what buyers might search for—upbeat, relaxing, cinematic, etc.
- Description: Briefly describe the mood, instruments, or intended use
Ensure your files are well-organized. Create a dedicated folder for your submission, labeling each file clearly with the title and version if necessary. This makes it easier when uploading multiple tracks and keeps everything neat.
Finally, perform a quick listening check. Play back your exported files on different devices—headphones, speakers, computer—to catch any unintended issues like background noise, clicks, or volume inconsistencies. A little extra effort here can make a big difference in how your music is perceived and accepted.
Creating an Artist Account on Shutterstock
Ready to upload your music? The first step is setting up your artist account on Shutterstock. Don’t worry—it’s straightforward and designed to be user-friendly, even if you’re new to online platforms.
Start by visiting the Shutterstock Contributor website. Look for the “Sign Up” or “Join Now” button, usually located at the top right corner. You’ll need to provide some basic information such as your email address, name, and creating a secure password. Make sure to use an email you check regularly because Shutterstock will send you important updates and notifications.
Once registered, you’ll be prompted to complete your profile. This includes providing additional details like your country of residence, payment preferences, and tax information if applicable. Filling out these fields accurately ensures smooth transactions and earnings tracking later on.
Next, verify your email address by clicking on the link sent to your inbox. This step confirms your account and allows you to access all features. After verification, log in to your dashboard where you’ll find the option to upload your music files.
Before submitting any music, it’s a good idea to review Shutterstock’s contributor guidelines and licensing terms. Understanding what’s allowed and what isn’t will help you avoid potential issues down the line. They also have a helpful FAQ section if you’re unsure about anything.
Finally, consider setting up your payment details early. Shutterstock offers multiple payout options like PayPal, Skrill, or bank transfer. Connecting your preferred method now means you can start earning immediately once your music is approved and sold.
And that’s it! With your account created and your files prepared, you’re all set to start submitting your music to Shutterstock and making those earnings roll in. It’s an exciting journey—so take your time, follow the steps, and soon you’ll be sharing your musical creations with a global audience!
Uploading Your Music Tracks to Shutterstock
Alright, you’ve got your music ready, and you’re excited to share it with the world—and hopefully earn some extra income along the way. Uploading your tracks to Shutterstock is pretty straightforward, but it’s important to follow a few key steps to make sure everything goes smoothly.
First things first, log into your Shutterstock Contributor account. If you haven’t created one yet, signing up is quick and free. Once you’re in, navigate to the dashboard and find the “Upload” button—it’s usually prominently displayed.
When you click on “Upload,” you’ll be prompted to select your music files. Shutterstock accepts various audio formats, but the most common are WAV, AIFF, or MP3. For the best quality and to meet Shutterstock’s standards, WAV files are recommended. Make sure your tracks are properly mixed and mastered before uploading to give buyers the best listening experience.
Next, select the tracks you want to upload from your computer. You can upload multiple files at once—just hold down the shift or control key (depending on your device) to select several tracks. Once uploaded, the platform will process your files, which might take a few minutes depending on the size.
While your tracks are uploading and processing, you’ll be prompted to fill out some basic information. This includes choosing the appropriate category, licensing options, and whether the track is instrumental or includes vocals. Be honest and accurate—this helps ensure your music reaches the right audience.
After the processing is complete, review your uploaded tracks to make sure everything looks good. Check the waveform, duration, and file quality. If everything checks out, you can proceed to the next step: adding metadata and tags to make your music discoverable.
Remember, uploading your music is just the beginning. Once it’s live, promoting it through social media or your own website can help attract more buyers. But don’t worry, Shutterstock’s platform makes the submission process simple, so you can focus on creating more great tracks!
Adding Metadata and Tags for Better Visibility
Now that your music is uploaded, the real magic begins with adding the right metadata and tags. Think of this as giving your tracks a detailed description so they can be easily found by people searching for exactly what you’ve created.
Why is metadata important? Well, it determines how your music shows up in search results. Proper tags, titles, and descriptions increase the chances that your tracks will be discovered by filmmakers, content creators, or anyone looking for the perfect background music.
Start with a clear and descriptive title. Instead of vague titles like “Music Track 1,” go for something specific like “Upbeat Corporate Background Music” or “Relaxing Acoustic Guitar Melody.” This helps buyers quickly understand what your track offers.
Next, add a detailed description. Mention the mood, style, instruments used, tempo, and any other relevant details. For example:
| Aspect | Example |
|---|---|
| Style | Ambient, Chillout, Electronic |
| Mood | Relaxing, Uplifting, Motivational |
| Instruments | Synthesizers, Piano, Drums |
| Tempo | 120 BPM |
Adding relevant tags is equally crucial. Think like a buyer: what keywords would they type to find your music? Use a mix of broad and specific tags. For instance:
- background music
- corporate
- uplifting
- instrumental
- relaxing
- motivational
- ambient
Be consistent and accurate with your tags. Avoid overstuffing or using misleading keywords, as this can hurt your reputation and visibility in the long run.
Finally, review all the metadata before submitting. Properly tagged and well-described tracks stand a much better chance of being purchased or licensed. Remember, the goal is to make your music as easy as possible for buyers to find and love. With the right metadata, your tracks can shine and start generating income sooner!
Understanding Shutterstock’s Content Guidelines for Music
Before you hit that upload button, it’s essential to understand what Shutterstock is looking for when it comes to music. Think of it as the rules of the game—knowing them helps you play better and increases your chances of getting approved. Shutterstock has specific content guidelines designed to maintain a high standard of quality and to ensure that all tracks are suitable for licensing across various projects.
First, your music should be original. That means no copying or heavily sampling other artists’ work unless you have the proper rights. Copyright infringement is a big no-no and can lead to rejection or even legal issues down the line. Make sure your track is genuinely yours and hasn’t been used elsewhere without permission.
Next, consider the technical quality. Your music should be well-mixed and mastered, with clear sound and no distracting background noise. Poor audio quality can be a quick ticket to rejection. Use good recording equipment, or if you’re working with virtual instruments, ensure they sound polished and professional.
Shutterstock also emphasizes versatility. Their customers look for music that can fit various projects—ads, videos, presentations, and more. Tracks that are too niche or specific might not get approved unless they have broad appeal. Keep your compositions fairly neutral or adaptable, unless you’re intentionally creating a specialized piece for a particular niche.
Another key point is licensing and rights. If your music includes samples, loops, or sounds from other sources, you need proper licensing for those as well. Otherwise, your entire submission could be invalidated. When in doubt, use royalty-free or original sounds.
Lastly, avoid explicit content, offensive language, or themes that might be inappropriate for a wide audience. Shutterstock aims to provide content suitable for commercial use, so keep it clean and professional.
In summary, to align with Shutterstock’s guidelines, ensure your music is original, high-quality, versatile, properly licensed, and appropriate for all audiences. Staying within these parameters boosts your chances of approval and helps you build a reputable portfolio on the platform.
Submitting Your Music for Review and Approval
Once you’ve prepared your track following the guidelines, it’s time to submit it for review. This step is crucial because Shutterstock has a review team that assesses each submission to ensure it meets their standards. Don’t worry; it’s a straightforward process, but paying attention to details can speed things up.
Start by logging into your contributor account and navigating to the ‘Upload’ section. Here, you’ll find options to upload your music files. Make sure your files are in the accepted formats—typically WAV or MP3—and meet any specified technical requirements, such as sample rate or bit depth.
When uploading, you’ll be prompted to add metadata—this includes your track’s title, description, genres, and keywords. Be descriptive and accurate. Use relevant keywords that potential buyers might search for, such as “uplifting corporate background music” or “ambient nature sounds.” Good metadata improves discoverability.
In addition to the audio file, you’ll need to upload a cover image or album art. Choose something simple yet representative of your music. Keep in mind Shutterstock’s guidelines for images—avoid text overlays, offensive imagery, or low-resolution files.
After uploading your files and entering the metadata, double-check everything. Mistakes or missing info can lead to delays or rejection. Once you’re satisfied, submit your track for review. Shutterstock’s review process typically takes a few days, but it can vary based on volume.
During the review, the team will evaluate your music against their quality standards and guidelines. If approved, your track will go live in the marketplace, ready for licensing. If it’s rejected, you’ll receive feedback on what needs improvement. Use this feedback to refine your track and resubmit.
Pro tip: Keep a record of your submissions, especially if you plan to upload multiple tracks. This helps you track approval status and manage your portfolio effectively.
Remember, patience is key. The review process can be rigorous, but it’s worth it to get your music in front of a global audience. Stay persistent, keep improving your tracks, and soon you’ll have a growing library of music earning you royalties on Shutterstock!
Tips to Maximize Earnings from Your Music Uploads
Thinking about making the most out of your music uploads on Shutterstock? It’s all about strategy and understanding what buyers are looking for. Here are some practical tips to help you boost your earnings and get your music noticed:
- Create High-Quality, Versatile Tracks: Ensure your music is professionally produced, well-mixed, and mastered. Offer a variety of styles—ambient, corporate, cinematic, upbeat—so you appeal to a broader audience.
- Focus on Trends and Popular Genres: Keep an eye on what’s trending in stock media. For example, motivational tunes, relaxing background music, or energetic tracks often get more downloads. Tailor some of your uploads to these popular styles.
- Use Relevant Keywords and Descriptions: When uploading, include detailed, accurate keywords and descriptions. Think about what buyers might search for, like “uplifting corporate music” or “calm meditation track.” This boosts your tracks’ visibility in search results.
- Upload Consistently: Regular uploads keep your portfolio fresh and increase your chances of being discovered. The more high-quality tracks you have, the more opportunities for sales.
- Offer Different Lengths and Versions: Provide various lengths (e.g., 15, 30, 60 seconds) and versions (loops, intros, outros). This gives buyers flexibility and increases the likelihood your music will fit their projects.
- Engage with the Community: Participate in Shutterstock forums or social media groups. Sharing tips and getting feedback can inspire new ideas and improve your work.
- Stay Updated on Shutterstock’s Guidelines: Make sure your music adheres to their standards and usage policies. This prevents issues with rejection and ensures your tracks remain available for sale.
- Promote Your Music Outside Shutterstock: Use your social media, website, or email list to showcase your portfolio. More exposure can lead to more buyers finding your work.
Remember, patience is key! Building a solid catalog and reputation takes time, but with dedication and smart strategies, you can turn your passion for music into a steady income stream on Shutterstock.
Monitoring Sales and Earnings on Shutterstock
Once you start uploading your music, it’s important to keep an eye on how your tracks are performing. Shutterstock provides tools that make tracking your sales and earnings straightforward, giving you valuable insights into what works and what might need improvement.
Accessing Your Dashboard: Log into your contributor account and navigate to your dashboard. Here, you’ll find an overview of your recent activity, including sales, earnings, and most popular tracks.
Key Metrics to Watch:
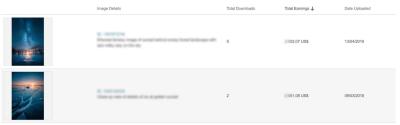
- Sales Data: See which tracks are selling the most and identify any patterns. For example, certain genres or styles might perform better than others.
- Earnings: Track your income over time. Shutterstock pays contributors monthly, so reviewing your earnings regularly helps you understand your progress and set goals.
- Download Trends: Check the number of downloads per track. This helps you determine which keywords or descriptions are attracting buyers.
- Customer Feedback and Comments: Read any comments or reviews. They can provide insights into what buyers appreciate or what could be improved.
Using Reports and Analytics: Shutterstock offers detailed sales reports that can be filtered by date, track, or category. Use these reports to analyze your best performers and identify opportunities for new uploads in high-demand areas.
Adjust Your Strategy Based on Data: If certain genres are selling well, consider creating more tracks in those styles. Conversely, if some tracks aren’t performing, think about updating descriptions or replacing them with fresh content.
Set Goals and Track Progress: Establish monthly or quarterly targets for uploads, sales, and earnings. Monitoring your progress helps keep you motivated and focused on growth.
Lastly, stay patient and consistent. Building a successful music portfolio on Shutterstock is a marathon, not a sprint. By regularly reviewing your sales and adjusting your approach, you’ll be better positioned to maximize your income over time.
Conclusion and Additional Resources for Musicians
Uploading your music to Shutterstock can be a rewarding way to monetize your creativity and reach a global audience. By following the step-by-step process outlined above, you ensure that your tracks meet platform standards, increase your chances of approval, and maximize your earning potential. Remember, consistency and quality are key—regularly updating your portfolio with fresh content can lead to greater visibility and sales.
To further support your music licensing journey, here are some valuable resources:
- Shutterstock Contributor Help Center: Comprehensive guides and FAQs for uploading and managing your content.
- Music Licensing Best Practices: Articles on how to create marketable and compliant music for licensing platforms.
- Community Forums: Connect with other musicians and contributors for tips, feedback, and support.
- Music Production Tutorials: Improve your skills with tutorials on recording, mixing, and mastering your tracks.
Joining online communities, attending webinars, and continuously honing your craft will enhance your chances of success. Keep experimenting with different genres and styles, stay updated on platform guidelines, and be persistent. Your musical talent combined with strategic effort can turn your passion into a sustainable income source through Shutterstock.