If you’re a graphic designer or a photographer looking to showcase your artwork, Shutterstock is a fantastic platform to get your work seen and potentially earn some income. One common question is, “How do I upload EPS files correctly?” EPS, or Encapsulated PostScript files, are a popular format for vector graphics because they maintain quality no matter the size. However, uploading EPS files isn’t just a matter of clicking ‘upload’—there are some important steps to ensure your files meet Shutterstock‘s standards and get approved smoothly. In this guide, we’ll walk through the essentials so your EPS submissions are flawless and ready for the marketplace.
Preparing Your EPS Files for Submission
Before you hit that upload button, taking the time to prepare your EPS files properly can save you a lot of hassle and increase your chances of acceptance. Here’s what you need to focus on:
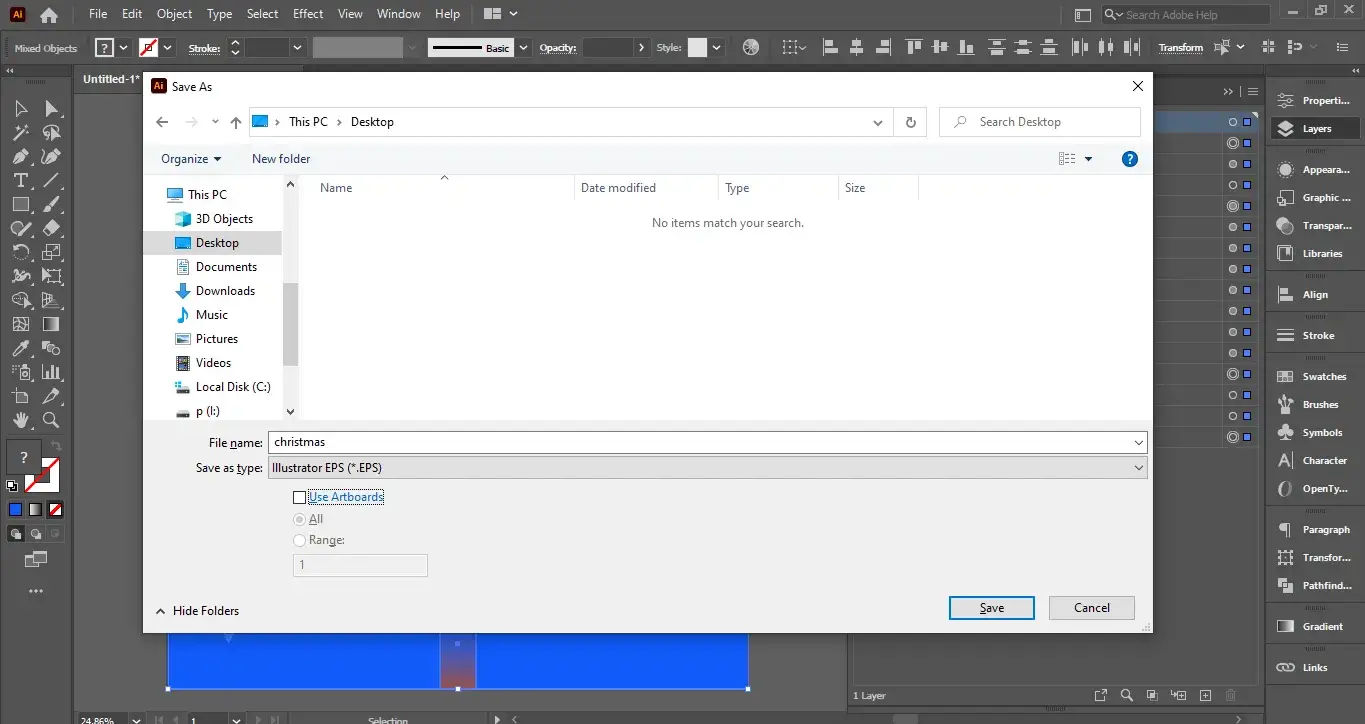
- Check File Compatibility: Ensure your EPS files are saved in a version compatible with Shutterstock’s system, typically EPS 10 or earlier. Save your files using Adobe Illustrator or similar vector software, and avoid using overly complex effects that might not render properly.
- Flatten Layers and Simplify: Shutterstock prefers files that are clean and easy to work with. Flatten unnecessary layers and hide or delete any hidden objects. This reduces the risk of errors during processing.
- Embed Fonts and Convert Text to Outlines: To prevent font issues, embed all fonts used in your artwork or better yet, convert all text to outlines. This makes your artwork universally compatible and prevents font mismatches.
- Maintain Vector Quality: Make sure your artwork is vector-based and scalable without loss of quality. Avoid raster images embedded within your EPS, unless explicitly allowed, and ensure all elements are crisp and clear.
- Use Proper Color Profiles: Embed color profiles like RGB or CMYK, depending on your artwork. Shutterstock mainly prefers RGB for digital assets, so convert your colors accordingly before saving.
- Optimize File Size: Compress your EPS files without losing quality. Large files can cause upload issues or slow down processing. Save a version optimized for web use, but keep the original high-quality version ready for submission.
By following these steps, you ensure that your EPS files are clean, compatible, and professional-looking—key factors that can help your artwork pass Shutterstock’s review process without hiccups. Taking a little extra time in preparation not only makes the upload smoother but also boosts your chances of your artwork getting approved and featured in the marketplace.
Step-by-Step Guide to Upload EPS Files to Shutterstock
Uploading EPS files to Shutterstock might seem a bit daunting at first, but once you get the hang of the process, it becomes straightforward. Here’s a simple, step-by-step guide to help you upload your EPS files smoothly and correctly:
- Sign in to Your Contributor Account
- Navigate to the Upload Section
- Select Your EPS Files
- Add Relevant Metadata
- Choose the Correct File Type and Settings
- Preview and Confirm
- Submit for Review
- Monitor Your Submission
If you haven’t already, head over to Shutterstock and log into your contributor account. If you’re new, you’ll need to create one — it’s free and easy to set up.
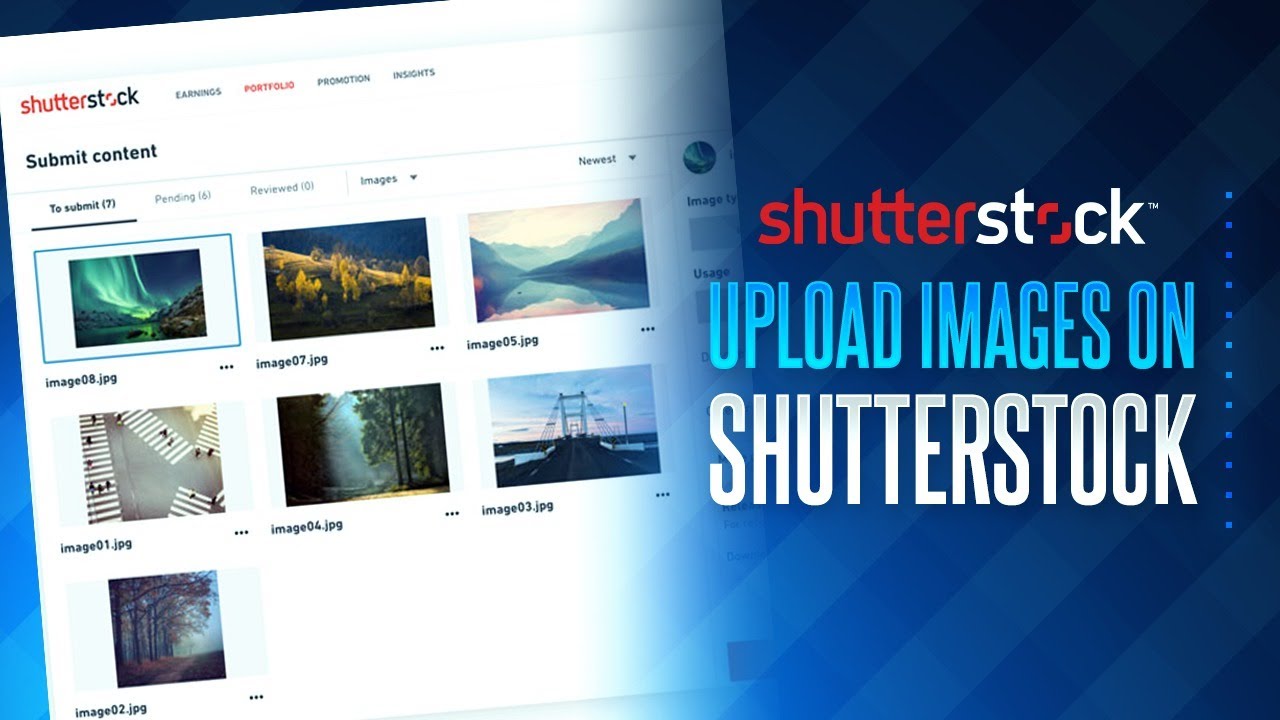
Once logged in, click on the “Upload” button, usually located at the top right corner of the dashboard. From the dropdown, select “Upload Files” or similar options.
Click the “Select Files” button and browse your computer to find the EPS files you want to upload. Remember, ensure your files are finalized and correctly named before uploading.
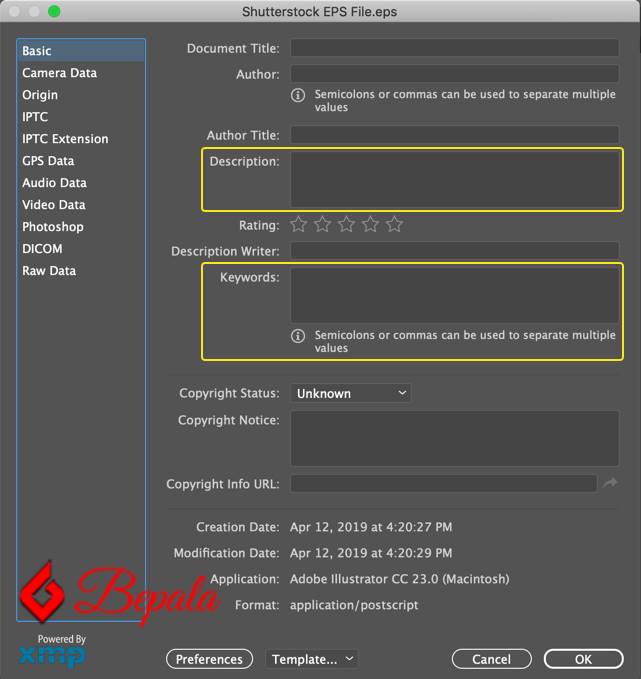
After selecting your files, you’ll be prompted to add details like the title, description, keywords, and categories. Be precise and descriptive — this helps your artwork get discovered.
Ensure you select “Vector” or “EPS” as the file type. If Shutterstock has options for color profile or resolution, set them according to their guidelines. Typically, EPS files should be saved with embedded fonts and without rasterization.
Most platforms allow a quick preview. Check that your EPS file displays correctly and that all elements are intact. If everything looks good, proceed to the next step.
Once all details are filled out, click “Submit” or “Publish.” Your upload will enter Shutterstock’s review queue, where their team will check for quality and compliance.
You can track the status in your contributor dashboard. If approved, your EPS file will be live and available for licensing. If rejected, review the feedback and make necessary adjustments.
And that’s it! Following these steps ensures your EPS files are uploaded correctly and are set up for success on Shutterstock. Just remember, always double-check your files and metadata before hitting submit — it saves time and frustration later.
Common Mistakes to Avoid When Uploading EPS Files
Even seasoned contributors can fall into some common pitfalls when uploading EPS files. Being aware of these mistakes can help you avoid rejections and ensure your artwork meets Shutterstock’s standards:
- Not Embedding Fonts
- Including Rasterized Elements
- Incorrect Color Profile
- Poor File Naming
- Uploading Incomplete or Draft Files
- Ignoring Shutterstock’s Technical Guidelines
- Forgetting to Add Accurate Metadata
One of the biggest issues with EPS files is missing or unembedded fonts. If your fonts aren’t embedded, your artwork might display incorrectly or get rejected. Always embed fonts in your vector software before saving.
EPS files should be purely vector graphics. If you include raster images, ensure they are high-resolution and properly embedded. However, Shutterstock prefers clean, vector-only files for scalability.
Using a CMYK color profile instead of RGB can cause color distortions or rejection. Check Shutterstock’s guidelines and stick to RGB color mode for your EPS files.
Using vague or inconsistent file names can make it harder for reviewers to identify your work. Use descriptive, keyword-rich names that reflect the content of your EPS file.
Make sure your EPS file is finalized before uploading. Uploadting drafts, incomplete designs, or placeholder files will lead to rejection.
Always review Shutterstock’s specific technical requirements for EPS files, including maximum file size, resolution, and color mode. Not adhering to these can cause delays or rejection.
The quality of your metadata impacts discoverability. Avoid generic descriptions and keywords — be specific and relevant to your design.
By avoiding these common mistakes, you streamline the review process and increase your chances of having your EPS files accepted and ready for sale. Remember, attention to detail and following platform guidelines are key to a successful submission!
Tips for Ensuring Your EPS Files Meet Shutterstock Quality Standards
Uploading your EPS files to Shutterstock can be a great way to showcase your creative work, but it’s essential to make sure those files meet their quality standards. After all, nobody wants their beautiful vectors rejected or returned for fixes. So, let’s go over some handy tips to ensure your EPS files are in tip-top shape before hitting the upload button.
First things first, always use the latest version of Adobe Illustrator or your preferred vector editing software. Shutterstock prefers files created or saved with the most recent updates, as older versions might have compatibility issues or missing features.
Next, check your file for:
- Proper resolution and clarity: While EPS files are vector-based and resolution-independent, if you’ve embedded raster images, ensure they are high-resolution (at least 300 DPI) to avoid pixelation when scaled.
- Correct color mode: Use CMYK color mode if your design is intended for print, or RGB for digital use. Shutterstock recommends RGB for web and digital assets, as it aligns with their display standards.
- Clean and well-organized layers: Flatten unnecessary layers or group related elements. Clear layer naming helps reviewers understand your design easily.
- No unnecessary embedded files or linked images: Embed all necessary images and ensure no broken links or missing resources are present.
Another tip is to run a validation check on your EPS file. Use your software’s built-in tools or third-party validators to identify any errors, such as missing fonts, incompatible features, or corrupt data.
Lastly, always preview your EPS file in different viewers or even convert it into a PDF to see how it appears outside your editing program. This step helps catch issues that might not be obvious during editing but could affect your submission’s quality.
Understanding Shutterstock’s Guidelines for EPS File Submissions
Getting your EPS files accepted by Shutterstock isn’t just about good quality—it’s also about following their specific guidelines. These rules are in place to ensure that the images in their library are consistent, professional, and ready for clients to use without surprises.
Let’s break down what Shutterstock expects from EPS file submissions:
- File Format and Compatibility: Your EPS file should be saved in version 8 or newer, and compatible with Adobe Illustrator or similar vector software. Avoid using proprietary or deprecated features that might not open correctly.
- Embedded Fonts: All fonts used must be either outlined or embedded. This prevents font substitution issues during licensing or download.
- Color Profile: Use the RGB color profile, as Shutterstock primarily caters to digital platforms. Ensure your colors are consistent across different devices.
- Transparency and Effects: Shutterstock recommends avoiding complex transparency effects or raster effects within EPS files, as these can cause rendering issues. If you use transparency, flatten it appropriately.
- Size and Resolution: While EPS is vector, embedded images should meet the recommended resolution (minimum 300 DPI) for raster elements, as mentioned earlier.
- Content Restrictions: Ensure your EPS artwork complies with Shutterstock’s content policies—no offensive or copyrighted material, and all elements should be original or properly licensed.
Additionally, always review Shutterstock’s submission guidelines regularly, as standards can evolve. Ensuring your EPS files adhere to these rules not only increases the chances of approval but also guarantees your work will display correctly for clients worldwide.
In summary, understanding and following Shutterstock’s guidelines is key to a smooth submission process. Take the time to verify your files, keep up with policy updates, and prepare your EPS files with quality and compliance in mind. That way, you’ll be well on your way to successful uploads and happy clients!
Final Checks Before Submitting Your EPS Files
Before you hit that submit button on Shutterstock, it’s super important to give your EPS files a thorough once-over. Think of this step as the final polish on a masterpiece—tiny details can make a big difference in how your file is accepted and displayed.
Here are some key things to double-check:
- File Compatibility: Make sure your EPS files are saved in a compatible version (usually EPS 10 or earlier works best). Sometimes, newer versions can cause issues during upload or rendering.
- Color Mode: Confirm that your artwork is in CMYK color mode. Shutterstock prefers CMYK because it’s geared towards print quality, although RGB is acceptable for online use. But when in doubt, stick to CMYK.
- Embedded Fonts and Outlines: To avoid font issues, either embed all fonts or convert text to outlines. This ensures your text looks exactly how you intend, no matter what system is used during review or display.
- Clean and Organized Layers: Flatten unnecessary layers or keep your artwork tidy. Overly complex layer structures can cause issues, so simplify where possible.
- Resolution and Detail: Although EPS files are vector-based, ensure that embedded images or raster effects are at the appropriate resolution (usually 300 dpi for print). Check that all embedded images are high quality and sharp.
- Size and Dimensions: Verify the dimensions match your intended use. If you’re submitting for a specific size, double-check the pixel dimensions and aspect ratio.
- File Integrity: Open your EPS file in a different vector editor or viewer to confirm everything appears correct. Sometimes, issues can crop up if the file was corrupted or improperly saved.
Doing these quick checks can save you a lot of time and frustration during the review process. Remember, quality and accuracy go a long way in getting your artwork approved and making sure it looks great once published!
Conclusion and Additional Resources for Uploading EPS Files
Uploading EPS files to Shutterstock might seem straightforward at first, but paying attention to the details can really boost your chances of success. From preparing your artwork properly to doing those final checks, each step helps ensure your files meet Shutterstock’s standards and look professional to buyers.
Think of it as preparing for a big presentation—you want everything to be polished, organized, and ready to impress. By following best practices, like converting fonts to outlines, embedding images correctly, and verifying color modes, you set yourself up for smooth uploads and happy clients.
And remember, the more you familiarize yourself with Shutterstock’s guidelines and tools, the easier the process becomes. Don’t hesitate to use their resources, such as:
- Shutterstock Contributor Help Center: Great for detailed guidelines and troubleshooting tips.
- Support Articles: Find answers to common questions about file formats, submission, and account management.
- Community Forums: Connect with other contributors, share tips, and learn from their experiences.
Finally, practice makes perfect. Keep experimenting with your EPS files, stay updated on best practices, and don’t get discouraged by a few rejections—they’re just stepping stones to becoming a successful contributor. Happy uploading!