Uploading EPS files to Shutterstock might seem straightforward, but there are some key things to keep in mind to ensure your images are approved quickly and look professional. Whether you’re a seasoned designer or just starting out, understanding the process can save you time and frustration. In this guide, we’ll walk you through the essentials of getting your EPS files ready for submission, from preparing your artwork to understanding Shutterstock’s requirements. Let’s dive in and make your upload process as smooth as possible!
Preparing Your EPS Files for Submission

Before you hit the upload button, it’s crucial to prepare your EPS files properly. Shutterstock has specific standards to ensure all images are high quality and ready for use by their customers. Here are some key steps to get your EPS files submission-ready:
1. Check the Artwork Quality
- Resolution: Since EPS files are vector-based, resolution isn’t as critical as with raster images. However, ensure your artwork is crisp and detailed without any pixelation.
- Clean Design: Remove any unnecessary elements, guides, or hidden layers that aren’t part of the final design.
- Colors: Make sure your color palette is consistent and appropriate for your artwork’s purpose. Use CMYK or RGB color modes as needed.
2. Use Proper Naming Conventions
Give your EPS files descriptive and clear filenames. Avoid special characters or spaces; instead, use hyphens or underscores. For example: modern-logo-vector.eps. This helps with organization and makes it easier for reviewers to identify your work.
3. Flatten and Save Correctly
- Flatten Layers: While EPS files support layers, it’s often best to flatten them unless you want to keep certain elements editable. This reduces the risk of submission errors.
- Embed Fonts: Ensure all fonts are embedded within the EPS file to prevent missing text issues.
- Convert Text to Outlines: To avoid font compatibility problems, convert all text to outlines before saving.
4. Check Compatibility and Size
- File Version: Save your EPS as a compatible version (usually EPS 10 or later). Older versions might not open correctly or could cause issues.
- File Size: Keep your EPS files under Shutterstock’s maximum size limit (typically around 50MB). Compress if necessary, but don’t sacrifice quality.
5. Preview and Validate
Before uploading, open your EPS file in multiple vector editing programs (like Adobe Illustrator or CorelDRAW) to ensure it displays correctly. Double-check that all elements look good, colors are accurate, and no hidden layers or unwanted objects are present.
In Summary:
Properly preparing your EPS files ensures they meet Shutterstock’s quality standards and minimizes rejection or delays. Focus on cleaning up your artwork, embedding fonts, converting text, and giving files clear names. Taking these extra steps can make a big difference in getting your images approved and available for sale quickly.
Step-by-Step Instructions for Uploading EPS Files

Uploading your EPS files to Shutterstock might seem straightforward, but there are a few key steps to ensure everything goes smoothly. Let’s walk through the process together so you can get your artwork approved and uploaded without a hitch.
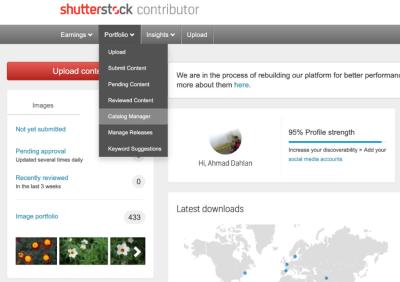
Step 1: Log into Your Contributor Account
First things first, head over to Shutterstock Contributor and sign in with your credentials. If you’re new, you’ll need to create an account — it’s quick and free!
Step 2: Prepare Your Files
Before uploading, double-check your EPS file:
- Ensure it’s a high-quality, vector-based EPS file.
- Remove any unnecessary layers or hidden objects.
- Include a transparent background if applicable.
- Make sure the file complies with Shutterstock’s technical specifications (e.g., file size, color mode).
It’s also a good idea to name your file clearly and professionally, including relevant keywords or descriptions.
Step 3: Start the Upload Process
Once your file is ready, click the “Upload” button on your dashboard. You’ll be prompted to select your EPS file from your computer. Choose your file and wait for it to upload. The process might take a moment depending on your internet speed and file size.
Step 4: Add Metadata and Details
After uploading, you’ll need to fill out some important information:
- Title: Make it descriptive but concise.
- Keywords: Add relevant keywords to help buyers find your artwork.
- Description: Provide a brief overview of your design.
- Category: Select the most appropriate category for your artwork.
This step is crucial because well-optimized metadata can significantly improve your chances of sales.
Step 5: Submit for Review
Once all details are filled out, review everything carefully. When you’re satisfied, click “Submit for Review.” Shutterstock’s team will then evaluate your EPS file to ensure it meets their quality standards and guidelines. This review process can take anywhere from a few hours to several days.
Step 6: Monitor Your Submission
Keep an eye on your dashboard for updates. If approved, your EPS file will be available for licensing. If rejected, Shutterstock will typically provide feedback on what needs fixing, so you can make adjustments and resubmit.
And that’s it! Uploading EPS files to Shutterstock is a simple process once you get the hang of it. Just remember to prepare your files properly and fill out your metadata thoughtfully for the best results.
Common Mistakes to Avoid When Uploading EPS Files
Even seasoned contributors can slip up sometimes, especially when it comes to EPS files. To help you avoid unnecessary rejections or delays, here are some common mistakes to watch out for:
1. Submitting Non-Vector Files or Corrupted EPS Files
Shutterstock requires vector EPS files that are clean and uncorrupted. Submitting raster images, or files with issues like broken links or missing fonts, will lead to rejection. Always double-check that your EPS opens correctly in vector software like Adobe Illustrator before uploading.
2. Using Inappropriate Colors or Color Modes
Make sure your EPS files are in the correct color mode—usually RGB for digital use. CMYK files are typically not suitable unless specifically requested. Also, avoid using spot colors unless they are essential and compatible with Shutterstock’s licensing.
3. Including Unnecessary Layers or Hidden Content
Layers can sometimes cause issues if they contain hidden or unnecessary elements. Flatten your artwork if possible and remove any hidden objects to keep your file clean and optimized.
4. Forgetting to Save with Compatibility Settings
When saving your EPS file, choose compatibility with older versions of Adobe Illustrator (like CS6 or earlier) to ensure broad compatibility. Save a copy with “Include Linked Files” unchecked to avoid missing links.
5. Ignoring Metadata and Descriptions
Failing to add detailed titles, descriptions, and keywords can hinder your artwork’s discoverability. Take the time to fill out these fields thoughtfully—your future sales depend on it!
6. Not Following Shutterstock’s Technical Specifications
Each platform has its own guidelines. For Shutterstock, ensure your EPS files are under the maximum file size limit, usually around 50MB, and that they are properly named and formatted.
7. Skipping the Preview Check
Before final submission, open your EPS in different programs or viewers to verify it displays correctly. Sometimes, what looks good in your software might have issues elsewhere, which could cause rejection.
By avoiding these common pitfalls, you’ll streamline your upload process and increase your chances of getting your EPS files approved quickly. Remember, quality and clarity are key—both in your artwork and in how you prepare your files for upload. Happy creating and uploading!
Ensuring Your EPS Files Meet Shutterstock Quality Standards
Before you hit that upload button, it’s super important to make sure your EPS files are up to snuff with Shutterstock’s quality standards. After all, nobody wants their beautiful design rejected just because of avoidable issues! So, what should you be checking?
First things first: always optimize your EPS files for print and digital use. Make sure they are high resolution, typically 300 DPI, so they look crisp and professional. If your EPS contains raster images, double-check that these are also high quality.
Next, pay attention to the color mode. Shutterstock prefers CMYK or RGB color profiles. For digital use, RGB is usually preferred, but if you’re designing for print, CMYK is the way to go. Just ensure the color profiles are embedded properly.
Here are some key points to follow:
- Use vector elements whenever possible: This ensures scalability without quality loss.
- Flatten images and fonts: Avoid issues with missing fonts or embedded raster images that could cause problems.
- Check for unnecessary layers: Simplify your artwork by merging layers where possible to prevent export issues.
- Validate your file: Use Adobe Illustrator’s Validate PDF / EPS feature to spot problems before uploading.
Another tip is to preview your EPS files in different viewers or software to ensure they appear as intended. Sometimes, what looks good in Illustrator might not translate perfectly elsewhere. Fix any issues you find beforehand!
Finally, make sure your EPS file size isn’t excessively large. While quality is important, huge files can cause upload errors or slow down the process. Try to keep your files optimized without sacrificing detail. A good rule of thumb is to keep it under a few hundred megabytes if possible.
In summary, meeting Shutterstock’s quality standards involves checking resolution, color profiles, vector integrity, and file size. Taking these steps will help your EPS files stand out and get accepted faster!
Final Tips for Successful EPS File Uploads on Shutterstock
Alright, you’ve prepared your EPS files and checked all the quality boxes. Now, let’s talk about some final tips to make sure your upload process goes smoothly and your files get approved without a hitch.
Tip 1: Use descriptive filenames — Instead of generic names like “design1.eps,” use clear, descriptive filenames that reflect the content. For example, “Modern-Abstract-Logo.eps.” This helps Shutterstock reviewers quickly identify and categorize your work.
Tip 2: Organize your files — Keep your EPS files organized in folders by project or theme. This makes it easier to manage uploads, especially if you have multiple files for a single campaign.
Tip 3: Upload a sample preview — Although Shutterstock primarily requires the EPS, providing a low-resolution JPEG preview can help reviewers understand your design at a glance. Some contributors include preview images in their descriptions or uploads.
Tip 4: Check for proper color separation — If your design uses multiple colors or is intended for print, confirm that your color separations are accurate and that no unintended color overlaps exist.
Tip 5: Follow Shutterstock’s guidelines meticulously — Always double-check their latest submission standards. They may update requirements regarding file formats, resolution, or other technical aspects.
And finally, don’t be discouraged if your first few uploads need some adjustments. Review any rejection comments carefully, tweak your files as needed, and try again. Practice makes perfect!
Remember, uploading EPS files to Shutterstock isn’t just about technical compliance—it’s about showcasing your creativity in the best possible light. With these tips in mind, you’ll be well on your way to contributing high-quality, professional designs that stand out and sell!


