Thinking about sharing your stunning photos with the world? Shutterstock is one of the leading platforms where photographers and illustrators can showcase their work and earn some extra income. Uploading your photos might seem like a daunting task at first, but once you get the hang of it, it’s pretty straightforward. In this guide, we’ll walk you through each step so you can confidently upload your images and start building your portfolio. Whether you’re a hobbyist or a professional, these tips will help you make the most of your Shutterstock experience!
Prerequisites for Uploading Photos

Before you dive into uploading your beautiful images, there are a few important things to have in place. First and foremost, you’ll need to create a Shutterstock contributor account. It’s quick and easy to sign up, just head over to the Shutterstock Contributor website and fill out their registration form. You’ll need to provide some basic info like your name, email address, and payment details.
Next, it’s a good idea to get your photos organized. Make sure your images are high-quality, properly edited, and saved in the correct formats (JPEG or TIFF are usually preferred). Shutterstock has specific guidelines regarding image quality, so familiarizing yourself with their technical requirements is a smart move. This includes things like resolution (generally at least 4MP), color profile (sRGB), and avoiding watermarks or logos.
Additionally, consider creating a few sample images that showcase your style. Having a diverse portfolio ready to upload can help you get started faster. Remember, Shutterstock values originality and clarity, so choose photos that are well-composed and visually appealing. Once you have your account set up and your images prepared, you’re ready to move on to the upload process!
Creating a Shutterstock Contributor Account

Alright, so you’re ready to share your stunning photos with the world and potentially earn some extra cash? The first step is creating your Shutterstock contributor account. Don’t worry, it’s pretty straightforward, and I’ll walk you through it.
First, head over to the Shutterstock Contributor registration page. You’ll see a big button that says “Start Uploading” or “Join Now.” Click on it, and you’ll be prompted to sign up.
Here’s what you’ll need to prepare:
- Email address: Make sure it’s an active email you check regularly.
- Password: Choose a strong password to keep your account secure.
- Personal details: Your full name, country of residence, and sometimes your phone number.
Once you fill out the basic info, Shutterstock might ask you to verify your email. Just check your inbox, click the link, and you’re almost there.
Next, you’ll be asked to agree to the contributor terms and conditions. It’s a good idea to read through these, so you understand how the royalty system works and your rights as a contributor. After that, hit “Create Account,” and voila—you’re in!
Now, the platform will prompt you to set up your payout details. You can choose how you’d like to get paid, whether via PayPal, bank transfer, or other options. Make sure to fill this in accurately to avoid any issues later on.
And that’s pretty much it! Once your account is set up, you’ll have access to your dashboard, where you can start uploading photos, track your earnings, and manage your portfolio. Remember, the more complete and professional your profile looks, the better your chances of getting accepted and noticed by buyers.
Preparing Your Photos for Submission
Before you hit that upload button, it’s super important to prepare your photos properly. Quality and compliance are key if you want your images approved and featured on Shutterstock. Here’s a checklist to help you get your photos ready for submission:
1. Check Image Quality
Shutterstock has specific quality standards. Your photos should be sharp, well-exposed, and free of noise or artifacts. Use editing software like Adobe Lightroom or Photoshop to enhance your images if needed. Remember, images that look professional have a better chance of being accepted and selling well.
2. Size and Resolution
High-resolution images are a must. Shutterstock recommends a minimum of 4 megapixels, but bigger is always better. Aim for at least 300 DPI for print-quality images. Keep the dimensions large—at least 4,000 pixels on the longer side—to ensure versatility in usage.
3. File Format and Naming
Submit your images in JPEG format, with sRGB color profile embedded. Before uploading, give your files clear, descriptive names—avoid generic names like “IMG001.jpg.” Instead, use keywords that describe the content, like “sunset-beach-coconut.jpg.” This helps buyers find your images more easily.
4. Metadata and Keywords
Adding relevant keywords and a compelling description is crucial. Think about what someone searching for this type of photo might type in. Use a mix of broad and specific keywords, and be honest about what the image depicts. Use all available keyword slots to maximize discoverability.
5. Model and Property Releases
If your photo features recognizable people or private property, you’ll need the appropriate releases. Without them, your images won’t be approved for sale. Make sure you have signed releases stored and ready to upload if required.
6. Organize Your Portfolio
Keep your photos organized in folders by themes or categories. This makes it easier to manage your submissions and keep track of what’s uploaded and approved.
By taking the time to prepare your photos properly, you increase your chances of approval, sales, and building a successful portfolio on Shutterstock. Remember, quality always wins in the world of stock photography!
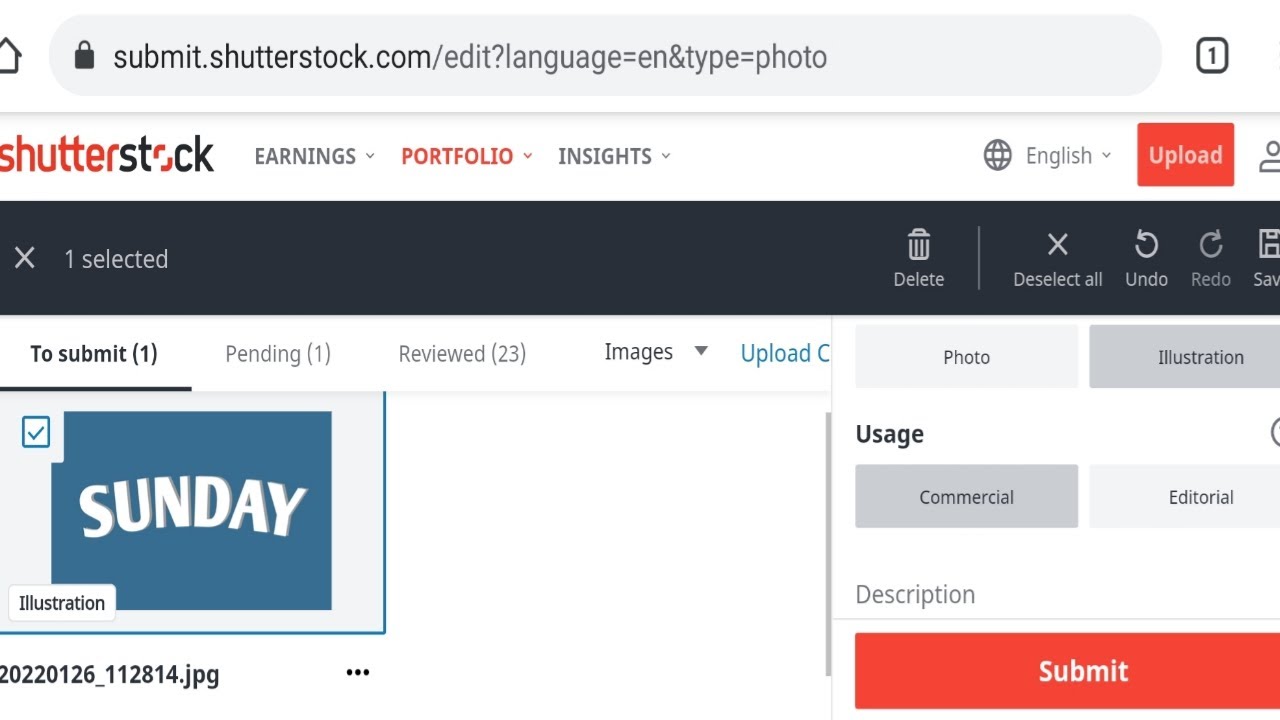
Uploading Photos to Shutterstock
Once you’re ready to share your amazing photos with the world, uploading them to Shutterstock is a straightforward process—once you get the hang of it! First things first, make sure you’re logged into your contributor account. If you haven’t created one yet, you’ll need to sign up and get verified before you can start uploading.
When you’re logged in, look for the “Upload” button, usually found at the top right corner of your dashboard. Clicking on it will take you to the upload page. Here, you can start adding your photos in bulk or one at a time—whichever suits your workflow best.
Now, it’s time to select the files. You can drag and drop your photos directly into the upload window or click the “Select Files” button to browse your computer. Keep in mind, Shutterstock has specific requirements for image quality and format—primarily JPEGs with a minimum of 4 megapixels and sRGB color space—so double-check your files before uploading.
As your photos upload, you’ll see a progress bar. Large files might take a few moments, so grab a coffee! Once uploaded, you’ll get a quick preview of each image. Take a moment to review them to ensure they uploaded correctly—no accidental duplicates or lower-quality versions.
After uploading, you’ll be prompted to assign categories. Don’t worry; you can do this in the next step. For now, just confirm that your files are properly uploaded and move on. Remember, batch uploading can save you a lot of time if you have multiple images to submit.
Tip: Organize your photos into folders on your computer beforehand. This way, when you upload, you can easily find and select groups of related images, streamlining the process.
Once everything looks good, click “Continue” or “Next,” and you’ll move on to the next phase: adding details and metadata. But don’t worry—this part is just as important, and we’ll cover it in the next section!
Adding Details and Metadata for Your Photos
Great! Your photos are uploaded, now it’s time to give them a bit of personality through details and metadata. Think of this as telling a story about your image—what’s happening, where it was taken, and why someone might want to use it. The more accurate and detailed you are, the easier it will be for buyers to find your work.
First up, you’ll need to assign relevant categories. Shutterstock offers a list of categories like “Nature,” “Business,” “People,” and more. Choose the ones that best describe your image. Be specific but honest—incorrect categories can make your images harder to find and might even lead to rejection.
Next, add keywords. This is arguably the most critical part of metadata. Think about what words someone might search for when looking for an image like yours. Use a mix of broad and specific keywords. For example, if your photo features a sunset over mountains, keywords might include “sunset,” “mountains,” “nature,” “evening,” and “scenery.”
- Use relevant, descriptive keywords
- Avoid irrelevant or misleading tags
- Include both common and niche terms
- Use up to 50 keywords per image, if possible
Adding a compelling title and description can also boost your photo’s visibility. Keep the title clear and straightforward, like “Golden Sunset Over Mountain Range.” The description can expand on that, providing context or details about the scene, the location, or the mood.
Remember, metadata not only helps potential buyers find your images but also plays a role in Shutterstock’s search algorithm. Take your time here—quality metadata can make a big difference in your sales potential.
Before finalizing, review all the details to ensure accuracy. Once you’re satisfied, submit your image for review. Shutterstock’s review team will then evaluate your photo against their quality standards, and if everything checks out, your image will go live on the platform!
And that’s it! You’re now one step closer to earning from your photography. Keep uploading, refining your metadata skills, and exploring the platform—before you know it, you’ll be a seasoned contributor with a growing portfolio.
Submitting Your Photos for Review
Once you’ve selected the best photos from your shoot and made any necessary edits, it’s time to submit them for review on Shutterstock. This is an exciting step because it marks the transition from creating to sharing your work with the world. But before hitting that “submit” button, let’s walk through what you need to know to make this process smooth and successful.
First, ensure your photos meet Shutterstock’s technical requirements. They prefer high-resolution images with a minimum of 4 megapixels, and the file format should be JPEG. Also, double-check that your images are properly titled and include descriptive keywords; this helps reviewers understand what your photo depicts and makes it easier for customers to find.
Here’s a quick checklist before submission:
- Resolution: At least 4 MP (e.g., 2000 pixels on the shortest side)
- File Format: JPEG (JPEG baseline / progressive, maximum quality)
- Image Quality: No significant noise, artifacts, or compression issues
- Model & Property Releases: Uploaded when necessary, especially for recognizable people or private property
- Keywords & Titles: Descriptive, relevant, and specific
When you’re ready, log into your contributor account, navigate to the upload section, and select the photos you want to submit. Shutterstock allows multiple uploads at once, which is super convenient if you have a batch of images to share. During upload, you’ll be prompted to add titles, keywords, and categories—think of this as giving your photo a detailed label so buyers can find it easily.Once you’ve filled out all the necessary info, review everything one last time. Remember, accuracy and clarity here can speed up the review process. After clicking “submit,” your photos will enter the review queue, and a Shutterstock reviewer will evaluate them based on their quality, originality, and compliance with guidelines. Now, all that’s left is to wait patiently—most reviews are completed within a few days, and you’ll get notified once your images are approved or if any issues need fixing.
Tips for Ensuring Your Photos Get Approved
Getting your photos approved on Shutterstock can sometimes feel like a bit of a waiting game, but there are definitely ways to boost your chances of success. Think of it as aiming for the “yes” on your first try—more approvals mean more opportunities to earn and grow your portfolio.
Here are some practical tips to help ensure your photos stand out in the best way:
1. Follow Shutterstock’s Content Guidelines
This might seem obvious, but it’s essential. Familiarize yourself with their content policies, especially regarding prohibited content like trademarks, copyrighted material, or sensitive subjects. Avoid any images that could cause legal issues or violate community standards.
2. Focus on Technical Excellence
High-quality images are more likely to be approved. Make sure your photos are sharp, well-exposed, and free of noise or artifacts. Use a good camera or smartphone with a decent sensor, and always shoot in the highest resolution possible.
3. Pay Attention to Composition
Good composition can make your photos more appealing. Use principles like the rule of thirds, leading lines, and balanced framing. Avoid clutter or distracting backgrounds unless they add value to the shot.
4. Include Model and Property Releases When Needed
If your photo includes recognizable people or private property, include the appropriate releases. Not doing so can lead to rejection, or worse, legal complications. Always be transparent and get releases signed beforehand whenever possible.
5. Use Relevant and Specific Keywords
Keywords are your photos’ lifeline to potential buyers. Use accurate, descriptive keywords that match what someone would search for. Avoid overstuffing or irrelevant tags, as this can hurt your credibility and search visibility.
6. Submit a Diverse Portfolio
Offer a variety of subjects, styles, and themes. Shutterstock favors contributors with diverse portfolios because it provides more options for buyers. Experiment with different genres—landscapes, portraits, lifestyle shots, and more.
7. Review Your Photos Before Upload
Take a second look at each image. Does it tell a story? Is it compelling? Does it meet the quality standards? Sometimes a fresh pair of eyes can spot issues you might have missed.
Remember, rejection isn’t the end of the world. Use feedback from Shutterstock to improve your future submissions. Keep practicing, stay consistent, and over time, your approval rate will improve. Happy shooting and submitting!
Managing Your Portfolio and Tracking Upload Status
Once you’ve uploaded your stunning photos to Shutterstock, the journey doesn’t end there. Managing your portfolio effectively is key to building your reputation and increasing your chances of earning royalties. Plus, keeping an eye on your upload status helps you stay organized and ensures your images are moving through the review process smoothly.
Managing Your Portfolio: Think of your portfolio as your personal gallery on Shutterstock. It showcases all your submitted images and helps you keep track of what’s live, pending, or rejected. To manage it well:
- Organize by Keywords and Categories: Use relevant keywords and categorize your images to make them easy to find and improve discoverability.
- Edit Details: Need to update a title, description, or keywords? You can do this anytime from your dashboard to enhance your image’s visibility.
- Remove or Hide Images: If you want to temporarily hide or permanently remove an image, Shutterstock gives you that flexibility without deleting it permanently.
- Create Collections: Group similar images into collections for easy management, especially if you’re working on themed projects or series.
Tracking Upload Status: After submitting your images, you’ll want to keep tabs on their progress. Shutterstock provides a straightforward way to monitor each image’s status:
- Pending Review: Your image is in the queue waiting for Shutterstock’s review team to assess its quality, relevance, and compliance.
- Under Review: The review process is underway. This can take anywhere from a few hours to a few days, depending on the volume of submissions.
- Approved and Live: Congratulations! Your image is now available for licensing, and you can see its performance metrics.
- Rejected: If your image doesn’t meet Shutterstock’s standards, you’ll receive a reason for rejection. Don’t get discouraged—review the feedback, make necessary edits, and try again.
To make the most of this process, check your dashboard regularly. Shutterstock’s platform also offers notifications and email alerts for status updates, so you stay informed without constantly logging in. Remember, managing your portfolio actively not only keeps your work organized but also helps identify which images perform best, guiding your future photography efforts.
Conclusion and Additional Resources
Uploading your photos to Shutterstock is an exciting step toward turning your passion into a potential income stream. With a clear understanding of the upload process, keyword optimization, and portfolio management, you’re well on your way to success as a contributor. Remember, patience and persistence are key—every rejection is a chance to learn and improve.
To help you along the way, here are some additional resources:
- Shutterstock Contributor Help Center: Offers detailed guides and FAQs on every aspect of contributing.
- Photography and Licensing Tips: Blogs and tutorials on creating marketable images and understanding licensing agreements.
- Community Forums: Connect with other contributors to share experiences, tips, and encouragement.
- Keyword Research Tools: Use tools like Google Keyword Planner or specialized stock photo keyword tools to find trending tags and improve your image visibility.
Getting your photos on Shutterstock is just the beginning. Keep honing your skills, stay updated with platform changes, and engage with the community. With time and dedication, you’ll build a diverse portfolio that earns royalties and opens new opportunities. Happy uploading!