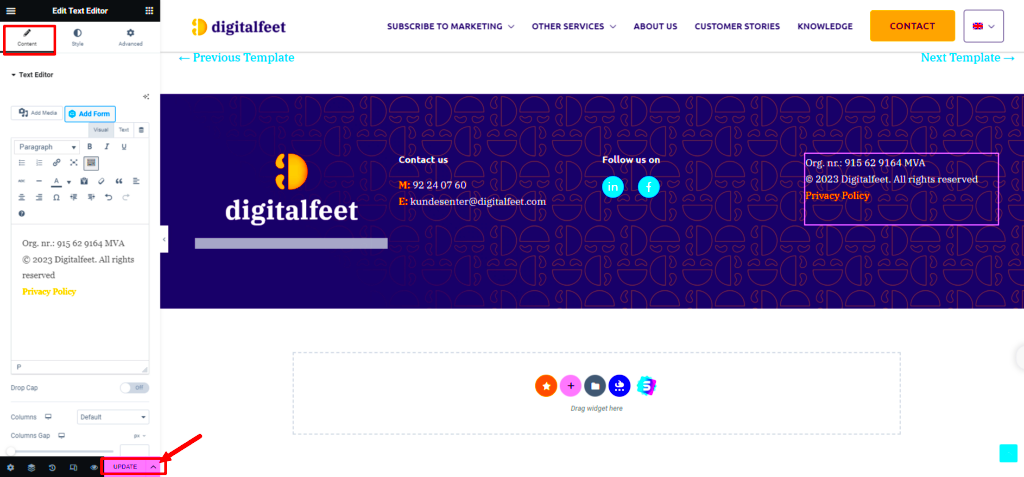
Updating your footer in Elementor is a breeze and can significantly enhance the look and functionality of your website. A well-designed footer not only adds to your site’s aesthetic appeal but also serves several crucial purposes—like providing contact information, enhancing navigation, and even boosting SEO. In this guide, we’ll walk you through how to easily update your footer using Elementor, one of the most popular page builders out there. Ready to give your footer a fresh look? Let’s dive in!
Accessing the Elementor Footer Template
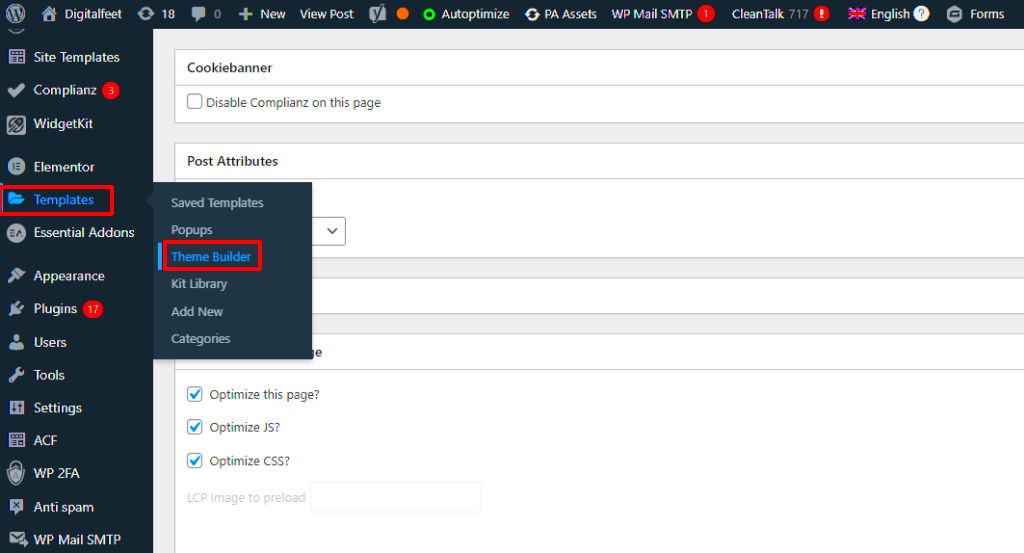
Before you start updating your footer, you first need to access the Elementor footer template. This can be accomplished in a few straightforward steps:
- Log into Your WordPress Dashboard: Use your admin credentials to access your dashboard.
- Navigate to Templates: From the left sidebar, look for the “Templates” section and click on it.
- Go to Theme Builder: Under Templates, you’ll find a sub-option called “Theme Builder.” Click on that to see all the overall elements you can modify, including headers, footers, and more.
- Select Footers: In the Theme Builder, search for “Footers” to find the specific templates you have. If there’s a footer already configured, it’ll show up here.
- Edit with Elementor: Once you find your footer template, hover over it and click the “Edit with Elementor” button that appears. This action will take you directly to the Elementor editor.
Now you’re all set to make changes! You can modify text, add widgets, or even toggle styling options, making your footer as unique as your brand. Enjoy the design process!
Customizing Footer Content
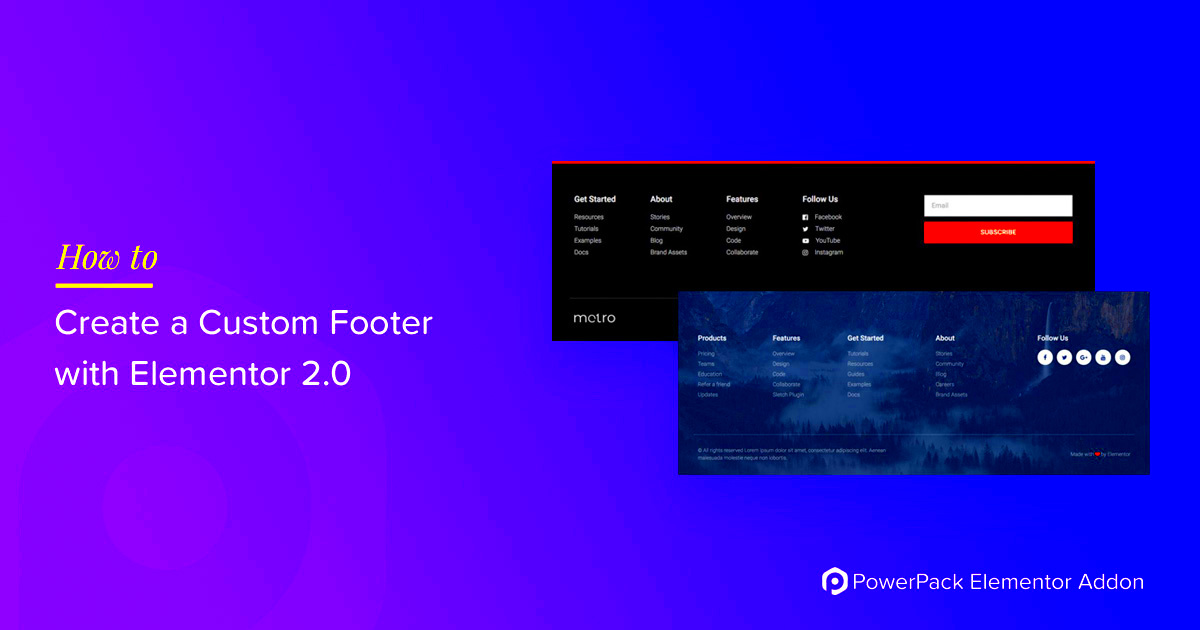
When it comes to creating a stunning website, your footer is just as important as any other part of the page. This is where you can share crucial information such as your contact details, social media links, copyright notices, and even some navigation links. So, let’s dive into how you can effectively customize the content of your footer using Elementor!
To begin customizing your footer, follow these steps:
- Go to the WordPress Dashboard and navigate to Templates > Theme Builder.
- Select the Footer tab, and then click on “Add New”. You can choose to either use a pre-designed template or start from scratch.
- Once in the Elementor editor, you can drag and drop various widgets like Text, Image, and Icon to design your footer the way you want.
Here are some essential elements you might want to consider adding:
- Contact Information: Make it easy for visitors to get in touch by including your email, phone number, and physical address.
- Social Media Links: This is a great way to direct traffic to your social profiles. Use icon widgets to add links!
- Navigation Links: Including links to important pages can enhance the user experience, especially for first-time visitors.
- Newsletter Signup: Encourage your visitors to subscribe to your newsletter for updates and promotions.
Remember, the footer is often overlooked, but taking the time to customize its content can greatly improve the overall effectiveness of your website!
Styling Your Footer Using Elementor
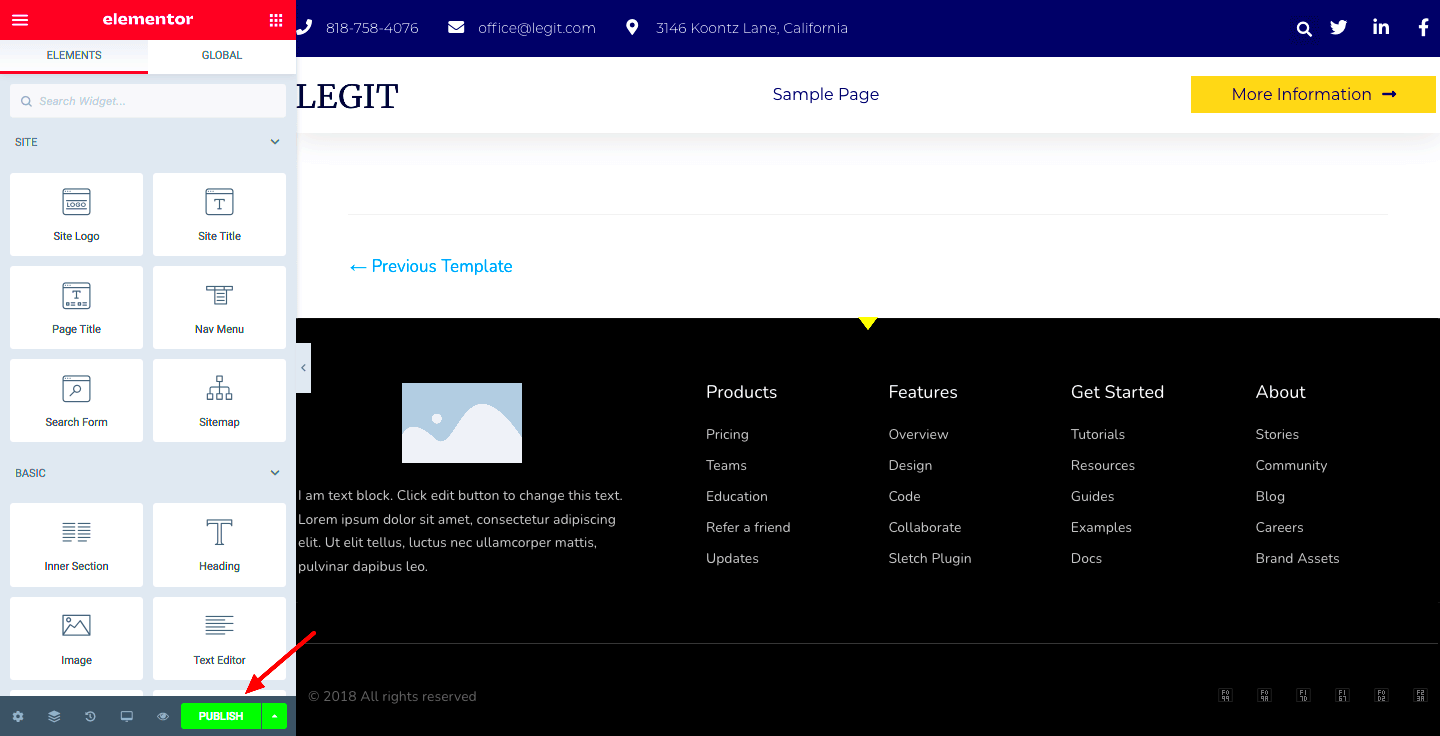
Now that you’ve customized the content of your footer, it’s time to make it visually appealing! Styling your footer in Elementor is a breeze thanks to its user-friendly interface and powerful design tools. Let’s see how you can do this.
Once you’re in the Elementor editor, here are some styling options you can explore:
| Element | Styling Options |
|---|---|
| Background | Change the background color or add a background image to make your footer stand out. |
| Typography | Choose from a variety of fonts for your text. Adjust sizes, weights, and colors for readability. |
| Paddings and Margins | Control the spacing around your footer elements for a cleaner and more organized look. |
| Alignment | Align text and elements to fit your design aesthetic, whether you prefer left, center, or right alignment. |
Additionally, you might consider adding a hover effect to links or buttons to enhance interactivity. Using Elementor’s advanced motion effects can also add a modern touch to your footer design.
Just remember, keep it simple and consistent with your overall website theme. A stylish footer can leave a lasting impression on your visitors, making them more likely to return!
5. Adding Widgets to Your Footer

Adding widgets to your footer in Elementor is an exciting way to incorporate essential elements that enhance the user experience and make your website more functional. Whether you want to include social media icons, contact information, or a newsletter signup form, Elementor provides a straightforward way to do it. Here’s how you can easily add widgets to your footer:
First, you’ll want to create a footer template. In Elementor, navigate to Templates > Add New, and select the Footer layout. Once you’ve named your footer and set it up, you can open the Elementor editor to start customizing.
Now, let’s talk widgets! You’ll find a plethora of widgets on the left sidebar. Here are some popular widgets you might consider adding to your footer:
- Text Editor – Perfect for adding your business’s contact information or a brief description.
- Social Icons – A fantastic way to connect your audience with your social media profiles.
- Button – Direct users to a specific action, like “Contact Us” or “Shop Now.”
- Image – Show off your logo or any branding elements.
- Form – Capture leads effortlessly through a newsletter sign-up form.
To add any of these widgets, simply drag and drop the widget of your choice onto the footer canvas. Don’t forget to customize each widget’s settings to suit your brand’s style and needs. Using the Style and Advanced tabs, you can adjust everything from padding to colors, ensuring a cohesive look with the rest of your site. Once you’re satisfied, hit Publish and voilà! Your footer is now equipped with useful widgets.
6. Configuring Footer Settings and Visibility
After adding those snazzy widgets, it’s time to dive into configuring your footer settings and visibility options. This step ensures that your footer appears just the way you want and is easily accessible for your visitors. So let’s jump in!
Head over to the Footer Settings, which you can find in the Elementor editor. Here’s what you’ll typically come across:
- Layout Settings – Choose the layout that best suits your design. Options include sections for a single or multiple columns.
- Visibility Settings – Control where your footer shows up. You can set it to display on all pages, specific pages, or exclude certain areas.
- Responsive Settings – Make sure your footer looks great on all devices. Elementor allows you to customize your footer’s appearance for desktop, tablet, and mobile views.
Moreover, consider the Z-index property if you’re placing your footer over other elements. This determines the stacking order of positioned elements. A higher Z-index means your footer will be on top!
Finally, don’t forget to review your settings before hitting that Publish button. Preview how the footer looks across different devices to ensure everything aligns perfectly. Remember, an appealing and well-configured footer isn’t just aesthetic; it enhances navigation, guides users, and ultimately contributes to a better user experience! So, take your time to get it just right!
7. Previewing Your Updates
Once you’ve made changes to your footer in Elementor, it’s crucial to preview those updates before going live. This step allows you to see how your changes will look to visitors and ensures everything is functioning as expected.
To preview your updates in Elementor, follow these simple steps:
- Look for the Eye Icon: In the Elementor editor, you’ll notice a small eye icon at the bottom left. Clicking on this will open a live preview of your footer.
- Check Different Devices: It’s vital to see how your footer appears on various devices. Use the responsive mode feature in Elementor by clicking on the device icons (desktop, tablet, mobile) at the bottom left to switch views.
- Inspect Links and Interactions: Make sure that any links, buttons, or interactive elements work properly. Click through these elements in preview mode to confirm functionality.
- Consider User Experience: Pay attention to spacing, alignment, and overall aesthetics. Does everything look harmonious and readable? Ask yourself if the footer complements your site’s design.
By taking the time to preview your updates effectively, you can catch any issues before they affect your visitors. Remember, a well-crafted footer goes a long way in enhancing the user experience!
8. Saving and Publishing Your Footer Changes
After you’ve previewed your modifications and are satisfied with how your footer looks and functions, it’s time to save and publish your changes. This is the moment where all your hard work comes together for the world to see!
To save and publish your updates in Elementor, simply follow these steps:
- Save Your Changes: Before publishing, be sure to click the green “Update” button at the bottom of the Elementor panel. This will save all of your changes even if you decide not to publish them right away.
- Publish Your Footer: If you’re ready for the updates to go live, click the same green “Update” button again while in the preview mode. Your changes will reflect on your website immediately.
- Use Versions: Elementor has a revision history feature. If you ever need to revert to an earlier version, you can do so easily by clicking on the History icon (clock symbol) at the bottom of the editor.
In conclusion, once you’ve saved and published your changes, you’ll want to visit your site to see your new footer in action. Don’t forget to share any updates on your social media if you’ve added something cool! Happy designing!
Conclusion: Best Practices for Footer Design
Updating the footer in Elementor is an essential aspect of website design, as it can significantly influence user experience and engagement. A well-crafted footer provides vital information and enhances the overall look of your site. Below are some best practices to keep in mind when designing your footer:
- Keep it Simple: Avoid cluttering the footer with too much information. A clean and straightforward design helps users find essential details quickly.
- Prioritize Information: Include key elements such as contact information, social media links, or a newsletter signup. Think about what your visitors might need access to.
- Consistent Branding: Ensure that the footer design aligns with your overall brand style, including color schemes, fonts, and logos.
- Mobile Responsiveness: Make sure that your footer looks good on mobile devices. Test different screen sizes to optimize the user experience.
- Use Visual Hierarchy: Utilize headings, subheadings, and icons to guide users’ eyes towards the most important information.
Additionally, consider incorporating elements such as:
| Element | Description |
|---|---|
| Contact Information | Email, phone number, and address for easy communication. |
| Social Media Links | Direct access to your social media profiles increases audience engagement. |
| Quick Links | Provide shortcuts to important pages like Privacy Policy, Terms of Service, and FAQ. |
By following these best practices, you can create a functional and aesthetically pleasing footer that enhances user experience and supports your website’s goals.

