If you’re passionate about photography and eager to turn your images into earnings, Shutterstock is a fantastic platform to showcase your work. The Nikon D40, though an older model, still packs a punch for capturing high-quality photos suitable for stock photography. In this guide, we’ll walk through how to effectively shoot for Shutterstock using your Nikon D40, covering everything from camera settings to understanding what makes a photo sellable. Whether you’re a hobbyist looking to get started or someone wanting to refine your skills, you’ll find practical tips to help you succeed and make the most of your gear.
Understanding Shutterstock Photo Requirements and Guidelines
Before you start snapping away, it’s crucial to understand what Shutterstock looks for in their images. They have specific requirements to ensure your photos meet quality standards and are suitable for licensing. Here’s a quick rundown of the key guidelines:
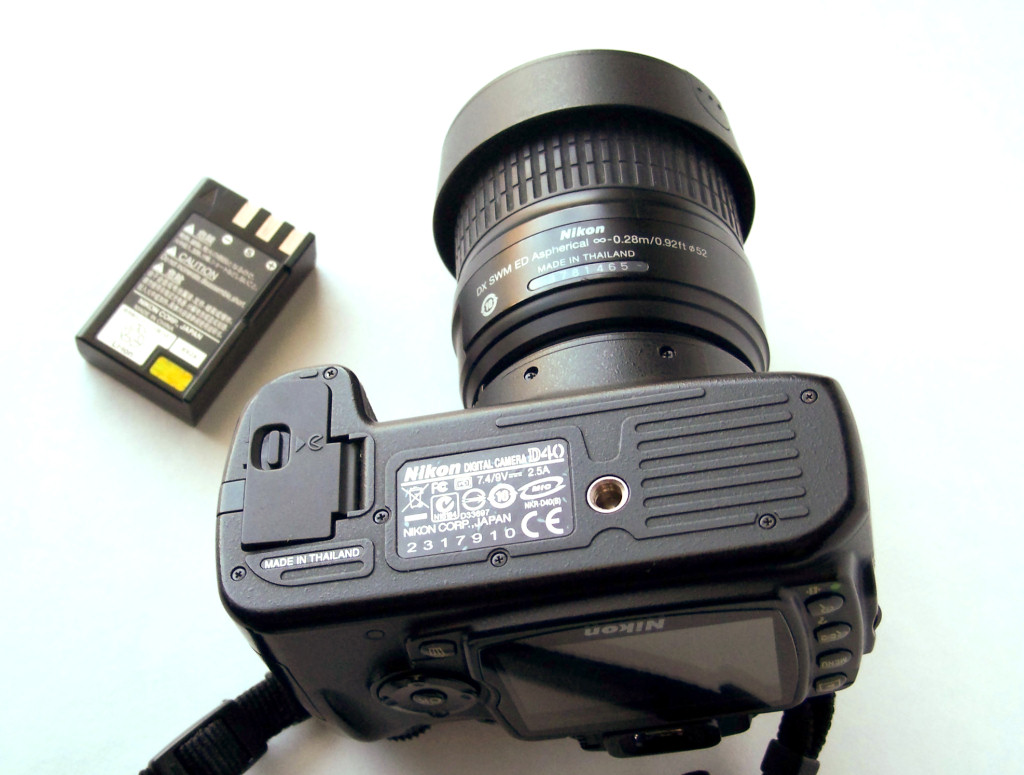
- Image Quality: Photos must be sharp, well-exposed, and free of noise or artifacts. The Nikon D40, with its 6.1-megapixel sensor, can produce good quality images if you pay attention to focus and lighting.
- File Format: JPEG is the only accepted format. Save your images with the highest quality setting available.
- Size and Resolution: Shutterstock recommends images be at least 4 megapixels. Your D40’s images typically meet this, but always verify the resolution before uploading.
- Content Guidelines: Photos should be original, avoid copyrighted logos, and not contain identifiable people unless you have model releases. Also, avoid offensive or inappropriate content.
- Model and Property Releases: For images featuring recognizable people or private property, appropriate releases are mandatory to ensure they can be licensed commercially.
Understanding these requirements helps you focus on capturing the right shots and preparing your images correctly. Keep in mind that Shutterstock also values good composition, natural lighting, and clear subject matter. By aligning your photography with their guidelines, you’ll increase your chances of acceptance and sales. Remember, quality and compliance are key—so take your time, review your images carefully, and always aim to produce professional-looking photos that can appeal to a wide audience.
3. Preparing Your Nikon D40 for Professional Photography
Getting your Nikon D40 ready to capture stunning, professional-looking photos isn’t just about knowing the camera settings—it’s also about making sure your gear is in top shape and properly set up. So, before you start snapping away, take a few moments to prepare your camera to maximize its potential.
First, clean your camera and lens. Dust, fingerprints, or smudges can really affect image quality. Use a soft, lint-free cloth and a gentle blower to remove dust from the lens and sensor area. Avoid harsh cleaning solutions—sometimes a simple wipe with a microfiber cloth does the trick.
Next, check your battery and memory card. Make sure your battery is fully charged, especially if you plan to shoot for extended periods. Carry a spare battery if possible. Also, ensure your memory card has enough free space and is formatted correctly in the camera to prevent any hiccups during shooting.
Now, it’s time to configure your camera settings for professional results. Here are some key settings to consider:
- Image Quality: Set your image quality to RAW if you want maximum editing flexibility later. JPEG is faster and smaller but offers less room for post-processing.
- ISO: Keep ISO as low as possible to reduce noise. Use higher ISO settings only when necessary in low-light situations.
- Aperture and Shutter Speed: Start with a wide aperture (like f/2.8 or f/4) for portraits or a narrower one (f/8 or f/11) for landscapes. Adjust shutter speed to suit your scene—faster shutter speeds freeze motion, while slower ones can create nice motion blur effects.
- Focus Mode: Use single-point AF for precise focusing, especially for portraits or detailed shots. Switch to continuous AF if you’re photographing moving subjects.
- White Balance: Set to auto or adjust manually based on your lighting conditions for more accurate colors.
Finally, think about using a tripod or stabilizer if you’re shooting in low light or doing long exposures. This helps keep your shots sharp and professional-looking.
Remember, practice makes perfect. Spend some time familiarizing yourself with your Nikon D40’s settings before heading out to shoot for Shutterstock. The more comfortable you are with your gear, the more confident you’ll feel capturing those amazing images that stand out in the marketplace.
4. Tips for Composing and Framing Your Shots Effectively
Great photos often come down to how you compose and frame your shot. Even with a good camera like the Nikon D40, understanding some basic principles of composition can elevate your images from average to eye-catching. Let’s dive into some practical tips to help you frame your shots like a pro.
First, always think about the story you want to tell. What is the main subject? What feeling or message do you want your photo to convey? Keep that in mind as you set up your shot.
One of the most fundamental rules is the Rule of Thirds. Imagine dividing your frame into nine equal parts with two horizontal and two vertical lines. Place your main subject along these lines or at their intersections. This naturally creates a more balanced and interesting composition, making your photo more engaging.
Next, pay attention to leading lines. Roads, fences, rivers, or even shadows can guide the viewer’s eye toward the main subject. Use these lines intentionally to create depth and draw attention where you want it most.
Be mindful of background clutter. A busy or distracting background can take away focus from your subject. Look for clean, simple backgrounds or use a wider aperture to blur out distractions, making your subject pop.
When framing your shot, consider angle and perspective. Don’t just shoot from eye level—try getting lower, higher, or at an angle to add interest. Sometimes a little change in perspective can turn a mundane shot into a dynamic image.
Pay attention to lighting. Soft, natural light during the golden hour (shortly after sunrise or before sunset) creates warm, flattering tones. Avoid harsh midday sun if possible, as it can cause hard shadows and blown-out highlights. If shooting indoors or in tricky lighting, use your camera’s exposure compensation or adjust ISO accordingly.
Lastly, check your framing before pressing the shutter. Use the viewfinder to ensure your subject is well-positioned and that there’s enough space around it. Avoid cutting off important parts unless it’s a deliberate stylistic choice.
And don’t be afraid to experiment. Take multiple shots from different angles, distances, and with various settings. Sometimes, the best shot comes from trying a few different compositions.
Remember, the key to great composition is practice and observation. Study photos you love, analyze what makes them work, and then apply those principles to your own shooting. Before long, framing and composing will feel natural, helping you create stunning images perfect for Shutterstock!
5. Adjusting Camera Settings for High-Quality Images
Getting those stunning, high-quality shots with your Nikon D40 starts right here—by dialing in the right camera settings. Even though the D40 is an older model, it’s still capable of capturing beautiful images when you set it up properly. So, let’s walk through some key settings to focus on.
First up, the ISO. Think of ISO as your camera’s sensitivity to light. In bright conditions, keep it low—around 100-200—to avoid grainy images. When it’s darker or indoors, bump it up gradually, but be cautious; higher ISO values can introduce noise. The D40’s ISO range is 200-1600, so use this to your advantage.
Next, the aperture (f-stop). For portrait shots with a blurry background, choose a wider aperture like f/2.8 or f/4 if your lens allows. For landscapes or scenes where everything should be sharp, opt for a narrower aperture—say, f/8 or f/11. Keep in mind, the D40 often comes with kit lenses like 18-55mm, which can be versatile for many situations.
Then, the shutter speed. To freeze motion, go for a shutter speed of at least 1/250 sec or faster. If you’re capturing fast-moving subjects or sports, even quicker speeds like 1/500 or 1/1000 sec might be needed. For static scenes, a slower shutter speed can work, especially if you’re using a tripod.
Don’t forget about the white balance. Setting it correctly ensures your colors look natural. Use the auto white balance for general shots, but if you’re shooting under specific lighting—like tungsten or daylight—you might want to set it manually or pick a preset that matches your environment.
Finally, take some time to explore your camera’s shooting modes. While auto mode is handy, switching to aperture priority (A) or shutter priority (S) can give you more control over your images, helping you craft the look you want.
6. Techniques for Achieving Sharp and Well-Exposed Photos
Now that your camera settings are dialed in, let’s talk about some practical techniques to make sure your photos are sharp, well-exposed, and just downright beautiful.
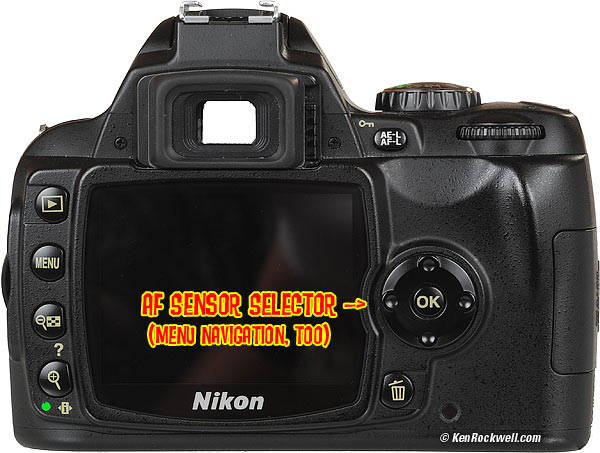
First, always use proper focus. On the D40, you can select the autofocus points to help you focus precisely where you want. For portraits, focus on the eyes—the eyes are the windows to the soul, after all. For landscapes, focus about a third into the scene for maximum depth of field.
Next, stabilize your camera. Handshakes happen to all of us, but they can ruin a shot. Use a tripod whenever possible, especially in low light or when using slower shutter speeds. If you don’t have a tripod, brace your elbows against your body or find a sturdy surface to rest on.
Another tip is to use proper framing and composition. Follow the rule of thirds—imagining your scene divided into nine equal parts, place your main subject along those lines or at their intersections. This creates a more balanced and engaging photo.
Pay attention to your exposure. If your photo looks too dark or too bright, adjust the exposure compensation or tweak your settings. Using the camera’s histogram (if available) can help you see if your exposure is balanced—aim for a histogram that’s spread across the middle without clipping highlights or shadows.
Finally, take multiple shots. Slightly change your settings, angles, or focus points and shoot several versions. This gives you options to choose from and increases your chances of capturing that perfect shot.
With patience and a little practice, your Nikon D40 can produce sharp, well-exposed images that you’ll love to share. Remember, every shot is a learning opportunity—so get out there, experiment, and have fun capturing the world around you!
7. Editing and Enhancing Your Photos for Shutterstock Submission
Once you’ve captured your stunning shots with your Nikon D40, the next step is to make sure they stand out on Shutterstock. Editing is a crucial part of the process because it helps refine your images, correct any imperfections, and ensure they meet Shutterstock’s quality standards. Don’t worry—this doesn’t mean you need to be a professional photographer or an editing wizard. A few simple adjustments can make a big difference!
First, start by reviewing your photos on a larger screen—preferably a computer monitor—so you can see every detail clearly. Use photo editing software like Adobe Lightroom, Photoshop, or even free options like GIMP or Canva. Here are some key editing tips to consider:
- Crop and straighten to improve composition and remove unnecessary elements from the edges. Shutterstock prefers images with clean compositions.
- Adjust brightness and contrast to make your image pop. Bright, well-contrasted photos tend to perform better.
- Correct color balance to ensure your colors look natural. If your photo has a color cast, fix it before submission.
- Sharpen your image slightly to bring out details, especially if your photo appears soft or blurry.
- Remove distractions or blemishes using cloning or healing tools—things like dust spots, unwanted objects, or minor imperfections.
Remember, Shutterstock prefers natural-looking images, so avoid over-editing or adding filters that drastically change the photo’s appearance. Keep it authentic and true to life.
Lastly, always save your edited image in a high-quality format—preferably JPEG with a minimum of 300 dpi resolution. Before uploading, double-check that your image meets Shutterstock’s technical requirements, including size (at least 4 MP) and file format.
8. Uploading Your Photos to Shutterstock Successfully
Now that your images are polished and ready, it’s time to upload them to Shutterstock. This part is pretty straightforward, but doing it carefully ensures your photos are accepted and reach the widest audience possible. Here’s a step-by-step guide to help you upload successfully:
- Create an account or log in to your Shutterstock Contributor account. If you’re new, it’s quick to sign up, and you’ll be guided through the process.
- Navigate to the upload section of your dashboard. You’ll find an “Upload” button—click it to get started.
- Select your photos from your computer. For better organization, upload one or a few at a time rather than bulk uploading dozens without reviewing.
- Fill out the submission details:
- Title: Write a clear, descriptive title that accurately reflects the image.
- Description: Add relevant keywords and details to help buyers find your photo.
- Keywords: Use specific, relevant keywords—think about what someone searching for this image might type.
- Select the appropriate categories and licensing options. Shutterstock offers options like Standard or Enhanced licenses—choose based on how you want your images to be used.
- Review your submission to ensure all details are correct. Mistakes in titles or keywords can impact discoverability.
- Click “Submit” to upload your images. Shutterstock often processes images quickly, but it may take a few hours or days for approval.
After submission, Shutterstock’s review team will evaluate your photo for quality, content, and compliance with their guidelines. If your image is approved, it goes live on the platform, and you’ll start earning royalties whenever someone licenses your work.
Tips for success:
- Always upload high-resolution images that meet Shutterstock’s standards.
- Use accurate and relevant keywords to improve your image’s visibility.
- Be patient—review times can vary, and not all images get accepted on the first try.
By following these steps carefully, you’ll increase your chances of getting your photos approved and earning revenue from your Nikon D40 shots. Happy uploading!
9. Common Mistakes to Avoid When Shooting for Shutterstock with a Nikon D40
Getting your photos accepted on Shutterstock is a fantastic goal, but it’s easy to make some common mistakes along the way. As a Nikon D40 user, being aware of these pitfalls can help you improve your shots and increase your chances of success. Let’s go over some of the most frequent errors and how to avoid them.
1. Ignoring Image Quality and Resolution
Shutterstock has strict quality standards, and one of the key requirements is high resolution. Since the Nikon D40 offers a maximum of 6.1 megapixels, it’s crucial to ensure your images are sharp and well-exposed. Avoid shots that are blurry, pixelated, or underexposed. Always check your images at full size before uploading.
2. Forgetting to Check for Model and Property Releases
If your photos feature recognizable people or private property, you need proper releases. Not having these can lead to rejection or legal issues later. Always get model releases for people and property releases for private locations. Shutterstock’s guidelines specify that you should have these ready if needed.
3. Shooting with Poor Composition
Good composition can make or break your stock photos. Avoid cluttered backgrounds, awkward framing, or distracting elements. Use the rule of thirds, leading lines, and natural framing to create visually appealing images. Take your time to compose your shots thoughtfully.
4. Over-editing or Under-editing
Post-processing is key, but it’s easy to go overboard or not do enough. Over-editing can make images look unnatural, while under-editing might leave them dull. Aim for a natural, clean look with good contrast, brightness, and sharpness. Use editing tools sparingly to enhance, not distort.
5. Not Paying Attention to Lighting
Lighting is everything. Avoid harsh midday sunlight that causes strong shadows or flat images. Instead, shoot during golden hours—early morning or late afternoon—for warm, soft light. Using a reflector or fill flash can also improve indoor shots or photos in tricky lighting conditions.
In summary, be mindful of image quality, legal requirements, composition, editing, and lighting. Avoid these common mistakes, and you’ll be well on your way to creating stock photos that stand out on Shutterstock.
10. Conclusion and Final Tips for Success in Stock Photography
You’ve got your Nikon D40 ready, and now it’s time to make the most of it in the world of stock photography. Success doesn’t happen overnight, but with a few final tips, you can boost your chances of getting accepted and even making sales on Shutterstock.
Here are some key takeaways:
- Focus on quality over quantity: It’s better to submit a handful of sharp, well-composed images than dozens of mediocre ones.
- Research popular themes: Browse Shutterstock to see what types of images are in demand—think business, technology, lifestyle, and nature.
- Master your camera settings: Use the Nikon D40’s features to get properly exposed, sharp photos. Don’t forget to shoot in RAW if possible, or at least in the highest quality JPEG.
- Stay consistent with your style: Developing a recognizable style or niche can help build your portfolio and attract buyers.
- Follow Shutterstock’s guidelines: Always review their submission policies to ensure your images meet technical and legal requirements.
Remember, patience and persistence are key. Keep practicing, learn from your mistakes, and don’t be afraid to experiment with different subjects and techniques. Over time, you’ll develop an eye for what works and build a portfolio that showcases your best work.
Finally, enjoy the process! Stock photography is a fantastic way to turn your passion for photography into a steady stream of income. With your Nikon D40 in hand and these tips in mind, you’re well on your way to success. Happy shooting!