If you’ve ever loved capturing moments with your Nikon D40 and wondered how to turn those snapshots into income, Shutterstock might just be your new best friend. Selling photos online is a fantastic way to share your creativity, reach a global audience, and earn passive income. Shutterstock is one of the biggest stock photo platforms out there, welcoming both amateur and professional photographers alike. The good news? Getting started is easier than you might think—especially if you already own a Nikon D40, a reliable camera perfect for beginners and enthusiasts. In this guide, we’ll walk you through the essentials of selling your photos on
Understanding Shutterstock’s Photo Requirements and Guidelines
Before you start uploading your images, it’s crucial to understand Shutterstock’s specific requirements and guidelines. This ensures your photos are accepted and have the best chance of selling. Let’s break down the main points:
- Image Quality: Shutterstock wants high-quality, sharp images. Your photos should be in focus, well-exposed, and free of noise or artifacts. Since the Nikon D40 has a 6.1 MP sensor, make sure your images are taken at the highest possible resolution and saved in JPEG format with a minimum of 4 MP (preferably higher).
- File Format and Size: JPEG is the standard format. The minimum accepted resolution is 4 MP (e.g., 2688 x 1512 pixels), but higher resolutions are preferred. Keep your file size under 50 MB.
- Content Guidelines: Your photos must be original, and you should have the rights to all content within them. Avoid copyrighted elements, logos, or recognizable private property unless you have model or property releases.
- Model and Property Releases: For recognizable people or private property, you need to obtain signed releases. Shutterstock requires these for commercial use photos, so plan ahead if your shot includes identifiable individuals or trademarks.
- Composition and Style: Aim for clean, well-composed images that tell a story or highlight a particular subject. Good lighting, interesting angles, and proper framing make your photos stand out.
Additionally, Shutterstock discourages images with excessive noise, pixelation, or over-editing. Keep edits natural, and avoid heavy filters or overly saturated colors. By adhering to these guidelines, you increase the chances your photos will be accepted and sell well. Remember, quality and originality are key—so take your time to review your images before uploading. Happy shooting with your Nikon D40!
Preparing Your Nikon D40 for Professional Photography

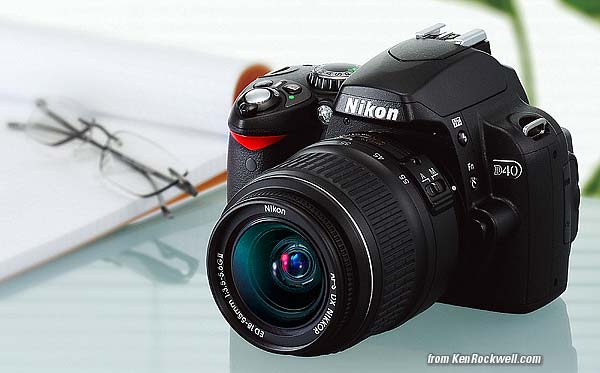
Getting your Nikon D40 ready for professional-quality shots is all about understanding your camera’s features and making sure it’s set up for optimal performance. Even though the D40 is an older model, it still packs plenty of punch when used correctly. Let’s walk through some essential preparation steps to ensure your camera is ready to capture stunning images for Shutterstock.
Clean Your Equipment: Before heading out, give your camera and lens a quick cleaning. Dust, fingerprints, or smudges can ruin a good shot. Use a soft microfiber cloth and a gentle blower to clear lenses and camera sensors. Maintaining clean equipment ensures your images come out crisp and clear.
Check Your Battery and Storage: Nothing’s more frustrating than running out of juice or space during a shoot. Fully charge your Nikon D40’s battery and carry a spare if possible. Also, insert a high-quality SD card with ample space—preferably one with fast write speeds to handle high-resolution images without lag.
Set the Correct Image Quality and Size: For Shutterstock, you’ll want the highest quality images. In your camera menu, select Image Quality: RAW or Large JPEG. RAW files give you more editing flexibility later, but JPEGs are quicker for immediate uploads. If your workflow allows, shoot in RAW; just remember to convert files to JPEG before uploading.
Adjust Your Camera Settings: Start by setting your ISO to a low value like 100 or 200 to minimize noise. Use aperture and shutter speed based on your scene—faster shutter speeds for moving subjects, smaller apertures for greater depth of field, etc. Also, enable Auto White Balance or manually set it depending on lighting conditions to keep colors accurate.
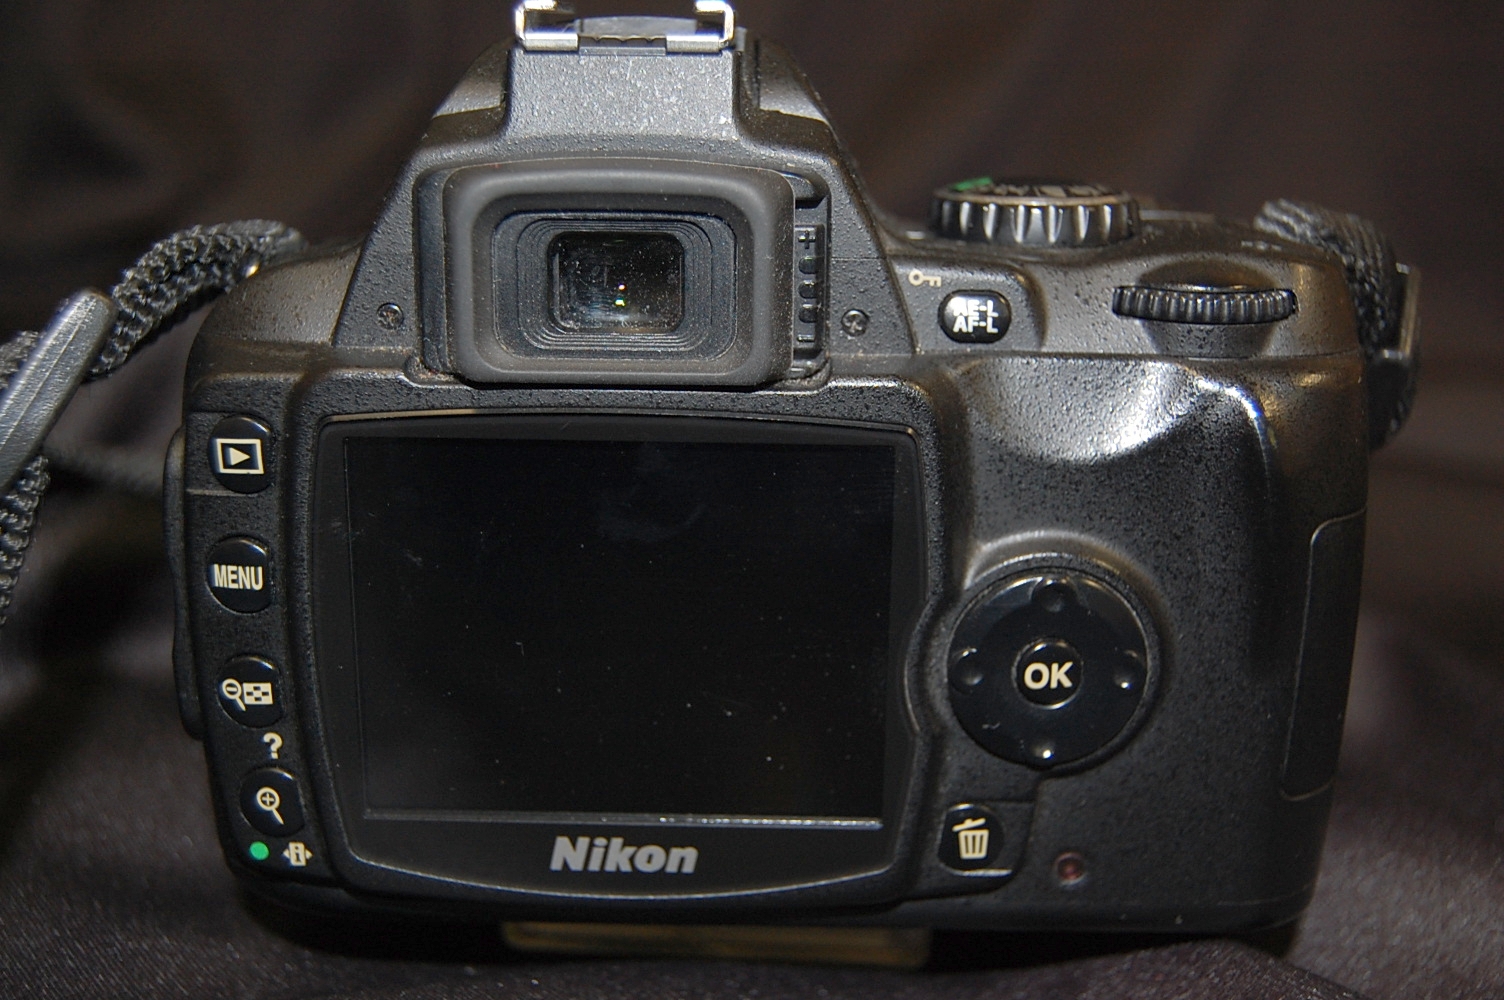
Focus Properly: Use the Auto Focus (AF) mode carefully. For sharp images, switch to Single-Point AF and select the focus point manually, especially if your subject isn’t centered. Don’t forget to enable Focus Lock if needed, so you can recompose without losing focus.
Finally, do a quick test shot, review it on the camera’s LCD, and zoom in to check for sharpness. Once everything looks good, you’re all set to start capturing images that meet Shutterstock’s standards!
Tips for Composing Captivating Images Suitable for Shutterstock
Great photos aren’t just about technical settings—they’re about storytelling, composition, and capturing a moment that resonates. When shooting with the goal of submitting to Shutterstock, keep these composition tips in mind to stand out and appeal to buyers.
Follow the Rule of Thirds: Imagine your frame divided into nine equal parts with two horizontal and two vertical lines. Place key elements along these lines or at their intersections to create a balanced, engaging shot. Most cameras, including the Nikon D40, have grid overlays you can turn on to help you compose more effectively.
Keep It Simple: Cluttered images can distract viewers and reduce the commercial appeal. Focus on a clear subject, and eliminate unnecessary background elements. Use a wider aperture if needed to blur out distracting backgrounds, making your subject pop.
Use Leading Lines and Framing: Guide the viewer’s eye into the image using natural lines like roads, fences, or rivers. Framing your subject with elements like trees, doorways, or arches adds depth and interest, making your photo more engaging.
Mind the Lighting: Good lighting is key. Shoot during the golden hour—shortly after sunrise or before sunset—for warm, soft light that flatters most subjects. Avoid harsh midday sun unless you’re aiming for high-contrast or silhouette shots. Always pay attention to shadows and highlights; avoid blown-out areas or overly dark sections.
Capture Authentic Moments: Shutterstock customers love images that tell a story or evoke emotion. Look for candid moments, genuine expressions, or interesting perspectives. Don’t be afraid to experiment with different angles—get low, shoot from above, or try close-ups—to add variety and interest.
| Tip | Why It Matters |
|---|---|
| Use the Grid Overlay | Helps align elements and follow the rule of thirds for balanced compositions. |
| Focus on a Clear Subject | Ensures your image communicates its message effectively and is visually appealing. |
| Experiment with Perspectives | Creates unique images that stand out in Shutterstock’s library. |
| Mind the Background | Prevents distractions and keeps the viewer’s attention on the main subject. |
Remember, the best Shutterstock images often combine technical excellence with creative storytelling. Take your time, experiment with different compositions, and most importantly, have fun capturing moments that will inspire others!
Optimizing Camera Settings on the Nikon D40 for Stock Photography
Getting the perfect shot starts with setting up your Nikon D40 correctly. When you’re aiming for stock photography, you want images that are sharp, well-exposed, and versatile enough for various uses. Let’s walk through some key camera settings to help you optimize your D40 for this purpose.
1. Shooting Mode: Use the Manual (M) mode whenever possible. This gives you full control over aperture, shutter speed, and ISO, ensuring your images are just the way you want them. If you’re in a hurry or shooting a variety of scenes, Aperture Priority (A) can be a good alternative, allowing you to set the aperture while the camera adjusts the shutter speed.
2. Aperture Settings: For stock photos, versatility is key. Use a moderate aperture like f/8 to f/11 to maximize depth of field and ensure your entire subject is in focus. That way, your images look sharp from front to back, making them suitable for multiple uses.
3. ISO Settings: Keep ISO as low as possible to avoid noise. The Nikon D40 performs well at ISO 100-400. Increase ISO only if you’re shooting in low light and can’t use a tripod, but remember, higher ISO can introduce graininess, which may not be desirable for stock images.
4. White Balance: Set your white balance to Auto or manually adjust based on your lighting conditions. For consistent results, especially if you’re batch shooting, consider shooting in RAW so you can fine-tune white balance in post-processing.
5. Image Quality: Always shoot in RAW format. RAW files retain all image data, giving you maximum flexibility during editing. JPEGs are smaller but lose some quality and detail, which isn’t ideal for stock photography.
6. Focus Settings: Use Single-servo autofocus (AF-S) for static subjects, and focus on the main point or use the center focus point for precise control. Make sure your focus is sharp on your subject, as this is critical for professional-looking images.
By carefully adjusting these settings, you’ll ensure your Nikon D40 is set up for success. Remember, every scene may require slight tweaks, so don’t hesitate to experiment and review your images on the camera’s LCD to confirm you’re capturing the look you want.
Techniques for Shooting High-Quality Photos with the Nikon D40
Shooting high-quality photos isn’t just about having a good camera; it’s about applying the right techniques to make the most of your gear. Here are some practical tips to elevate your Nikon D40 photography for stock images:
1. Use a Tripod: Stability is your best friend. A tripod helps eliminate camera shake, especially in low-light conditions or when shooting long exposures. It also allows you to compose your shot carefully and maintain consistency across multiple images.
2. Focus Carefully: Always ensure your subject is in sharp focus. Use manual focus if autofocus struggles, especially in tricky lighting or with small subjects. Zoom in on the LCD to check focus accuracy before snapping the shot.
3. Pay Attention to Composition: Apply the classic rule of thirds by placing your main subject along the grid lines. Keep backgrounds clean and uncluttered to make your subject stand out. Use leading lines or frames within the scene to guide the viewer’s eye.
4. Control Lighting: Natural light is often best, so shoot during the golden hours—early morning or late afternoon—for warm, soft light. If shooting indoors or in harsh sunlight, consider diffusing light with reflectors or diffusers to soften shadows and reduce glare.
5. Use Proper Exposure Techniques: Check your histogram after taking a shot to ensure you’re not overexposing highlights or losing shadow detail. Bracketing exposures can also help if you’re unsure about the correct exposure settings, giving you options during post-processing.
6. Keep Your Lens Clean: Dirty or smudged lenses can ruin a shot. Regularly clean your lens with a microfiber cloth and avoid touching the glass with your fingers.
7. Experiment with Angles and Perspectives: Don’t be afraid to shoot from low or high angles. Changing your perspective can add interest and uniqueness to your images, making them more appealing for stock buyers.
8. Post-Processing: Shoot in RAW and spend some time editing your photos. Adjustments like contrast, sharpness, and color balance can turn a good shot into a great one. Remember, subtle edits are usually best—avoid over-processing.
By applying these techniques, you’ll be able to produce high-quality, professional-looking images with your Nikon D40 that are perfect for stock photography. Practice consistently, review your shots critically, and don’t hesitate to experiment—every picture is a learning opportunity!
Editing and Enhancing Your Photos Before Upload
Once you’ve captured your shots with your Nikon D40, the fun really begins! Editing your photos is an essential step to ensure they look their absolute best before sharing them with the world on Shutterstock. But don’t worry — you don’t need to be a professional photographer or have fancy software to make your images pop. A good editing process can dramatically improve the quality and appeal of your photos, making them more likely to get accepted and purchased.
Start by transferring your photos to your computer. You can do this with a simple card reader or via USB cable. Once your images are on your computer, it’s a good idea to review and select the strongest shots. Keep an eye out for photos that are sharp, well-exposed, and free of distracting elements.
For editing, popular software options include Adobe Lightroom, Photoshop, or free tools like GIMP and Darktable. Here are some key adjustments to focus on:
- Crop and straighten: Remove any unwanted edges and ensure your horizon is level. Cropping helps improve composition and focus on the main subject.
- Adjust brightness and contrast: Make your photo brighter or darker as needed, and tweak contrast to add depth.
- Color correction: Fix any color casts and enhance vibrancy to make your image more lively. Be careful not to oversaturate.
- Sharpening: Slight sharpening can make details stand out, especially for images intended for stock use.
- Noise reduction: If your photo has grainy spots, especially in low-light shots, apply noise reduction for a cleaner look.
Remember, the goal is to produce a clean, professional-looking image that highlights the subject without over-editing. Keep your edits natural and true to what you originally captured. After editing, save your images in high-quality JPEG format, ideally with a resolution of at least 4 megapixels, and ensure the file size doesn’t exceed Shutterstock’s limits.
Uploading and Tagging Your Photos on Shutterstock
You’re almost there! Once your images are polished and ready, it’s time to upload them to Shutterstock. The platform is user-friendly, but paying attention to details like proper tagging can make a huge difference in how often your photos get discovered.
First, create an account or log in to your Shutterstock Contributor Dashboard. When uploading, you’ll find clear prompts to select your files. Here’s a quick checklist:
- Select high-quality JPEG files.
- Ensure your images meet Shutterstock’s technical requirements (resolution, size, no watermarks).
- Add your images to relevant collections if you organize your portfolio that way.
Now, the most critical step is tagging your photos effectively. Think of tags as keywords that help buyers find your images. The more accurate and descriptive your tags, the better your chances of sales. Here are some tips:
- Be specific: Instead of generic tags like “nature,” use more precise ones like “mountain landscape sunrise.”
- Include relevant details: Mention colors, locations, emotions, or activities depicted.
- Avoid over-tagging: Use only relevant tags. Irrelevant or spammy tags can get your submission rejected or reduce your credibility.
- Use synonyms and related keywords: Think about how different buyers might search for your image.
Besides tags, add a compelling description that accurately describes the content of your photo. This not only helps with searchability but also gives buyers confidence in your work.
Before submitting, double-check everything — file quality, tags, description — and then hit the upload button. Once uploaded, your images will go through Shutterstock’s review process, which can take a few days. If approved, they’ll be available for licensing, and you’ll earn from each download.
Remember, consistency is key. Keep uploading high-quality photos with thoughtful tags, and over time, you’ll build a strong portfolio that attracts buyers and helps you succeed as a Shutterstock contributor using your Nikon D40!
Best Practices for Increasing Your Shutterstock Portfolio Success
So, you’ve started uploading photos to Shutterstock with your Nikon D40, and you’re eager to see your portfolio grow and succeed. That’s fantastic! Building a successful stock photography portfolio isn’t just about uploading a bunch of images; it’s about strategic planning, quality, and consistency. Here are some best practices to help you boost your success:
Focus on Quality Over Quantity
While it might be tempting to upload as many photos as possible, quality is key. Shutterstock favors sharp, well-composed images with excellent lighting. Use your Nikon D40’s best features—like shooting in good lighting conditions and ensuring your images are in focus—to produce high-quality photos. Remember, a few stunning images can outperform dozens of mediocre ones.
Research Market Trends and Popular Subjects
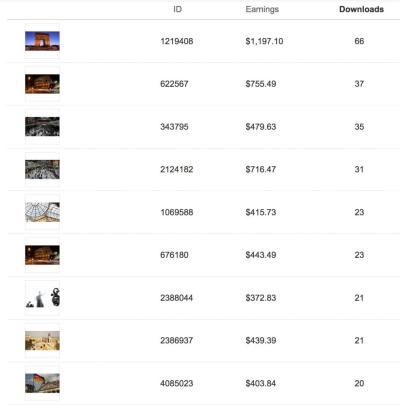
Stay updated on what’s in demand. Check Shutterstock’s trending images or browse their top contributors to see what types of photos are popular. Common sought-after themes include business, technology, health, lifestyle, and nature. Incorporate these trends into your shoots to increase the chances of your photos being downloaded.
Optimize Your Metadata
Proper titles, keywords, and descriptions are vital for discoverability. Be specific and accurate—use relevant keywords that describe the image clearly. Think about what a buyer might search for when looking for an image like yours. Avoid keyword stuffing; instead, aim for natural, descriptive language.
Maintain Consistency and Regular Uploads
Consistency helps build your portfolio and keeps your work fresh. Set a goal to upload new images regularly—whether weekly or bi-weekly. This signals to Shutterstock that you’re an active contributor, which can positively influence your visibility and earnings.
Engage with the Community and Learn
Join forums, social media groups, or communities dedicated to stock photography. You can gain valuable insights, feedback, and inspiration. Plus, networking can open doors to collaborations or mentorship opportunities that can elevate your craft.
Be Patient and Persistent
Success in stock photography takes time. Don’t get discouraged if your images aren’t getting downloads right away. Keep refining your skills, updating your portfolio, and learning from your experiences. Over time, your efforts will pay off.
Conclusion and Final Tips for Aspiring Stock Photographers
Embarking on a journey to become a successful stock photographer with your Nikon D40 is exciting and rewarding. Remember, every great contributor started somewhere, and with dedication, you can build a portfolio that stands out. Here are some final tips to keep in mind:
- Invest in Your Skills: Continuously learn about photography techniques, lighting, and editing. Use online tutorials, workshops, or books to improve your craft.
- Master Your Equipment: Get comfortable with your Nikon D40’s features. Understanding your camera deeply allows you to capture better images effortlessly.
- Stay Organized: Keep track of your images, keywords, and upload schedules. Use folders or management tools to stay on top of your work.
- Be Authentic and Creative: Don’t shy away from unique perspectives or niche subjects. Authentic photos often resonate more with buyers.
- Respect Copyright and Model Releases: Always ensure you have the right to sell your images, especially if they include recognizable people or private property.
- Enjoy the Process: Photography should be fun! Keep experimenting, exploring new ideas, and capturing moments that inspire you.
Remember, building a successful Shutterstock portfolio with your Nikon D40 is a marathon, not a sprint. Stay committed, keep learning, and enjoy the journey of turning your passion into a rewarding side hustle or even a full-time gig. Happy shooting!