If you’ve ever used WordPress, you might be familiar with the visual editor, which makes writing and formatting posts a breeze. But did you know that WordPress also offers an HTML view? This lets you dive deeper into your content, giving you full control over the code. Switching to HTML view can seem daunting at first, but it opens up a world of possibilities for customization. Let’s take a closer look at what HTML view is and why it can be beneficial for your
Why Use HTML View in WordPress?
Switching to HTML view in WordPress can significantly enhance your content creation process. Here are some key reasons why you might want to consider it:
- Enhanced Control: HTML view allows you to refine your content with precision. You can adjust the structure, add custom code, and troubleshoot any formatting issues that might arise.
- Custom Styling: Want to add a unique flair to your posts? HTML view lets you insert custom CSS for styling, giving your site a personalized touch.
- Access to Additional Features: Some hidden functions and tags are only accessible through the HTML view. This might include specific meta tags or embedded content that wouldn’t be easy to incorporate through the visual editor.
- Faster Edits: For those who are comfortable with coding, making adjustments in HTML can be quicker than navigating through the visual editor’s options.
- Improved SEO Optimization: With direct access to your content’s HTML, you’re better equipped to optimize your posts for search engines, ensuring your site ranks well.
So, whether you’re a seasoned coder or just looking to spice up your blog, HTML view in WordPress is definitely worth exploring! It can transform your overall editing experience into something much more powerful and satisfying.
Step-by-Step Guide to Switch to HTML View
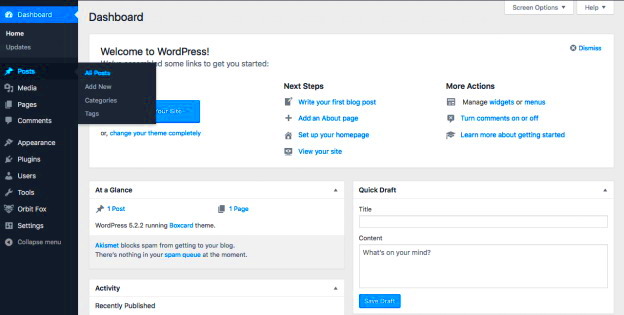
Switching to HTML view in WordPress is a breeze! If you’re looking to add custom code, optimize your content for SEO, or just explore the raw HTML of your posts, here’s a simple guide to take you through the process.
-
Log in to your WordPress Dashboard: Start by logging in to your WordPress account. You’ll be greeted with your dashboard – it’s your command center for managing everything on your site.
-
Navigate to the Posts or Pages Section: Depending on what you want to edit, click on either ‘Posts’ or ‘Pages’ in the left-hand menu. This will show you a list of your existing content.
-
Select a Post or Page: Click on the title of the post or page you wish to edit. This will open up the block editor for your selected content.
-
Locate the Code Editor Option: In the block editor, look for the three vertical dots (options menu) at the top right or bottom of your content area. Click on it, and you will see the option for ‘Code editor’ or ‘HTML view.’
-
Switch to HTML View: After selecting the Code editor option, your editor will switch from the Visual view to the HTML view. Here, you can see and edit the HTML code directly.
-
Save Your Changes: Once you’re finished editing your HTML, make sure to click ‘Update’ or ‘Publish’ to save your changes. And voila! You’ve just switched to HTML view!
Understanding the Visual vs. HTML Editor
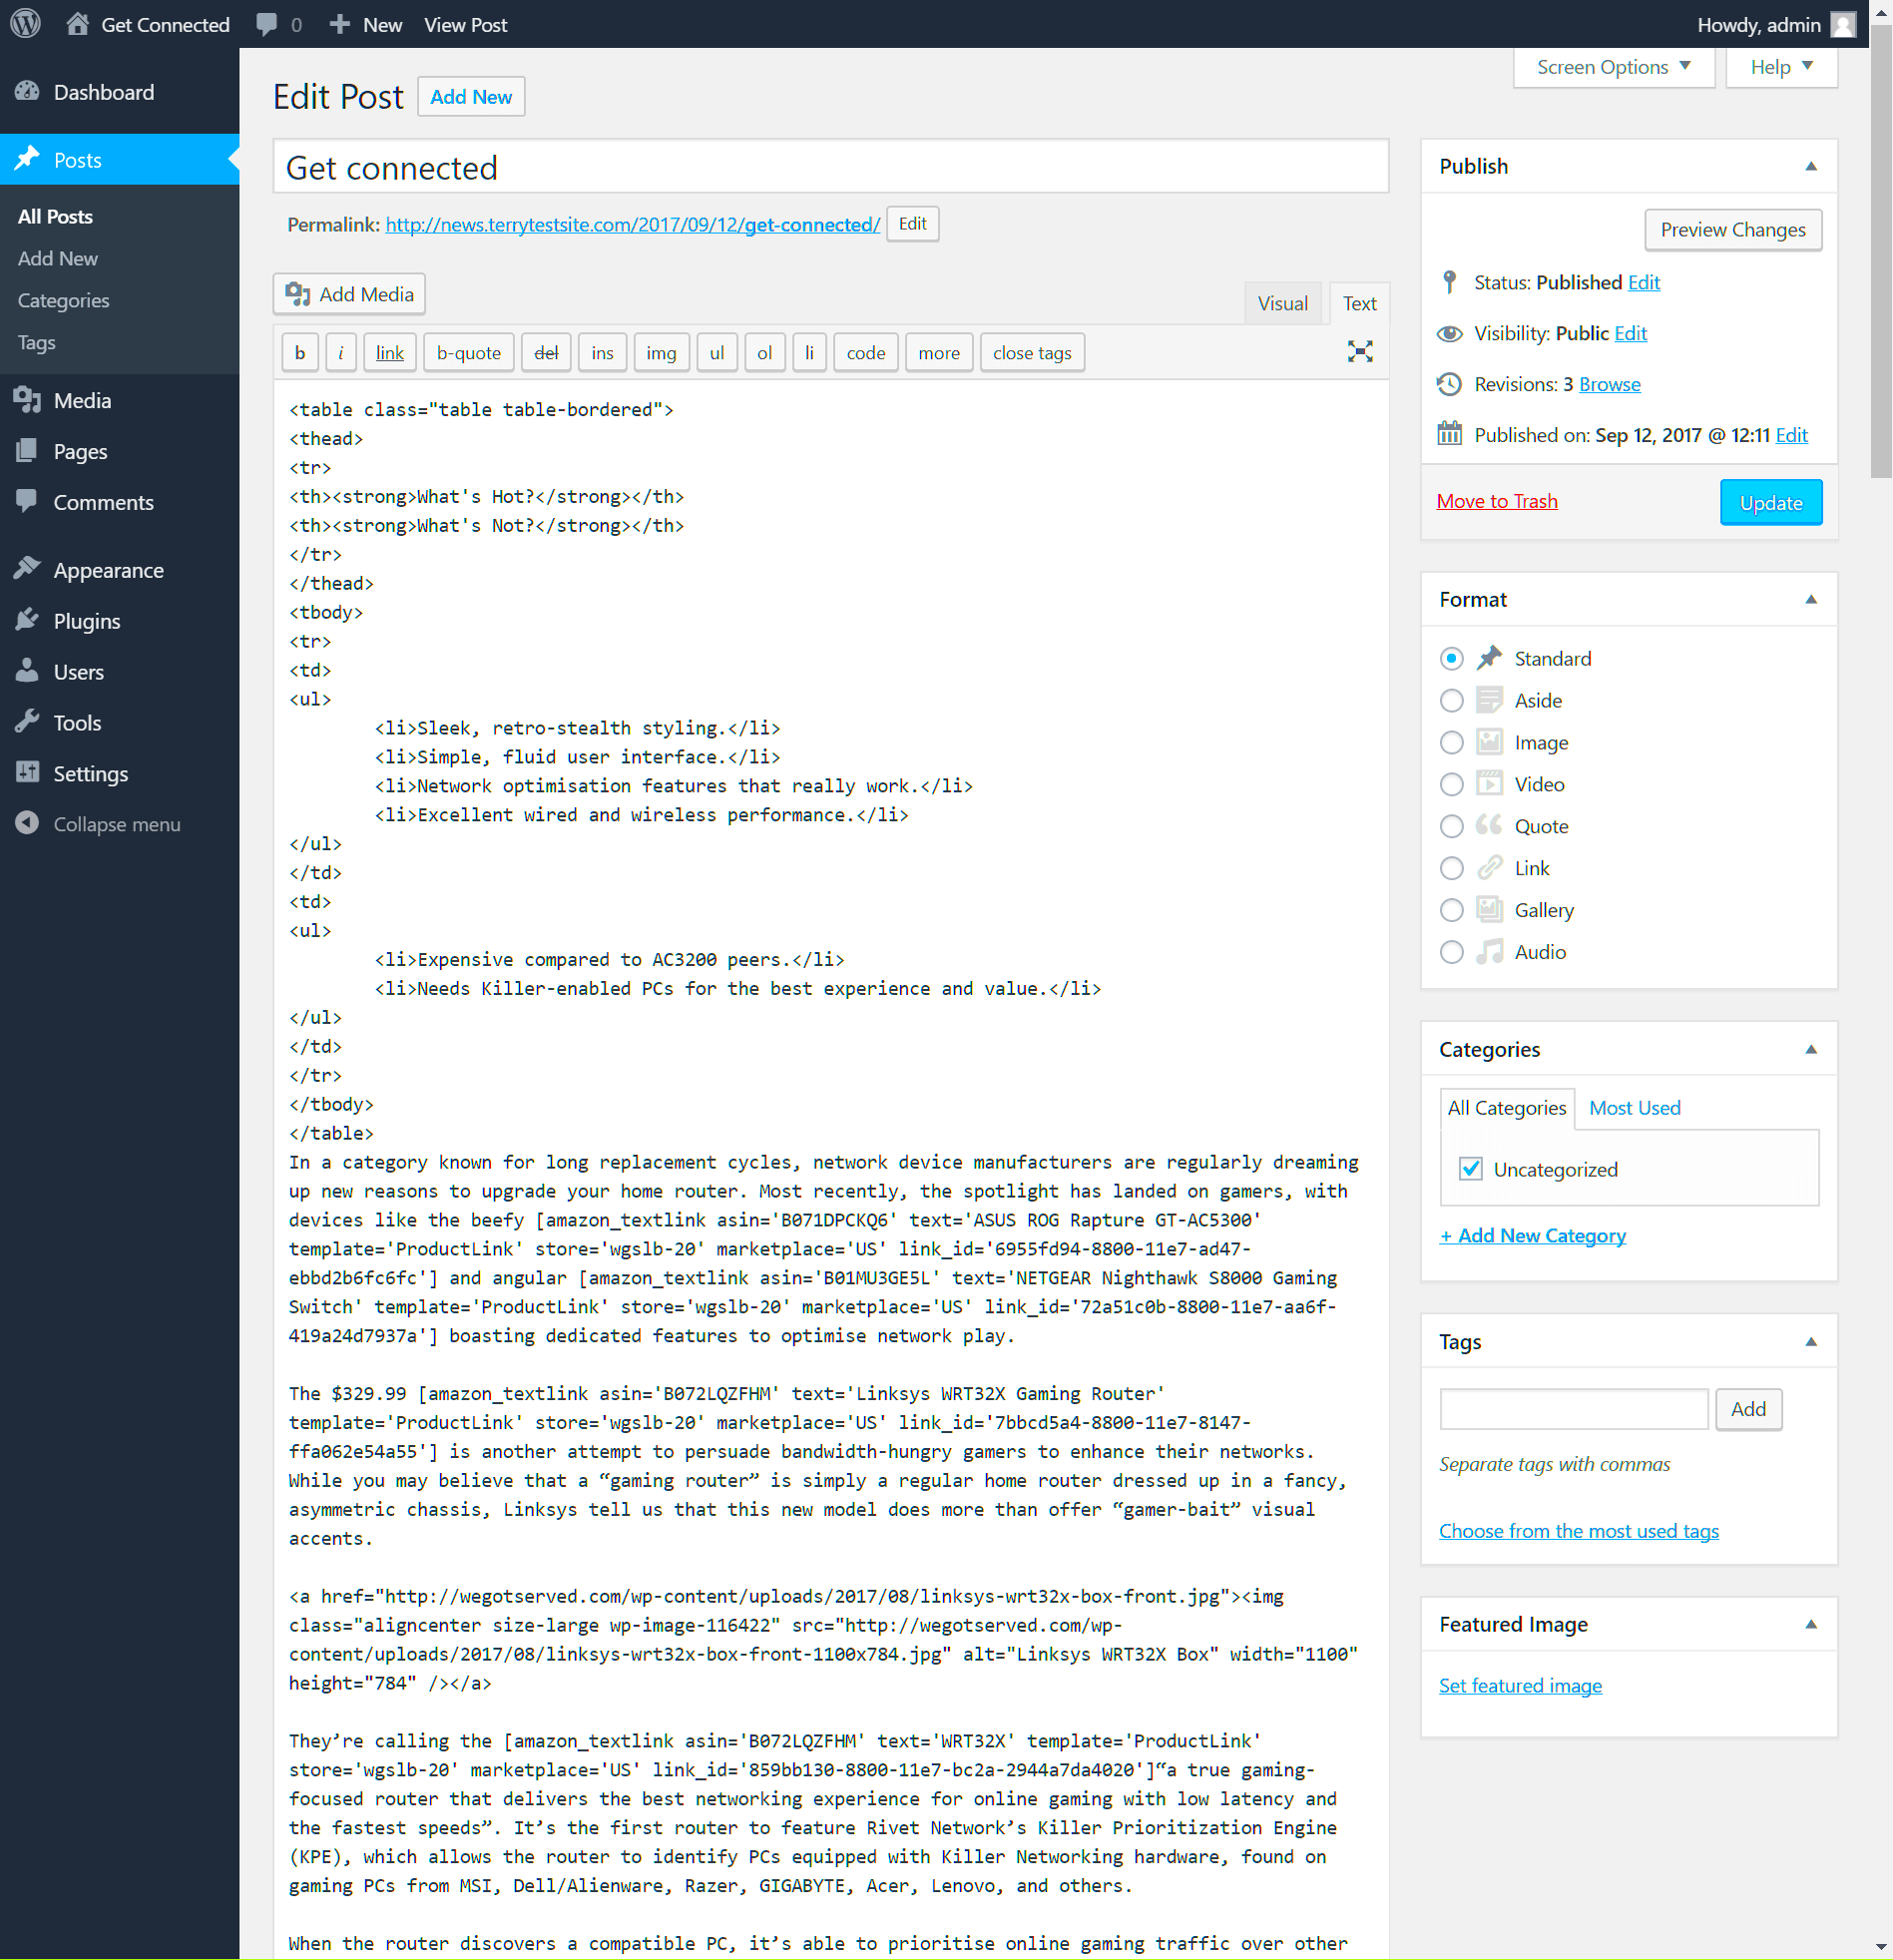
When you’re working in WordPress, you might often hear the terms “Visual Editor” and “HTML Editor.” But what do they really mean? Let’s break it down!
The Visual Editor: This is what most users see by default. It’s designed to mimic a word processor, with a toolbar that offers formatting options like bold, italics, lists, and links. It’s user-friendly and perfect for those who prefer a more visual approach:
- Easy to use: Perfect for beginners or anyone less tech-savvy.
- Real-time formatting: You can see how your text looks while you edit.
- Image and media integration: Adding images and media is straightforward and intuitive.
The HTML Editor: This is where the magic happens for those who are comfortable with coding or want to add specific elements to their content. It allows you to edit the raw HTML directly:
- Greater control: If you need to fine-tune your content, the HTML editor offers the flexibility to do just that.
- SEO optimization: You can easily add meta tags, custom styles, and scripts to enhance your site’s visibility.
- Learning opportunity: Working in the HTML editor can be a great way to learn basic coding skills!
In conclusion, whether you prefer the visual simplicity of the Visual Editor or the precise control of the HTML Editor, WordPress has you covered. Each option has its benefits, so feel free to switch back and forth as needed to create your perfect post!
5. Common Use Cases for HTML Editing
Switching to HTML view in WordPress opens up a world of opportunities for enhancing your content. While the visual editor is user-friendly, sometimes you need to dive a little deeper to get the results you want. Here are some common scenarios where HTML editing becomes invaluable:
- Custom Styling: Want your text to pop? By adding inline CSS styles directly within the HTML, you can customize fonts, colors, and sizes without needing plugins.
- Embedding Multimedia: If you’re trying to embed videos, maps, or other third-party widgets that don’t have a built-in WordPress block, HTML view is your best friend. You can copy and paste the embed code directly.
- Using Shortcodes: Many plugins offer shortcodes that require you to insert them directly in HTML. This is especially useful for more advanced functionalities without cluttering your visual editor.
- Creating Custom Tables: Tables can be tricky to format in the visual editor. By switching to HTML, you can create complex tables that display your data precisely how you envision.
- Tweaking Formatting: Sometimes, you might want to adjust specific elements, like removing automatic
<p>or<br>tags added by WordPress. Editing HTML gives you that control.
In short, whether you’re a seasoned developer or just starting, knowing how to toggle to HTML view can empower your WordPress experience, making your content stand out.
6. Troubleshooting HTML Issues in WordPress
We’ve all been there—after a long session of HTML editing, you end up with a layout that just doesn’t look right. Fear not; troubleshooting HTML issues in WordPress can be easier than you think. Here are some tips and tricks to resolve common problems:
- Check for Incorrect Tags: Always double-check your opening and closing tags. A missing
</div>or</p>can throw the entire layout off. - Validate Your Code: Use online validators to catch errors. Tools like W3C Validator can help you identify any syntax issues.
- Clear Your Cache: Sometimes, the problem might not be with the HTML but rather with cached versions of your site. Clear your browser and WordPress cache to see changes reflected immediately.
- Disable Plugins: If you notice unexpected behaviors, a rogue plugin could be the culprit. Temporarily disable them to see if that fixes the issue.
- Use the Preview Function: Before hitting that update button, always use the preview function. It allows you to see how your changes will render without pushing them live.
With these troubleshooting tactics up your sleeve, editing with HTML can turn from a daunting task into a smooth experience. Happy editing!
How to Switch to HTML View in WordPress
WordPress, one of the most popular content management systems, offers a variety of editing options to cater to different user preferences. Among these options, the HTML view stands out for those looking to enhance their customization capabilities and perfect their online content. Switching to HTML view allows users to have granular control over the code, making it an appealing choice for developers and advanced users alike.
To switch to HTML view in WordPress, follow these simple steps:
- Log in to your WordPress dashboard.
- Navigate to the page or post you want to edit.
- Click on the Editor button.
- In the block editor (Gutenberg), click on the three vertical dots on the top right corner.
- Select Code Editor from the dropdown menu.
- If you’re using the Classic Editor, simply click on the Text tab next to the Visual tab.
In HTML view, you’ll notice the raw HTML code of your content. This is where you can:
- Modify text formatting: Change headers, lists, and links.
- Add custom HTML: Insert third-party widgets or scripts.
- Fix layout issues: Tweak CSS directly for specific elements.
Remember to use the preview option to check how your changes appear on the front end. Also, make a habit of saving your drafts frequently to avoid losing any of your hard work.
Conclusion: Embracing the HTML View for Better Customization
Switching to HTML view in WordPress opens the door to greater flexibility and customization. By taking advantage of this feature, users can ensure their content is tailored exactly to their needs, resulting in a more engaging and personalized experience for website visitors.

