Thinking about sharing your videos with the world? Shutterstock is a fantastic platform that not only helps you showcase your creativity but also offers a chance to earn from your work. But before your videos can go live, they need to pass Shutterstock‘s approval process. This might seem a bit daunting at first, but don’t worry! In this guide, we’ll walk you through the entire submission journey, from understanding what
Preparing Your Videos for Submission
Getting your videos ready for submission is a crucial step that can make or break your approval chances. Shutterstock has specific requirements to ensure quality and consistency across their library, so taking the time to prepare properly is well worth it. Here are some key tips to help you get your videos submission-ready:
- Check the technical specifications: Ensure your videos meet Shutterstock’s accepted formats, such as MP4 (H.264 codec), and adhere to their resolution standards (usually 4K or HD). Keep the file size manageable without sacrificing quality.
- Maintain high video quality: Use good lighting, steady shots, and clear focus. Avoid pixelation, blurriness, or excessive compression artifacts. The clearer, the better!
- Keep audio professional: Clear, undistorted audio free from background noise is essential. Use good microphones and editing to enhance sound quality.
- Content guidelines: Make sure your videos don’t contain any copyrighted material, logos, or identifiable people without model releases. Avoid controversial or sensitive content that might violate Shutterstock’s policies.
Beyond these basics, it’s smart to review Shutterstock’s detailed contributor guidelines regularly, as they update their standards to keep the library fresh and compliant. Also, consider creating a checklist of your videos’ key attributes—resolution, format, content quality—to streamline your preparation process. The more you invest in quality and compliance upfront, the smoother the approval process will be. Remember, Shutterstock values originality and professionalism, so take your time to polish your videos before submitting. With the right prep, you’ll be well on your way to getting your videos approved and featured in their vast collection!
Creating a Shutterstock Contributor Account
Getting started with submitting videos to Shutterstock is pretty straightforward, but the first step is setting up your contributor account. Think of this as your gateway to a global marketplace where your videos can reach thousands of potential buyers. So, let’s walk through how to create your account and make sure everything’s set up correctly.
First off, head over to the Shutterstock Contributor Portal. Click on the “Sign Up” button — it’s usually at the top right corner. You’ll be asked to provide some basic information such as your name, email address, and creating a secure password. Make sure your email is valid because Shutterstock will send you a verification email to activate your account.
Next, you’ll need to fill out your profile details, including your location, preferred payout method, and tax information. Be honest and precise here because this info is crucial for payments and compliance. Shutterstock is pretty strict about maintaining quality and authenticity, so providing accurate details helps your account stay in good standing.
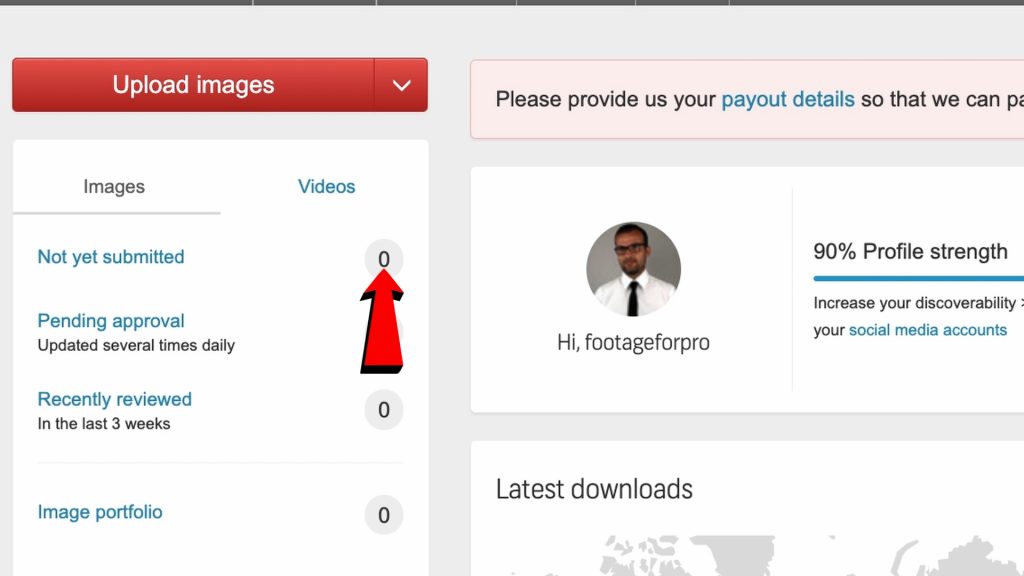
Once your account is set up and verified, you’ll gain access to your contributor dashboard. This is where you’ll upload videos, track your submissions, see approval statuses, and get feedback. Take some time to familiarize yourself with the dashboard. There’s a lot of helpful resources, tips, and guidelines available that can make your submission process smoother.
Finally, make sure to read through Shutterstock’s contributor guidelines. They have specific requirements regarding video quality, content restrictions, and submission standards. Adhering to these rules from the beginning will save you a lot of time and frustration down the line. Remember, your goal is to produce content that aligns with their quality standards and content policies to increase your chances of approval.
Uploading Your Videos to Shutterstock
Now that your account is all set up, it’s time to upload your videos. Think of this step as sharing your creative work with a global audience — exciting, right? Shutterstock makes this process simple, but there are a few tips and best practices to keep in mind to maximize your chances of approval.
First, log into your contributor dashboard and click the “Upload” button. You’ll be prompted to select the video files from your computer. Make sure your videos meet Shutterstock’s technical specifications — typically, this includes formats like MOV or MP4, a minimum resolution of 1920×1080 (Full HD), and a bitrate suitable for high-quality playback.
Before uploading, it’s a good idea to review your videos for quality. Check for issues like shaky footage, poor lighting, background noise, or any distracting elements. Shutterstock’s reviewers look for polished, professional content — so taking the time to edit and enhance your videos can really pay off.
During the upload process, you’ll be asked to add metadata — this includes titles, descriptions, keywords, and categories. Think of metadata as the map that helps buyers find your videos. Use clear, descriptive titles and include relevant keywords that accurately reflect your content. For example, if your video features a sunset at the beach, keywords might include “sunset,” “beach,” “ocean,” “relaxing,” and “nature.”
| Tips for Effective Uploads | Details |
|---|---|
| Use high-quality footage | Ensure your videos are sharp, well-lit, and properly exposed. |
| Follow technical specs | Check format, resolution, and file size requirements. |
| Add accurate metadata | Use relevant titles, descriptions, and keywords to improve discoverability. |
| Review your videos | Make sure there are no distracting elements or errors before uploading. |
After uploading, submit your video for review. Shutterstock’s team typically takes a few days to evaluate your content against their quality and content standards. During this period, avoid making changes or resubmitting the same video repeatedly — patience is key! If your video is rejected, don’t get discouraged. Review the feedback, make necessary improvements, and try again.
Uploading videos might seem simple on the surface, but paying attention to details and adhering to guidelines will give your submissions a much better shot at approval. Keep honing your craft, stay consistent, and soon enough, your videos could be featured in a vast library accessible to buyers worldwide!
Understanding Shutterstock Video Requirements and Guidelines
Before you hit that upload button, it’s essential to get familiar with Shutterstock’s video requirements and guidelines. Think of these as the rules of the game—they help ensure your videos meet the platform’s standards and increase your chances of approval.
First off, Shutterstock is pretty specific about video quality. Your footage should be in high-definition, preferably in 4K or at least 1080p. This means clear visuals with sharp details—blurry or pixelated clips just won’t cut it. Also, make sure your videos are well-lit, with good exposure and minimal noise.
Next, the format matters. Shutterstock recommends uploading videos in MP4 format with H.264 codec. The standard aspect ratio is 16:9, but they also accept other ratios as long as the content is professional and well-framed.
Audio quality is just as important as visuals. Your videos should have clear, balanced sound without background noise or distortions. If your video includes speech or music, ensure it’s properly mixed so viewers can hear everything comfortably.
Now, onto content guidelines. Shutterstock is quite strict about what they accept. They avoid videos that:
- Include copyrighted or trademarked material without permission.
- Have explicit or inappropriate content.
- Feature poorly composed or shaky footage.
- Are staged or scripted in a way that looks unnatural.
Additionally, always ensure you own the rights to everything in your video—this includes music, images, and people featured. If your video contains recognizable individuals, you might need a signed model release form, especially if the footage will be used commercially.
Lastly, pay attention to the metadata you provide. Accurate titles, descriptions, and keywords help reviewers understand your video’s content and increase the chance of approval. Be honest and precise—misleading or vague info can lead to rejection.
Tips for Increasing Your Video Approval Chances
Now that you know what Shutterstock is looking for, let’s talk about how to give your videos the best shot at getting approved. Here are some practical tips to boost your success rate:
1. Follow the technical specs religiously. Double-check your video’s resolution, format, aspect ratio, and sound quality. Small mistakes here can lead to rejection, so use editing software to make sure everything is spot-on before uploading.
2. Keep content professional and original. Shutterstock prefers authentic, well-produced content. Avoid overly staged or cliché shots. Instead, focus on capturing natural, compelling footage that tells a story or offers value to buyers.
3. Minimize shaky footage and distractions. Use stabilizers or tripod shots when possible. Clear, steady footage looks more professional and is more likely to pass review.
4. Be mindful of copyright and model releases. Only upload footage you have rights to. If your video features people or private property, secure signed releases. This not only speeds up approval but also protects you from legal issues.
5. Edit ruthlessly. Trim out any unnecessary or poor-quality segments. Keep your videos concise and engaging—long, dull clips are less appealing to buyers and reviewers alike.
6. Use accurate metadata. Craft descriptive titles, detailed descriptions, and relevant keywords. Think about what a buyer might search for and include those terms naturally. This increases visibility and the likelihood of approval.
7. Review Shutterstock’s content policies regularly. Policies evolve, and staying updated ensures your content remains compliant. Subscribe to their guidelines or check their contributor resources frequently.
Remember, patience is key. Even if your first few videos aren’t approved, learn from any feedback provided, refine your approach, and keep creating. Over time, with consistency and attention to detail, your approval rate will improve, and you’ll build a solid portfolio of Shutterstock-approved videos.
Review and Approval Process for Submitted Videos
Once you’ve uploaded your videos to Shutterstock, the next step is understanding what happens during the review and approval process. Think of it as a friendly gatekeeper checking if your content meets their standards and guidelines. Shutterstock wants high-quality, original videos that are clear, well-lit, and professionally presented, so they can satisfy their diverse clientele.
After submission, your video enters a review queue. This process typically takes from a few days up to a week, depending on the volume of submissions. During this time, Shutterstock’s review team will evaluate your video based on several key criteria:
- Technical Quality: Is your footage sharp, well-exposed, and free from noise or artifacts?
- Content Relevance: Does your video fit within Shutterstock’s licensing categories and current market demand?
- Legal and Ethical Compliance: Are there any copyright issues, inappropriate content, or recognizable people without model releases?
- Metadata Accuracy: Have you provided clear, descriptive titles, tags, and descriptions?
Generally, Shutterstock provides feedback if your video is rejected. Common reasons include poor quality, lack of focus, or missing metadata. If your video passes the review, you’ll receive a notification that it’s approved and ready to be licensed by buyers worldwide.
It’s important to remember that the review process isn’t just about ticking boxes—it’s about ensuring your content aligns with Shutterstock’s standards. Patience is key here! If your video gets rejected, don’t be discouraged. Use the feedback to improve your future submissions, and consider re-submitting after making necessary edits.
Final Steps After Your Videos Are Approved
Congratulations! Once your video is approved, it moves into the marketplace where millions of buyers can discover and license your work. But your job isn’t over yet. Here are some essential final steps to maximize your earnings and keep your portfolio thriving:
- Check Your Dashboard: Regularly monitor your contributor account to see how your videos are performing. Keep track of downloads and earnings so you understand what content resonates most with buyers.
- Optimize Metadata: Even after approval, you can refine your video titles, tags, and descriptions to improve discoverability. Use relevant keywords and accurate descriptions to help your videos appear in search results.
- Update Your Portfolio: Continuously upload new content to keep your portfolio fresh and engaging. Diversify your videos across different themes, styles, and categories to attract a broader audience.
- Engage with Trends: Stay informed about current market trends and popular topics. Creating timely content related to holidays, seasons, or trending themes can boost your visibility and sales.
- Promote Your Work: While Shutterstock handles licensing, sharing your portfolio on social media or personal websites can attract more viewers and potential buyers to your work.
And remember, earning on stock footage is often a marathon, not a sprint. Keep learning, experimenting, and refining your craft. Over time, with consistent effort and quality content, you’ll build a strong presence on Shutterstock and other stock platforms, turning your passion for videography into a steady income stream.
Common Issues and Troubleshooting During Submission
Submitting videos to Shutterstock can sometimes come with its fair share of hiccups. Don’t worry though—most issues are straightforward to resolve once you know what to look out for. Here are some common problems contributors face and tips on how to troubleshoot them effectively:
1. File Format and Codec Errors
One of the most frequent issues is an unsupported file format or codec. Shutterstock recommends using MP4 files encoded with H.264 video codec and AAC audio codec. If your video doesn’t meet these specs, it might get rejected.
- Solution: Use a video editing tool or converter to export your video in the correct format. Tools like Handbrake or Adobe Media Encoder are great options.
2. Video Length and Size Restrictions
Shutterstock has specific guidelines on video duration and size—typically between 5 seconds and 60 minutes, with a maximum file size of 4GB.
- Solution: Trim longer videos or compress your files to reduce size without losing quality. Always check the latest requirements on Shutterstock’s contributor guidelines.
3. Poor Video Quality or Blurry Content
If your video appears pixelated or blurry upon upload, it might be due to low-resolution footage or compression artifacts.
- Solution: Upload high-resolution videos shot with quality equipment. Avoid excessive compression during export, and always review your video at full quality before submission.
4. Metadata and Tagging Mistakes
Incorrect or incomplete titles, descriptions, and keywords can lead to rejection or poor discoverability.
- Solution: Write clear, descriptive metadata that accurately reflects your video content. Use relevant keywords, but avoid keyword stuffing.
5. Technical Upload Errors
Sometimes, uploads fail due to unstable internet connections or server errors.
- Solution: Ensure a stable internet connection. If issues persist, try uploading at a different time or contact Shutterstock support for assistance.
Pro Tip:
If your submission gets rejected, don’t get discouraged. Shutterstock usually provides feedback on why it was rejected. Use that feedback as a learning opportunity to improve your future uploads.
Conclusion and Resources for Shutterstock Video Contributors
Getting your videos approved on Shutterstock is an exciting journey that can open up new opportunities for creative expression and revenue. While the process might seem daunting at first, understanding the guidelines, preparing your videos properly, and troubleshooting common issues can make your experience much smoother.
Remember, every successful contributor started somewhere. Don’t hesitate to revisit the Shutterstock Contributor Guidelines regularly—they’re your best resource for up-to-date requirements and tips. Additionally, engaging with the community forums can provide valuable insights and support from fellow creators.
If you encounter persistent challenges, Shutterstock’s Help Center and Customer Support are there to assist you. They can help clarify technical issues or give guidance on improving your submissions.
Finally, keep practicing and refining your craft. The more you upload and learn from each experience, the better your videos will become, increasing your chances of approval and success on the platform.
Happy filming, editing, and submitting—your next great video might be just a upload away!