Getting your illustrations onto Shutterstock can be an exciting step in sharing your creative work with a global audience and earning some income along the way. But before you start uploading, it’s good to understand how the process works. Shutterstock has a straightforward submission process, but it’s important to follow their guidelines carefully to ensure your artwork gets approved quickly. In this guide, I’ll walk you through each step, from preparing your illustrations to submitting them for review, so you can confidently showcase your talent and get your work published on one of the world’s leading stock image platforms.
Preparing Your Illustrations for Submission
Before you even think about clicking that upload button, there are some key preparations to make sure your illustrations are ready for Shutterstock. First impressions matter, and adhering to their standards can make the approval process smoother and faster.
1. Check Shutterstock’s Content Guidelines
Start by reviewing Shutterstock’s contributor guidelines thoroughly. They have specific requirements regarding content quality, originality, and technical specifications. Your illustrations should be original, high-quality, and free of any copyrighted elements unless you have proper licensing.
2. Create High-Quality Files
Use a high-resolution canvas—generally, Shutterstock recommends a minimum of 4 megapixels (e.g., 3500 x 2500 pixels). Save your files in the accepted formats, such as JPEG for raster images or AI/EPS for vectors. Make sure your images are sharp, well-lit, and free of pixelation or compression artifacts.
3. Optimize Your File Sizes
Compress your files without sacrificing quality to ensure quick downloads and easy management. Keep file sizes reasonable but ensure they meet Shutterstock’s minimum resolution and quality standards.
4. Add Accurate Titles, Descriptions, and Keywords
When preparing your submission, include clear, descriptive titles and detailed descriptions. Use relevant keywords that accurately reflect your illustration’s content. This helps buyers find your work more easily and improves your chances of acceptance.
5. Review and Edit Your Illustrations
Give your illustrations a final review. Check for any imperfections, such as stray marks or inappropriate elements. Consider getting a second opinion or using editing tools to enhance your work before submission.
By taking these steps, you’re setting yourself up for a smooth approval process and increasing the likelihood that your illustrations will be accepted and appreciated by Shutterstock’s vast user base. Preparation is key, so don’t rush this stage—your future sales depend on it!
Creating a Shutterstock Contributor Account
Alright, so you’re ready to share your amazing illustrations with the world? The first step is setting up your Shutterstock Contributor account. Don’t worry—it’s pretty straightforward, and I’ll walk you through it.
Start by heading over to the Shutterstock Contributor registration page. You’ll see a big button that says “Become a Contributor” or something similar. Click on it, and you’ll be prompted to fill out a few essential details:
- Personal Information: Your full name, email address, and country of residence. Make sure your email is active because Shutterstock will send you important updates and notifications.
- Creating a Username and Password: Pick a username that reflects your brand or style. Your password should be strong—think a mix of uppercase, lowercase, numbers, and symbols to keep your account secure.
- Tax and Payment Details: You’ll need to provide tax info and choose your preferred payment method (PayPal, bank transfer, etc.). This is crucial for getting paid once your illustrations are approved and sold.
Once you’ve entered all your details, agree to Shutterstock’s terms and conditions. It’s a good idea to read through their contributor agreement so you know your rights and responsibilities.
After submitting, you might need to verify your email through a confirmation link they’ll send to your inbox. Just click that link, and your account setup is almost complete! From there, you can log in and start preparing your illustrations for submission.
Tip: Take some time to browse the Shutterstock Contributor interface once logged in. Familiarize yourself with their dashboard, submission guidelines, and best practices. It’ll make the next steps much smoother and help you get your illustrations approved faster.
Uploading Your Illustrations to Shutterstock
Now that your account is all set up, it’s time to upload those fantastic illustrations! Shutterstock makes this process pretty seamless. Here’s how you can do it step-by-step:
- Log into your Contributor account at https://submit.shutterstock.com/. Once logged in, click on the “Upload” button—usually found in the dashboard menu.
- Prepare your files: Before uploading, make sure your illustrations meet Shutterstock’s technical requirements:
- File formats: JPEG, TIFF, or EPS for vector artwork
- Resolution: At least 4 MP (megapixels) for raster images
- Color Profile: sRGB for consistent colors
- File size: Keep within the maximum upload limits (usually around 50MB)
- Click “Select Files” and choose your illustration files from your computer. You can upload multiple files at once if they’re ready.
- Add details for each illustration: This is where you’ll input metadata to help buyers find your work:
- Title: Be descriptive and specific.
- Description: Briefly explain what the illustration depicts.
- Keywords: Use relevant tags—think about what someone might search for. Include styles, colors, themes, and objects present.
- Select appropriate categories and content type—this helps Shutterstock classify your work correctly.
- Set the licensing options: Usually, you’ll choose between Standard and Extended licenses depending on how you want your illustrations to be used.
- Review your uploads: Double-check your files, metadata, and categories. Accuracy here can speed up approval.
- Click “Submit” when everything looks good. Your illustrations will then go into the review queue.
Once uploaded, Shutterstock’s review team will evaluate your illustrations to ensure they meet quality and content guidelines. This process can take anywhere from a few days to a couple of weeks, depending on volume. While waiting, you can continue creating more illustrations or familiarize yourself with Shutterstock’s best practices to optimize future submissions.
Pro Tip: Keep a record of your uploads—file names, titles, keywords—so you can easily track what’s in the review queue and follow up if needed.
Understanding Shutterstock’s Content Guidelines for Illustrations
Before you dive into creating your next masterpiece for Shutterstock, it’s essential to get a good grasp of their content guidelines. Think of these as the “rules of the road” — they help ensure your illustrations are approved smoothly and stand out in the marketplace.
Shutterstock has specific standards to maintain quality and legal safety for all users. Here’s what you should keep in mind:
- Originality is Key: Your illustrations should be unique and not directly copied from other sources. Even inspired by existing work, your piece must add a fresh perspective.
- Quality and Resolution: Always submit high-resolution images. Shutterstock recommends a minimum of 4 MP (megapixels), but higher is better to ensure versatility across different uses.
- Appropriate Content: Avoid illustrations that contain offensive, violent, or adult content. Shutterstock has a strict policy against images that could be deemed inappropriate or harmful.
- Model and Property Releases: If your illustration depicts identifiable people or private properties, ensure you have the necessary releases. For illustrations, this can sometimes be less strict, but if your artwork closely resembles real individuals or trademarks, it’s safer to have documentation.
- Technical Specifications: Pay attention to the file formats (usually PNG or JPEG for illustrations), color profiles (sRGB is preferred), and transparent backgrounds if applicable.
It’s also a good idea to review Shutterstock’s detailed content guidelines directly on their contributor portal. They often update their policies to reflect new trends and legal considerations, so staying informed will help you create compliant illustrations that are more likely to pass review.
Remember, the goal is to produce content that adds value for buyers, adheres to legal standards, and reflects Shutterstock’s quality benchmarks. Taking the time to understand and follow these guidelines will save you time and frustration in the long run!
Tips for Increasing Your Approval Chances
Getting your illustrations approved on Shutterstock can sometimes feel like a game of patience, but there are definitely strategies to boost your success rate. Here are some friendly tips to help you get more of your artwork accepted:
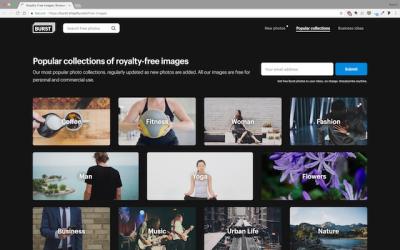
1. Follow Trends and Popular Themes
Research what types of illustrations are in demand. Check out Shutterstock’s trending collections or popular categories to see what buyers are looking for. Creating pieces that align with current trends increases the chances of approval and sales.
2. Pay Attention to Details
Small tweaks can make a big difference. Ensure your illustrations are clean, well-organized, and free of visible flaws like jagged lines or pixelation. Use vector software like Adobe Illustrator for crisp, scalable artwork.
3. Use Clear and Descriptive Titles & Tags
When you upload your illustration, craft accurate titles, descriptions, and tags. This helps Shutterstock’s review team understand your artwork and categorize it correctly, increasing the likelihood of approval and discoverability.
4. Submit Diverse and Relevant Content
Don’t put all your eggs in one basket. Submit a variety of illustrations covering different themes and styles. This not only increases your chances of approval but also diversifies your portfolio, attracting a broader audience.
5. Review and Revise Before Upload
Take the time to review your artwork critically. Ask yourself: Is it original? Is it technically sound? Does it meet the guidelines? If possible, get feedback from fellow designers or friends to spot issues you might have missed.
6. Keep Learning and Improving
Stay updated with tutorials, forums, and Shutterstock’s contributor resources. The more you learn about design trends, technical skills, and platform policies, the better your chances of creating approved, high-quality illustrations.
7. Be Patient and Persistent
Not every submission will be accepted right away. If your illustration gets rejected, don’t get discouraged. Use the feedback (if provided) to improve your work, and try again. Persistence pays off!
By following these tips, you’ll increase your chances of approval and build a strong portfolio that attracts buyers. Remember, creating high-quality, compliant illustrations is the first step toward a successful Shutterstock contributor journey!
Reviewing and Managing Your Submission Status
Once you’ve submitted your illustrations to Shutterstock, the waiting game begins. But don’t worry—keeping an eye on your submission status is pretty straightforward and super important. It helps you stay in the loop and understand where your work stands in the review process.
When you log into your contributor account, head over to the “Dashboard”. Here, you’ll see a section called “Submission Status”. Each illustration you submit will be listed with its current status, which could be:
- Pending Review: Your illustration is in the queue waiting for review.
- Under Review: The Shutterstock review team is actively evaluating your submission.
- Approved: Congrats! Your illustration has passed the review process and is now available for licensing.
- Rejected: Unfortunately, your submission didn’t meet Shutterstock’s standards or guidelines. Don’t get discouraged—review the feedback, learn from it, and try again!
Managing your submissions effectively means checking this status regularly. Shutterstock also provides detailed feedback if your illustration gets rejected. It’s a goldmine of information—use it to improve your future work.
Another handy tip is to keep organized records of your submissions. Make a simple spreadsheet or document noting details like submission date, status, and any notes from the review team. This way, you can track your progress over time and identify patterns—like whether certain styles or topics tend to get approved more often.
Remember, patience is key. The review process can take anywhere from a few days to a couple of weeks. If your submission remains pending for too long, you can contact Shutterstock support through your account dashboard for updates or questions.
Lastly, don’t forget to stay engaged with the community and other contributors. Sometimes, forums or social media groups can offer helpful advice or share experiences that prepare you better for future submissions. Managing your submission status isn’t just about waiting—it’s about staying proactive and learning every step of the way!
Final Steps After Your Illustrations Are Approved
Yay! Your illustrations have been approved—that’s a big milestone. Now, what’s next? The final steps are all about maximizing your success and making the most of your new assets on Shutterstock.
First, double-check your approved illustrations on your “My Portfolio”. Make sure everything looks good—correct titles, tags, and descriptions. These elements are crucial because they help buyers find your work easily. Think of your tags as the keywords that match your illustrations with search queries. Be specific and relevant, but also consider popular search terms.
Once your illustrations are live, it’s time to promote your work. Share links to your portfolio or specific illustrations on your social media channels, personal website, or art communities. The more visibility you get, the higher the chances of your work being licensed.
Another important step is to monitor your sales and performance. Shutterstock provides analytics that show how often your illustrations are viewed and licensed. Use this data to understand what resonates with buyers. For example, if certain styles or themes sell well, consider creating more content along those lines.
Keep creating and submitting new work consistently. The more high-quality illustrations you contribute, the better your chances of establishing a solid presence on the platform. Remember, the stock marketplace is competitive, so staying active and diverse in your portfolio is key.
And don’t forget to stay updated on Shutterstock’s guidelines and trends. Sometimes, platform policies change, or new popular styles emerge. Being adaptable and informed ensures your illustrations continue to meet the standards and attract buyers.
Lastly, celebrate your success! Getting approved is no small feat, so take pride in your work. Each approved illustration adds value to your portfolio and brings you closer to your creative and financial goals. Keep learning, keep creating, and enjoy the journey of sharing your art with the world!
Common Reasons for Rejection and How to Avoid Them
Getting your illustrations approved on Shutterstock can sometimes feel like a rollercoaster — one day you’re confident, and the next, you’re wondering what went wrong. Rejection is part of the process, but understanding the common reasons behind it can save you time and help you improve your submissions. Let’s go over some of the most frequent pitfalls and how to steer clear of them.
Common Reasons for Rejection
- Low-Quality Images: Shutterstock expects sharp, high-resolution images. Blurry, pixelated, or poorly lit illustrations are a big no-no.
- Incorrect File Format or Size: Submissions should be in JPEG format with a minimum of 4MP resolution. Files that are too small or in the wrong format will be rejected.
- Copyright Issues: Using copyrighted characters, logos, or proprietary designs without permission will get you rejected. Always create original artwork or ensure you have rights to all elements.
- Inappropriate Content: Shutterstock has strict guidelines against offensive, violent, or adult content. Make sure your illustrations are suitable for a broad audience.
- Poor Composition or Cluttered Design: Cluttered images with too many elements or poor layout may not meet Shutterstock’s quality standards. Keep your design clean and focused.
- Non-Compliance with Technical Guidelines: This includes issues like missing transparency, incorrect color profiles, or improper cropping.
How to Avoid Rejection
Prevention is better than correction! Here are some practical tips:
- Review Shutterstock’s Contributor Guidelines: Familiarize yourself thoroughly with their standards. They provide detailed info on what’s acceptable.
- Check Your Image Quality: Use editing tools to enhance sharpness, brightness, and contrast. Make sure your illustrations are crisp and clear before submitting.
- Use Proper File Formats and Sizes: Save your files in JPEG format with RGB color mode and ensure they meet the minimum resolution criteria.
- Create Original Content: Avoid copying or mimicking copyrighted characters. Originality is key to success.
- Maintain Consistent Style and Composition: Keep your illustrations well-organized, with good lighting, balanced elements, and a clear focal point.
- Get Feedback: Before submitting, ask friends or fellow artists to review your work. Fresh eyes can spot issues you might overlook.
- Use Preview Tools: Some editing programs offer preview modes that simulate how your image will appear on different devices, helping you spot potential problems.
Remember, rejection isn’t the end — it’s a learning opportunity. Review the feedback, make adjustments, and try again. With patience and attention to detail, your illustrations will eventually find their way onto Shutterstock’s platform.
Conclusion and Resources for New Shutterstock Contributors
Congratulations! You’ve now got a clear roadmap for submitting your illustrations to Shutterstock and navigating the approval process. Remember, every successful contributor started where you are now — with a little patience, persistence, and a willingness to learn. Keep honing your skills, studying the platform’s guidelines, and experimenting with different styles and subjects.
To help you along your journey, here are some valuable resources:
- Shutterstock Contributor FAQ: Your go-to source for answers to common questions.
- Shutterstock Contributor Support: Get direct help from their support team.
- Shutterstock Blog – Contributor Tips: Tips, success stories, and best practices from the community.
- Skillshare Illustration Courses: Improve your skills with online tutorials and courses.
- Behance: Showcase your portfolio, connect with other creatives, and get inspired.
Remember, consistency is key. Keep creating, refining, and submitting your work. Over time, you’ll build a portfolio that not only gets approved but also sells well. Stay patient, keep learning, and enjoy the creative journey!