Setting up an email service in WordPress can feel daunting, but it doesn’t have to be! Two pivotal components in this journey are SMTP (Simple Mail Transfer Protocol) and SendGrid. SMTP is the standard protocol used for sending emails, ensuring your messages are delivered not just technically, but reliably. On the other hand, SendGrid, a cloud-based service, takes your email delivery to the next level with powerful features that enhance both deliverability and analytics. Together, they form a robust system to manage and send your emails effortlessly through your WordPress site.
Why Use SendGrid for WordPress Email
When it comes to sending emails from your WordPress site, SendGrid stands out for several compelling reasons:
- High Deliverability Rates: SendGrid’s infrastructure ensures that your emails reach inboxes rather than landing in spam folders.
- Scalability: Whether you’re sending a few emails or millions, SendGrid can handle it. It grows with your needs, making it suitable for websites of all sizes.
- Analytics and Reporting: Track the performance of your emails with detailed analytics. You can see open rates, click rates, and more, allowing you to refine your strategies.
- Easy Integration: With several WordPress plugins available, integrating SendGrid into your site is a breeze.
- Reliable Support: SendGrid offers comprehensive customer support and a wealth of resources to help you troubleshoot any issues.
By leveraging SendGrid for your WordPress emails, you’re not just sending messages; you’re enhancing your communication strategy, ensuring that your audience receives what you send, and gaining valuable insights along the way. It’s a win-win situation!
Prerequisites for Setting Up SMTP with SendGrid
Before diving headfirst into the setup process for SMTP with SendGrid in your WordPress site, it’s important to ensure that you have a few essentials in place. Think of this like packing your suitcase for a trip—you don’t want to forget anything that could make your journey smoother!
Here are the prerequisites you’ll need:
- WordPress Website: First things first, you need a WordPress website up and running. If you don’t have one yet, you’ll need to get that sorted.
- Admin Access: You should have the admin credentials for your WordPress site. This is crucial because you’ll be making changes to the site’s settings.
- SendGrid Account: You must create an account with SendGrid. Don’t worry; I’ll guide you through this in the next section!
- Email Verification: Make sure you have access to the email address you used for your SendGrid account. Verification is a key step in ensuring that everything is linked correctly.
- SMTP Plugin: You will need a WordPress SMTP plugin to facilitate the connection between your website and SendGrid. Some popular choices include WP Mail SMTP, Easy WP SMTP, and Post SMTP Mailer/Email Log.
Once you have these prerequisites checked off your list, you’re ready to move on to creating your SendGrid account!
Creating a SendGrid Account
Ready to set up your SendGrid account? Let’s get started! This process is pretty straightforward, assuming you have your email verification handy.
- Visit the SendGrid Sign Up Page: Go ahead and navigate to the SendGrid website. Locate the “Sign Up” button, which is usually prominently displayed on the homepage.
- Choose a Plan: SendGrid offers several pricing plans, including a free option that’s perfect for those just starting. Evaluate which fits your needs best, keeping in mind that the free tier has some limitations.
- Fill Out Your Details: In the sign-up form, you’ll need to provide a few key details, including your name, email address, and password. Make sure to use the email address you have access to.
- Email Verification: After submitting the form, check your inbox for a verification email from SendGrid. Click the link in that email to confirm your account.
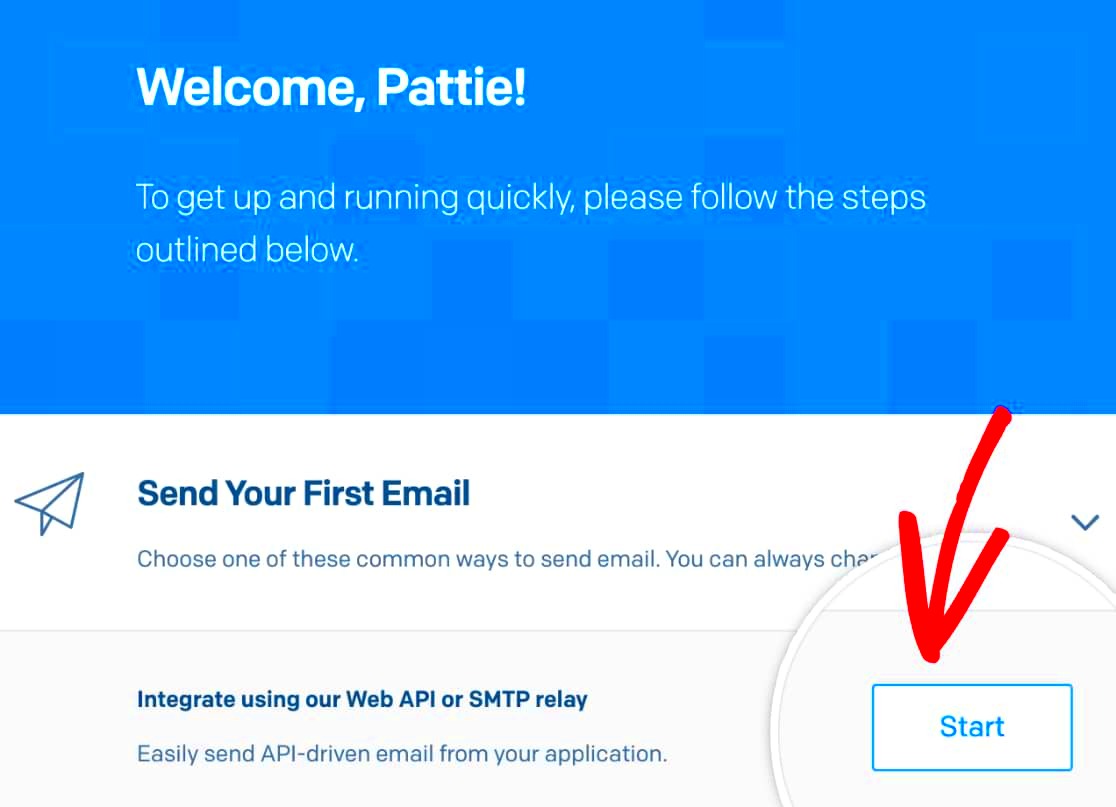
- Complete Onboarding: After verification, you’ll go through a short onboarding process where SendGrid will ask about your use case and guide you through some essential settings.
Once you’re done with these steps, you’re officially a SendGrid user! You can now harness the power of email marketing and transactional emails for your WordPress site.
Generating API Key for SMTP
To integrate SendGrid with your WordPress site, the very first step is to generate an API key. This key will serve as a secure link between your WordPress website and the SendGrid service, allowing you to send emails efficiently. Follow these easy steps to create your API key:
- Log in to SendGrid:
Start by logging into your SendGrid account. If you don’t have an account yet, you’ll need to create one at sendgrid.com.
- Navigate to API Keys:
Once logged in, go to the Settings menu on the left side of the dashboard. From there, select API Keys.
- Create a New API Key:
Click on the “Create API Key” button. You’ll be prompted to enter a name for your key. Choose something descriptive that will help you remember its purpose.
- Set Permissions:
For this purpose, you can set the permissions to Full Access or limit it to Mail Send if you prefer more restricted access. Choose what feels right for your needs.
- Generate API Key:
Finally, click the “Create & View” button. Your new API key will be displayed. Copy it and store it in a safe place—this is what you’ll use to configure your SMTP settings in WordPress!
And voilà! You’ve successfully generated your SendGrid API key, which is the key to unlocking seamless email delivery on your WordPress site.
Installing an SMTP Plugin in WordPress
Now that you have your SendGrid API key handy, the next step is to install an SMTP plugin on your WordPress site. Using an SMTP plugin helps you configure your email settings easily and ensures your emails are sent via SendGrid instead of your web host’s mail server. Here’s a straightforward guide to get you started:
- Access the WordPress Dashboard:
Log in to your WordPress admin panel. You can usually do this by visiting
yourdomain.com/wp-admin. - Go to Plugins:
In the left sidebar, find and click on Plugins. Then, select Add New.
- Search for an SMTP Plugin:
In the search bar, type WP Mail SMTP or another SMTP plugin of your choice. WP Mail SMTP is a popular option for many users due to its ease of use and effective features.
- Install and Activate the Plugin:
Once you find the plugin, click the Install Now button. After the installation completes, don’t forget to click Activate.
- Configure the Plugin:
Go to the newly added menu item in your WordPress dashboard, often labeled WP Mail SMTP. Here, you’ll need to enter the necessary details:
- From Email: This is the email address you want your emails to be sent from.
- From Name: The name that will be displayed to your recipients.
- Mailer: Select the SendGrid option.
With these settings configured, you’ll soon be able to send emails securely using your SendGrid account! Just remember to paste your API key where prompted.
7. Configuring the SMTP Plugin with SendGrid Details
Alright, let’s dive into configuring the SMTP plugin with SendGrid. If you’ve successfully installed your SMTP plugin, you’re halfway there. Now comes the fun part—linking it to SendGrid to ensure your emails land smoothly in your recipients’ inboxes! Let’s break this down step by step.
1. Access the Plugin Settings: Start by navigating to your WordPress dashboard. On the left-hand menu, find Settings and then click on the SMTP plugin you’ve installed (like WP Mail SMTP, Easy WP SMTP, etc.).
2. Input Basic SMTP Settings: Now, you need to enter the SMTP configuration details provided by SendGrid:
- SMTP Host:
smtp.sendgrid.net - SMTP Port: Choose either
587for TLS or465for SSL. - Encryption: Select TLS (recommended) or SSL, based on your port choice.
3. Authentication: This is where you provide your SendGrid credentials:
- Username: Enter your SendGrid username, which is usually your SendGrid account name.
- Password: This should be your SendGrid API key that you generated earlier.
4. From Email Address: Don’t forget to specify the email address you wish to send emails from. This should ideally be a verified sender in your SendGrid account to avoid any deliverability issues.
Once you’ve filled all these details, save your settings. You’re now officially telling WordPress to use SendGrid for sending emails!
8. Testing the SMTP Configuration
Now that you’ve set everything up, it’s crucial to test your SMTP configuration to make sure all is working as planned. After all, what good is a shiny new setup if you can’t send emails? Here’s how to do it seamlessly:
1. Locate the Test Email Feature: Head back to your SMTP plugin settings. Most plugins offer a dedicated section for sending a test email. Look for a tab or button labeled Test Email.
2. Enter Recipient Email: In the test email section, enter the email address where you want to send a test message. Ideally, use your own email so you can check the inbox (and spam folder!) for the results.
3. Send the Test Email: Hit the Send Test Email button. This process usually takes just a few seconds.
4. Check Your Inbox: After sending, watch for the test email to land in your inbox. If everything was configured correctly, you should see it. Remember to check your spam folder, just in case!
5. Troubleshooting: If it didn’t arrive, double-check your SMTP settings. Issues could stem from:
- Incorrect API key or username.
- Firewall blocking SMTP ports.
- Using an email address that hasn’t been verified by SendGrid.
By carefully following these steps, you set yourself up for email success. Happy emailing!
Troubleshooting Common Issues
Setting up SMTP for SendGrid in WordPress can sometimes come with its fair share of hiccups. Don’t worry! Many issues are relatively straightforward to resolve. Here are some common problems you might encounter, along with solutions to get you back on track.
- Authentication Failures: If you’re getting emails that refuse to send due to authentication errors, double-check your API key. Make sure there are no extra spaces or characters. You can regenerate your API key in the SendGrid dashboard if needed.
- Firewall Issues: Sometimes, your hosting provider may block SMTP ports (usually 587 or 2525). Contact them to confirm whether these ports are open and accessible. If not, they may assist you in opening them.
- Email Not Receiving: Are you sending emails, but they aren’t reaching recipients? Check the spam folder first. If they’re there, you may want to set up DKIM and SPF records in your domain settings to improve deliverability.
- Localhost Configuration: If you’re testing on a local server, you may encounter issues sending emails. Try testing on a live site or look into using tools like Mailtrap to monitor the sending process.
- Plugin Conflicts: Occasionally, your WordPress installation may conflict with other plugins you use. Disable other plugins temporarily to identify the culprit. Once identified, check for updates or reach out for support from the plugin developer.
Remember, troubleshooting can sometimes feel frustrating, but with a bit of patience, you’re likely to find a solution that works!
Conclusion
Setting up SMTP for SendGrid in WordPress isn’t just a task; it’s an essential step for ensuring your emails hit the inbox and maintain your credibility. By following the steps laid out in this guide, you’ll enhance your email deliverability and manage communications more effectively.
Let’s recap some key points:
| Step | Description |
|---|---|
| 1. Create a SendGrid Account | SignAn internal server error occurred. |


