If you’re looking for a reliable and free hosting option for your WordPress site, InfinityFree is definitely worth considering. This platform offers an impressive range of features, making it accessible for both beginners and seasoned developers. In this guide, we’ll explore what InfinityFree is all about and why it stands out in the crowded web hosting market. So, if you’re ready to dive into the world of free web hosting without sacrificing quality, read on!
Why Choose InfinityFree for Your WordPress Site?
When it comes to selecting a hosting provider for your WordPress site, InfinityFree brings several benefits to the table that can make your decision a bit easier. Let’s break down the key reasons why you should consider it:
- Completely Free Hosting: InfinityFree offers a no-cost hosting solution without the catch of hidden fees or trial periods. You can host your website for free, forever!
- No Time Limit: Unlike some free hosting providers, InfinityFree doesn’t impose a time limit on your hosting plan. You can stick with them for as long as you desire.
- Unlimited Disk Space and Bandwidth: Enjoy the freedom of unlimited disk space and bandwidth. This means you don’t have to worry about your site running out of space or slowing down due to excessive traffic.
- Easy WordPress Installation: With just a few clicks, you can get WordPress up and running. The setup process is user-friendly, making it suitable for beginners.
- Support for Custom Domains: You can use your own domain with InfinityFree, which gives your site a professional look right from the start.
- Ad-Free Hosting: Unlike other free hosting services that display annoying ads, InfinityFree keeps your website clean and ad-free, allowing your content to shine.
Overall, InfinityFree combines robust features with a straightforward setup process that can be a game-changer for anyone looking to launch their WordPress site without the financial burden. Why not give it a try?
Step 1: Creating Your InfinityFree Account
Alright, let’s dive right into the first step of setting up your WordPress site using InfinityFree. Creating your InfinityFree account is a straightforward process and won’t take much of your time. Here’s how to do it:
- Visit InfinityFree’s Website: Head over to InfinityFree. The homepage is user-friendly and guides you smoothly through the process.
- Click on “Sign Up”: On the top right corner of the homepage, you will find the “Sign Up” button. Click on that to start creating your account.
- Fill in Your Details: You’ll be asked to provide some basic details such as your email address and password. Make sure to choose a strong password to keep your account secure.
- Verify Your Email: After filling in your details, you will get an email from InfinityFree. Open that email and click on the verification link. This step is crucial to activate your account.
- Log In: Now that your email is verified, go back to the InfinityFree website and log in using your email and password.
And that’s it! In just a few clicks, you have successfully created your InfinityFree account. You’ll find a user dashboard that serves as your primary command center for managing your web hosting needs.
Step 2: Choosing a Domain Name
Now that your InfinityFree account is all set up, it’s time to choose a domain name for your new WordPress site! Your domain name is more than just an address; it’s your brand’s online identity. Here are some steps and tips to help you choose the perfect one:
- Brainstorm Ideas: Sit down and jot down a few names that represent your business, blog, or project. Think about the themes or topics you want to cover and what resonates with your audience.
- Keep It Simple: Aim for a domain name that is easy to spell and remember. Complicated names can make it difficult for visitors to find you. Shorter names are generally better!
- Consider Keywords: If you’re creating a blog or a business site, incorporating keywords related to your niche can improve SEO. For example, if your blog is about travel, think about names that include ‘travel,’ ‘wander,’ or similar words.
- Check Availability: Once you have a shortlist, it’s time to see if they’re available. You can use domain registrar websites like Namecheap or GoDaddy to check if your chosen names are up for grabs.
- Choose the Right Domain Extension: While .com is the most popular extension, don’t shy away from .net, .org, or even niche extensions like .blog or .tech if they fit your brand.
Choosing a domain name is a fun—and sometimes challenging—process. Take your time and pick something that you love and can work with for the long haul!
Step 3: Setting Up Your WordPress Installation
Now that you have your InfinityFree account all set up, it’s time to dive into the fun part: installing WordPress! It’s easier than you might think, so let’s break it down step by step.
First off, head over to the InfinityFree client area and look for the “Control Panel” button. This is where all the magic happens. Once you’re in the control panel, find the “Softaculous Apps Installer”. Softaculous is a great tool that automates the installation of various applications, including WordPress.
Here’s how to install WordPress:
- Click on the WordPress icon in the Softaculous installer.
- Hit the “Install” button to launch the installation process.
- Fill out the required fields:
- Choose Protocol: You can opt for HTTP or HTTPS if you have an SSL certificate.
- Choose Domain: Select the domain you wish to install WordPress on.
- In Directory: Leave this blank to install in the root directory or specify a folder if you want a subdirectory.
After a few moment, you’ll see a success message along with the URL to your new WordPress site. Congratulations! You’ve officially set up WordPress on InfinityFree. Time to move on to the next crucial step: configuring your WordPress settings!
Step 4: Configuring Your WordPress Settings
With WordPress installed, you’ll want to make it feel like home. Configuration is critical, allowing you to tailor your site to your needs. Here’s how to get started:
To access the settings, log in to your WordPress dashboard by navigating to yourdomain.com/wp-admin. Enter the admin credentials you created during installation, and you’re in!
Here’s a breakdown of key settings to adjust:
- General Settings:
In the dashboard, go to Settings > General. Here, you can set your site title and tagline. Make sure to also set your timezone and date format to match your location.
- Writing Settings:
Under Settings > Writing, you can configure how you want to publish content and manage notifications from your site.
- Reading Settings:
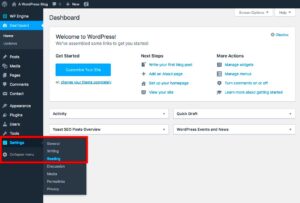
In Settings > Reading, decide if you want your homepage to display your latest posts or a static page. This is important for SEO and user experience.
- Permalinks:
Changing your URL structure can improve SEO. Go to Settings > Permalinks and opt for Post name for cleaner URLs.
- Discussion Settings:
If you want to allow comments on your posts,check these settings in Settings > Discussion. There are several options to manage comments effectively.
- Media Settings:
In Settings > Media, you can set how images and other media are handled on your site, including sizes and dimensions.
After you’ve customized these settings to your liking, don’t forget to click “Save Changes” at the bottom of each settings page. Properly configuring your WordPress installation is crucial for function and ease of use as you grow your site. Happy configuring!
Step 5: Choosing and Installing a WordPress Theme
Now that you’ve got your WordPress site all set up with InfinityFree, it’s time to focus on the look and feel of your website. Choosing a WordPress theme is crucial because it defines not only the aesthetic appeal but also the functionality and user experience of your site.
Here’s how to navigate this step:
- Browse the WordPress Theme Repository: Head over to the official WordPress Themes directory. You’ll find thousands of themes, both free and premium. You can easily filter themes based on various categories, features, and layout options. Just take your time to explore!
- Consider Your Niche: Choose a theme that resonates with your niche. If it’s a blog, you might want something minimal and clean. If it’s an e-commerce site, look for a theme that highlights products well. It’s all about finding a design that enhances your content.
- Check Responsiveness: In today’s mobile-first world, ensure your theme is responsive. This means it should look great and function well on both desktop and mobile devices. A quick test on different screen sizes can save you a lot of headaches later.
- Read Reviews and Ratings: Check the user reviews and ratings. This can give you insight into the theme’s performance, support, and reliability that you can’t get from just looking at screenshots.
- Install the Theme: Once you’ve chosen a theme, go to your WordPress dashboard, click on “Appearance” > “Themes” > “Add New”, and either upload your theme or search for it if it’s already in the repository. After that, just click “Install” and then “Activate”.
And there you go! Your site’s style is now set. Just remember, the theme can greatly affect how users perceive your site, so choose wisely!
Step 6: Essential WordPress Plugins to Install
Plugins are like apps for your WordPress site, and they can greatly enhance functionality. With so many available, it can be overwhelming to know which ones are necessary. But no worries, I’ve got your back! Here’s a list of essential plugins to consider:
| Plugin Name | Purpose |
|---|---|
| Yoast SEO | This plugin helps you optimize your site for search engines by providing SEO analysis and tips. |
| Wordfence Security | Enhances your website’s security by offering firewall protection and malware scanning. |
| Contact Form 7 | Allows you to easily create and manage multiple contact forms, enhancing communication with your visitors. |
| WooCommerce | If you plan to sell online, this is a must-have for creating a fully functional e-commerce store. |
| UpdraftPlus | This backup plugin ensures you never lose your data by allowing you to easily back up your WordPress site. |
Installing plugins is simple: just go to your WordPress dashboard, click on “Plugins” > “Add New”, and search for the plugins listed above. After finding a plugin you want, just click “Install Now” and then “Activate”.
With these plugins in place, you’re setting a strong foundation for your WordPress site. They not only enhance functionality but also improve user experience and security. Happy plugging!
Step 7: Customizing Your WordPress Site
Now that you’ve successfully installed WordPress on InfinityFree, it’s time to have some fun – yes, we’re diving into customization! This step is all about adding your personal touch to your site, making it not just functional but truly yours.
First things first, let’s talk about themes. Your theme defines how your site looks and feels, so it’s crucial to pick one that resonates with your vision. Here’s how you can do it:
- Log in to your WordPress dashboard.
- Navigate to Appearance > Themes.
- Click on Add New to browse through the theme repository.
- Filter your search with categories like Popular, Latest, or even Feature Filter for specific styles.
- Once you find a theme you like, hover over it and click Install, then activate it!
Now, let’s configure other essential aspects of your site:
- Plugins: Just as themes enhance visuals, plugins extend functionality. Go to Plugins > Add New, and search for must-have tools like Yoast SEO, WooCommerce, or Contact Form 7.
- Customization Options: Head to Appearance > Customize for a live preview. Here, you can tweak your site’s title, tagline, colors, and more.
- Menus: Organize your navigation. Under Appearance > Menus, create and manage menus for a better user experience.
With these steps, your WordPress site on InfinityFree will start to take shape exactly how you envisioned. Play around, experiment, and don’t hesitate to make it uniquely yours!
Troubleshooting Common Issues
Great job setting up your WordPress site! Now, while most things should run smoothly, sometimes you may encounter a hiccup or two. But don’t worry; most issues are easily resolvable. Let’s tackle some common troubleshooting tips for your InfinityFree-hosted WordPress site:
| Issue | Possible Solution |
|---|---|
| Site is Down or Loading Slowly | Check if the InfinityFree server is experiencing downtime. You can also optimize your images and use caching plugins. |
| WordPress Admin Login Error | Ensure you’re entering the correct username and password. If forgotten, use the “Lost your password?” link to reset it. |
| White Screen of Death | This can happen due to a faulty theme or plugin. Try accessing your site via an FTP client to disable plugins or switch themes. |
| Error Establishing Database Connection | Double-check your wp-config.php file to ensure your database credentials are correct. If issues persist, try reinstalling your database. |
Remember, troubleshooting is part of the learning process, and with each error, you’re gaining invaluable experience. Also, community forums and the WordPress support page are great resources for solutions and assistance. Stay calm and keep building your site – you got this!
Conclusion and Final Thoughts
Setting up a WordPress site with InfinityFree hosting is an excellent way to get started with your online presence without incurring any costs. From creating a free account to installing WordPress, the process is straightforward and user-friendly. Here are key points to remember:
- Free Hosting: InfinityFree provides free web hosting, making it an ideal choice for beginners and small projects.
- Easy Installation: The auto-installer for WordPress simplifies the installation process, which is beneficial for users with limited technical expertise.
- Limitations: Keep in mind the limitations of free hosting, such as storage limits and lack of customer support.
- Backup and Security: Ensure to implement regular backups and security measures to protect your site.
- Upgrade Options: As your site grows, consider upgrading to a paid hosting solution for better performance and more features.
By following the steps outlined in this guide, you can create a professional-looking WordPress site that meets your needs, all while minimizing costs. Remember to stay informed about the evolving features and tools available to enhance your site further. Happy blogging!

