Thinking about turning your photography hobby into a side hustle? Selling your photos on Shutterstock is a fantastic way to do just that! It’s a platform used by millions worldwide, giving your images exposure and the chance to generate some extra income. Whether you’re a seasoned pro or just starting out, Shutterstock makes it easy to upload, manage, and sell your photos. In this guide, we’ll walk through everything you need to know — from preparing your images to successfully listing them for sale — all without the hassle. Let’s get your photos out into the world and start earning!
Preparing Your Photos for Upload and Sale

Before you hit that upload button, it’s essential to get your photos ready for prime time. High-quality, well-prepared images are more likely to sell and attract buyers. Here’s a step-by-step rundown to help you get your photos in top shape:
1. Choose Your Best Shots
Start by selecting images that are sharp, well-composed, and visually appealing. Avoid blurry, overexposed, or underexposed photos. Look for images that tell a story or evoke emotion — these tend to perform better in the marketplace.
2. Edit and Enhance
Use photo editing software like Adobe Lightroom or Photoshop to fine-tune your images. Adjust brightness, contrast, and color balance to make your photos pop. Don’t over-edit; keep it natural unless a creative effect is intentional. Removing distractions or blemishes can also boost your photo’s professionalism.
3. Resize and Format Correctly
Shoehorning your images into the right size and format is crucial. Shutterstock recommends uploading images at a minimum of 4 megapixels (e.g., 2400 x 1600 pixels). Save your files in JPEG format with a high-quality setting (around 80-100%) to ensure clarity without huge file sizes. Avoid watermarks or borders — your images should be clean and ready for sale.
4. Add Accurate Metadata
The magic behind discoverability is good metadata. Add clear, descriptive titles, and detailed keywords related to your image. Think about what a buyer might search for — location, subject, mood, or style. The more relevant your keywords, the more likely your photo will be seen.
5. Review Shutterstock’s Content Guidelines
Make sure your photos comply with Shutterstock’s policies. Avoid copyrighted elements, offensive content, or recognizable people without model releases. Familiarize yourself with their standards to prevent rejections or issues later.
By taking these steps, you’re setting yourself up for success. Well-prepared photos not only increase your chances of getting accepted but also help you attract more buyers — making your effort worthwhile and hassle-free!
Creating an Effective Shutterstock Contributor Account
Getting started with selling your photos on Shutterstock is an exciting journey, but setting up your contributor account the right way can make all the difference. Think of it as building your digital storefront — the more professional and complete it looks, the more trust you’ll inspire in potential buyers.
First things first, head over to the Shutterstock Contributor Portal and sign up. During registration, you’ll need to provide basic info like your name, email address, and a secure password. But don’t stop there — take the time to fill out your profile thoroughly. Upload a clear, friendly profile picture and craft a compelling bio that highlights your photography style and experience. This helps buyers connect with you and builds credibility.
Next, you’ll want to review Shutterstock’s contributor guidelines carefully. Familiarize yourself with their content standards — this ensures your photos meet the platform’s quality and subject requirements, reducing the chances of rejection. Remember, Shutterstock values high-quality, original images that are technically sound and visually appealing.
Once your account is set up, consider verifying your identity if prompted. This extra step can speed up your approval process and improve your trustworthiness as a contributor. Also, explore the dashboard to understand the different features available — from tracking your sales to managing your portfolio.
Finally, start building a diverse collection of images. Upload a variety of subjects, styles, and themes that showcase your talents. Keep in mind that consistency and quality are key — the better your profile looks, the more enticing your portfolio becomes to buyers and the Shutterstock review team.
In short, creating an effective Shutterstock contributor account involves more than just signing up — it’s about presenting yourself professionally, understanding the platform’s standards, and setting the stage for success right from the start.
Uploading Your Photos and Optimizing Metadata
Now that your account is ready, it’s time to upload your photos. But hold on — don’t just upload blindly and hope for the best. Optimizing your images with the right metadata is crucial to making sure your photos get noticed and sold.
When you upload a photo, Shutterstock will ask for several details: a title, description, keywords, and categories. Think of these as the clues that help buyers find your images. Be specific and descriptive. For example, instead of “dog,” use “Golden Retriever puppy playing in the park.” The more accurate your metadata, the easier it is for someone searching for that exact shot to discover your work.
Here are some tips for optimizing your metadata:
- Titles: Keep them clear and concise. Include relevant keywords but avoid keyword stuffing.
- Descriptions: Expand on your title, providing context or details about the image. Mention location, mood, or activity.
- Keywords: Use all available keyword slots. Think about what a buyer might search for. Use both broad and specific terms.
- Categories: Assign your images to the most relevant categories to increase visibility.
Additionally, ensure your images are of high quality and properly edited. Shutterstock prefers sharp, well-exposed photos with no noise or distractions. Use editing tools to fine-tune brightness, contrast, and color balance, but avoid over-processing.
When uploading multiple images, consider batching similar photos together. Consistency in style and subject matter can help attract targeted buyers who appreciate your particular niche.
And don’t forget about the file format and size. Shutterstock recommends JPEG files with a minimum of 4 megapixels resolution. Larger, high-quality images are more likely to be approved and sell better.
By taking the time to craft detailed metadata and ensuring your images meet quality standards, you significantly increase your chances of making sales. Remember, the more your photos are optimized for search, the more visible they become — leading to more downloads and, ultimately, more income.
Understanding Shutterstock’s Review and Approval Process
So, you’ve uploaded your stunning photos to Shutterstock—great start! But before your images appear in the marketplace, they go through a review process. Understanding this process can help you set realistic expectations and improve your chances of getting approved quickly.
First off, once you submit your images, Shutterstock’s review team begins inspecting them for quality, content, and adherence to their guidelines. They look for sharp focus, good lighting, proper exposure, and overall visual appeal. Additionally, they check for issues like noise, pixelation, or watermarks—things that could detract from the viewing experience.
Typically, the review process takes anywhere from a few hours to a few days. During busy periods, like holidays or special campaigns, it might take a bit longer. Keep in mind that if your images don’t pass the review, Shutterstock provides feedback on what needs improvement. Common reasons for rejection include:
- Poor image quality (blurry, pixelated, or noisy)
- Incorrect or missing model/property releases
- Non-compliant content (e.g., recognizable logos or copyrighted materials)
- Inadequate keywording or metadata
To improve your approval chances, always double-check your images before uploading. Use high-resolution files, ensure proper lighting, and include any necessary legal releases. Remember, patience is key. Once approved, your photos will be available for licensing, so take pride in submitting the best work possible.
Best Practices for Increasing Your Photo Sales
Now that your images are live on Shutterstock, it’s time to maximize their potential. Increasing your photo sales is all about visibility, relevance, and engagement. Here are some tried-and-true tips to help you boost your earnings:
1. Optimize Your Keywords and Titles
Think of keywords as the bridge between your images and potential buyers. Use accurate, descriptive, and relevant keywords to help your photos show up in search results. Be specific—if you have a photo of a “sunset over New York City,” include keywords like “sunset,” “NYC,” “city skyline,” “dusk,” and “urban landscape.” Avoid stuffing irrelevant keywords; instead, focus on what truly describes your image.
2. Create a Diverse Portfolio
Don’t put all your eggs in one basket. Upload a variety of images covering different themes, styles, and subjects. This broad approach appeals to a wider audience and increases the chances of your images being licensed.
3. Keep Up with Trends
Pay attention to current market trends and seasonal needs. For example, during holidays, images of festive scenes or gift ideas tend to perform well. Follow popular searches on Shutterstock to see what buyers are looking for.
4. Use High-Quality, Unique Content
Stand out from the crowd by uploading high-quality, original photos. Avoid overused stock images—try to bring a fresh perspective or capture unique moments. Buyers appreciate authenticity and creativity.
5. Engage with the Community and Promote Your Work
Share your Shutterstock portfolio on social media, photography forums, or personal websites. Building a personal brand can drive more traffic to your images and increase sales. Also, participate in Shutterstock forums to learn tips from other successful contributors.
6. Regularly Update Your Portfolio
Consistently adding new images keeps your profile active and appealing. Shutterstock favors active contributors, which can improve your search rankings and visibility.
Remember, patience and persistence are key. Building a successful stock photography portfolio takes time, but with these best practices, you’ll be well on your way to increasing your sales and turning your passion into profit. Happy shooting and selling!
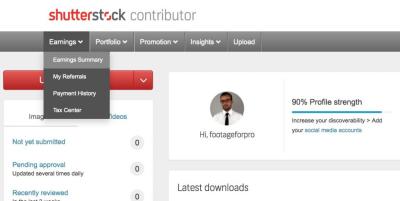
Managing Your Earnings and Payouts on Shutterstock
Once you’ve started uploading your stunning photos to Shutterstock, you’ll naturally want to keep track of your earnings and make sure you’re getting paid smoothly. Managing your earnings effectively can help you stay motivated and ensure you’re making the most of your photography efforts.
Understanding Your Earnings
Shutterstock pays contributors based on a royalty system, which varies depending on your lifetime earnings and the type of license purchased by buyers. The more your photos sell, the higher your royalty payout percentage becomes. Keep an eye on your dashboard to see real-time updates of your sales and earnings.
Setting Up Your Payment Preferences
- Choose Your Payout Method: Shutterstock offers several payout options, including PayPal, Skrill, and bank transfer. Select the method that’s most convenient for you.
- Minimum Payout Threshold: Typically, you need to reach a minimum balance (often around $35) before you can request a payout. Be sure to check the current threshold in your account settings.
- Scheduling Payouts: You can set up automatic payouts or request manual withdrawals once your earnings hit the threshold. Decide what works best for your cash flow.
Monitoring Your Earnings
Regularly review your contributor dashboard for insights into which images are performing well. Use this data to guide your future uploads—focusing on styles or themes that sell best can increase your income over time.
Tax Considerations
Don’t forget about taxes! Depending on your country, you might need to report your earnings from Shutterstock. Keep track of your payouts and consult a tax professional if needed to stay compliant and optimize your tax situation.
Managing your earnings on Shutterstock is all about staying organized, choosing the right payout options, and keeping tabs on your sales. With a little attention, you can make the most of your photography income without any hassle.
Tips to Avoid Common Challenges When Selling Photos
While selling photos on Shutterstock can be a rewarding experience, it’s not without its bumps in the road. Luckily, many common challenges can be easily avoided with a few smart strategies. Let’s walk through some helpful tips to keep your selling journey smooth and successful.
1. Understand and Follow Shutterstock’s Content Guidelines
Every platform has rules, and Shutterstock is no exception. Make sure your images comply with their technical and content standards. Avoid issues like:
- Using copyrighted or trademarked content without permission
- Submitting low-quality or overly edited images
- Including offensive or inappropriate content
Sticking to the guidelines prevents rejection and saves you time and frustration.
2. Avoid Keyword Stuffing and Misleading Tags
Keywords help buyers find your images, but overloading or mislabeling can hurt your reputation. Be honest and precise with your tags, and use relevant keywords that accurately describe your photo. This helps your images reach the right audience and reduces the chances of your images being flagged or rejected.
3. Regularly Upload Fresh Content
Keep your portfolio active by adding new photos regularly. This not only increases your chances of sales but also keeps your account lively and engaging. Don’t wait too long between uploads—consistency is key.
4. Protect Your Work
Watermark your images if you’re sharing previews elsewhere, and always keep original copies safe. This prevents unauthorized use and helps you maintain control over your work.
5. Engage with the Community
Participate in Shutterstock forums and read other contributors’ experiences. Learning from others can help you avoid common pitfalls and stay updated on platform changes.
By keeping these tips in mind, you can dodge many of the typical challenges faced by stock photographers. Remember, patience and attention to detail go a long way in building a successful, hassle-free selling experience on Shutterstock. Happy shooting, and here’s to your growing earnings!
Conclusion and Next Steps for Successful Selling
Congratulations! You’re now equipped with the fundamental knowledge to start selling your photos on Shutterstock with confidence. Remember, consistency and quality are key to building a strong portfolio that attracts buyers and maximizes your earnings. Regularly updating your collection with fresh, high-quality images can significantly improve your visibility and sales potential.
To ensure ongoing success, consider the following next steps:
- Optimize Your Listings: Use relevant keywords and detailed descriptions to make your photos easily discoverable.
- Maintain Quality Standards: Continue capturing sharp, well-composed images that meet Shutterstock’s quality requirements.
- Engage with the Community: Participate in forums and webinars to stay informed about trends and best practices.
- Analyze Your Performance: Regularly review your sales data to identify popular topics and tailor your future uploads accordingly.
- Stay Informed: Keep up with Shutterstock’s policies and updates to ensure compliance and maximize your earning potential.
Embarking on your journey as a stock photographer can be both rewarding and profitable when approached with dedication and strategic planning. By focusing on quality, consistency, and continuous learning, you’ll be well on your way to establishing a successful presence on Shutterstock and turning your passion for photography into a sustainable income stream.