Are you passionate about wildlife photography and looking for ways to turn your stunning shots into income? Selling wildlife images on Shutterstock can be a fantastic opportunity to reach a global audience and earn royalties for your work. Whether you’re a hobbyist or a seasoned pro, understanding how to navigate Shutterstock‘s platform and submission process is key to success. In this guide, we’ll walk through everything you need to know to start selling your wildlife photos, from preparing your images to meeting the platform’s requirements. Let’s dive into the wild world of wildlife photography sales!
Understanding Shutterstock’s Submission Requirements for Wildlife Images
Before you upload your wildlife photos to Shutterstock, it’s essential to understand their specific submission requirements to ensure your images are accepted and can start earning royalties. Shutterstock has set standards to maintain high-quality content that appeals to a broad range of customers. Here’s what you need to keep in mind:
- Image Quality: Your photos should be sharp, well-exposed, and free of noise or artifacts. Use a decent camera and proper editing techniques to enhance clarity and color accuracy.
- Resolution and Size: Shutterstock prefers images with a minimum of 4 megapixels, but higher resolutions (such as 12 MP or more) are recommended to maximize licensing options.
- File Format: Submit images in JPEG format with a minimum of 8-bit color depth. Ensure they are saved in RGB color mode.
- Content Guidelines: Wildlife images must be authentic and not heavily manipulated. Avoid overly stylized edits or composite images that combine multiple shots unless clearly indicated.
- Metadata and Keywords: Properly keyword your images with relevant, descriptive terms to improve discoverability. Include species name, location, behavior, and environment details.
- Model and Property Releases: Generally, wildlife images do not require releases unless recognizable individuals or private property is visible. Be sure to review Shutterstock’s specific policies on this.
It’s also a good idea to review Shutterstock‘s content guidelines regularly, as they can update their standards. By ensuring your wildlife images meet these basic criteria, you increase your chances of acceptance and sales. Remember, high-quality, well-tagged images that accurately depict wildlife will stand out and attract buyers looking for authentic nature content.
Preparing and Capturing High-Quality Wildlife Photographs
Getting those stunning wildlife shots isn’t just about pointing your camera and hoping for the best. It’s about preparation, patience, and understanding your subject. Before you even step into the field, a little groundwork can make all the difference in capturing images that stand out on Shutterstock.
Research Your Subjects — Know the animals or plants you’re aiming to photograph. Study their behaviors, habitats, and the best times to see them active. This background knowledge helps you anticipate moments worth capturing and increases your chances of getting that perfect shot.
Choose the Right Equipment — A good camera with a fast autofocus and a telephoto lens (preferably 300mm or longer) is ideal for wildlife photography. Don’t forget a sturdy tripod or monopod to stabilize your shots, especially in low light or when using heavy lenses.
Scout Locations — Visit your chosen location beforehand if possible. Look for good vantage points, natural light conditions, and potential hideouts or blinds. Early mornings and late afternoons often provide the best lighting — soft, warm, and less crowded.
Timing Is Everything — Wildlife is most active during dawn and dusk, so plan your outings accordingly. Patience is key — sometimes you need to wait hours just to get a single perfect shot.
Camera Settings for Success — Use fast shutter speeds (1/1000 sec or faster) to freeze motion, especially for fast-moving animals. Aperture should be set to balance depth of field and light — often, a wider aperture (like f/4 or f/5.6) helps isolate your subject from the background. Keep ISO as low as possible to reduce noise, but don’t hesitate to increase it if lighting is low.
Respect Wildlife and Environment — Always prioritize the well-being of animals and their habitats. Keep a respectful distance, don’t disturb nesting sites, and follow local regulations. Ethical wildlife photography isn’t just good manners — it’s essential for preserving the subjects you love to photograph.
Remember, patience and practice are your best friends. Each outing is a new opportunity, so keep learning, experimenting with angles, compositions, and settings. Over time, you’ll develop an eye for capturing those breathtaking moments that make your wildlife images truly special and ready for sale on Shutterstock.
Tips for Editing and Enhancing Wildlife Photos for Sale
Once you’ve captured your wildlife images, the next step is polishing them up for the marketplace. Editing isn’t about making your photos look fake — it’s about highlighting their best features and ensuring they meet Shutterstock’s quality standards.
Start with a Good Base — Use a reliable photo editing software like Adobe Lightroom or Photoshop. These tools offer powerful options for adjustments and corrections without compromising image quality.
Adjust Basic Settings — Begin by fine-tuning exposure, contrast, highlights, and shadows. Aim for a balanced image where details are visible both in bright and dark areas. Keep an eye on color balance — wildlife photos often benefit from warm tones that mimic natural lighting.
Sharpen and Reduce Noise — Wildlife photos, especially those shot at high ISO, can benefit from sharpening. Be careful not to overdo it, as excessive sharpening can create unwanted artifacts. Use noise reduction sparingly to smooth out grainy areas without losing detail.
Crop for Composition — A well-placed crop can improve the focal point and eliminate distractions. Follow the rule of thirds: place your subject along the gridlines to create a balanced, engaging image.
| Editing Tip | Purpose |
|---|---|
| Adjust White Balance | Ensure accurate color tones that reflect natural lighting conditions. |
| Enhance Details | Bring out textures like fur, feathers, or scales to add depth. |
| Vignette | Darken the edges slightly to draw attention to the subject center. |
| Remove Distractions | Clone or heal unwanted elements like branches or spots that divert focus. |
Maintain Natural Look — While editing, avoid overdoing enhancements. The goal is to make your image pop, not to create an unnatural or overly processed look. Subtle adjustments often have the most professional results.
Finally, always keep original, unedited copies of your photos. This way, you can revisit and make different edits if needed, or provide high-quality originals to Shutterstock if requested during their review process.
With thoughtful editing, your wildlife images will look polished, vibrant, and ready to impress buyers. Remember, the key is to enhance what’s already beautiful in your photos, showcasing nature’s wonders in the best possible light.
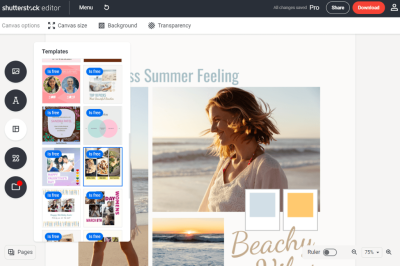
Uploading and Tagging Wildlife Images Effectively on Shutterstock
So, you’ve taken some stunning wildlife photographs and are ready to share them with the world on Shutterstock. But, simply uploading your images isn’t enough. To make sure your images get noticed and purchased, you need to master the art of uploading and tagging effectively.
First things first, high-quality images are a must. Make sure your photos are sharp, well-exposed, and free of distractions. Shutterstock’s reviewers are quite strict about quality, so take the time to edit your images properly. Use tools to correct color, contrast, and sharpness, and crop your photos to focus on the subject.
Once your images are ready, it’s time to upload. Here’s a quick checklist:
- File format: JPEG is preferred, with a minimum of 4 MP resolution.
- File size: Keep it under 50 MB for smooth uploading.
- Metadata: Fill out all relevant fields honestly and accurately.
Now, onto the most crucial part—tagging. Proper tags are what help your images appear in search results. Think of tags as keywords that describe your photo. Be specific, but also consider what potential buyers might search for. For example, instead of just “lion,” use tags like “African lion,” “wildlife,” “savannah,” and “big cat.”
Tips for effective tagging:
- Use a mix of broad and specific tags: Broad tags like “wildlife” attract larger audiences, while specific ones like “red fox in snow” target niche buyers.
- Include location tags: If your shot was taken in a specific place, add that info. Many buyers look for images from particular regions.
- Describe the mood or activity: Words like “peaceful,” “feeding,” or “curious” can help buyers find images that match their project needs.
- Avoid overstuffing: Use 10-30 relevant tags. Too many unrelated tags can hurt your image’s visibility.
Don’t forget to add a compelling title and description. Use natural language, incorporate your main keywords, and highlight what makes your image unique. Remember, clear and accurate metadata improves your chances of sales and reduces rejection chances.
Maximizing Your Sales and Earnings from Wildlife Photography
Getting your wildlife images onto Shutterstock is just the beginning. To truly maximize your sales and earnings, you need a strategic approach. Let’s explore some helpful tips to boost your income and get your work in front of more eyes.
Consistency is key. Regularly uploading new wildlife images keeps your portfolio fresh and increases your chances of being discovered. Set a manageable goal—whether it’s weekly or monthly—and stick to it. Over time, your consistent effort will pay off.
Focus on quality, not just quantity. While uploading frequently helps, the quality of your images is what really matters. Exceptional, eye-catching photos are more likely to be purchased and featured in Shutterstock’s collections.
Another way to maximize earnings is by diversifying your portfolio. Don’t just stick to one species or style. Include a variety of wildlife, habitats, behaviors, and seasons. This broadens your appeal to different buyers—from magazines and websites to advertising agencies.
Here are some additional strategies:
| Strategy | What to Do |
|---|---|
| Target Niche Markets | Identify specific wildlife themes or behaviors that are in demand, like conservation or endangered species, and create focused collections. |
| Use Promotions and Collections | Group related images into collections and promote them through your portfolio. This encourages buyers to purchase multiple images. |
| Stay Informed | Follow Shutterstock’s trends, seasonal themes, and popular searches. Tailor some of your uploads to current demand. |
| Optimize Your Titles and Tags | Use relevant keywords diligently to improve discoverability. Think like a buyer—what would they search for? |
Finally, don’t forget to promote your work outside Shutterstock. Share your best wildlife images on social media, create a personal website or blog, and engage with wildlife photography communities. Building your brand and network can lead to more opportunities and sales.
Remember, patience and persistence are essential. Building a successful wildlife photography portfolio on Shutterstock takes time, but with dedication and smart strategies, your images can generate a steady stream of income while inspiring others with the beauty of the natural world.
Legal Considerations and Ethical Practices When Selling Wildlife Photos
Before you start uploading those stunning wildlife shots to Shutterstock, it’s super important to get your legal and ethical ducks in a row. Wildlife photography isn’t just about capturing beautiful moments; it also involves respecting the animals and the law. Ignoring these aspects can land you in hot water, both legally and ethically.
First up, know the laws. Different countries and regions have specific regulations about photographing wildlife. For example, some protected species are off-limits, or you might need permits if you’re shooting in protected areas or using certain equipment. Always do your research before heading out. Check with local wildlife authorities or national park regulations to ensure you’re compliant.
Next, consider model releases and property releases. Unlike human photography, wildlife images typically don’t require model releases, but if your shot includes private property or identifiable individuals (like rangers or guides), it’s good practice to get permissions. Also, if your photo features endangered species, you might need to provide proof that the image was taken legally and ethically.
Respect the animals. This is the golden rule of wildlife photography. Avoid disturbing or stressing animals just for a shot. Use long lenses to keep your distance, don’t bait or lure animals artificially, and steer clear of disturbing their natural behaviors. Remember, your goal is to capture authentic moments without causing harm or undue stress.
When it comes to ethical practices, think about the message your images send. Promoting responsible wildlife interaction helps conservation efforts and maintains your integrity as a photographer. For instance, avoid images that suggest illegal activities like poaching or habitat destruction. Instead, focus on showcasing the beauty and importance of wildlife in their natural habitats.
To sum it up, ethical wildlife photography isn’t just the right thing to do—it’s also good for your reputation. Buyers on Shutterstock value authenticity and responsibility. By adhering to legal standards and practicing good ethics, you’re not only protecting yourself but also contributing positively to wildlife conservation.
Conclusion and Resources for Aspiring Wildlife Photographers on Shutterstock
Congratulations! You’ve reached the end of this ultimate guide to selling wildlife images on Shutterstock. Whether you’re just starting out or looking to sharpen your skills, remember that success in wildlife photography comes from a mix of passion, patience, and professionalism.
To recap, here are some key takeaways:
- Invest in quality gear—a good camera and lens are your best friends.
- Master your camera settings to capture sharp, well-exposed images.
- Practice patience and persistence—wildlife rarely cooperates on demand!
- Learn editing skills—enhance your photos without overdoing it.
- Understand legal and ethical responsibilities—respect animals, habitats, and laws.
- Build a diverse portfolio to increase your chances of sales and exposure.
Now, for those eager to learn more and grow as wildlife photographers, here are some excellent resources:
| Resource | Description | Link |
|---|---|---|
| National Geographic Photography | Offers tips, tutorials, and inspiring stories from professional wildlife photographers. | https://www.nationalgeographic.com/photography |
| Wildlife Photography Tips & Tricks (Online Course) | Comprehensive courses covering gear, techniques, and ethics. | https://www.wildlifephotographycourse.com |
| Shutterstock Contributor Resources | Guidelines, tips, and best practices specifically for Shutterstock contributors. | https://submit.shutterstock.com |
| Books: “The Wildlife Photographer” by David Tipling | Deep dives into wildlife photography stories, techniques, and ethics. | Available on major bookstores or online retailers |
| Local Wildlife and Nature Workshops | Hands-on learning with experienced photographers and conservationists. | Check local listings or organizations like Nature Conservancy |
Remember, every great wildlife photographer started with a single shot. Keep practicing, stay ethical, and enjoy the incredible journey of capturing the natural world. Happy shooting, and here’s to your success on Shutterstock!