Thinking about turning your design skills into a source of income? Selling vectors on Shutterstock is a fantastic way to do just that, even if you’re new to the game. Shutterstock is one of the biggest platforms for stock images, and vectors are in high demand for websites, apps, and print projects. The good news? You don’t need years of experience or a fancy portfolio to get started. With a little guidance, you can begin uploading your vector art and start earning. Let’s dive into how you can make your first sale and grow your presence on this popular platform.
Understanding Shutterstock’s Vector Submission Requirements
Before you start creating or uploading your vector art, it’s crucial to understand what Shutterstock looks for in submissions. This way, you can ensure your work meets their standards and gets approved quickly. Here’s what you need to know:
- File Format: Shutterstock accepts vectors in AI (Adobe Illustrator), EPS, and SVG formats. Make sure your files are saved in the correct format and are compatible with these programs.
- Quality and Resolution: While vectors are scalable by nature, your files should be clean, well-organized, and free of errors. Avoid pixelation or low-quality elements.
- Design Originality: Your vector must be original work. Avoid copying existing designs or using copyrighted elements unless you have proper licenses.
- Content Relevance: Shutterstock favors vectors that are versatile and relevant to current trends. Think icons, logos, illustrations, and patterns that publishers and clients might need.
- Metadata and Keywords: Properly tagging your vectors with relevant keywords helps increase visibility. Use descriptive terms that accurately reflect your design.
In addition to these technical requirements, Shutterstock has specific guidelines about the content itself. For example, avoid including any copyrighted characters, logos, or trademarked content unless you have explicit rights. Also, ensure the vectors are free from unnecessary complexity—simple, clean designs tend to perform better.
Getting familiar with their submission guidelines will save you time and frustration. Remember, quality always beats quantity. Focus on creating high-quality vectors that meet these standards, and you’ll be well on your way to success on Shutterstock—even without prior experience.
Creating High-Quality Vectors Without Prior Experience
Starting out with vector art might feel a bit daunting, especially if you’re new to design tools or digital illustration. But don’t worry—creating high-quality vectors is absolutely achievable, even without previous experience. The key is to focus on simplicity, clarity, and practice.
First, pick a straightforward idea or theme for your vectors. Think of things like icons, simple patterns, or basic illustrations that are in demand. For example, social media icons, minimalist logos, or geometric shapes tend to do well on Shutterstock.
When designing, use user-friendly tools like Adobe Illustrator, CorelDRAW, or free options like Inkscape and Vectr. These programs have tutorials and templates to help you get started quickly. Start with basic shapes—circles, squares, lines—and learn how to combine them into more complex designs.
Here are some tips to create professional-looking vectors:
- Keep it simple: Avoid overly complicated details. Clean, bold lines and minimal color schemes work best for stock vectors.
- Use consistent style: Maintain uniform line weights and color palettes across your designs to ensure they look cohesive.
- Focus on clarity: Your vectors should be easily recognizable and versatile for various uses. Think about how someone might use your design in a logo, icon, or website.
- Pay attention to details: Even simple vectors should be polished. Make sure shapes are aligned, curves are smooth, and there are no unnecessary anchor points or artifacts.
Practice makes perfect. Don’t hesitate to recreate popular vectors or follow online tutorials to improve your skills. Over time, you’ll develop your own style and a portfolio of vectors that you’re proud to upload to Shutterstock. Remember, every expert was once a beginner, so keep experimenting and learning!
Setting Up Your Shutterstock Contributor Account
Once you’ve created some quality vectors, it’s time to get them on Shutterstock. Setting up your contributor account is straightforward, but it’s important to do it correctly to start earning smoothly.
First, visit the [Shutterstock Contributor website](https://submit.shutterstock.com/) and click on the “Sign Up” button. You’ll need to provide some basic information, including your name, email address, and create a secure password. Make sure to use an email address you check regularly, as Shutterstock will send important updates and notifications there.
Next, you’ll go through the registration process, which includes verifying your email address. Once your account is verified, you’ll be prompted to complete your profile. This includes adding:
- Personal details: Full name, country of residence, and tax information.
- Payment details: Your preferred payout method (bank transfer, PayPal, etc.) and relevant account info.
- Portfolio upload: You can start uploading your vectors once your account is set up, but it’s wise to review Shutterstock’s guidelines beforehand.
Before uploading, make sure your vectors meet Shutterstock’s quality standards and licensing requirements. Read their contributor guidelines carefully—this includes file formats, resolution, and metadata (titles, keywords, descriptions). Accurate and keyword-rich descriptions help your vectors get discovered.
Also, consider setting up a professional profile with a friendly bio and profile picture. This helps build trust with buyers and shows you’re serious about contributing quality work.
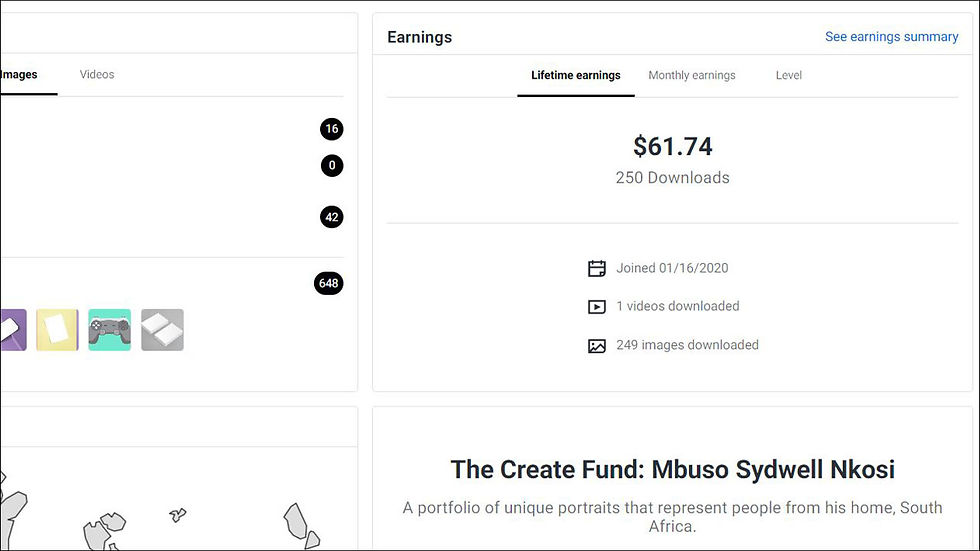
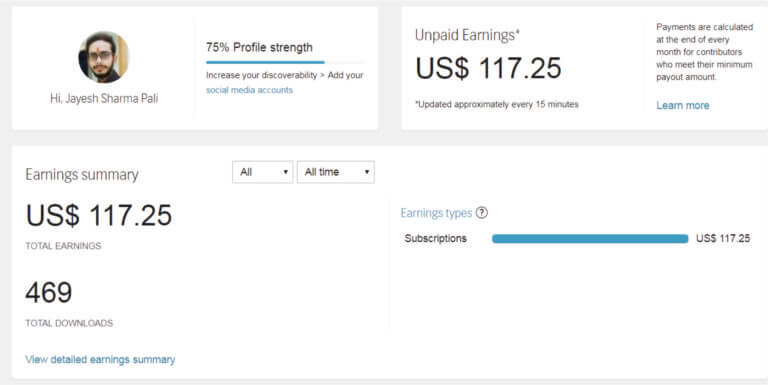
Finally, familiarize yourself with the dashboard. It’s where you’ll upload files, track your sales and earnings, and access resources to improve your portfolio. Take some time exploring the platform, and don’t hesitate to reach out to Shutterstock’s support if you encounter any issues.
Getting your contributor account up and running smoothly sets the foundation for a successful vector-selling journey. With quality designs and a well-optimized profile, you’ll be on your way to earning from your creativity in no time!
Uploading and Tagging Your Vectors Effectively

Once you’ve created your vectors and are ready to share them with the world, the next step is uploading and tagging them properly. This part might seem a bit tedious at first, but trust me, doing it right can make a huge difference in how many people find and purchase your designs.
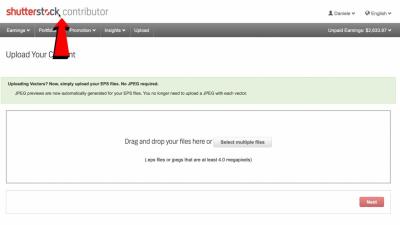
First things first, ensure your vectors are in the right format — usually AI, EPS, or SVG — and that they’re high quality, clean, and properly named. When you’re ready to upload, Shutterstock’s interface is straightforward. Just follow their step-by-step process to add your files.
Now, onto the crucial part: tags. Think of tags as the keywords that help buyers discover your vectors. Be descriptive and specific — don’t just use vague terms like “flower” or “circle.” Instead, think about the context and potential uses:
- Use relevant keywords: For a vector of a sunflower, use tags like “sunflower,” “flower illustration,” “botanical,” “summer,” etc.
- Include style descriptors: Is your vector minimalistic? Vintage? Modern? Add tags like “minimal,” “retro,” or “flat design.”
- Think about target audiences: If your vector is suitable for planners or educational materials, include tags like “planner,” “educational,” or “kids.”
Shutterstock also allows you to add metadata such as titles and descriptions. Use these to provide context and incorporate your primary keywords naturally. Write clear, engaging descriptions that explain what your vector is and how it can be used, which can entice buyers to click and purchase.
Another tip: avoid overstuffing your tags with irrelevant keywords. Keep them focused, and choose the most accurate descriptors. Remember, the goal is to help the right customers find your art, so think from their perspective.
Finally, double-check everything before submitting. Once uploaded, your vectors are in the marketplace, waiting to be discovered. Proper uploading and tagging are foundational steps toward making your vectors visible and attractive to potential buyers.
Tips for Increasing Your Vector Sales on Shutterstock
So, you’ve uploaded some vectors and tagged them well — now what? Growing your sales on Shutterstock takes a bit of strategy, patience, and a proactive approach. Here are some tried-and-true tips to help you boost your vector sales:
1. Consistently Upload New Content
Frequent uploads keep your portfolio fresh and increase the chances of being found. Buyers tend to gravitate toward sellers with active portfolios, so set a schedule for creating and uploading new vectors regularly.
2. Focus on Trending Topics and Styles
Stay aware of current design trends and industry needs. For example, if minimalism or flat icons are popular, create vectors that fit those styles. Use trending themes like sustainability, technology, or health to tap into what buyers are currently searching for.
3. Optimize Your Keywords and Descriptions
Revisit your tags and descriptions periodically. Use keyword research tools or browse Shutterstock’s popular vectors to see what keywords are trending. Well-optimized metadata can significantly improve your vectors’ visibility in search results.
4. Promote Your Work Outside Shutterstock
Share your vectors on social media platforms like Instagram, Pinterest, or LinkedIn. Join design communities or forums to showcase your work and get feedback. The more exposure you get, the more potential buyers will discover your portfolio.
5. Study Successful Contributors
Look at top-selling vector artists on Shutterstock. Analyze their portfolios — what kinds of vectors they upload, how they tag their work, and how they present themselves. You can learn a lot by observing best practices and applying them to your own work.
6. Offer Bundles or Sets
Instead of just individual vectors, create themed sets or bundles. Buyers love to purchase collections that save them time. For example, a set of icons for social media or a group of seasonal illustrations can be very appealing.
Remember, patience is key. Building a steady stream of sales takes time, but with consistent effort, quality work, and smart promotion, you’ll see your vector sales grow. Keep experimenting, learning, and refining your approach, and you’ll be well on your way to success on Shutterstock!
Common Mistakes to Avoid When Selling Vectors
Jumping into selling vectors on Shutterstock can be exciting, but it’s easy to make some common mistakes that can hold you back or even get your submissions rejected. Let’s chat about a few pitfalls to avoid so you can set yourself up for success from the start.
1. Ignoring Quality and Resolution
One of the biggest mistakes is submitting vectors that aren’t high quality or don’t meet Shutterstock’s resolution requirements. Always ensure your files are at least 4K resolution or higher and are cleanly designed. Blurry, pixelated, or poorly detailed vectors won’t make it past the review process and can harm your reputation as a contributor.
2. Overloading with Complex or Cluttered Designs
While detailed vectors are great, overdoing it can make your artwork confusing or hard to use. Think about the end-user—cluttered designs are less appealing. Aim for simplicity, clarity, and versatility. Remember, you want your vectors to be easily editable and adaptable by buyers.
3. Forgetting to Read Shutterstock’s Guidelines
Every platform has rules, and Shutterstock is no different. Not paying attention to their submission guidelines, licensing policies, or prohibited content can result in rejection or account issues. Take time to thoroughly read and understand their requirements before uploading.
4. Poor Organization and Naming
Your vector files should be well-organized and clearly named. Use descriptive filenames that include keywords relevant to the design. This makes it easier for buyers to find your work and helps improve your visibility in searches.
5. Neglecting Keywords and Descriptions
Keywords are your best friends when it comes to discoverability. Don’t just upload and hope for the best. Spend time researching relevant keywords, writing clear descriptions, and tagging your vectors accurately. This boosts your chances of making sales.
6. Ignoring Trends and Buyer Needs
Sticking only to what you like isn’t enough. Keep an eye on current design trends, popular themes, and what buyers are searching for. This strategic approach can increase your sales and help you build a more appealing portfolio.
7. Not Staying Consistent
Success on Shutterstock often comes down to consistency. Upload regularly, maintain quality, and keep updating your portfolio. Consistent contributors tend to perform better in search rankings and build a loyal following.
Conclusion and Next Steps for Aspiring Vector Artists
So, you’re ready to dip your toes into the world of selling vectors on Shutterstock? That’s fantastic! Remember, the journey might have its challenges, but with patience, learning, and a willingness to improve, you can turn your designs into a steady income stream.
Here’s a quick recap of the next steps to get you started:
- Build a Portfolio of Quality Vectors – Focus on creating versatile, clean, and high-resolution designs that meet Shutterstock’s standards.
- Learn About Keywords and SEO – Master the art of tagging and describing your vectors so they’re easily discoverable by buyers.
- Stay Updated on Trends – Keep an eye on current design trends and buyer preferences to make your portfolio more appealing.
- Follow Submission Guidelines – Always double-check your files against Shutterstock’s requirements to avoid rejections.
- Be Patient and Persistent – Growing your presence takes time. Keep uploading, refining, and engaging with the community.
Remember, every successful vector artist started where you are now. Keep practicing, stay inspired, and don’t be afraid to experiment with different styles. Soon enough, you’ll be turning your creative passion into profit!
Happy creating and good luck on your journey to selling vectors on Shutterstock!