Thinking about turning your passion for photography into a source of extra income? Shutterstock is one of the most popular platforms where photographers can sell their images to a global audience. Whether you’re a hobbyist or a seasoned pro, Shutterstock offers an accessible way to showcase your work and earn money. The process might seem a bit overwhelming at first, but with the right guidance, you’ll be uploading and selling your photos in no time. So, let’s dive into how you can get started and make the most out of this opportunity!
Setting Up Your Shutterstock Contributor Account

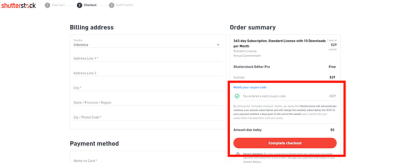
First things first, you’ll need to create a contributor account on Shutterstock. It’s a straightforward process, but paying attention to the details can make your journey smoother. Head over to the Shutterstock Contributor page and click on the “Join Now” button. You’ll be prompted to fill out some basic information, including your name, email address, and a secure password.
Once you’ve registered, you’ll need to verify your email address—check your inbox for a confirmation email and click the link to activate your account. After that, you’ll be asked to provide additional details like your full name, country of residence, and tax information. This step is crucial because it determines how you’ll get paid and helps Shutterstock ensure compliance with legal requirements.
Next, you’ll upload a sample of your best work. Choose high-quality, diverse images that showcase your skills and style. Shutterstock reviews your submission to ensure it meets their quality standards and content guidelines. This review process can take anywhere from a few hours to several days. During this time, consider preparing a short bio about yourself, which will appear on your contributor profile. A friendly, professional bio helps attract buyers and build your reputation as a photographer.
Finally, familiarize yourself with Shutterstock’s contributor dashboard. It’s where you’ll upload photos, track your earnings, see licensing details, and access resources. Spend some time exploring the platform—getting comfortable with the interface will save you time and frustration later on. Once your account is approved, you’re all set to start uploading, optimizing your images for sale, and earning money from your photography adventures!
Preparing Your Photos for Submission
Before you start uploading your beautiful photos to Shutterstock, it’s essential to make sure they’re polished and ready for prime time. Think of it like preparing a dish— you want everything to look appealing and be of the highest quality to attract buyers. Here’s what you should focus on:
- High-Resolution Images: Shutterstock prefers images that are at least 4 megapixels, but higher is always better. Aim for sharp, crisp photos with no pixelation or blurriness. This ensures your images look professional and appeal to a wide range of buyers.
- Proper File Format: Save your photos in JPEG format, with an sRGB color profile. JPEGs are standard in stock photography and widely accepted on Shutterstock.
- Color and Exposure: Make sure your photos are well-balanced in terms of color and exposure. Use editing software to adjust brightness, contrast, and saturation if needed. Avoid overly dark or washed-out images.
- Sharpness and Clarity: Run your photos through sharpening tools carefully to enhance details without making them look unnatural.
- Removing Distractions: Crop out any unwanted elements or backgrounds that don’t add value. Your goal is to create clean, focused images that tell a story or highlight a subject clearly.
- Meta-Details: Keep a record of when and where you took each photo, especially if they’re relevant to the content. This can help you craft better descriptions and tags later.
Remember, your goal is to submit images that look professional, are technically perfect, and meet Shutterstock’s quality standards. Taking the time to prepare your photos will pay off in increased downloads and earnings!
Uploading and Tagging Your Photos Effectively

Once your photos are polished and ready, it’s time to upload them to Shutterstock. But just clicking “upload” isn’t enough — the way you tag and describe your images can make a huge difference in how often they get seen and purchased. Here’s a quick guide to uploading and tagging like a pro:
Uploading Your Photos
- Login to Your Contributor Account: Head over to Shutterstock’s contributor portal and sign in.
- Select Your Files: Use the upload tool to choose your photos. You can upload multiple images at once, which saves time.
- Choose the Right Category: Assign your photo to a relevant category — this helps buyers find your images more easily.
- Set Licensing and Model/Property Releases: If required, upload any necessary releases to avoid issues later.
- Preview and Submit: Double-check your images for correct orientation, quality, and tags before submitting.
Tagging Your Photos Effectively
Tags are like the keywords that help people discover your photos. The right tags can significantly boost your images’ visibility, so spend some time on this step:
- Use Descriptive Keywords: Think about what someone might search for when looking for an image like yours. Be specific and accurate.
- Include Variations: Use synonyms and related terms to cover different search queries. For example, if your photo is of a “sunset,” also include “dusk,” “evening sky,” or “twilight.”
- Avoid Overstuffing: While it’s good to be thorough, don’t just stuff keywords. Focus on the most relevant and high-impact tags.
- Use the Allowed Number of Tags: Shutterstock allows up to 50 tags per image. Use as many as applicable to maximize discoverability, but prioritize quality over quantity.
- Think Like a Buyer: What would someone searching for this type of photo type in? Use those terms.
Additional Tips
- Write Clear, Concise Titles and Descriptions: These help contextualize your images and improve searchability.
- Review Your Tags: Before final submission, review your tags for typos and relevance to ensure your images reach the right audience.
- Stay Updated on Trends: Pay attention to popular search terms and trending topics to keep your tags fresh and relevant.
Effective uploading and tagging might seem simple, but it’s a crucial step to helping your photos get noticed and sold. Take your time, be strategic, and you’ll see better results as your portfolio grows!
Understanding Shutterstock’s Review Process
Before you start uploading your stunning photos to Shutterstock, it’s important to understand how their review process works. Think of it as a friendly gatekeeper that ensures only the best images make it onto their platform. This process can sometimes feel a bit daunting, but knowing what to expect can make it smoother and help you get your photos approved faster.
When you submit a photo, it doesn’t go live immediately. Instead, Shutterstock’s review team carefully examines each image for several key criteria:
- Technical Quality: Is the photo sharp, well-exposed, and free from noise or artifacts? Blurry or poorly lit images are usually rejected.
- Content Authenticity: Does the photo accurately represent what it claims to show? Stock photos should look natural and genuine.
- Model and Property Releases: If your image includes recognizable people or private property, proper releases are necessary. Shutterstock checks for these documents during review.
- Compliance with Guidelines: Your photo must adhere to Shutterstock’s content policies—no offensive, copyrighted, or illegal content allowed.
The review process typically takes anywhere from a few hours to a few days, depending on the volume of submissions and the complexity of your images. During busy times, it might take a bit longer, so patience is key.
Once your images are reviewed, you’ll receive an email notification. If approved, your photo goes live on the platform, ready for customers worldwide to license. If rejected, Shutterstock usually provides feedback, so you know what to improve for next time. Common reasons for rejection include poor image quality, inappropriate content, or missing releases.
Tip: To increase your chances of approval, always upload high-resolution images with proper metadata and releases when needed. Keep an eye on Shutterstock’s contributor guidelines—they’re your roadmap to success!
Optimizing Your Portfolio for Better Visibility
Once your photos are live, the real magic happens when people find and license your images. That’s where optimizing your portfolio becomes essential. Think of it as giving your photos a boost so they stand out in a crowded marketplace.
Here are some practical tips to maximize your visibility and attract more buyers:
- Use Accurate and Descriptive Keywords: Keywords are your main way for customers to find your images. Be specific and relevant—think about what someone searching for that photo might type.
- Write Clear and Concise Titles: Your photo titles should complement your keywords and accurately describe the content. Avoid vague titles like “image1.” Instead, say “Sunset over mountain lake with reflection.”
- Create Detailed Descriptions: Use the description box to add context and include additional keywords. Mention location, mood, and any unique features.
- Categorize Correctly: Select the most appropriate categories and subcategories. This helps Shutterstock’s algorithms understand where to show your images.
- Maintain a Consistent Style and Theme: If you focus on a niche—like travel, food, or business—build a cohesive portfolio. Buyers often look for specific styles or topics.
Additionally, consider the following:
- Update Regularly: Upload new images frequently to keep your portfolio fresh and relevant.
- Analyze Trends: Keep an eye on popular themes and styles. Shutterstock often highlights trending topics, so aligning your uploads can boost visibility.
- Engage with the Community: Participate in forums and read other contributors’ tips. Sometimes, collaborative insights can lead to better strategies.
Finally, don’t forget about the importance of quality over quantity. A smaller, well-optimized portfolio with high-quality images often performs better than a large collection of mediocre photos. Focus on creating images that are unique, professional, and in demand.
By understanding the review process and optimizing your portfolio, you’re setting yourself up for success in earning extra income through Shutterstock. Remember, patience, consistency, and attention to detail are your best friends on this journey!
Tips for Increasing Your Photo Sales on Shutterstock
So, you’ve got your camera ready and some fantastic photos uploaded to Shutterstock. But how do you actually boost your sales and get those images in front of more eyes? Here are some tried-and-true tips to help you increase your photo sales and make the most out of your Shutterstock portfolio.
Focus on High-Demand Topics
First things first, pay attention to what buyers are searching for. Shutterstock’s trending topics often include business, lifestyle, technology, health, and travel. Keep an eye on popular search terms and create photos that align with these themes. For example, if remote work is trending, capturing images of people working from home can be a hit.
Optimize Your Keywords
Think of keywords as the GPS that guides buyers to your photos. Use relevant, specific keywords that accurately describe your image. Don’t just go for broad terms like “nature”—be more detailed, like “sunset over mountain lake” or “happy family cooking dinner.” This helps your photos appear in more targeted searches.
Upload Consistently
Don’t put all your eggs in one basket. Regularly uploading new photos keeps your portfolio fresh and increases the chances of being discovered. Shutterstock’s algorithm tends to favor active contributors, so make a habit of uploading regularly—whether that’s weekly or bi-weekly.
Create a Cohesive Portfolio
While diversity is good, having a cohesive style or theme can help buyers recognize your work. For example, if you focus on vibrant cityscapes or candid portraits, building a portfolio around that theme can attract repeat buyers looking for similar images.
Pay Attention to Technical Quality
Ensure your photos are sharp, well-lit, and properly exposed. Use editing software to enhance colors and clarity if needed. High-quality images are more likely to be accepted and purchased. Also, shoot in high resolution to give buyers flexibility in how they use your images.
Engage with the Shutterstock Community
Participate in forums, join groups, or follow other contributors. Sharing tips and getting feedback can inspire new ideas and improve your skills. Plus, community engagement can sometimes lead to collaborations or insights into what buyers want.
Stay Updated on Shutterstock Policies
Finally, keep yourself informed about Shutterstock’s submission guidelines and trends. Sometimes, platform updates or new features can help you optimize your uploads and sales strategy.
Remember, growing your Shutterstock sales is a mix of creating great content, optimizing it for discoverability, and staying consistent. Keep experimenting, learning, and refining your approach, and you’ll see those sales start to climb!
Monitoring Your Earnings and Managing Payments
Once you start selling photos on Shutterstock, it’s important to keep an eye on your earnings and make sure payments are smooth and timely. Let’s walk through how you can effectively monitor your income and manage your payments.
Check Your Contributor Dashboard Regularly
Your Shutterstock contributor dashboard is your go-to hub for tracking sales, earnings, and performance stats. Log in regularly to see detailed insights such as:
- Total earnings
- Number of downloads
- Top-selling images
- Search terms leading to your images
This info helps you understand what types of photos are performing well and where to focus your efforts.
Set Up Payment Thresholds
Shutterstock offers different payout options, including PayPal, Skrill, or bank transfer. You can typically set a minimum payout threshold—often around $35—so you don’t get paid until your earnings reach that amount. Keep an eye on this threshold to plan your withdrawals accordingly.
Understand Your Royalties and Payment Schedule
Royalties on Shutterstock vary depending on your contributor level and the type of license sold. Usually, payments are processed monthly, but it’s good to confirm the schedule in your account settings. Also, review how much you earn per download—this can fluctuate based on factors like the license type and your contributor level.
Keep Track of Tax and Legal Requirements
Depending on your country, you may need to report earnings for tax purposes. Shutterstock provides tax documentation, but it’s wise to keep your own records of sales and earnings. Consult with a tax professional if needed, especially if your earnings grow significantly.
Manage Your Payments Efficiently
When your earnings hit the payout threshold, Shutterstock will process your payment via your chosen method. Make sure your payment details are accurate and up to date to avoid delays. It’s also a good idea to check your email or dashboard notifications for confirmation of each payout.
Analyze Your Earnings Trends
Over time, look for patterns in your earnings. Are certain types of images consistently performing well? Do your sales fluctuate seasonally? Understanding these trends can help you plan future uploads and marketing efforts.
Stay Informed About Platform Changes
Shutterstock occasionally updates their earning policies, payout methods, or thresholds. Keep an eye on platform announcements or emails from Shutterstock so you’re always in the loop and can adapt your strategy accordingly.
Managing your earnings effectively isn’t just about watching the numbers—it’s about understanding your performance, ensuring smooth payments, and planning your next steps. With regular monitoring and organization, you’ll be able to maximize your income and enjoy the rewarding process of selling your photos online.
Common Mistakes to Avoid When Selling Photos on Shutterstock
Jumping into selling your photos on Shutterstock can be exciting, but it’s easy to make some common mistakes that might hold you back or even get your submissions rejected. Let’s go over a few pitfalls to watch out for so you can set yourself up for success.
Not Knowing Shutterstock’s Content Guidelines
One of the biggest mistakes is not thoroughly understanding Shutterstock’s content and quality guidelines. Every platform has its standards, and Shutterstock is no exception. If your images don’t meet their resolution, focus, or model release requirements, they’ll be rejected. Take the time to review their Contributor Guidelines before submitting.
Ignoring Keyword Optimization
Keywords are your best friends when it comes to getting your photos discovered. A common mistake is either overloading your images with irrelevant keywords or neglecting to add enough descriptive terms. Think about what potential buyers might search for and include those keywords naturally. Use a mix of broad and specific terms to enhance discoverability.
Uploading Poor-Quality Images
It might seem obvious, but uploading blurry, noisy, or poorly composed photos can hurt your reputation and chances of sales. Always ensure your images are sharp, well-lit, and properly exposed. Use editing tools to enhance your photos if needed, but avoid over-editing that looks unnatural.
Failing to Model or Property Releases
If your photos feature recognizable people or private property, you’ll need the proper releases. Not having these can lead to rejection or legal issues down the line. Always secure model releases for people and property releases when necessary before submitting.
Uploading Duplicate or Similar Shots
While diversity is good, flooding Shutterstock with multiple very similar images can be a turnoff for reviewers and buyers. Instead, focus on a few high-quality, unique shots that add variety and value to your portfolio.
Neglecting to Keep Up with Trends
Trends change, and what’s popular today might not be tomorrow. Keep an eye on Shutterstock’s trending categories and popular keywords. This can guide you to create images that are in demand, increasing your chances of making sales.
Conclusion and Next Steps for Successful Selling
Congratulations! You now know some of the key strategies to start selling your photos on Shutterstock and the common pitfalls to avoid. Remember, building a successful portfolio takes time and persistence, but with consistent effort, you can turn your passion for photography into a steady side income.
Next Steps to Boost Your Success
- Refine Your Shooting Skills: Focus on quality over quantity. Practice capturing sharp, well-composed images that tell a story or evoke emotion.
- Optimize Your Metadata: Use relevant keywords, clear titles, and detailed descriptions to help your images get discovered.
- Stay Informed: Keep up with Shutterstock’s updates, trends, and changing guidelines. Join contributor forums or groups to learn tips from other photographers.
- Review and Improve: Regularly analyze your sales data and portfolio. Remove underperforming images and update your portfolio with fresh, trending content.
- Be Patient and Persistent: Success doesn’t happen overnight. Keep uploading, learning, and refining your approach.
By avoiding common mistakes and taking proactive steps, you’ll be well on your way to building a thriving Shutterstock portfolio. Happy shooting, and here’s to turning your photos into a reliable income stream!