Thinking about turning your passion for photography into a source of income? Selling your photos on Shutterstock might be just what you need! It’s a fantastic platform that connects talented photographers with millions of buyers worldwide. Whether you’re a hobbyist or a pro, Shutterstock offers a straightforward way to showcase your work and earn royalties. In this guide, we’ll walk you through the essentials—what you need to know to get started, how to meet
Understanding Shutterstock’s Requirements and Guidelines

Before you start uploading your photos, it’s super important to understand what Shutterstock looks for and the rules you need to follow. This will save you time and help you avoid having your images rejected. First off, Shutterstock has specific technical requirements for images:
- Resolution: Your images should be at least 4 megapixels (usually 3000×2400 pixels or higher).
- File Format: JPEG files are the standard, with a minimum of 8-bit color depth.
- Quality: Photos need to be sharp, well-exposed, and free of noise or artifacts.
But it’s not just about the technical specs. Shutterstock also wants images that are unique, high-quality, and commercially relevant. That means avoiding overly generic or heavily edited photos that look unnatural. Additionally, you should be mindful of their content guidelines:
- Model Releases: If your photo includes recognizable people, you need a signed model release form.
- Property Releases: For private property or trademarks, having the appropriate permissions is essential.
- Prohibited Content: Photos containing illegal activities, hate symbols, or sensitive content are not allowed.
Another key aspect is copyright compliance. Make sure you own the rights to your images and that they don’t infringe on someone else’s work. Shutterstock also encourages diversity and originality—think about capturing fresh perspectives that stand out from the crowd. By understanding and following these requirements and guidelines, you’ll be setting yourself up for a smoother submission process and better chances of your photos getting accepted and earning royalties.
Preparing Your Photos for Submission

Alright, so you’ve got your camera ready, and you’ve snapped some stunning shots. Now, before you upload them to Shutterstock, it’s super important to prepare your photos properly. Think of it like packing your suitcase—you want everything neat, organized, and ready to impress.
First things first, make sure your images are of high quality. Shutterstock has specific requirements, typically asking for photos with a minimum resolution of 4 megapixels—think at least 3880 x 2592 pixels. But honestly, the higher, the better! Clear, sharp images tend to sell more.
Next, focus on the technical aspects:
- File Format: Save your photos in JPEG format with an sRGB color profile. This ensures colors look vibrant and consistent across devices.
- Compression: Use minimal compression to preserve image quality. Shutterstock recommends a quality setting of around 8-10 (out of 12).
- File Size: Keep your file size under 50MB, but avoid overly compressed images that look pixelated.
Now, about editing—don’t go overboard, but a bit of post-processing can make your photos pop. Adjust brightness, contrast, and sharpness to enhance your image without making it look unnatural. Remember, authenticity sells!
Another crucial step is to double-check your photos for:
- Clarity: No blurry or out-of-focus shots unless intentionally artistic.
- Noise: Remove any digital noise, especially in low-light shots.
- Distractions: Crop out unwanted objects or backgrounds that don’t add value.
And let’s not forget about metadata! Adding relevant keywords and descriptions helps your photos get discovered. Be specific—think about what someone might search for when looking for images like yours. Use descriptive tags like “sunset,” “city skyline,” or “happy family.”
Lastly, review your images one more time to ensure they meet Shutterstock’s content guidelines—no watermarks, logos, or copyrighted elements. Once everything looks perfect, you’re ready to upload!
Creating a Shutterstock Contributor Account
Now that your photos are prepped and polished, it’s time to get yourself set up as a contributor on Shutterstock. Think of this as creating your own storefront—your personal space to showcase and sell your work.
Starting is simple:
- Visit the Shutterstock Contributor Website: Head over to submit.shutterstock.com.
- Click on “Join Now” or “Sign Up”: You’ll be prompted to create an account. You can sign up using your email or connect via social media accounts like Google or Facebook for quicker access.
- Fill in Your Details: Enter your full name, email address, and create a strong password. Take your time—accuracy helps with payouts and communication.
- Read and Agree to Terms: Make sure to review Shutterstock’s contributor terms and conditions. Once you agree, you’re officially on your way!
After signing up, Shutterstock will ask you to provide some additional information:
- Tax Information: Depending on your country, you might need to fill out tax forms for royalty payments.
- Payment Details: Choose how you want to get paid—PayPal, bank transfer, or other options available in your region.
Next, you’ll need to upload a sample portfolio—usually a few of your best photos. Shutterstock reviews new contributors to ensure quality standards are met. This process can take anywhere from a few days to a couple of weeks. Be patient, and if they request revisions or more samples, take it as a good sign—they want quality content!
Once approved, your contributor dashboard will be active. From there, you can start uploading your images, track your sales, and see your earnings grow. Remember, the key is to stay consistent, upload regularly, and keep improving your photography skills. Happy selling!
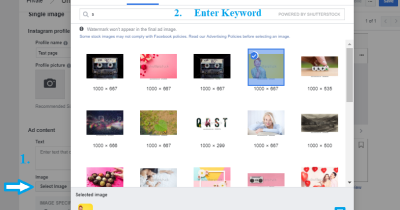
Uploading Your Photos and Optimizing Metadata
Alright, so you’ve taken some amazing shots and you’re ready to share them with the world on Shutterstock. The process of uploading your photos is pretty straightforward, but to really stand out and make sales, you need to pay close attention to how you upload and optimize your metadata.
First things first, when you’re ready to upload, log into your Shutterstock contributor account and click on the “Upload” button. You can upload multiple images at once, which is a huge time-saver. But before you hit submit, take a moment to review each photo carefully.
Optimizing your metadata is crucial because it helps buyers find your images. Metadata includes the title, description, keywords, and categories. Think of it as giving your photo a detailed label so that when someone searches for something specific, your image shows up.
Tips for optimizing metadata:
- Use descriptive titles: Make the title clear and relevant. Instead of “Photo1,” try “Sunset over Mountain Lake”.
- Write detailed descriptions: Highlight what’s interesting or unique about the photo. Mention colors, mood, location, or any story behind the shot.
- Add relevant keywords: Use specific words that match what buyers might search for. Think about colors, objects, emotions, and concepts.
- Select appropriate categories: Choose categories that fit your image. This helps Shutterstock organize your photo and makes it easier for buyers to find.
Remember, the more accurate and detailed your metadata, the better your chances of your photos being discovered. Avoid keyword stuffing—use relevant tags but don’t overdo it. Also, stick to Shutterstock’s guidelines regarding acceptable content and metadata standards.
Once you’ve uploaded your images and filled out the metadata, double-check everything. Preview your submission if possible. When satisfied, hit the “Submit for Review” button. Shutterstock will review your image to ensure it meets their quality standards, which usually takes a few days.
Tips for Increasing Your Photo Sales on Shutterstock
Congratulations! Your images are live. Now, how do you get more eyes on your work and increase your sales? Here are some practical tips that can help you boost your success on Shutterstock.
1. Upload Consistently
Think of your Shutterstock portfolio as a growing library. The more quality images you upload regularly, the higher your chances of appearing in search results. Consistency not only boosts visibility but also helps you refine your style and understand what sells best.
2. Focus on Popular and Evergreen Topics
Some subjects sell year-round, like business, technology, food, travel, and lifestyle. Keep an eye on trending topics and seasonal themes. Stock images related to current events, holidays, or popular trends often see a spike in demand.
3. Use High-Quality, Unique Shots
While stock photos are competitive, your unique perspective can make your images stand out. Invest in good equipment, pay attention to lighting, composition, and post-processing. Remember, Shutterstock values high-resolution, professional-looking images.
4. Engage with the Shutterstock Community
Join forums, read contributor tips, and participate in challenges. Learning from fellow photographers can inspire new ideas and help you stay current with best practices.
5. Promote Your Portfolio
Share your Shutterstock portfolio on your social media platforms, personal website, or blog. Let your network know you’re selling stock photos. The more exposure, the better your chances of making a sale.
6. Analyze Your Data
Use Shutterstock’s analytics tools to see which images are performing well and which aren’t. Pay attention to keywords, categories, and the types of images that generate the most sales. Use this insight to guide your future uploads.
7. Be Patient and Persistent
Stock photography success doesn’t happen overnight. Keep uploading new images, refining your metadata, and experimenting with different styles. Over time, your portfolio will grow, and so will your sales.
In summary, increasing your Shutterstock sales is about quality, consistency, understanding market trends, and engaging with the community. Stick with it, stay creative, and keep optimizing your approach. Happy shooting!
Common Mistakes to Avoid When Selling Photos on Shutterstock
Getting started with selling your photos on Shutterstock is exciting, but it’s easy to fall into some common traps that can slow down your progress or even hurt your chances of making sales. Let’s talk about a few mistakes to watch out for so you can set yourself up for success right from the start.
1. Ignoring Shutterstock’s Content Guidelines
Shutterstock has specific rules about what kinds of images are acceptable. Uploading photos that don’t meet these guidelines — like low resolution, poor lighting, or inappropriate content — can lead to rejection or even account suspension. Always review their content policies and ensure your photos are high quality and compliant.
2. Overlooking Keyword Optimization
Keywords are how buyers find your images. Using vague or irrelevant keywords, or forgetting to add enough descriptive tags, makes it harder for your photos to be discovered. Be thorough and thoughtful with your keywords. Think about what someone might search for when looking for an image like yours.
3. Uploadting Poor-Quality Images
Subpar images—blurry, pixelated, or poorly composed—won’t sell. Shutterstock customers expect professional quality, so always upload sharp, well-lit, and properly exposed photos. Invest in good equipment and take your time editing to make your images stand out.
4. Not Diversifying Your Portfolio
Relying on just one niche or style can limit your sales. Instead, experiment with different subjects, styles, and themes. This not only broadens your appeal but also increases your chances of making sales across various categories.
5. Forgetting to Update Your Portfolio
Many beginners upload a handful of images and then forget about their portfolio. Regularly adding new photos keeps your collection fresh and increases visibility. Keep an eye on current trends and add relevant new images to stay competitive.
By avoiding these common mistakes, you set yourself on a smoother path to success. Remember, patience and consistency are key. Keep learning, keep improving, and don’t get discouraged if sales don’t come overnight!
Monitoring Your Sales and Managing Your Portfolio
Once you start uploading your photos and making sales, the journey doesn’t end there. Managing your portfolio and keeping an eye on your sales data is crucial for long-term success. Let’s explore how you can effectively monitor and manage your Shutterstock account.
Tracking Your Sales Performance
Shutterstock provides a dashboard where you can see your sales stats, including:
- Total earnings
- Number of downloads
- Top-selling images
- Revenue over time
Regularly checking these metrics helps you understand what’s working and what isn’t. For example, if certain types of images are selling well, consider creating more similar content. Conversely, if some photos aren’t getting any views, it might be time to update or remove them.
Managing Your Portfolio
Effective portfolio management involves:
- Organizing your images: Use tags, titles, and categories thoughtfully to keep your portfolio organized and easy to navigate.
- Removing underperforming images: If some photos aren’t getting views after a long period, consider removing or updating them to keep your portfolio fresh.
- Adding new content regularly: Consistently uploading new images keeps your portfolio active and improves your chances of being featured or recommended.
Responding to Trends and Feedback
Pay attention to what buyers are searching for and adapt your content accordingly. Also, review any feedback or comments from Shutterstock’s review team. Constructive criticism can help you improve your future uploads.
Using Analytics Tools
Some third-party tools or even simple spreadsheets can help you analyze your sales data over time. Tracking patterns can reveal which themes, styles, or keywords are most effective, guiding your future content creation.
In summary, monitoring your sales and managing your portfolio isn’t a one-time task—it’s an ongoing process. Stay engaged, be adaptable, and keep refining your approach. Over time, these efforts will help you build a successful and sustainable photography business on Shutterstock.
Conclusion and Final Tips for Success in Stock Photography
Embarking on a journey to sell your photography on Shutterstock can be highly rewarding, but it requires dedication, consistency, and strategic planning. As you venture into this competitive marketplace, keep in mind that success often comes from continuous improvement and understanding your audience. Remember, high-quality images that tell a story or fulfill a specific need tend to perform better. To maximize your potential, consider the following final tips:
- Invest in Quality Equipment: Use a good camera and editing software to ensure your images are sharp, well-lit, and professionally polished.
- Research Market Trends: Stay updated on popular themes and styles to align your portfolio with current demand.
- Keyword Effectively: Use relevant, descriptive keywords to improve discoverability of your images in searches.
- Maintain Consistency: Regularly upload fresh content to increase visibility and grow your portfolio over time.
- Understand Licensing: Familiarize yourself with Shutterstock’s licensing options to choose the best fit for your work and maximize earnings.
Additionally, keep track of your sales and analyze which images perform best. This insight can guide your future shoots and help you refine your portfolio. Remember, patience and persistence are key—building a successful stock photography presence doesn’t happen overnight. By following these tips and continually honing your skills, you’ll enhance your chances of achieving success and turning your passion for photography into a sustainable income stream.