Ever needed to tweak an image just a bit to make it perfect? Shutterstock Editor is a handy online tool that makes editing images a breeze, whether you’re cropping, adding text, or rotating. If you’re wondering how to rotate an image to get that ideal angle, you’re in the right place. In this guide, we’ll walk through the simple steps to rotate your images seamlessly using Shutterstock Editor. No complicated software or steep learning curves—just straightforward, user-friendly editing to help your visuals stand out!
Accessing Shutterstock Editor and Uploading Your Image
Getting started with Shutterstock Editor is easy and quick. First, head over to the Shutterstock Editor website. If you already have a Shutterstock account, simply log in using your credentials. If not, signing up is free and straightforward—just click on the “Sign Up” button and follow the prompts.
Once you’re logged in, you’ll see the main dashboard. Look for the “Create” or “Upload” button—usually prominently displayed on the screen. Click on it to begin your editing journey. Now, it’s time to upload your image:
- Click on the “Upload Image” button, which opens your computer’s file explorer.
- Navigate to the folder containing your image, select the file, and click “Open.”
- Wait a few moments while your image uploads. You’ll see a progress indicator during this step.
After the upload completes, your image will appear on the editor workspace, ready for you to start customizing. From here, you can crop, add text, adjust colors, or rotate your image—whatever you need to make it perfect for your project!
Using the Rotate Tool in Shutterstock Editor
Now that you’ve uploaded your image and are ready to start rotating, it’s time to get familiar with the Rotate Tool in Shutterstock Editor. This tool is straightforward and makes the process simple, even if you’re new to editing images. Once your image is open in the editor, look for the toolbar usually located on the right side or at the top of the workspace—depending on your layout.
To activate the rotate feature, find the rotate icon or handle. It’s often represented by a circular arrow or a rotation symbol. Clicking on this will enable you to rotate the image manually, giving you the flexibility to spin your image in any direction you want. You’ll notice your cursor change to a rotate icon when you hover over the handle or corner of the image.
Another handy feature is the rotation handle—a small circular icon at the corner of your image. Click and hold this handle, then drag left or right to rotate the image freely. This is perfect for quick adjustments or when you want to see how different angles look visually. As you drag, you’ll see the rotation angle update in real-time, giving you instant feedback.
If you prefer a more controlled approach, Shutterstock Editor also offers options to rotate by specific degrees. Some versions have a dedicated rotate button or menu where you can input exact values. This is especially useful if you need your image to be perfectly aligned or rotated to a precise angle for professional projects.
Remember, during this process, you can always undo the rotation if you’re not happy with the position. Just click the undo button or press Ctrl+Z (Cmd+Z on Mac), and you’ll be back to the original orientation. Once you’re satisfied with the rotation, click outside the image or press Enter to lock in your changes and move on to the next step.
Adjusting the Rotation Angle for Precise Editing
While dragging the rotate handle is great for quick, visual adjustments, sometimes you need a more precise control over the rotation angle. Shutterstock Editor makes this easy with options to input exact degree values, ensuring your image is perfectly aligned.
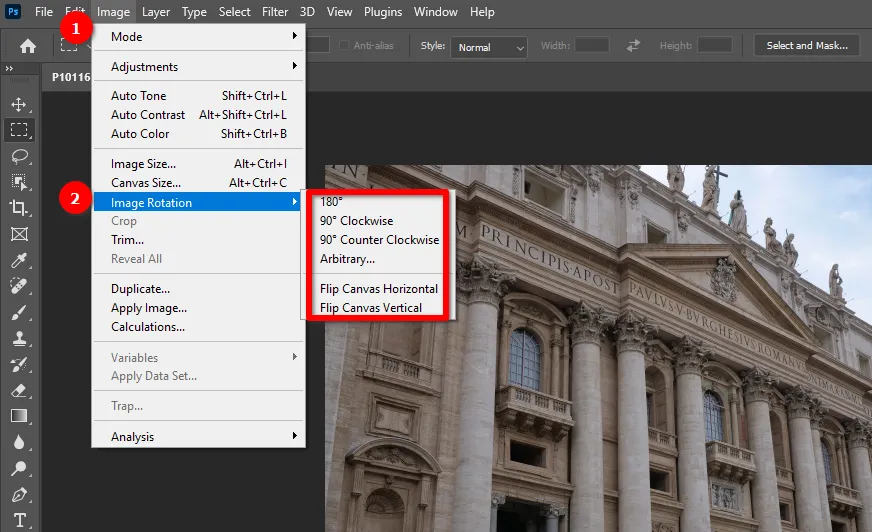
To fine-tune your rotation angle, look for the rotation input box—usually located in the toolbar or a sidebar. It might be labeled as “Angle” or similar. Here, you can type in the exact number of degrees you want to rotate your image. For example, entering “45” will rotate the image 45 degrees clockwise, while entering “-30” will rotate it 30 degrees counterclockwise.
Some editors also allow you to rotate in increments—like 15°, 30°, or 90°—which can be handy for quick adjustments. Just select the desired increment from a dropdown menu if available, or keep entering specific values for more control.
Here’s a quick tip: use the preview feature if available. Some editors let you see a live preview of your rotation before applying it, so you can experiment with different angles without committing immediately. This way, you can compare how each rotation looks and pick the best one for your project.
Once you’ve entered your desired angle, confirm the change by pressing Enter or clicking an “Apply” button if there is one. Your image will instantly rotate to the specified degree, giving you a professional, precise result. If you want to make further adjustments, simply repeat the process until you’re happy with the outcome.
Remember, maintaining the aspect ratio or keeping the horizon level can be crucial depending on your project. Some Shutterstock Editor tools offer additional options like straightening or snapping to certain angles, which can help you achieve a perfectly aligned image effortlessly.
By mastering both freehand rotation and precise degree adjustments, you’ll have full control over your image’s orientation, making your photos look exactly how you envision them. Happy editing!
Saving and Exporting Your Rotated Image
Great job! You’ve successfully rotated your image in Shutterstock Editor — now, let’s talk about saving and exporting your masterpiece so you can use it wherever you need. It’s a straightforward process, but paying attention to a few details can make sure your image looks perfect and is ready for its new purpose.
First, once you’re happy with the rotation and any other edits, look for the Save or Download button, usually located at the top right corner of the editor. Clicking this will open up your export options.
Here’s what you typically need to consider:
- File format: Choose the format best suited for your project. Common options include JPEG for web use, PNG if you need transparency, or TIFF for high-quality prints.
- Resolution & Size: Decide on the resolution. For online use, 72 DPI is standard, but for printing, go for 300 DPI or higher. Also, check the dimensions—make sure they’re appropriate for your needs.
- Quality settings: Higher quality means better image fidelity but larger file size. Balance it based on your usage.
Some editors offer a preview before you finally save, so take advantage of that to double-check everything looks good. Once you’re ready, click Download, and your rotated image will be saved to your device.
Remember to keep a copy of the original image if you might want to make more edits later. Saving different versions can save you headaches down the line!
Tips for Effective Image Rotation and Editing
Rotating an image might seem simple, but a few extra tips can help you make the most of your edits and improve the overall quality of your images. Whether you’re working on a professional project or just having fun, these pointers will help you achieve better results.
1. Use Grid and Guides for Precision
Most editors, including Shutterstock, have grid lines or guides you can enable. Use these to align your image perfectly, especially if you’re rotating by custom angles. It helps keep things looking neat and professional.
2. Rotate in Small Increments
If you need to tilt or rotate an image, do it gradually—say, 1° or 5° at a time. This gives you more control and prevents over-rotation, which can distort your image or make it look unnatural.
3. Keep an Eye on Image Quality
Rotation can sometimes cause pixels to stretch or blur, especially if you’re rotating by a large angle. To avoid losing sharpness, work with high-resolution images and avoid excessive rotations. If necessary, use sharpening tools afterward.
4. Experiment with Other Editing Tools
Rotation is just one part of editing. Combine it with cropping, adjusting brightness/contrast, or applying filters to enhance your image further. A good tip is to rotate first, then fine-tune the image afterward for the best results.
5. Practice and Save Your Edits
Don’t be afraid to experiment! Save your work in stages so you can revert if needed. Creating a workflow where you rotate, adjust, and then save versions can make editing more manageable and less stressful.
6. Consider the Final Use
Think about where your image will be used. For social media, small rotations might be enough. For printed materials, precise alignment and high resolution are key. Tailor your editing process to fit the end goal.
By following these tips, you’ll turn simple rotations into professional-looking edits that really stand out. Happy editing!
Conclusion and Additional Resources for Image Editing
Mastering the art of image rotation in Shutterstock Editor enhances your visual content, ensuring images are perfectly aligned and professionally presented. Whether you’re adjusting for aesthetic balance or preparing images for a specific layout, understanding the rotation tools and techniques is essential. Remember, small adjustments can make a significant difference in the overall impact of your images.
For further improvement in your image editing skills, consider exploring these additional resources:
- Shutterstock Editor Help Center: Comprehensive tutorials and frequently asked questions to guide you through various editing features.
- Online Image Editing Courses: Platforms like Udemy, Coursera, and Skillshare offer courses on photo editing and graphic design fundamentals.
- Design Blogs and Forums: Websites such as Canva Design School, Adobe Creative Cloud Blog, and Reddit’s r/graphic_design community provide tips, inspiration, and peer support.
By continuing to explore these resources and practicing regularly, you’ll refine your image editing skills and produce more polished, professional visuals. Happy editing!