If you’ve ever uploaded a video clip to Shutterstock and then realized it could be improved or fixed, you’re not alone. Sometimes, a clip might not meet the platform’s standards on the first try, or you might receive feedback requiring adjustments. Luckily, Shutterstock allows contributors to resubmit their clips, giving you a second chance to get your work approved and make some extra income. In this guide, we’ll walk you through the simple steps to resubmit your clip, so you can confidently get your content back in front of buyers and boost your portfolio.
Reasons You Might Need to Resubmit a Clip

There are several common situations where resubmitting a clip makes perfect sense. Understanding these reasons can help you decide when to take action and how to improve your chances of approval:
- Technical Issues: If your clip has poor audio quality, shaky footage, or incorrect formatting, it might be rejected. Resubmitting after fixing these issues can make a big difference.
- Metadata Errors: Sometimes, the title, description, or keywords are inaccurate or incomplete. Updating your metadata helps buyers find your clip more easily.
- Content Violations: If your clip contains copyrighted material, inappropriate content, or violates Shutterstock’s guidelines, it will be rejected. Making necessary edits and resubmitting can resolve this.
- Quality Improvements: If the original video doesn’t meet the platform’s quality standards—like resolution or lighting issues—you might need to enhance the footage before resubmitting.
- Feedback from Shutterstock: Sometimes, Shutterstock editors provide specific feedback on what needs fixing. Addressing these points and resubmitting increases your chances of approval.
By understanding these common reasons, you can better prepare your clip for resubmission and improve your overall success rate as a contributor. Remember, resubmitting is a normal part of the process, and a little extra effort can go a long way in getting your content approved and earning on Shutterstock.
Preparing Your Clip for Resubmission

Alright, so you’ve decided to give your clip another shot on Shutterstock. That’s a smart move! But before you jump into the resubmission process, it’s crucial to make sure your video is all set and polished. Preparation is key to increasing your chances of approval this time around.
First things first, review the original feedback from Shutterstock, if you received any. They often point out specific issues or areas that need improvement, whether it’s video quality, metadata, or licensing information. Address those points thoroughly.
Next, check your clip carefully. Here’s a quick checklist to keep in mind:
- Video Quality: Make sure your clip is high resolution (at least 4K if possible), free of pixelation, blurriness, or compression artifacts.
- Lighting & Color: Bright, well-lit scenes always do better. Adjust colors if needed to look vibrant but natural.
- Sound: If your clip has audio, ensure it’s clear and free of background noise or distortions.
- Metadata: Update your title, description, and keywords to be accurate and relevant. Use descriptive, natural language, and avoid keyword stuffing.
- Legal & Licensing: Confirm you have the rights to all content within your clip, including music, people, and locations.
It’s also a good idea to preview your clip on different devices—smartphone, tablet, computer—to ensure it looks good everywhere. Lastly, double-check that your clip meets Shutterstock’s technical specs and content guidelines, which you can find on their contributor resource pages.
Once you’re confident your clip is improved and compliant, you’re ready to move on to the next step: resubmitting it. Preparation now can save you time later and boost your chances of approval!
Step-by-Step Instructions for Resubmitting a Clip on Shutterstock
Now that your clip is prepped and polished, let’s walk through the simple process of resubmitting it on Shutterstock. Don’t worry, it’s pretty straightforward—think of it as giving your clip a fresh start!
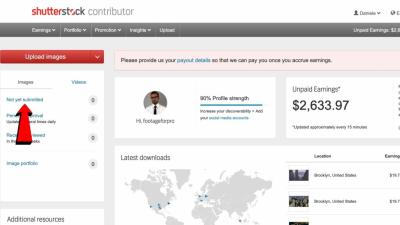
- Log into Your Contributor Account: Head over to Shutterstock and sign in with your username and password. If you’ve forgotten your login details, use the “Forgot password” link to reset them.
- Navigate to Your Dashboard: Once logged in, click on your profile icon or name at the top right corner, then select “Contributor Dashboard” from the dropdown menu.
- Find the Rejected or Pending Clip: In your dashboard, go to the “My Files” or “Submissions” section. Locate the clip you want to resubmit. It might be marked as “Rejected,” “Pending,” or “Needs Revision.”
- Open the Clip Details: Click on the clip’s title or thumbnail to view its details. Here, you’ll see the reasons for rejection or feedback from Shutterstock.
- Click on the “Edit” or “Resubmit” Button: If available, select the “Edit” button to make changes directly. Otherwise, choose “Resubmit” to upload the revised version.
- Upload the Revised Clip: Follow the prompts to upload your new video file. Make sure it meets all technical specs—file format, resolution, etc.
- Update Metadata: Enter a clear, descriptive title, and write a detailed, keyword-rich description. Select relevant categories and tags to improve discoverability.
- Review & Final Checks: Double-check all your information, ensuring everything is accurate. Preview your clip if possible to verify quality.
- Submit for Review: Once everything looks good, click the “Submit” or “Resubmit” button. Your clip will then go through Shutterstock’s review process again.
And that’s it! Keep an eye on your email and your dashboard for any updates or additional feedback from Shutterstock. If your clip gets approved, congratulations—you’re back in the game! If not, review their feedback carefully, make necessary adjustments, and try again. Persistence pays off!
Tips for Ensuring Your Resubmission Meets Shutterstock Guidelines
Resubmitting a clip on Shutterstock can be a smooth process if you pay close attention to their guidelines. Think of it as making sure your content is polished and ready to impress before hitting that submit button again. Here are some practical tips to help you align your resubmission with Shutterstock’s standards:
- Review the Submission Requirements Carefully: Before resubmitting, revisit Shutterstock’s content guidelines. Make sure your clip is in the correct format, resolution, and aspect ratio. For example, most clips should be in MOV or MP4 format with a minimum of 1920×1080 resolution.
- Address Previous Feedback: If you received specific comments or reasons for rejection, tackle those issues head-on. For instance, if the clip had poor lighting or shaky footage, take the time to improve those aspects.
- Ensure Proper Metadata and Keywords: Accurate titles, descriptions, and tags are crucial. Use relevant keywords naturally; avoid keyword stuffing. A well-optimized clip makes it easier for buyers to find your content.
- Check for Technical Issues: Use video editing software to verify your clip’s quality. Remove any unwanted artifacts, ensure smooth playback, and confirm audio levels are balanced if applicable.
- Follow Model and Property Releases: If your clip features recognizable people or private property, double-check that you have the appropriate releases uploaded. This is often a common cause for rejection.
- Preview Your Clip Before Resubmission: Play through the entire video to catch any errors or issues. Sometimes, small mistakes like watermark remnants or incorrect framing can cause rejection.
By taking these extra steps, you’re not just submitting a clip — you’re submitting a high-quality, compliant piece that aligns with Shutterstock’s expectations. Remember, a little extra diligence goes a long way in increasing your chances of approval on the first try!
Common Issues During Resubmission and How to Fix Them
Resubmitting a clip can sometimes come with its own set of challenges. Understanding the common issues can help you troubleshoot quickly and get your content approved faster. Let’s go over some typical problems and the simple fixes:
| Issue | Reason | How to Fix |
|---|---|---|
| Incorrect File Format or Codec | Using unsupported formats or codecs can prevent upload success. | Convert your clip to an accepted format like MOV or MP4 using software such as HandBrake or Adobe Media Encoder. |
| Low Resolution or Quality | The clip doesn’t meet minimum resolution or has compression artifacts. | Re-export your video at a higher resolution and better quality settings. Aim for at least 1920×1080 pixels and minimal compression. |
| Missing or Incorrect Metadata | Inaccurate or incomplete titles, descriptions, or keywords can hinder discoverability or cause rejection. | Update your metadata with clear, relevant, and keyword-rich descriptions. Be honest and precise about what’s in your clip. |
| Model or Property Release Issues | Having recognizable people or private property without proper releases. | Upload the necessary signed releases. If missing, obtain them before resubmitting. |
| Watermarks or Branding | Unremoved watermarks or logos appear in your clip. | Remove any watermarks before resubmission. Use editing software to crop or clean up the footage. |
| Technical Artifacts or Glitches | Video has visual glitches, artifacts, or audio sync issues. | Use editing tools to fix glitches, stabilize shaky footage, and ensure audio sync. Re-export the cleaned clip. |
Dealing with these issues might seem daunting at first, but once you identify the root cause, fixing them becomes straightforward. The key is to be thorough during your review process and double-check everything before resubmitting. Remember, each resubmission is an opportunity to improve your content and increase your chances of getting accepted. Keep at it — persistence pays off!
Frequently Asked Questions About Resubmitting Clips
Thinking about resubmitting your clip but still have some doubts? You’re not alone! Many contributors have questions when it comes to the resubmission process. Let’s go through some of the most common questions to clear things up.
Q: Do I need to make changes before resubmitting?
Not necessarily. If your clip was rejected due to technical issues or metadata problems, fixing those can improve your chances. However, if the rejection was due to content quality or copyright concerns, consider revising the clip accordingly before resubmitting.
Q: How many times can I resubmit a clip?
There’s no strict limit, but it’s best to address the reasons for rejection thoroughly before resubmitting. Repeated submissions without changes might not increase your chances and could waste your effort.
Q: Will resubmitting affect my earnings or ranking?
Resubmitting a clip doesn’t directly impact your earnings. However, successfully approved clips can boost your portfolio and visibility, which is beneficial in the long run.
Q: How long should I wait before resubmitting?
Usually, it’s good to wait until you’ve made necessary adjustments and ensure your clip meets Shutterstock’s guidelines. Some contributors wait a few days to review their changes or seek feedback before trying again.
Q: Can I resubmit the same clip with minor edits?
Yes! Making small improvements like cropping, adjusting color, or cleaning up audio can help your clip get approved. Just make sure the edits align with Shutterstock’s content policies.
Q: What if my clip gets rejected multiple times?
If that happens, review the rejection reasons carefully. Consider seeking feedback from Shutterstock’s contributor support or community forums. Sometimes, a fresh perspective or professional editing can make all the difference.
Conclusion and Final Tips for Successful Resubmission
Resubmitting a clip on Shutterstock might seem daunting at first, but with patience and attention to detail, it becomes a straightforward process. Remember, every successful contributor has faced rejections—it’s part of the journey toward building a strong portfolio.
Here are some final tips to help ensure your next resubmission is a winner:
- Review the rejection reasons carefully: Understand why your clip was rejected so you can address those issues specifically.
- Make necessary improvements: Whether it’s technical quality, metadata, or content relevance, tweak your clip accordingly.
- Follow Shutterstock’s guidelines: Stay updated with their submission policies to avoid common pitfalls.
- Test your clip: Watch it on different devices and formats to catch any issues before resubmitting.
- Be patient and persistent: Sometimes, a small change can make all the difference, so don’t get discouraged by initial setbacks.
Remember, each resubmission is an opportunity to learn and improve. Keep refining your content, stay consistent, and soon enough, you’ll see your clips approved and earning revenue. Happy uploading!